


 文章介绍了如何安装和使用Labelme工具进行图片标注,包括创建和激活conda环境,安装必要的库,以及打开和保存标注。此外,还详细阐述了如何批量转换Labelme生成的json文件为png格式,包括对Labelme源代码的修改和执行命令,以及处理可能出现的错误。最后,提供了提取json中label.png并重命名的Python代码。
工具(Labelme)
一、安装过程:
1.1 打开Anaconda prompt
(我这里是创建了一个叫labelme的新环境),,激活环境,输入以下语句:
conda create lableme python=3.x#创建一个新环境
conda env list #查看已创建的环境
conda activate labelme #激活环境
1.2安装labelme
进入labelme环境,依次输入
pip install pyqt5
conda install pillow
pip install labelme==3.16.2
1.3安装完成后,直接输入labelme即可打开程序,对图片进行标注啦!
不要忘记按保存哦!
如图:(第一个open是打开单张图片,openDir打开图片文件夹)

1.4经过枯燥漫长的标注,就可以得到一大堆.json文件,标注结束
(注意注意:因为 labelme 打标时一般都是多边形,所有 points 的个数必然大于等于3。如果标注点小于3,解析json文件时会显示如下错误)、
AssertionError: Polygon must have points more than 2
二、图片转化
2.1我们的数据集需要最后生成png的格式,labelme有自带的转化工具,但是一次只能转化一张,而我们的数据集一般都成百上千张,这时就需要批量转化啦!
附上代码:
'''
功能:实现对json文件的批量转化
注意:此文件需要对labelme的源代码进行修改
将以下代码复制进labelme的 json_to_dataset.py
文件路径(举例):D:\miniconda3\envs\labelme\Lib\site-packages\labelme\cli
'''

#import argparse
import base64
import json
import os
import os.path as osp

#import imgviz
#import PIL.Image

#from labelme.logger import logger
from labelme import utils


def main():
    # logger.warning(
    #     "This script is aimed to demonstrate how to convert the "
    #     "JSON file to a single image dataset."
    # )
    # logger.warning(
    #     "It won't handle multiple JSON files to generate a "
    #     "real-use dataset."
    # )
    json_folder = "./json"
    out_dir = "./mask"
    if not osp.exists(out_dir):
        os.mkdir(out_dir)

    json_list = os.listdir(json_folder)
    for i in range(0, len(json_list)):
        json_file = os.path.join(json_folder, json_list[i])
        out_name = json_list[i][:-5]
        data = json.load(open(json_file))
        imageData = data.get("imageData")

        if not imageData:
            imagePath = os.path.join(os.path.dirname(json_file), data["imagePath"])
            with open(imagePath, "rb") as f:
                imageData = f.read()
                imageData = base64.b64encode(imageData).decode("utf-8")
        img = utils.img_b64_to_arr(imageData)

        label_name_to_value = {"_background_": 0}
        for shape in sorted(data["shapes"], key=lambda x: x["label"]):
            label_name = shape["label"]
            if label_name in label_name_to_value:
                label_value = label_name_to_value[label_name]
            else:
                label_value = len(label_name_to_value)
                label_name_to_value[label_name] = label_value
        lbl, _ = utils.shapes_to_label(
            img.shape, data["shapes"], label_name_to_value
        )

        label_names = [None] * (max(label_name_to_value.values()) + 1)
        for name, value in label_name_to_value.items():
            label_names[value] = name

        # lbl_viz = imgviz.label2rgb(
        #     label=lbl, img=imgviz.asgray(img), label_names=label_names, loc="rb"
        # )

        #PIL.Image.fromarray(img).save(osp.join(out_dir, "img.png"))
        utils.lblsave(osp.join(out_dir, out_name+".png"), lbl)
        #PIL.Image.fromarray(lbl_viz).save(osp.join(out_dir, "label_viz.png"))


        #logger.info("Saved to: {}".format(out_dir))


if __name__ == "__main__":
    main()
2.2修改完代码,我们再次通过anaconda prompt进入labelme环境
因为我的miniconda时安装在D盘下,所以需要cd进文件所在目录
d:
cd d:\miniconda3\envs\labelme\scripts
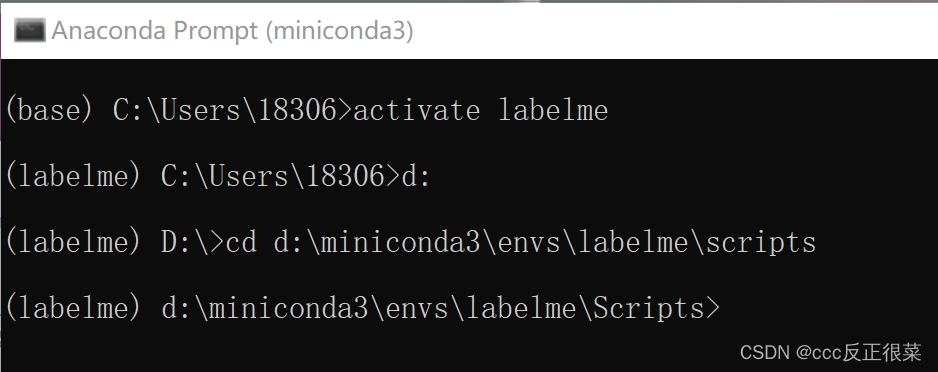
出现以上页面,输入labelme_json_to_dataset.exe d:\json_data(这个是标注完的json文件夹位置,我把它放在了D盘)
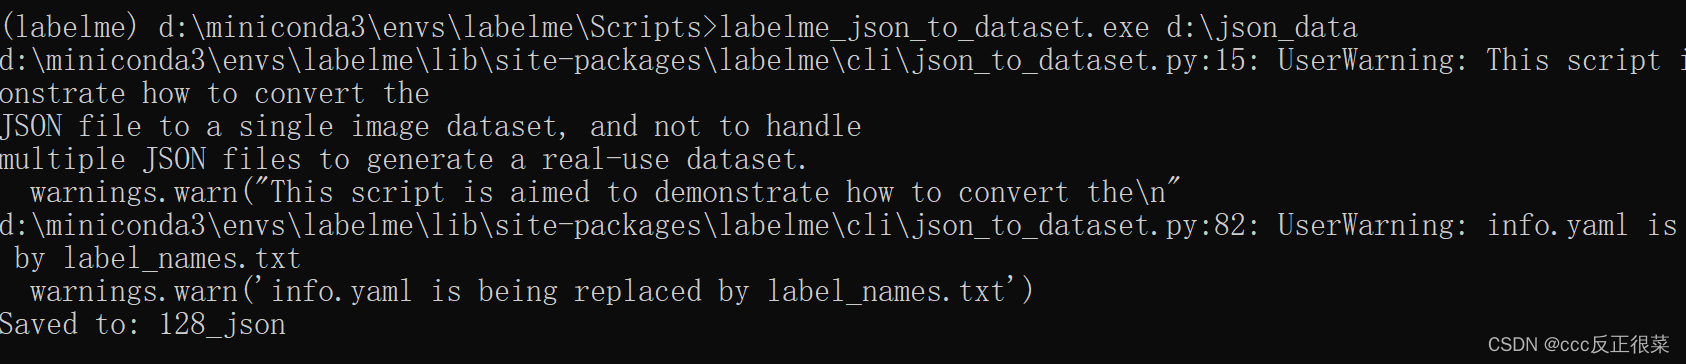
此过程可能出现的错误:
错误一:

解决方法: 1.关闭json文件夹(你的json文件被占用)
2.将你的json文件夹放在你环境的同一个磁盘路径下(例如我就一起放进了D盘)
错误二:
报Polygon must have points more than 2
你的json标注少于3个点,解决方法:从新将这张图片标注!
5.json批量转化后的文件保存在了D:\miniconda3\envs\labelme\Scripts
如图转化后的每个文件夹会产生五个文件。
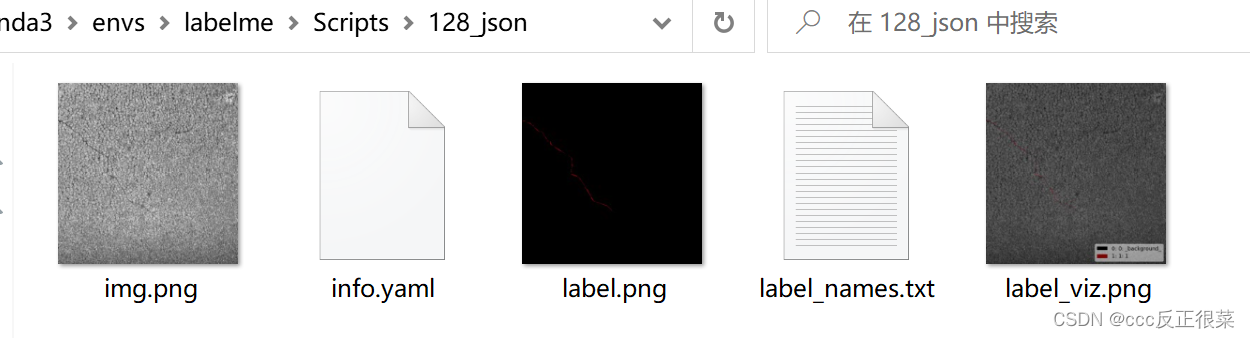
这时我们需要的是文件中的label.png,以下代码可将每个_json 中的label.png提取处理并转化为对应的名字,直接在Pycharm中运行即可完成,
附上代码:
'''
将标签图从json文件中批量取出后指定保存的文件目录
'''
importos
importcv2
importnumpyasnp
importshutil
Importglob

path_json=r'D:'#这里是指.json文件所在文件夹的路径
path_save_png=os.path.join(path_json,"json_png")#将标签图从json文件中批量取出后指定保存的文件目录

Def pre_treatment():
'''
创建一个文件夹用于存储
json_png用于存储从json_data提取出来的label.png(最终存储名字与json文件对应)
:return:
'''
ifos.path.isdir(os.path.join(path_json,"json_png"))isFalse:
os.mkdir(os.path.join(path_json,"json_png"))
else:
print('文件已存在')

Def extract_png():
'''
将标签图从json文件中批量取出
:return:
'''
foreachfileinos.listdir(path_json_to_data):
path1=os.path.join(path_json_to_data,eachfile)#获取单个json文件夹的目录
ifos.path.isdir(path1):#判断path1路径是否存在
ifos.path.exists(path1+'/label.png'):#判断path1路径下label.png是否存在
path1=os.path.join(path1,'label.png')#获取PNG所在的路径,准备等待复制
path2=os.path.join(path_save_png,(eachfile.split('_')[0]+'.png'))#将png复制到path2路径下的文件夹中去
shutil.copy(path1,path2)#将path1文件复制到path2
print(eachfile+'successfullymoved')

defprocess():
pre_treatment()#预处理,创建存储所需的相应文件夹
extract_png()#从转换的数据中提取png图像


if__name__=="__main__":
process()


 688
688

 被折叠的 条评论
为什么被折叠?
被折叠的 条评论
为什么被折叠?
 到【灌水乐园】发言


