在网上找了找有shader实现,也有下面这种重绘图片顶点的做法。
参考文章:
Unity中实现引导的镂空效果
https://blog.csdn.net/lllll__/article/details/104263122
Unity3D UGUI 性能耗费最小的一种UI渲染方式RawImage实现,圆角矩形,圆形,多边形等图片
https://www.geek-share.com/detail/2752643497.html
SimpleRoundedImage-不使用mask实现圆角矩形图片
https://www.geek-share.com/detail/2745953780.html
-
处理方式:将上面两个操作合并了了下,做个缝合怪【狗头】。
-
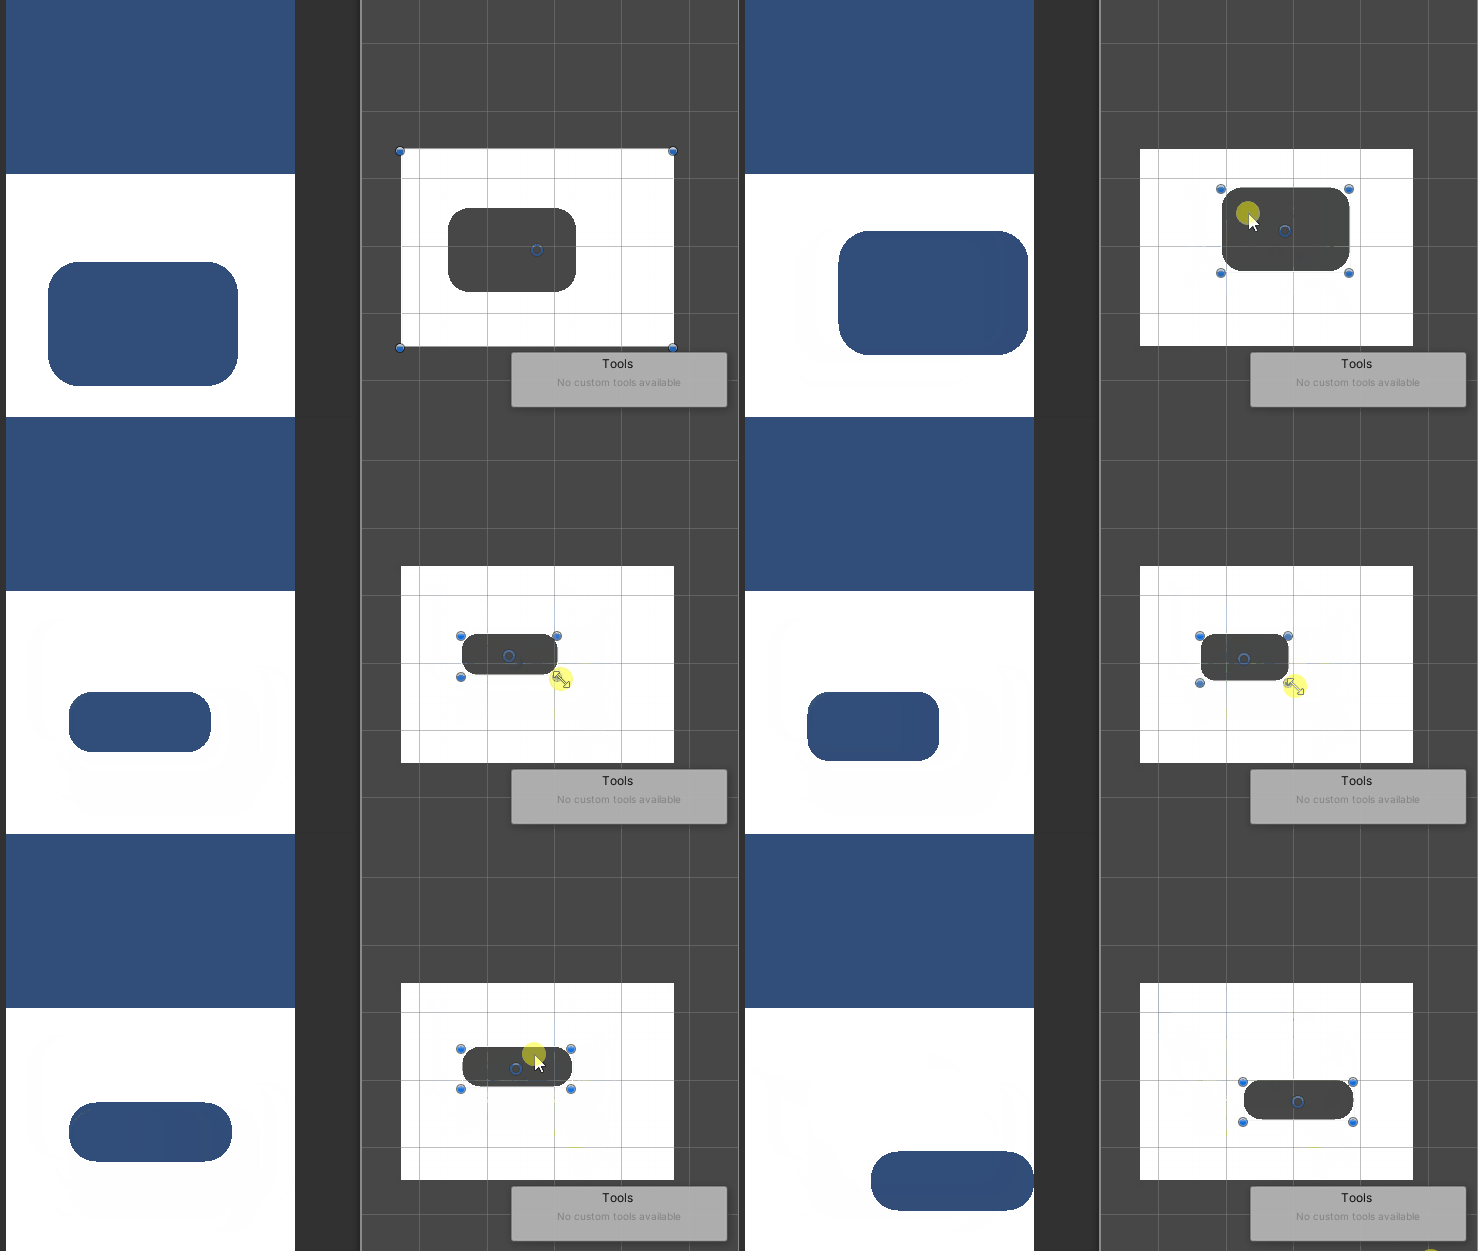
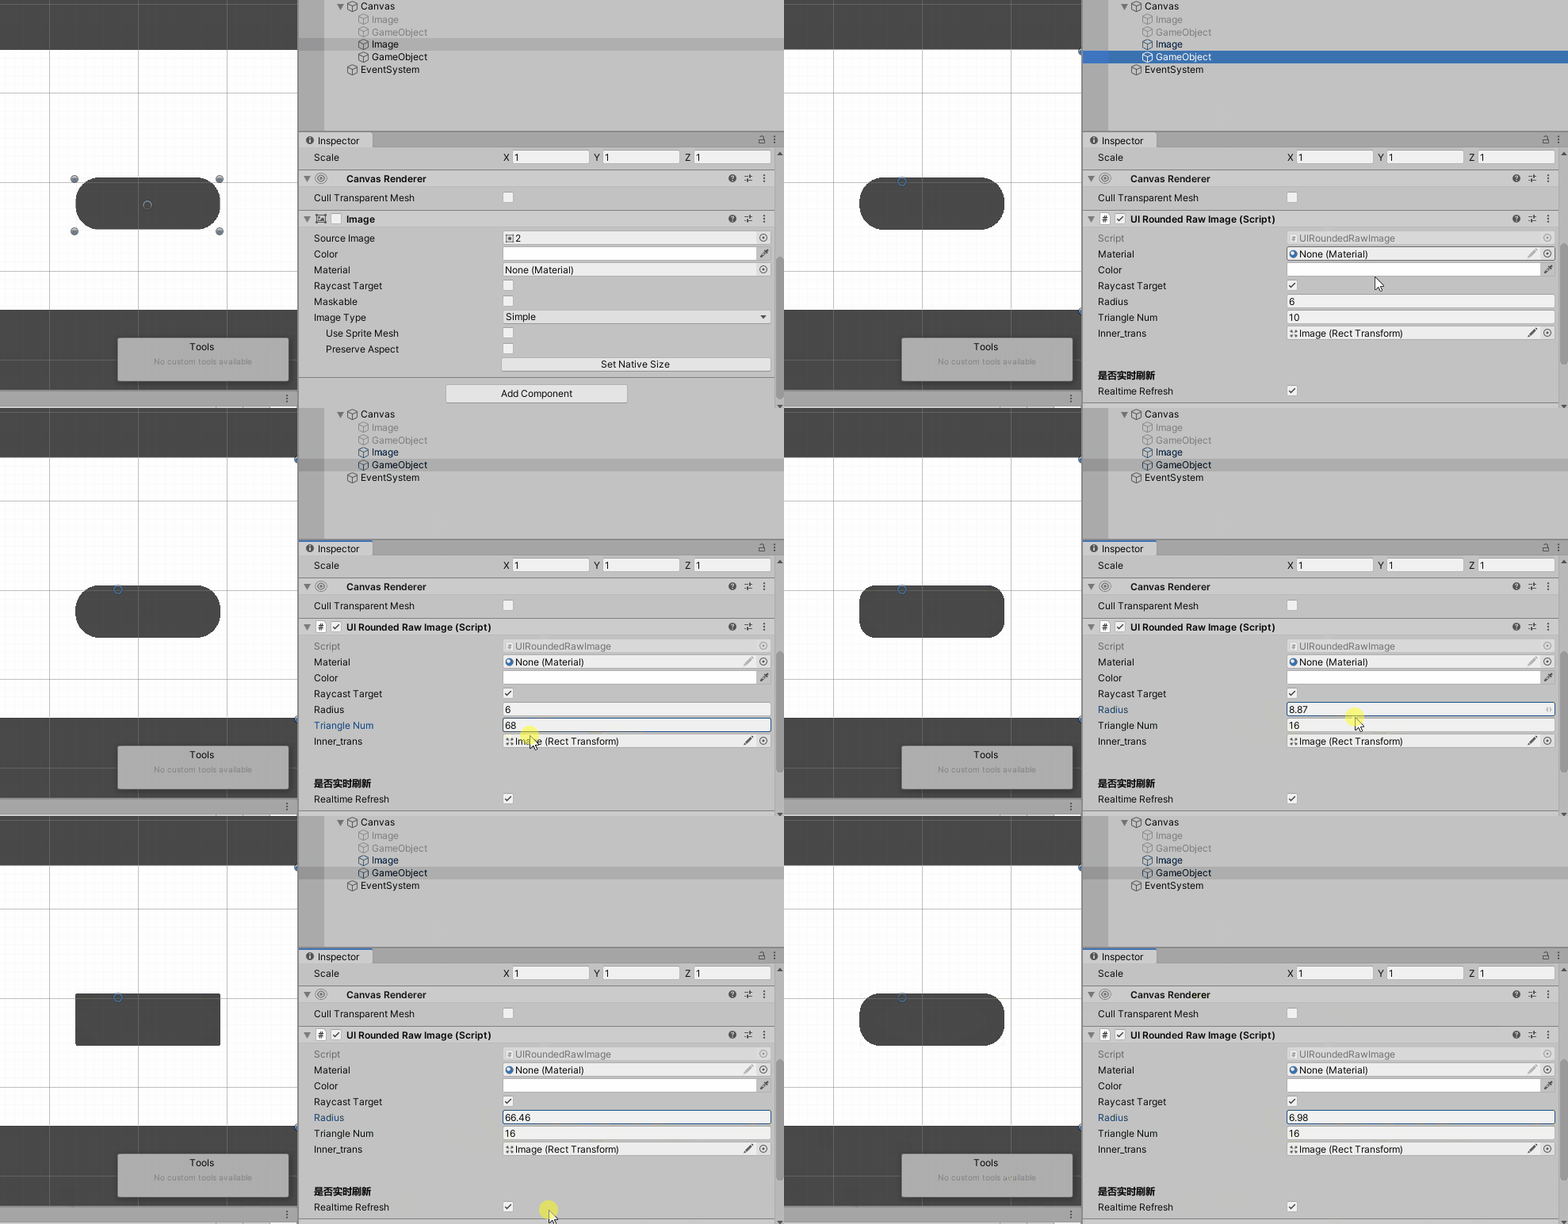
变更示意图:

-
最终效果:


- 代码:
using UnityEngine;
using System.Collections.Generic;
using UnityEngine.UI;
/// <summary>
/// 镂空背景图
/// </summary>
public class UIHollowOutImage : Graphic
{
    public float Radius = 10f;//内切圆半径 图片的一半差不多就是一个圆了 这里相当于图片十分之一的长度
    public int TriangleNum = 6;//每个扇形三角形个数 个数越大弧度越平滑

    public RectTransform inner_trans;
    private RectTransform outer_trans;//背景区域

    private Vector2 inner_rt;//镂空区域的右上角坐标
    private Vector2 inner_lb;//镂空区域的左下角坐标
    private Vector2 outer_rt;//背景区域的右上角坐标
    private Vector2 outer_lb;//背景区域的左下角坐标
    [Header("是否实时刷新")]
    [Space(25)]
    public bool realtimeRefresh;
    [Header("是否显示镂空")]
    [Space(25)]
    public bool ShowHollowOut = true;
    protected override void Awake()
    {
        base.Awake();

        outer_trans = GetComponent<RectTransform>();

        //计算边界
        CalcBounds();
    }

    protected override void OnPopulateMesh(VertexHelper vh)
    {
        vh.Clear();
        float tw = Mathf.Abs(inner_lb.x - inner_rt.x);//图片的宽
        float th = Mathf.Abs(inner_lb.y - inner_rt.y);//图片的高
        float twr = tw / 2;
        float thr = th / 2;

        if (Radius < 0)
            Radius = 0;
        float radius = tw / Radius;//半径这里需要动态计算确保不会被拉伸
        if (radius > twr)
            radius = twr;
        if (radius < 0)
            radius = 0;
        if (TriangleNum <= 0)
            TriangleNum = 1;

        UIVertex vert = UIVertex.simpleVert;
        vert.color = color;

        //0 outer左下角
        vert.position = new Vector2(outer_lb.x, outer_lb.y);
        vh.AddVert(vert);
        //1 outer左上角
        vert.position = new Vector2(outer_lb.x, outer_rt.y);
        vh.AddVert(vert);
        //2 outer右上角
        vert.position = new Vector2(outer_rt.x, outer_rt.y);
        vh.AddVert(vert);
        //3 outer右下角
        vert.position = new Vector2(outer_rt.x, outer_lb.y);
        vh.AddVert(vert);

        //4 inner左下角
        vert.position = new Vector3(inner_lb.x, inner_lb.y);
        vh.AddVert(vert);
        //5 inner左上角
        vert.position = new Vector3(inner_lb.x, inner_rt.y);
        vh.AddVert(vert);
        //6 inner右上角
        vert.position = new Vector3(inner_rt.x, inner_rt.y);
        vh.AddVert(vert);
        //7 inner右下角
        vert.position = new Vector3(inner_rt.x, inner_lb.y);
        vh.AddVert(vert);

        //不显示镂空
        if (ShowHollowOut == false)
        {
            vh.AddTriangle(0, 1, 2);
            vh.AddTriangle(2, 3, 0);
            return;
        }
        //绘制三角形
        vh.AddTriangle(0, 1, 4);
        vh.AddTriangle(1, 4, 5);
        vh.AddTriangle(1, 5, 2);
        vh.AddTriangle(2, 5, 6);
        vh.AddTriangle(2, 6, 3);
        vh.AddTriangle(6, 3, 7);
        vh.AddTriangle(4, 7, 3);
        vh.AddTriangle(0, 4, 3);


        //内四边形顶点
        List<Vector2> commonPointOutside = new List<Vector2>();//共点列表
        Vector2 point1 = new Vector2(inner_lb.x, inner_lb.y);//左下共点
        Vector2 point2 = new Vector2(inner_lb.x, inner_lb.y + radius);//决定首次旋转方向的点
        commonPointOutside.Add(point1);
        commonPointOutside.Add(point2);
        point1 = new Vector2(inner_lb.x, inner_rt.y);//左上共点
        point2 = new Vector2(inner_lb.x + radius, inner_rt.y);
        commonPointOutside.Add(point1);
        commonPointOutside.Add(point2);
        point1 = new Vector2(inner_rt.x, inner_rt.y);//右上共点
        point2 = new Vector2(inner_rt.x, inner_rt.y - radius);
        commonPointOutside.Add(point1);
        commonPointOutside.Add(point2);
        point1 = new Vector2(inner_rt.x, inner_lb.y);//右下共点
        point2 = new Vector2(inner_rt.x - radius, inner_lb.y);
        commonPointOutside.Add(point1);
        commonPointOutside.Add(point2);


        //圆心公共点
        List<Vector2> commonPoint = new List<Vector2>();//共点列表
        point1 = new Vector2(inner_lb.x + radius, inner_lb.y + radius);//左下共点
        point2 = new Vector2(inner_lb.x, inner_lb.y + radius);//决定首次旋转方向的点
        commonPoint.Add(point1);
        commonPoint.Add(point2);
        point1 = new Vector2(inner_lb.x + radius, inner_rt.y - radius);//左上共点
        point2 = new Vector2(inner_lb.x + radius, inner_rt.y);
        commonPoint.Add(point1);
        commonPoint.Add(point2);
        point1 = new Vector2(inner_rt.x - radius, inner_rt.y - radius);//右上共点
        point2 = new Vector2(inner_rt.x, inner_rt.y - radius);
        commonPoint.Add(point1);
        commonPoint.Add(point2);
        point1 = new Vector2(inner_rt.x - radius, inner_lb.y + radius);//右下共点
        point2 = new Vector2(inner_rt.x - radius, inner_lb.y);
        commonPoint.Add(point1);
        commonPoint.Add(point2);

        Vector2 pos2;


        float degreeDelta = (float)(Mathf.PI / 2 / TriangleNum);//每一份等腰三角形的角度 默认6份
        List<float> degreeDeltaList = new List<float>() { Mathf.PI, Mathf.PI / 2, 0, (float)3 / 2 * Mathf.PI };

        for (int j = 0; j < commonPoint.Count; j += 2)
        {
            float curDegree = degreeDeltaList[j / 2];//当前的角度
            AddVert(commonPointOutside[j], tw, th, vh, vert);//添加扇形区域所有三角形公共顶点//TODO :这里改成外面的点
            int thrdIndex = vh.currentVertCount;//当前三角形第二顶点索引
            int TriangleVertIndex = vh.currentVertCount - 1;//一个扇形保持不变的顶点索引
            List<Vector2> pos2List = new List<Vector2>();
            for (int i = 0; i < TriangleNum; i++)
            {
                curDegree += degreeDelta;
                if (pos2List.Count == 0)
                {
                    AddVert(commonPoint[j + 1], tw, th, vh, vert);
                }
                else
                {
                    vert.position = pos2List[i - 1];
                    vert.uv0 = new Vector2(pos2List[i - 1].x + 0.5f, pos2List[i - 1].y + 0.5f);
                }
                pos2 = new Vector2(commonPoint[j].x + radius * Mathf.Cos(curDegree), commonPoint[j].y + radius * Mathf.Sin(curDegree));
                AddVert(pos2, tw, th, vh, vert);
                vh.AddTriangle(TriangleVertIndex, thrdIndex, thrdIndex + 1);
                thrdIndex++;
                pos2List.Add(vert.position);
            }
        }
    }
    protected Vector2[] GetTextureUVS(Vector2[] vhs, float tw, float th)
    {
        int count = vhs.Length;
        Vector2[] uvs = new Vector2[count];
        for (int i = 0; i < uvs.Length; i++)
        {
            uvs[i] = new Vector2(vhs[i].x / tw + 0.5f, vhs[i].y / th + 0.5f);//矩形的uv坐标  因为uv坐标原点在左下角,vh坐标原点在中心 所以这里加0.5(uv取值范围0~1)
        }
        return uvs;
    }
    protected void AddVert(Vector2 pos0, float tw, float th, VertexHelper vh, UIVertex vert)
    {
        vert.position = pos0;
        vert.uv0 = GetTextureUVS(new[] { new Vector2(pos0.x, pos0.y) }, tw, th)[0];
        vh.AddVert(vert);
    }

    /// <summary>
    /// 计算边界
    /// </summary>
    private void CalcBounds()
    {
        if (inner_trans == null)
        {
            return;
        }

        Bounds bounds = RectTransformUtility.CalculateRelativeRectTransformBounds(outer_trans, inner_trans);
        inner_rt = bounds.max;
        inner_lb = bounds.min;
        outer_rt = outer_trans.rect.max;
        outer_lb = outer_trans.rect.min;
    }

    private void Update()
    {
        if (realtimeRefresh == false)
        {
            return;
        }

        //计算边界
        CalcBounds();
        //刷新
        SetAllDirty();
    }
}


 1万+
1万+


 被折叠的 条评论
为什么被折叠?


