


Adobe概述 (Adobe Overview)
The design process changes from person to person, practice to practice, and profession to profession. As we advance further into the 21st century, the design process for many people leans heavily on technology. Adobe leads the charge in developing creative software for those looking to design and create through digital means, through the Creative Cloud suite.
设计过程因人而异,因实践而异,因专业而异。 随着我们进一步进入21世纪,许多人的设计过程在很大程度上依赖于技术。 土坯 负责为希望通过数字方式通过Creative Cloud套件进行设计和创建的人员开发创意软件。
Adobe creates a wide variety of tools that address the needs of many creative genres. But what do Adobe products have to do with data science or machine learning?
Adobe创建了各种各样的工具来满足许多创意类型的需求。 但是Adobe产品与数据科学或机器学习有什么关系?
Well, this blog will discuss how Adobe incorporates machine learning / AI into a few of its products, in order to make the design process faster and more intuitive. We will discuss features that harness AI powered by Adobe Sensei in these products below in the Adobe Creative Cloud suite:
好吧,这个博客将讨论Adobe如何将机器学习/ AI集成到其一些产品中,以使设计过程更快,更直观。 我们将在以下Adobe Creative Cloud套件中的以下产品中讨论利用Adobe Sensei支持的AI的功能:
Premiere Pro and After Effects are video editors and might help YouTubers and streaming service content creators (like Netflix) to combine, rearrange, and edit video content.
Premiere Pro和After Effects是视频编辑器,可以帮助YouTuber和流服务内容创建者(例如Netflix)组合,重新排列和编辑视频内容。
Audition is an audio editor and might help a podcaster edit their audio file to add transitioning sound effects, or slicing out certain portions of the podcast before sharing.
Audition是音频编辑器,可以帮助播客编辑其音频文件以添加过渡音效,或在共享之前将播客的某些部分切出。
Photoshop is a photo editor and an essential tool for professional photographers to make adjustments to their images, whether it’s brushing away wrinkles on someone’s face, increasing the brightness, or montaging other content into the image.
的Photoshop 是照片编辑器,是专业摄影师调整其图像的必不可少的工具,无论它是刷去人脸上的皱纹,增加亮度还是将其他内容蒙版到图像中。
Illustrator is a must-have for graphic designers and UI/UX designers and provides a platform to design vector graphics such as logos, branding, digital art, posters, or website buttons.
Illustrator是图形设计师和UI / UX设计师的必备工具,并且提供了一个平台来设计矢量图形,例如徽标,品牌,数字艺术,海报或网站按钮。
InDesign assists in the design, layout, and publication of multi-page documents, which might be used by people on marketing teams, presentation designers, or magazine/publication editors.
InDesign协助设计,布局和发布多页文档,营销团队,演示文稿设计师或杂志/出版物编辑人员可能会使用它们。
Premiere Pro和After Effects (Premiere Pro & After Effects)
内容感知填充 (Content-Aware Fill)
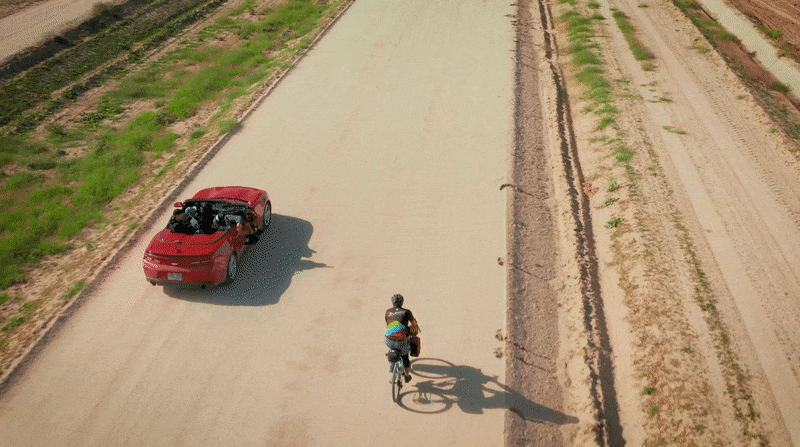
In After Effects, we can get rid of unwanted objects in our video footage using Adobe Sensei AI. The Content-Aware Fill tool in After Effects simply asks us for the region and the duration for the software to “fill” the video frames to mask things we don’t want to see. The tool then samples surrounding contextual pixels to generate pixel patterns in the video frames that “blend in” with the scene — as if the object never existed. This AI is probably built using Generative Adversarial Networks (GANs) — the same deep learning algorithms that can create incredibly convincing deepfakes.
在After Effects中,我们可以使用Adobe Sensei AI消除视频素材中不需要的对象。 After Effects中的“内容感知填充”工具仅要求我们提供软件“填充”视频帧以掩盖我们不愿看到的东西的区域和持续时间。 然后,该工具对周围的背景像素进行采样,以在与场景“融合”的视频帧中生成像素模式-好像该对象从不存在。 该AI可能是使用生成对抗网络(GAN)构建的 -相同的深度学习算法,可以创建令人信服的Deepfake 。
As a (very) concise overview — a GAN is composed of two competing neural networks: a generator and a discriminator. The generator looks at “true” data (the pixels of the road) and seeks to deceive the discriminator with “fake” generated data (pixels to match the road to obscure the car), whereas the mission of the discriminator is to detect the “fake” data. So after many rounds of training these neural nets, ultimately the goal is to have the generator get better and better at fooling the discriminator so that the discriminator cannot tell the “true” data from the “fake” data. The generator tries to maximize classification error, the discriminator tries to minimize classification error.
作为(非常)简洁的概述,GAN由两个相互竞争的神经网络组成: 生成器和鉴别器 。 生成器查看“真实”数据(道路像素),并试图用“假”生成的数据(与道路相匹配的像素来掩盖汽车)来欺骗鉴别器,而鉴别器的任务是检测“伪造”数据。 因此,在对这些神经网络进行了多轮训练之后,最终目标是使生成器在欺骗鉴别器方面变得越来越好,以使鉴别器无法从“伪”数据中分辨出“真实”数据。 生成器尝试使分类误差最大化,鉴别器尝试使分类误差最小化。
变形切割 (Morph Cut)
In Premiere Pro, Morph Cut allows us to more smoothly transition between video cuts — particularly when interviewing someone. We might want to take out a few seconds of video when the interviewee is scratching their nose or something, but we want our video interview to look like we never cut anything out. We don’t want it to jump from one cut to another harshly, nor do we want to visibly dissolve or fade into the next cut. We want to transition as seamlessly as possible.
在Premiere Pro中,Morph Cut允许我们在视频剪辑之间进行更平稳的过渡,尤其是在采访某人时。 当受访者抓挠鼻子或其他东西时,我们可能希望拍摄几秒钟的视频,但我们希望视频采访看起来像我们从来没有剪出任何东西。 我们既不希望它从一个切口急剧跳到另一个切口,也不希望明显地溶解或淡入下一个切口。 我们希望尽可能无缝地过渡。
So, a Morph Cut is placed between two video cuts. Then, a duration for the transition is set (maybe 15, 30, or 60 frames). Finally, Adobe Sensei AI built into Premiere Pro analyzes the scene — the interviewee’s face, the surroundings, the light, the color, etc…and it generates video content to “blend” between the two cuts. Like the Content-Aware Fill tool mentioned before, this AI tool is likely achieved through GANs. It is difficult to see the smooth transition that Morph Cut provides without a “before and after” example, so check out this YouTube video by Adobe Creative Cloud that really shows off the effect.
因此,将“变形剪切”放置在两个视频剪切之间。 然后,设置过渡的持续时间(可能是15、30或60帧)。 最终,Premiere Pro中内置的Adobe Sensei AI分析了场景-受访者的脸,周围环境,光线,颜色等……并生成视频内容以在两个剪辑之间“融合”。 像前面提到的Content-Aware Fill工具一样,此AI工具很可能是通过GAN实现的。 如果没有“之前和之后”的示例,很难看到Morph Cut提供的平滑过渡,因此请观看 Adobe Creative Cloud的YouTube视频 , 该视频真正展示了这种效果。
自动改组 (Auto Reframe)
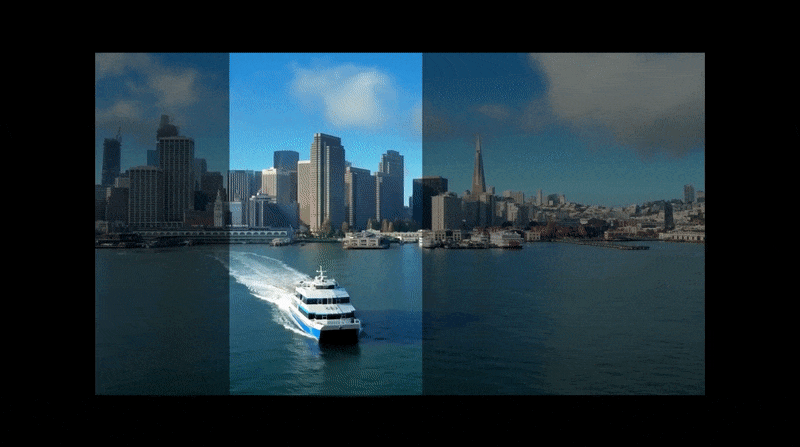
In Premiere Pro, Auto Reframe automatically changes the proportions of the video frame without losing the “important” focus of the footage. So for example, if we filmed a ship cruising in the San Francisco Bay using a DSLR camera with a 16:9 ratio and wanted to reframe the footage for a vertically oriented iPhone, we could use Auto Reframe to convert the 16:9 ratio to 9:16 and have it track the ship in the cropped footage. Check out this YouTube video again by Adobe Creative Cloud that shows you how to use this tool.
在Premiere Pro中,自动重画框会自动更改视频帧的比例,而不会丢失素材的“重要”焦点。 因此,例如,如果我们使用比例为16:9的DSLR相机拍摄了在旧金山湾巡航的船只,并想对垂直方向的iPhone的镜头进行重新构图,则可以使用自动重新构图将16:9的比例转换为9:16并在裁剪后的画面中跟踪船。 再次观看 Adobe Creative Cloud的YouTube视频 ,向您展示如何使用此工具。
试镜 (Audition)
混音 (Remix)
The Remix function in Adobe Audition automatically fits a music clip to any desired length. This video by Mike Murphy very succinctly demos and explains the Audition Remix tool. Imagine that you want a 30-second intro jingle for your podcast show. You scraped the internet and found a royalty-free music clip that you like, but it’s only 10 seconds long. Once again, it’s Adobe Sensei AI to the rescue! Once Remix is enabled and has analyzed the sound clip, you can stretch it out to 30 seconds, and the trained AI is able to automatically stitch together pieces of the 10-second music clip, to seamlessly extend it to your desired 30-second duration. Done!
Adobe Audition中的“混音”功能会自动将音乐剪辑调整为任何所需的长度。 此视频由Mike Murphy制作 非常简洁地演示并解释了Audition Remix工具。 想象一下,您需要30秒的播客节目简介。 您刮擦了互联网,找到了自己喜欢的免版税音乐剪辑,但它只有10秒长。 再一次,是要拯救Adobe Sensei AI! 一旦启用了Remix并分析了声音片段,您就可以将其延长到30秒,并且受过训练的AI可以自动将10秒音乐片段的片段缝合在一起,以将其无缝扩展到所需的30秒持续时间。 做完了!
自动引导 (Autoducking)
Autoducking uses AI to automatically adjust the volume up or down on audio. This is typically done for audio that uses both music and dialogue. For example, we might want the music softer in the background to hear the dialogue, but when the dialogue stops, we can increase the music volume. In this example, Adobe Sensei analyzes the locations and durations of sound files in Audition to understand and predict where the music or dialogue audio should be quieter or louder for the optimal audio experience. Check out Mike Murphy’s YouTube demo of the Autoducking feature in Adobe Audition.
Autoducking使用AI来自动调节音频的音量。 通常对同时使用音乐和对话的音频进行此操作。 例如,我们可能希望背景音乐更柔和以听见对话,但是当对话停止时,我们可以增加音乐音量。 在此示例中,Adobe Sensei分析了Audition中声音文件的位置和持续时间,以了解和预测音乐或对话音频在何处应该更安静或更响,以获得最佳的音频体验。 查看Mike Murphy的YouTube演示 , 演示 Adobe Audition中的Autoducking功能。

的Photoshop (Photoshop)
内容感知填充 (Content-Aware Fill)
Just like Content-Aware Fill in After Effects, Photoshop uses Adobe Sensei to generate “fill” pixels for a selected area of an image with pixel data sampled from adjacent portions of the image being edited. Want a pimple gone on your face in your latest selfie? AI in the form of Content-Aware Fill is there to save the day! It’ll sample the skin around the pimple, and make it disappear.
就像内容感知的After Effects中的填充一样,Photoshop使用Adobe Sensei生成图像的选定区域的“填充”像素,并从正在编辑的图像的相邻部分中采样像素数据。 想要在最新的自拍中将粉刺涂在脸上吗? 以内容感知填充的形式提供的AI可以节省一天! 它会采样丘疹周围的皮肤,并使其消失。
面部识别液化 (Face-Aware Liquify)
This feature automatically detects faces in the image and then lets us use custom grips (one for the mouth, one for the eyes, etc…) to alter the facial expressions. Adobe Sensei likely uses neural networks (computer vision) to find the faces and the features on the face to manipulate. This feature is quickly demonstrated in the first 30 seconds of this video tutorial by the Photoshop Training Channel.
此功能会自动检测图像中的脸部,然后让我们使用自定义握柄(一个用于嘴巴,一个用于眼睛,等等)来更改面部表情。 Adobe Sensei可能使用神经网络(计算机视觉)来找到面部和面部特征以进行操作。 在本视频教程的前30秒中可以快速演示此功能 由Photoshop培训频道提供。

对象选择 (Object Selection)
Object Selection makes lassoing and selecting elements in an image faster. Let’s say we took a photo of our friend against a blank white wall in her apartment, and our friend wants to look like she’s living her best life at the beach instead. So using Photoshop, we have to change the background around her. Using the Object Selection tool, we can simply click and drag a loose selection rectangle around her, and Adobe Sensei’s AI magic automatically draws a very accurate and tight selection that closely follows the profile of her body, so we can easily drop in the beach background! Mike Murphy shows the power of this feature in his YouTube demo here.
对象选择使套索和选择图像中的元素更快。 假设我们在她公寓的空白白墙上拍下了我们朋友的照片,而我们朋友想看起来像是她在海滩上过着最好的生活。 因此,使用Photoshop,我们必须更改她周围的背景。 使用“对象选择”工具,我们只需单击并在她周围拖动一个松散的选择矩形,Adobe Sensei的AI魔术就会自动绘制一个非常准确且紧紧的选择,使其紧贴她的身体轮廓,因此我们可以轻松地掉入海滩背景! Mike Murphy在此处的YouTube演示中展示了此功能的强大功能。
插画家 (Illustrator)
全局编辑 (Global Editing)
Global Editing powered by Adobe Sensei in Illustrator is able to automatically detect similar vector geometries and lets us make changes to all of these alike geometries in a single act. This lets us make changes to reoccurring shapes faster. For example, if we designed wallpaper with a repeating flower pattern, and this flower pattern was arrayed 100 times on the canvas, we could make a change to one of the flower patterns using Global Editing, and all 100 copies of this pattern would be updated! This is clearly illustrated in this YouTube video by Adobe Creative Cloud.
由Adobe Sensei in Illustrator提供支持的Global Editing能够自动检测相似的矢量几何形状,并使我们能够在一次操作中对所有这些相似的几何形状进行更改。 这使我们能够更快地更改重复出现的形状。 例如,如果我们设计了具有重复花朵图案的墙纸,并且该花朵图案在画布上排列了100次,则可以使用“全局编辑”更改其中一种花朵图案,并且将更新该图案的所有100个副本! Adobe Creative Cloud在此YouTube视频中清楚地说明了这一点 。

InDesign (InDesign)
查找相似字体 (Find Similar Fonts)
Within InDesign, Adobe Sensei can analyze certain traits of a font — like the font’s width, serif, or other attributes. Then, it is able to recommend other fonts on your computer that are similar to the selected font. This recommendation system makes it a lot easier to search for more typography options with a particular font style. Check out this video here for a demo.
在InDesign中,Adobe Sensei可以分析字体的某些特征-例如字体的宽度,衬线或其他属性。 然后,可以在计算机上推荐与所选字体相似的其他字体。 该推荐系统使搜索具有特定字体样式的更多字体选项变得容易得多。 在此处查看此视频以获取演示。

内容感知适合 (Content-Aware Fit)
A common struggle in InDesign is placing, cropping, and scaling multiple photos in a layout quickly. Adobe Sensei streamlines this process. Once the layout is set up with empty frames where you want the images to go, the images can be dragged and dropped from a folder on your computer into the empty boxes. With those frames selected, we can use the Content-Aware Fit tool to let Adobe Sensei find the “best” portion of each image and scale it within the frame automatically. And of course, if you want to make further adjustments, you can spend more time and tweak it afterward. See this demo on YouTube by Adobe Creative Cloud to see this tool in action.
InDesign中的一个常见难题是快速在布局中放置,裁剪和缩放多张照片。 Adobe Sensei简化了此过程。 一旦在布局中设置了要放置图像的空白框,就可以将图像从计算机上的文件夹拖放到空白框中。 选择这些框架后,我们可以使用Content-Aware Fit工具让Adobe Sensei找到每个图像的“最佳”部分,并在框架内自动缩放比例。 当然,如果您想进行进一步的调整,则可以花更多的时间进行调整。 在 Adobe Creative Cloud的YouTube上观看此演示,以了解此工具的实际效果。
下一步是什么? (What’s Next?)
Adobe remains dominant in building software for creative means, but to stay on top, what’s the next step? As artificial intelligence and machine learning become more prolific in software, Adobe should continue to invest in Adobe Sensei’s capabilities to streamline the digital creative process as much as possible, while being careful not to take away useful features.
Adobe在为创意手段开发软件方面仍然占主导地位,但要保持领先地位,下一步是什么? 随着人工智能和机器学习在软件中的应用越来越广泛,Adobe应该继续投资Adobe Sensei的功能,以尽可能地简化数字创作过程,同时注意不要剥夺有用的功能。
AI has the potential to achieve a particular result in a faster way through classification, prediction, and automation. Aggregating feedback data from the customer base — the photographers, the graphic designers, the video editors, and others, will be crucial to understand what people want to be automated. For example, Adobe might take note in situations where a skilled Photoshop user might exclaim:
AI具有通过分类,预测和自动化以更快的方式实现特定结果的潜力。 汇总来自客户群(摄影师,图形设计师,视频编辑者等)的反馈数据对于了解人们想要自动化的内容至关重要。 例如,在熟练的Photoshop用户可能惊呼的情况下,Adobe可能会注意:
“Gah, it be SO nice if Photoshop did ______ so I can ______ faster.”
“ Gah,如果Photoshop做到______真好,这样我就可以______更快。”
Identifying users’ struggles with time-consuming, monotonous, repetitive tasks, or understanding the most common workflows to achieve a particular effect, will help Adobe continue to develop useful machine learning features within each app in the Creative Cloud suite.
识别用户在费时,单调,重复的任务上的挣扎,或者了解实现特定效果的最常见工作流程,将帮助Adobe继续在Creative Cloud套件的每个应用程序中开发有用的机器学习功能。
翻译自: https://medium.com/swlh/artificial-intelligence-adobe-sensei-807a9283d0f8


 2845
2845

 被折叠的 条评论
为什么被折叠?
被折叠的 条评论
为什么被折叠?
 到【灌水乐园】发言


