


前阵子逛shadertoy,然后看到了好多用raymarching写的东西心里不禁感叹,

故今天给大家分享下在unity中的RayMarching使用。
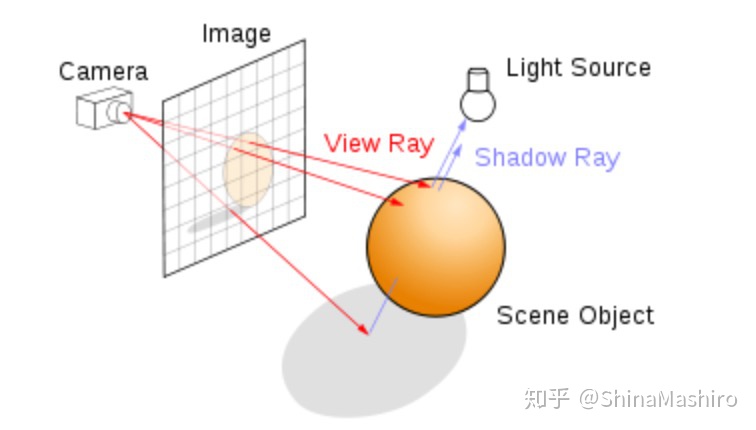
RayMarching是什么:顾名思义,是一根ray一步一步向前走(marching),知道与物体相交。基本只用于volumetric,或可以当作volumetric处理的情况。
初始化相机
我们首先需要初始化相机的视锥方便我们在shader中来得到光线的方向。
 private void OnRenderImage(RenderTexture src, RenderTexture dest)
    {
        if (!_raymarchMaterial)
        {
            Graphics.Blit(src, dest);
            return;
        }
        RenderTexture.active = dest;
        GL.PushMatrix();
        GL.LoadOrtho();
        _raymarchMaterial.SetPass(0);
        GL.Begin(GL.QUADS);

        //BL
        GL.MultiTexCoord2(0, 0.0f, 0.0f);
        GL.Vertex3(0.0f, 0.0f, 3.0f);
        //BR
        GL.MultiTexCoord2(0, 1.0f, 0.0f);
        GL.Vertex3(1.0f, 0.0f, 2.0f);
        //TR
        GL.MultiTexCoord2(0, 1.0f, 1.0f);
        GL.Vertex3(1.0f, 1.0f, 1.0f);
        //TL
        GL.MultiTexCoord2(0, 0.0f, 1.0f);
        GL.Vertex3(0.0f, 1.0f, 0.0f);

        GL.End();
        GL.PopMatrix();
    }

    private Matrix4x4 CamFrustum(Camera cam)
    {
        Matrix4x4 frustum = Matrix4x4.identity;
        float fov = Mathf.Tan(cam.fieldOfView * 0.5f * Mathf.Deg2Rad);
        Vector3 goUp = Vector3.up * fov;
        Vector3 goRight = Vector3.right * fov * cam.aspect;

        Vector3 TL = (-Vector3.forward - goRight + goUp);
        Vector3 TR = (-Vector3.forward + goRight + goUp);
        Vector3 BR = (-Vector3.forward + goRight - goUp);
        Vector3 BL = (-Vector3.forward - goRight - goUp);

        frustum.SetRow(0, TL);
        frustum.SetRow(1, TR);
        frustum.SetRow(2, BR);
        frustum.SetRow(3, BL);
        return frustum;
    }
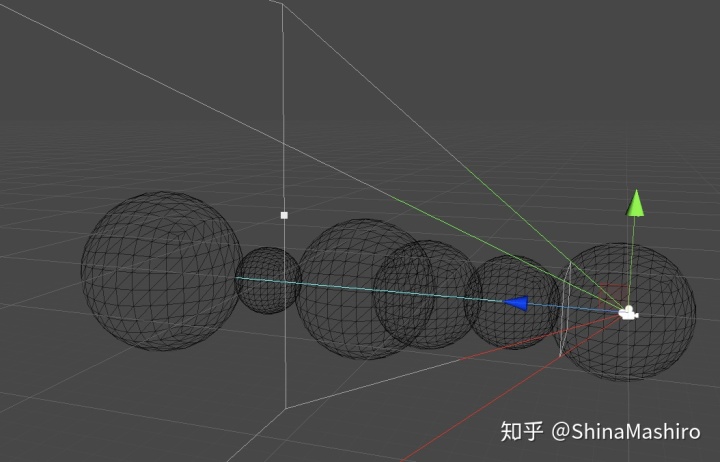
这里我们设置好相机的点大概是这样⬇️
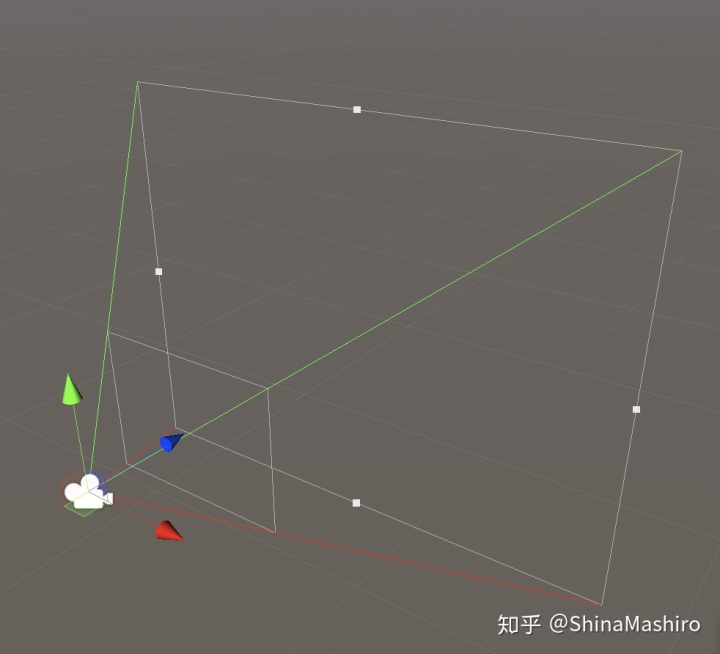
相机我们设置好后,当然是要在shader中获得我们刚刚设置的四个的顶点。这里我们通过vertex着色器指定顶点后,通过frag着色器的插值来获得每一根射线的方向。
伪代码
v2f vert (appdata v)
{
...
o.ray=_CamFrustum[(int)index].xyz;
o.ray/=abs(o.ray.z);//z=-1
o.ray=mul(_CamToWorld,o.ray);
return o;
}
fixed4 frag (v2f i) : SV_Target
{
Ray ray=createRay(_WorldSpaceCameraPos,normalize(i.ray.xyz));
return ray.direction;
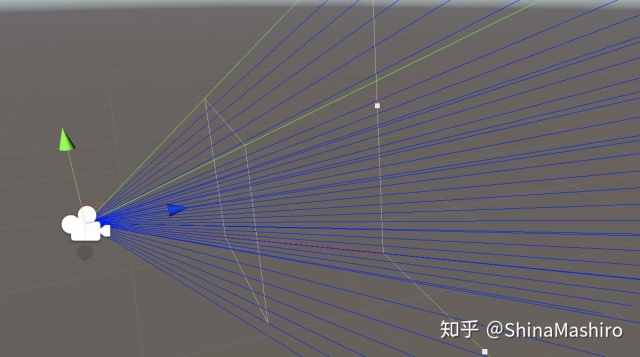
}
设置好后我们的射线大致就像这样⬇️
使用raymarching来得到图像
我们相机的初始化已经做完了下面可以开始来得到最基础的图形了我们从画球开始,因为球的绘制最为简单,直接得到球面上一点球心的位置,在判断其与半径之间的差值即表示hit成功。
float sdSphere(float3 p, float s)
{
	return length(p) - s;
}
float distenceField(float3 p)
{
        return sdSphere(p,_sphereRadius);
}
RayHit raymarching(Ray ray,float depth)
{
RayHit Hit = CreateRayHit();
float t=0;
for(int i=0;i<30;i++)
{
if(t>maxDistance||t>=depth)
{
Hit.position.w = 0;
break;
}
float3 p = ray.origin + ray.direction*t;
float4 d = distenceField(p);
if(d.w < 0.01)
{
Hit.position = float4(p,1);
Hit.normal = getNormal(p);
break;
}
t+=d.w;
}
return Hit;
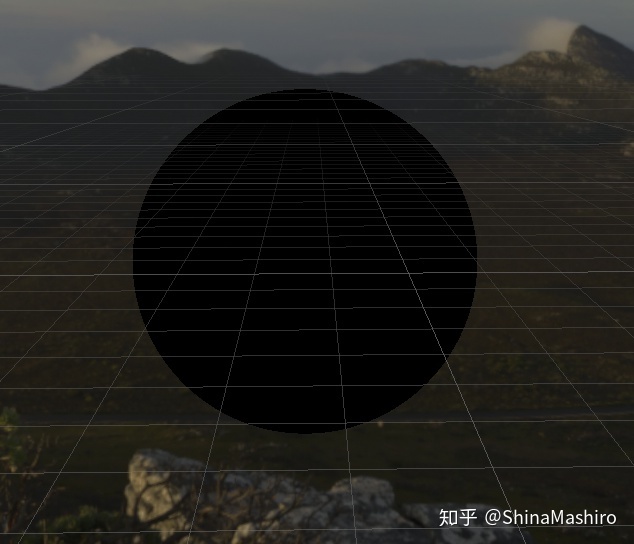
}当然这样我们画的这样子没有法线和光照固然只是一团黑,就像这样
我们可以为其计算表面法线,然后就可以很快乐的进行着色啦~因为我们这里可以用梯度来近似的到其法线:
代码如下:
float3 getNormal(float3 p)
            {
                const float2 offset = float2(0.001f,0.0f);
                float3 n= float3(
                    distenceField(p+offset.xyy)-distenceField(p-offset.xyy),
                    distenceField(p+offset.yxy)-distenceField(p-offset.yxy),
                    distenceField(p+offset.yyx)-distenceField(p-offset.yyx)
                );
                return normalize(n);
            }
这里我们先用Lambert模型凑个数就可以很清楚的看到法线的作用了。
 float3 Shading(inout Ray ray,RayHit hit,float3 col)
            {
                float3 light =(_LightCol* dot(-_LightDir,hit.normal);
                return float3(hit.color*light);
            }
Shading
这样子我们得到了法线基本大功告成了一半了,现在我们来进行着色,叮!
就是如下这样
还可以加noise变成这样是不是很有意思呢
以上图来举例这里面用的几个shading如下:
softShadow我这里用的是如下的方式实现,文章比较详细这里就不多赘述了
fractals, computer graphics, mathematics, shaders, demoscene and moreiquilezles.org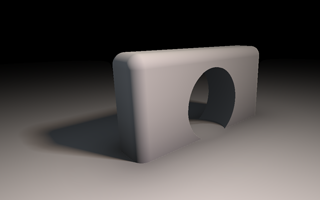
或者
倪朝浩:入门Distance Field Soft Shadowszhuanlan.zhihu.com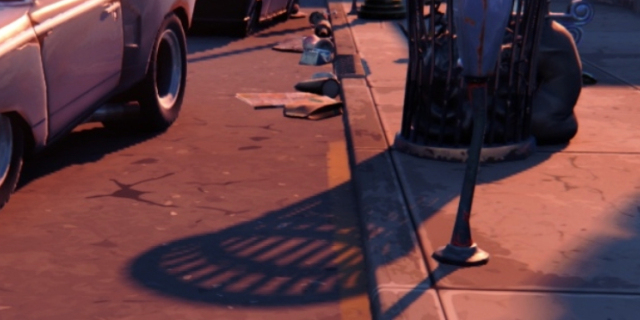
AO:
我们这里大致说下Ao本文中的Ao是最基础的方式,思想如下以hitpoint为起始点,再次以固定step(步长),朝着各个point的法线方向去Raymarhing,这样子即可在限定步数内判断到是否有遮蔽物。
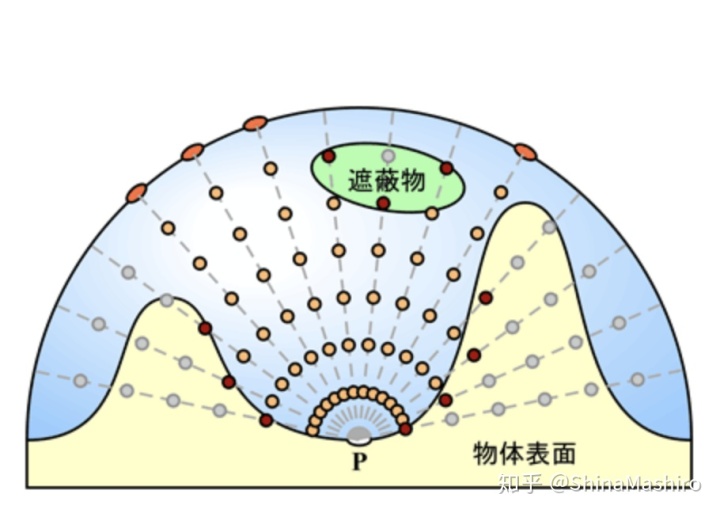
当然这种ao开销方式会很大,但是我们可以先整一坨采样点然后在糊一糊,想了解的可以去看 @CGBull 的文章那里头啥都有。
CGBull:Unity_GroundTruth-Oclusionzhuanlan.zhihu.com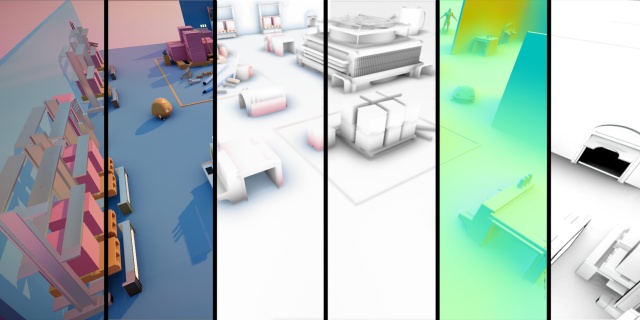
伪代码
float AmbientOcclusion(float3 p,float3 n)
{
float step=0.1;
float ao = 0.0;
float dist;
for(int i=0;i<3;i++)
{
dist= step*i;
ao+= max(0.0f,(dist-distenceField(p+n*dist))/dist);
}
return (1.0f-ao);
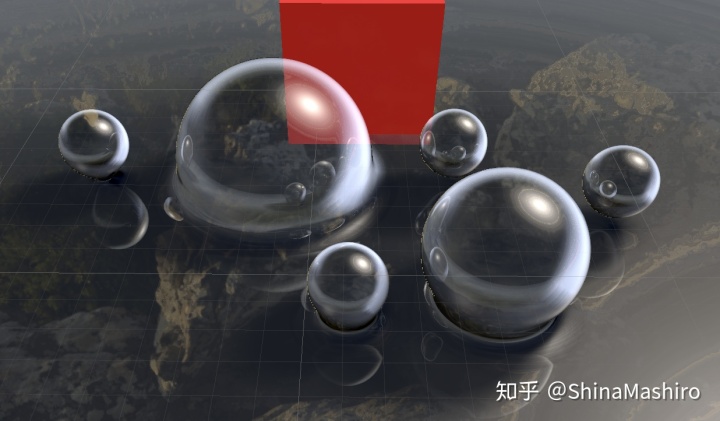
}transparent 和一些其他的着色都都来自shadertoy 这里的小球的来自。
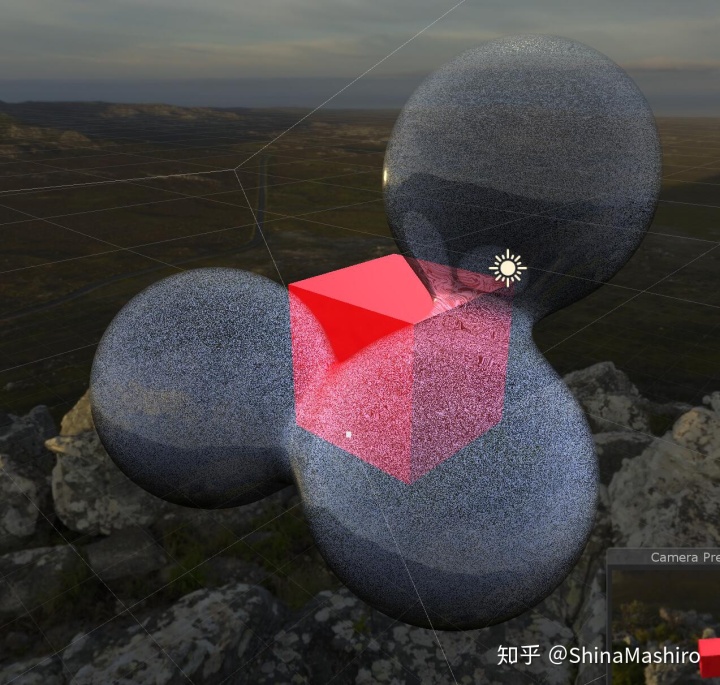
https://www.shadertoy.com/view/ld3Gz2www.shadertoy.com这里我们看到的metaball其实是通过opSmoothUnion函数来插值得到
float4 distenceField(float3 p)
            {
		float4 combines;
		combines=float4(_sphereColor.rgb, sdSphere(p-_spheres[0].xyz,_spheres[0].w));
		for(int i=1; i<_sphereNum; i++)
                {
                    float4 sphereAdd=float4(_sphereColor.rgb, sdSphere(p-_spheres[i].xyz,_spheres[i].w));
                    combines = opUS(combines,sphereAdd,_sphereSmooth);//opUS
                }
            }
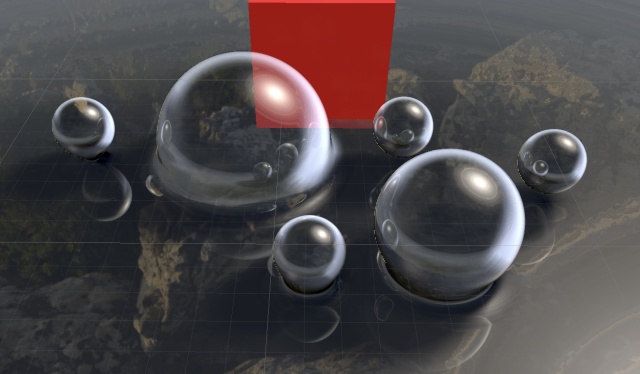
我们这样子添加则可以在外部用transform来控制这个球,这样子是不是就很有趣了呢~
上面的着色摸完了我们可以来试着整其他的烟雾了。
我们有了上面的raymarching的一些函数后,我们再来过构建烟雾十分的容易了。
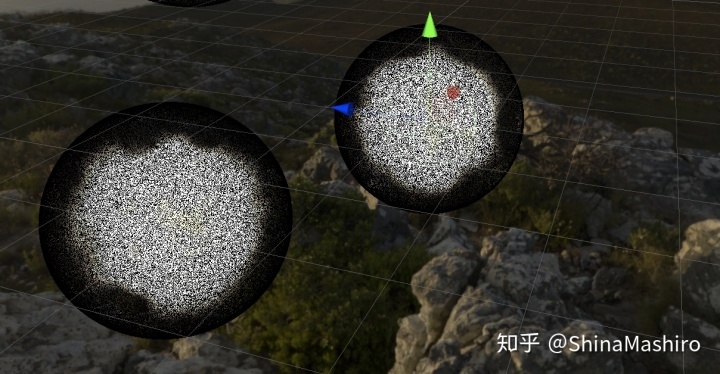
当然我们首先要有坨烟这里烟雾的构建,这里我们Raymarching噪声图多次采样, 然后我们在根据采样得到的烟浓度叠来得到我们的最终的效果。我这里的烟雾来自乐乐女神的shadertoy
https://www.shadertoy.com/view/Xsd3R2www.shadertoy.com我们这里可以把绘制云的函数丢在我们hit到的球体里头,这样子可以更加直观的看到球与我们烟的关系。
就像这样
当然我们要向刚刚那样子混合起来的话我们需要在raymarching cloud时候的distenceField那里像上面一样使用opSmoothUnion来进行混合。既可以达到效果啦~
文章基本上就到这里了,第一次发文好紧张好紧张。。。。
最后附上git文件骗赞233333
MashiroShina/RayMarchingPlayBallgithub.com
参考
- http://iquilezles.org/www/articles/distfunctions/distfunctions.htm
- https://flafla2.github.io/2016/10/01/raymarching.html
- http://jamie-wong.com/2016/07/15/ray-marching-signed-distance-functions/#signed-distance-functions
- http://9bitscience.blogspot.com/2013/07/raymarching-distance-fields_14.html
- http://marina.sys.wakayama-u.ac.jp/~tokoi/?date=20101122


 826
826


 被折叠的 条评论
为什么被折叠?
被折叠的 条评论
为什么被折叠?
 到【灌水乐园】发言


