


1. 安装supervisor yum pip的方式都可以
yum -y install supervisor
已加载插件:fastestmirror
Loading mirror speeds from cached hostfile
 * base: mirrors.aliyun.com
 * centos-sclo-rh: mirrors.bfsu.edu.cn
 * centos-sclo-sclo: mirrors.huaweicloud.com
 * extras: mirrors.aliyun.com
 * updates: mirrors.aliyun.com
没有可用软件包 supervisor。
错误:无须任何处理
yum install -y epel-release
yum install -y supervisor
2. 卸载(若需要)
yum -y remove supervisor
pip uninstall supervisor
ref:https://blog.csdn.net/weixin_42260789/article/details/89207072
3. 启动supervisord
第一次重启
(base) [root@localhost ~]# supervisord -c /etc/supervisord.conf
Unlinking stale socket /var/run/supervisor/supervisor.sock
(base) [root@localhost ~]# ps -ef | grep supervisord
root      5405     1  0 00:44 ?        00:00:00 /usr/bin/python /usr/bin/supervisord -c /etc/supervisord.conf
root      5431  1975  0 00:45 pts/12   00:00:00 grep --color=auto supervisord
修改配置文件后重启
(base) [root@localhost ~]# supervisorctl reload
Restarted supervisord
cat /etc/supervisord.conf
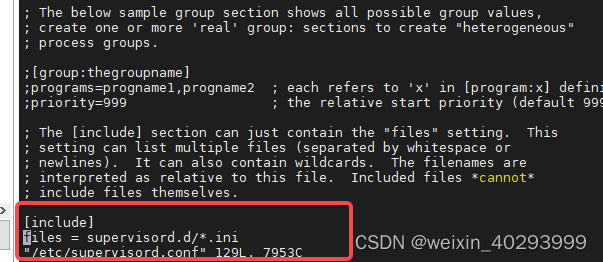
这里很重要,php管理拓展, nginx 管理web站点,都是这种分离的文件方式,各走各的,不一坨在一起,挺好的。
3.配置进程
(base) [root@localhost supervisord.d]# cat mytest1.ini
;supervisorctl status 显示的进程的名字,
[program:mytest1]
;开启多个进程是的显示方式
process_name=%(program_name)s_%(process_num)02d
;命令脚本
command=/home/miniconda_root/bin/python /root/test/test.py
;在supervisord启动的时候也自动启动
autostart=true
;程序退出后自动重启,可选值:[unexpected,true,false],默认为unexpected,表示进程意外杀死后才重启
autorestart=true
;用哪个用户启动进程,默认是root
user=root
;监控进程数
numprocs=1
;把stderr重定向到stdout,默认false
redirect_stderr=true
;日志文件,需要注意当指定目录不存在时无法正常启动
stdout_logfile=/tmp/mytest1.log
;HTTP服务器,提供web管理界面
[inet_http_server]
; Web管理后台运行的IP和端口,如果开放到公网,需要注意安全性
port=0.0.0.0:9001
; 用户名 (default is no username (open server))
username=admin
; 密码 (default is no password (open server))
password=admin
xxx.ini 的语法规则:
- 首行必须为[program:mytest1] 服务进程名
- 注释要以;开始并且独占一行
- 代码行 不能有空格, 比如password=admin, 不能是password=admin空格::
这样以来,它的任何输出和错误都会进入 /tmp/mytest1.log 日志。
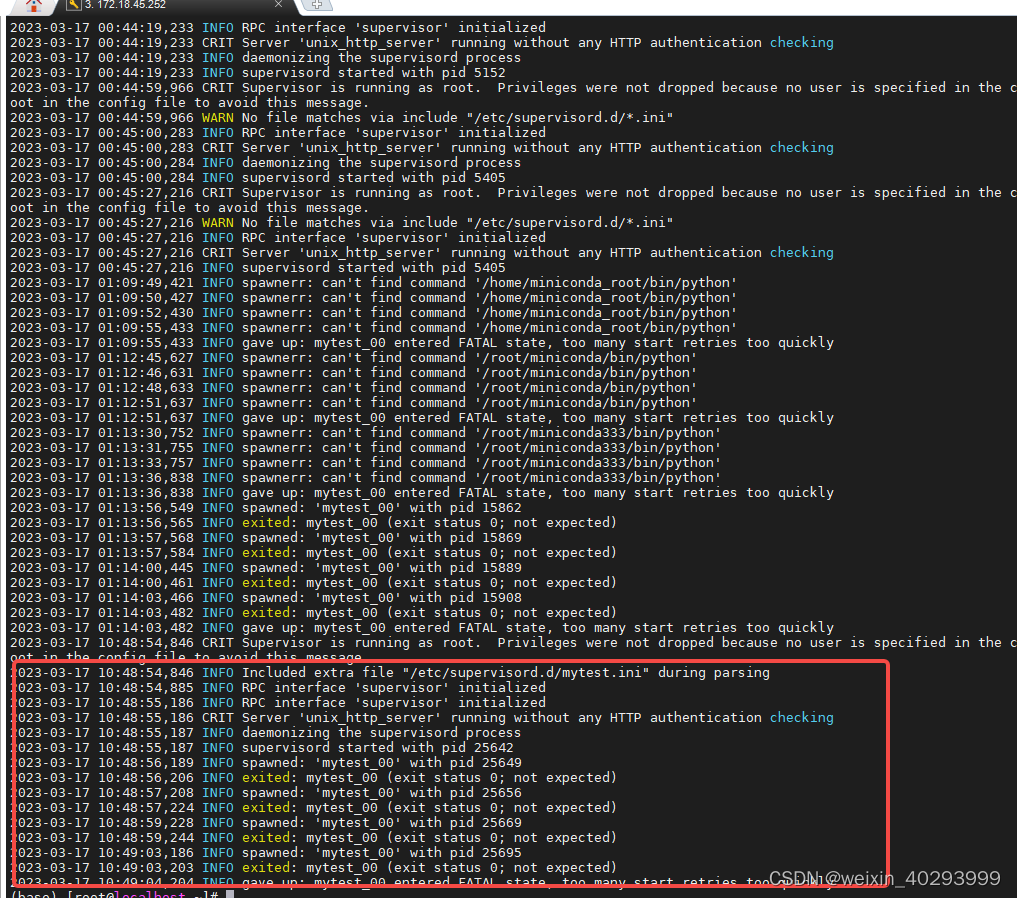
但是,这里我其实犯了一个错误,是因为 /root/test/test.py print了一句话就退出了。 然后 因为autorestart=true, 所以它会不断重启。然后就报错:too many process 了。
(base) [root@localhost supervisord.d]# supervisorctl status
mytest:mytest_00                 BACKOFF   Exited too quickly (process log may have details)
因为他死了,我又把它拉起来。

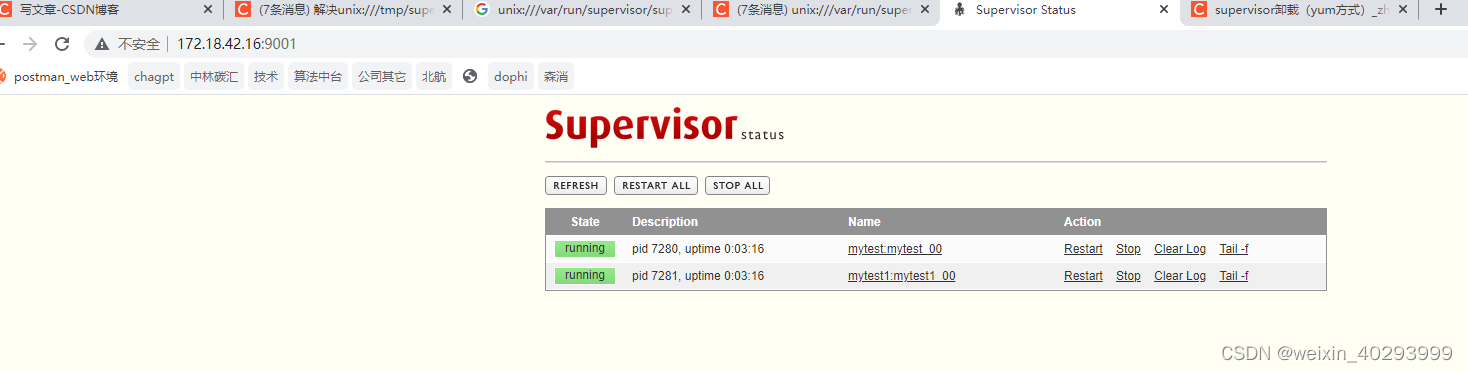
后面的web 管理界面, 之前以为这一段是没用的,因为没有服务器会给你权限,让你界面操作,其实也挺好的。
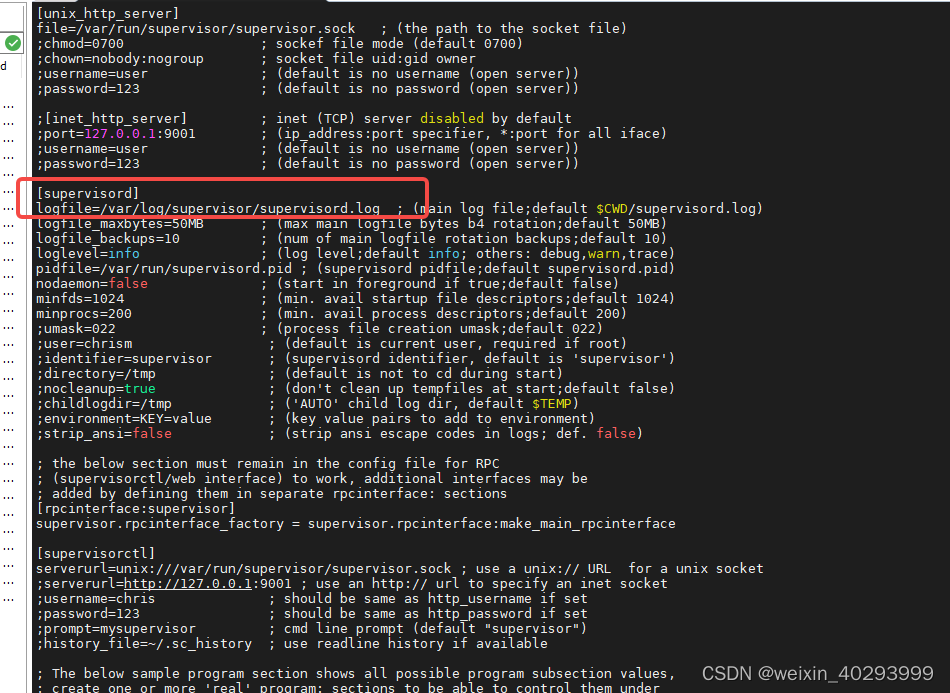
supervisor服务的日志在这里
tail -f /var/log/supervisor/supervisord.log
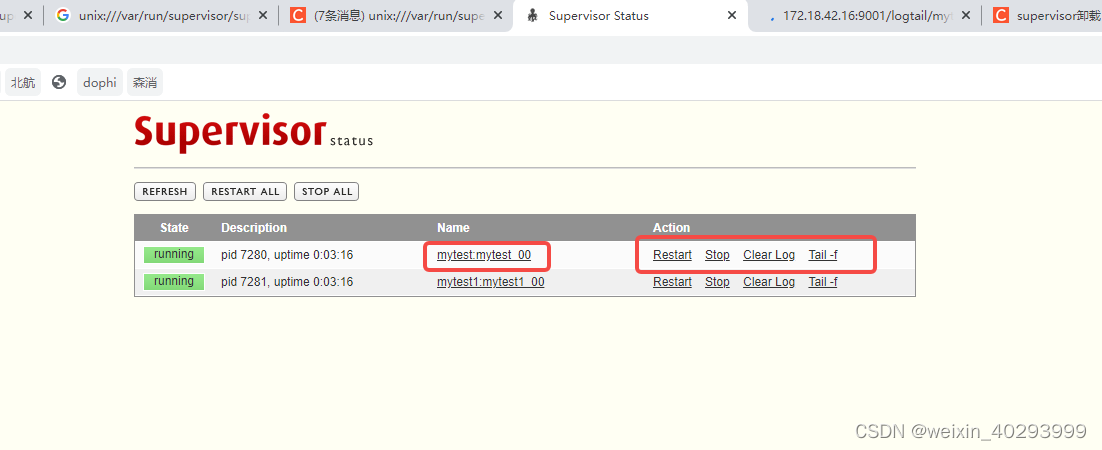
这些操作都是可以点进去的,比如 tail -f 看日志啥的。真的挺好用的。
4.一点体会
所以 supervisor 是用来管理常驻进程合适,比如 nginx服务, mysql服务,web服务等等。还有消息中间件的服务,死了马上能把它拉起来。 不至于损失验证。 一次性的跑的脚本 其实比较适合定时任务, 当然不是不可以用supervisor 比如1小时执行一次 你可以
while True:
   # do some thing ...
   time.sleep(3600)
5. 几个常用的命令
supervisorctl status # 查看状态
(base) [root@localhost supervisord.d]# supervisorctl status
mytest:mytest_00                 RUNNING   pid 7280, uptime 0:31:50
mytest1:mytest1_00               RUNNING   pid 7281, uptime 0:31:50
这个时候我们重新生成了一个 mytest2.ini文件,应该怎么办呢, 让supervisor发现它。
6. 暴力重启(柔性重启)
但也没有那么柔性, 我理解是可以吧过程中的任务,执行完在重启
supervisorctl reload
然后 supervisorctl start all
更改了supervisor配置文件,需要重启, 就用supervisorctl reload
7.关闭
先关闭supervisor启动脚本,之后再关闭supervisord服务
$ supervisorctl stop all
$ ps aux | grep supervisord
$ kill pid
9.另外一个很有用的命令
# 根据最新的配置文件,启动新配置或有改动的进程,配置没有改动的进程不会受影响而重启
supervisorctl update
添加了一个新脚本,update就启动了。多好!
(base) [root@localhost supervisord.d]# cp mytest1.ini  mytest2.ini
(base) [root@localhost supervisord.d]# vim mytest2.ini
(base) [root@localhost supervisord.d]#
(base) [root@localhost supervisord.d]#
(base) [root@localhost supervisord.d]#
(base) [root@localhost supervisord.d]#
(base) [root@localhost supervisord.d]#
(base) [root@localhost supervisord.d]#
(base) [root@localhost supervisord.d]#
(base) [root@localhost supervisord.d]#
(base) [root@localhost supervisord.d]# supervisorctl update
mytest2: added process group
(base) [root@localhost supervisord.d]# supervisorctl status
mytest:mytest_00                 RUNNING   pid 7280, uptime 0:40:19
mytest1:mytest1_00               RUNNING   pid 7281, uptime 0:40:19
mytest2:mytest2_00               RUNNING   pid 9369, uptime 0:00:09
8. supervisor 设置开机自启动
centos
新建文件supervisord.service
#supervisord.service

[Unit]
Description=Supervisor daemon

[Service]
Type=forking
ExecStart=/usr/bin/supervisord -c /etc/supervisord.conf
ExecStop=/usr/bin/supervisorctl shutdown
ExecReload=/usr/bin/supervisorctl reload
KillMode=process
Restart=on-failure
RestartSec=42s

[Install]
WantedBy=multi-user.target
将文件拷贝到/usr/lib/systemd/system/
cp supervisord.service /usr/lib/systemd/system/
可以看到本地有一份,但没有执行supervisorctl 客户端,只是开启了supervisord 服务端的程序 上面这个版本更全。
服务端没开启,supervisorctl status, reload 等命令是不能运行的。

启动服务
systemctl enable supervisord
验证一下是否为开机自启动
systemctl is-enabled supervisord

小试牛刀
开启 supervisor的服务端和客户端
systemctl start supervisord.service
用客户端查看supervisor的各个常驻进程的状态
(base) [root@localhost ~]# supervisorctl status
mytest:mytest_00                 BACKOFF   Exited too quickly (process log may have details)
可以看到报错了,这是对的, 打印个时间就退出了, 再重新拉起来。。。。

看下它的日志记录了啥:
cat cat /var/log/supervisor/supervisord.log
改成常驻的就行了。
(base) [root@localhost test]# python test.py
2023-03-17 10:55:17.729582
2023-03-17 10:55:18.730648
2023-03-17 10:55:19.731728
^Z
[1]+  已停止               python test.py
(base) [root@localhost test]# supervisorctl status
mytest:mytest_00                 FATAL     Exited too quickly (process log may have details)
(base) [root@localhost test]# supervisorctl start mytest
mytest: ERROR (no such process)
(base) [root@localhost test]# supervisorctl start mytest:my*
mytest:my*: ERROR (no such process)
(base) [root@localhost test]# supervisorctl start mytest:mytest_00
mytest:mytest_00: started
(base) [root@localhost test]# supervisorctl status
mytest:mytest_00                 RUNNING   pid 28175, uptime 0:00:06
(base) [root@localhost test]#
总结
到这里,所有的开机自启,常驻进程配置,常驻进程配置的注意点以及说清楚了。用这东西已经超过5年了,第一次好好总结!总以为是运维的活儿,后来发现,运维也靠不住,能多学点多学点吧,大家加油!


 773
773


 被折叠的 条评论
为什么被折叠?
被折叠的 条评论
为什么被折叠?
 到【灌水乐园】发言


