


这个是目录
- 前言
- UI搭建
- 捡起物品的逻辑
- 实时显示物品更新
前言
Hello and welcome back 送大家个迟来的国庆节祝福 国庆节出去玩了鸽了一段时间,今天我们来讲一下主角物品栏的课程,主要内容是物品栏的建立,物品的捡起,捡起物品后ui栏显示相应的物品
UI搭建
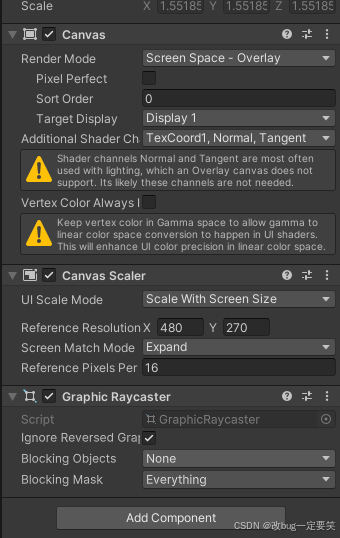
我们先来建立一个空物体 命名Canvas(我这里这样做是为了后期方便管理不同的canvas 如果不考虑后续维护的话可以直接create一个canvas)然后创建子物体canvas 命名为MainCanvas,证明是主界面的canvas 内部属性设为下图就可以
然后我们创建子物体UIInventory,添加cs文件UIInventory.cs,image和grid layout group
我们先来写uiinventory的逻辑
	private RectTransform rectTransform;
    private bool isInventoryPositionIsButton = true;//工具UI是否在底端
    public bool IsInventoryPositionIsButton { get => isInventoryPositionIsButton; set => isInventoryPositionIsButton = value; }
    public GameObject inventoryDragItem;
    [SerializeField] private Sprite blanksprite = null;
    [SerializeField] private InventorySort[] inventorySort = null;
    [HideInInspector] public GameObject inventoryTextGameObject;
    private void Awake()
    {
        rectTransform = GetComponent<RectTransform>();
    }
    private void Update()
    {
        SwitchInventoryPosition();
    }
    //监控主角位置改变对应的位置
    private void SwitchInventoryPosition()
    {
        Vector3 playerPosition=Player.Instance.GetPlayerViewPortPosition();
        ///离开了下方并且ui在顶端,就把ui放还原到下方
        if (playerPosition.y > 0.3f && isInventoryPositionIsButton == false)
        {
            rectTransform.pivot = new Vector2(0.5f, 0);
            rectTransform.anchorMin = new Vector2(0.5f, 0);
            rectTransform.anchorMax = new Vector2(0.5f, 0);
            rectTransform.anchoredPosition = new Vector2(0, 0);
            isInventoryPositionIsButton = true;
        }
        if (playerPosition.y <0.3f && isInventoryPositionIsButton == true)
        {
            rectTransform.pivot = new Vector2(0.5f, 1);
            rectTransform.anchorMin = new Vector2(0.5f, 1);
            rectTransform.anchorMax = new Vector2(0.5f, 1);
            rectTransform.anchoredPosition = new Vector2(0, 0);
            isInventoryPositionIsButton = false;
        }
    }
这个代码目前的作用是监测主角的位置,如果主角的位置特别靠下的话 就把这个ui显示到最上端,防止ui遮住主角
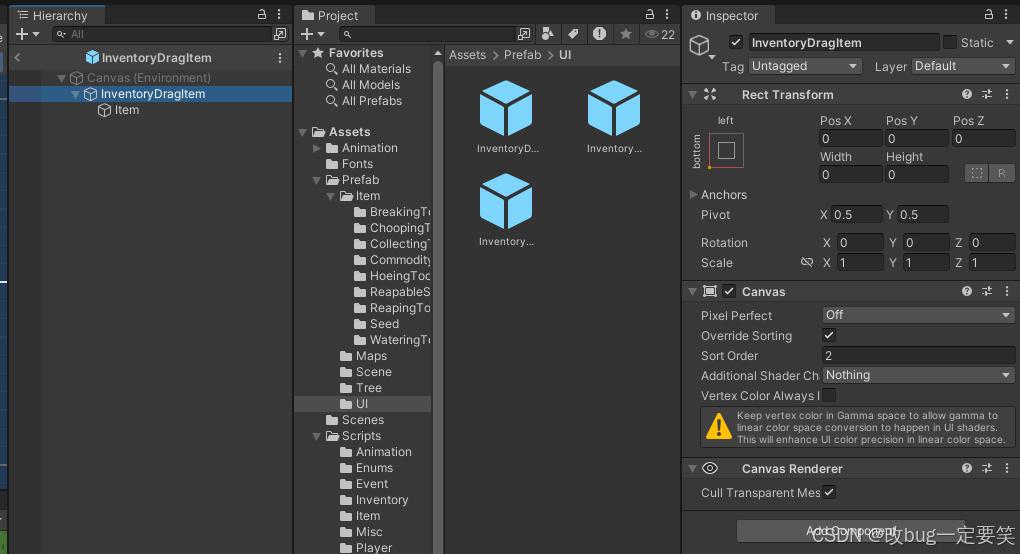
inventoryDragItem是拖拽物体后显示的对应的物品,我们这里可以做一个预制体来让它根据拖拽物体的id自动生成相对应的物体,我们可以做一个canvas 子物体添加一个image,然后拖拽到prefab中
image选择sprite是inventoryBar ,这个是ui的背景图,
grid layout group的作用是对其子物体按照该component来布局,成品如下图

效果图如下

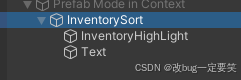
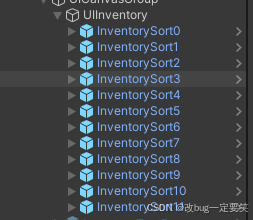
然后我们创建12个子物体来显示捡到的物品 我们先来创建一个image 添加代码inventorysort.cs,负责相应位置物体的逻辑,在子节点添加image 取名为InventoryHighLight,负责高光显示,添加子物体textmeshpro,负责显示物品的个数
代码inventorysort:
[HideInInspector] public Image inventorySlotHighLight;
[HideInInspector] public Image inventorySlotImage;
[HideInInspector] public TextMeshProUGUI textMeshProUGUI;
[HideInInspector] public ItemDetial itemDetial;
[HideInInspector] public int itemQuantity;
private Camera mainCamera;
private Transform parentItem;
private GameObject draggedItem;
public GameObject itemPrefab;
private Canvas parentCanvas;
[SerializeField] private UIInventory inventoryBar;
[SerializeField] private GameObject inventoryTextBoxPrefab;
public int sortNumber;
[HideInInspector] public bool isSelect = false;
private void Awake()
{
parentCanvas = gameObject.GetComponentInParent<Canvas>();
inventorySlotHighLight = gameObject.transform.GetChild(0).GetComponent<Image>();
textMeshProUGUI = gameObject.transform.GetChild(1).GetComponent<TextMeshProUGUI>();
inventorySlotImage = gameObject.GetComponent<Image>();
mainCamera = Camera.main;
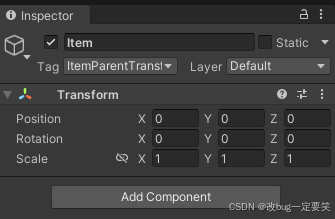
GameObject go = GameObject.Find("ItemParentTransform");
parentItem = GameObject.FindGameObjectWithTag(Tags.ItemParentTransform).transform;
inventoryBar = GameObject.Find("UIInventory").GetComponent<UIInventory>();
sortNumber =int.Parse( gameObject.name.Replace("InventorySort", ""));
}
我们来简单介绍一下这些成员变量
mainCamera就是主相机
inventorySlotHighLight 是高光的图片,如果预制体和我做的不一样不能用getchild的方法获取,可以拖拽
textMeshProUGUI 用来显示捡到物品的个数
inventorySlotImage 显示当前格子物品
inventoryBar就是它的整个ui物品栏即组件里有uiinventory的物品
sortnumber是物品栏编号 从0到11
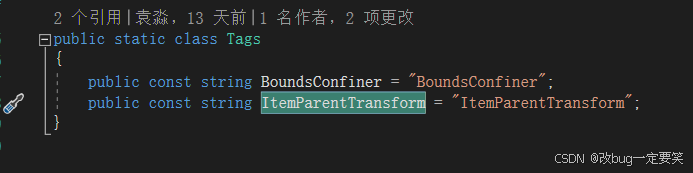
parentItem 这个可有可无是我为了方便场景管理做的一个空物品 如果大家要用的话就建立一个tags脚本然后设置它的子成员一个string 然后在场景中建立一个空物体 把tag设置为string
这样生成的物体就会用一些逻辑就可以自动成为item的子物体了
这样我们的ui就算是建好了
捡起物品的逻辑
捡物品很简单的就给主角添加一个碰撞检测的脚本,如果这个物品可以被捡起来那么就添加到物品栏中
public class ItemPickUp : MonoBehaviour
{
    private void OnTriggerEnter2D(Collider2D collision)
    {
        Item item = collision.gameObject.GetComponent<Item>();
        if (item != null)
        {
            ItemDetial itemDetial = InventoryManager.Instance.GetItemDetial(item.ItemCode);
            if (itemDetial.canBePickUp)
                InventoryManager.Instance.AddItemTest(InventoryLocation.player, item, item.gameObject);
        }
    }
}
public struct InventoryItem
{
    public int itemCode;
    public int itemQuantity;
}
code是物品编码,itemquantity是物品个数
public class InventoryManager : SingleMono<InventoryManager>
{
	private Dictionary<int, ItemDetial> itemDetialDic;
    [SerializeField] private OS_ItemList itemDetialList = null;

    public List<InventoryItem>[] inventoryLists;
    [HideInInspector] public int[] inventoryListCapactiyIntArray;

    private int[] selectedInventoryItem;//存放item的code 2个成员 0为玩家身上的 1为箱子里的
	override protected void Awake()
    {
        base.Awake();
        CreateItemDetialDic();
        CreateInventoryLists();
        selectedInventoryItem = new int[(int)InventoryLocation.count];
        for(int i = 0; i < selectedInventoryItem.Length; ++i)
        {
            selectedInventoryItem[i] = -1;
        }
    }

    private void CreateItemDetialDic()
    {
        itemDetialDic = new Dictionary<int, ItemDetial>();
        foreach (ItemDetial itemDetial in itemDetialList.itemDetialList)
        {
            itemDetialDic.Add(itemDetial.itemCode, itemDetial);
        }
    }
    public ItemDetial GetItemDetial(int itemCode)
    {
        ItemDetial itemDetial;
        if (itemDetialDic.TryGetValue(itemCode, out itemDetial))
            return itemDetial;
        return null;
    }
      private void CreateInventoryLists()
    {
        inventoryLists = new List<InventoryItem>[(int)InventoryLocation.count];
        for (int i = 0; i < (int)InventoryLocation.count; ++i)
        {
            inventoryLists[i] = new List<InventoryItem>();
        }
        inventoryListCapactiyIntArray = new int[(int)InventoryLocation.count];
        inventoryListCapactiyIntArray[(int)InventoryLocation.player] = Settings.PlayerInitialInventoryCapacity;
    }
     public int FindItemInInventory(InventoryLocation inventoryLocation, int itemCode)
    {
        List<InventoryItem> inventoryList = inventoryLists[(int)inventoryLocation];
        for (int i = 0; i < inventoryList.Count; ++i)
        {
            if (inventoryList[i].itemCode == itemCode)
                return i;
        }
        return -1;
    }
        public void AddItem(InventoryLocation inventoryLocation, Item item)
    {
        int itemCode = item.ItemCode;
        List<InventoryItem> inventoryList = inventoryLists[(int)inventoryLocation];
        int itemPosition = FindItemInInventory(inventoryLocation, itemCode);
        if (itemPosition != -1)
        {
            AddItemAtPosition(inventoryList, itemCode, itemPosition);
        }
        else
        {
            AddItemAtPosition(inventoryList, itemCode);
        }
        EventHandler.CallInventoryUpdateEvent(inventoryLocation, inventoryLists[(int)inventoryLocation]);
    }
     private void AddItemAtPosition(List<InventoryItem> inventoryList, int itemCode)
    {
        InventoryItem inventoryItem = new InventoryItem();
        inventoryItem.itemCode = itemCode;
        inventoryItem.itemQuantity = 1;
        inventoryList.Add(inventoryItem);
        DebugPrintInventoryList(inventoryList);
    }

    private void AddItemAtPosition(List<InventoryItem> inventoryList, int itemCode, int itemPosition)
    {
        InventoryItem inventoryItem = new InventoryItem();
        int quantity = inventoryList[itemPosition].itemQuantity + 1;
        inventoryItem.itemQuantity = quantity;
        inventoryItem.itemCode = itemCode;
        inventoryList[itemPosition] = inventoryItem;
        Debug.ClearDeveloperConsole();
        DebugPrintInventoryList(inventoryList);
    }
    private void DebugPrintInventoryList(List<InventoryItem> list)
    {
        foreach (var item in list)
        {
            Debug.Log("拿到的是" + InventoryManager.Instance.GetItemDetial(item.itemCode).itemDescription + "个数是:" + item.itemQuantity);
        }
    }
    public void AddItemTest(InventoryLocation location,Item item,GameObject gameObject)
    {
        AddItem(location, item);
        Destroy(gameObject);
    }
     public void SetSelectedInventoryItem(InventoryLocation inventoryLocation,int itemCode)
    {
        selectedInventoryItem[(int)inventoryLocation] = itemCode;
    }
    public void ClearSelectedInventoryItem(InventoryLocation inventoryLocation)
    {
        selectedInventoryItem[(int)inventoryLocation] = -1;
    }
}
这个代码的逻辑比较复杂,简单来介绍一下
itemDetialDic是来存放全部的物品,物品来源是之前做的那个list,key为物品id,value为物品
itemDetialList是上个课程的工具列表
inventoryLists存放的位置,0为玩家1为箱子
CreateItemDetialDic函数的作用是把工具列表的信息全部存到字典中
CreateInventoryLists是初始化主角的物品栏和箱子
GetItemDetial是根据item的code来获取相应的item
FindItemInInventory是根据item的code来判断物品栏中是否有这个物品了,如过有就返回对应的位置,没有就返回-1
AddItemAtPosition是一个多态函数,如果FindItemInInventory返回的不是-1那么证明这个物品存在背包中,只需要在相应的位置把个数加1就可以,如果是-1说明物品在该背包中不存在需要在list中添加这个物品
SetSelectedInventoryItem是设置选中的物品id
ClearSelectedInventoryItem是清除当前选中的物品id
之前的EventHandler.cs需要添加监听数量变化的事件
 public static event Action<InventoryLocation, List<InventoryItem>> InventoryEvent;
    public static void CallInventoryUpdateEvent(InventoryLocation inventoryLocation,List<InventoryItem> list)
    {
        if (InventoryEvent != null)
            InventoryEvent(inventoryLocation, list);
    }
创建一个空物体,把InventoryManager添加到该物体上就可以实现捡起物品了,但是现在还不能更新ui,所以我们写了个DebugPrintInventoryList函数来输出当前拿到的物品
实时显示物品更新
我们打开刚才写的uiinventory.cs添加以下代码
 private void OnEnable()
    {
        EventHandler.InventoryEvent += InventoryUpdate;
    }
    private void OnDisable()
    {
        EventHandler.InventoryEvent -= InventoryUpdate;
    }
 private void ClearInventorySlots()
    {
        if (inventorySort.Length > 0)
        {
            for(int i = 0; i < inventorySort.Length; ++i)
            {
                inventorySort[i].inventorySlotImage.sprite = blanksprite;
                inventorySort[i].textMeshProUGUI.text = " ";
                inventorySort[i].itemDetial = null;
                inventorySort[i].itemQuantity = 0;
               // SetHightLightOnInventorySolt(i);
            }
        }
    }
private void InventoryUpdate(InventoryLocation inventoryLocation, List<InventoryItem> inventoryList)
    {
        if(inventoryLocation == InventoryLocation.player)
        {
            ClearInventorySlots();
            if (inventorySort.Length > 0 && inventoryList.Count > 0)
            {
                for(int i = 0; i < inventorySort.Length; ++i)
                {
                    if (i < inventoryList.Count)//库存里的物品拿完之前
                    {
                        int itemCode = inventoryList[i].itemCode;
                        ItemDetial itemDetial = InventoryManager.Instance.GetItemDetial(itemCode);
                        if (itemDetial != null)
                        {
                            inventorySort[i].inventorySlotImage.sprite = itemDetial.itemSprite;
                            inventorySort[i].itemQuantity = inventoryList[i].itemQuantity;
                            inventorySort[i].itemDetial = itemDetial;
                            inventorySort[i].textMeshProUGUI.text = inventoryList[i].itemQuantity.ToString();
                           // SetHightLightOnInventorySolt(i);
                        }
                    }
                    else
                    {
                        break;
                    }
                }
            }
        }
    }
到这里逻辑就很简单了 我们只需要先把全部的图片制空然后遍历inventoryList,把它对应的item的sprite和个数更新一下就可以了,这里全部清空再显示也是为了方便后续的拖拽换位之类的功能
这样我们再运行游戏就可以实现捡起物品物品更新在物品栏中了~
好啦,时间不早代码刚好,本来想今天把物品的移动,物品丢弃,详细物品展示这几个功能都写了的,奈何坐了一天的车,人困马乏啦,这个逻辑就在下期来写把~感谢您的观看


 1109
1109

 被折叠的 条评论
为什么被折叠?
被折叠的 条评论
为什么被折叠?
 到【灌水乐园】发言


