


背景
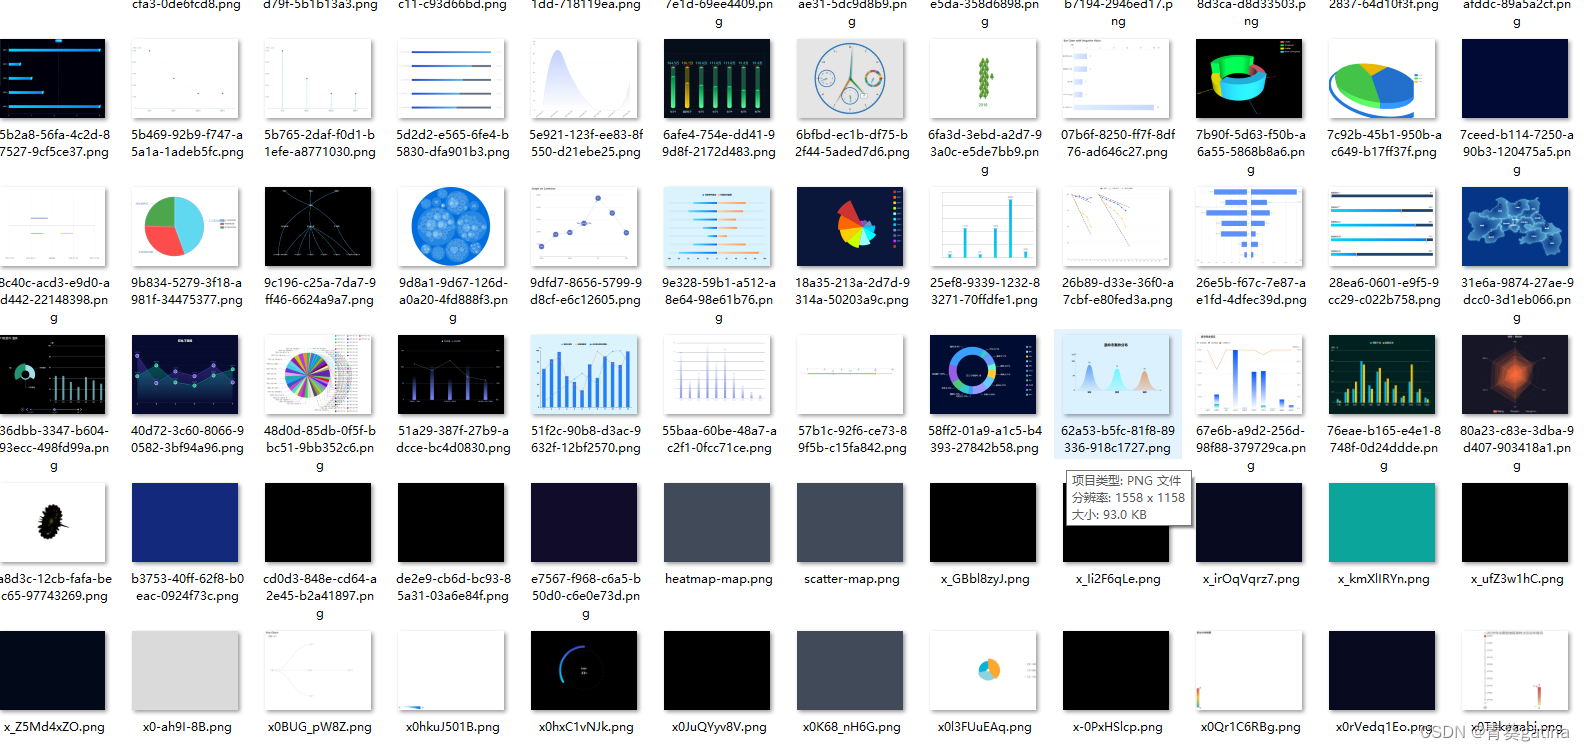
大模型的图表理解需要投喂大量的数据。爬了17000的html,能渲染成图片的数据有15000,但其中伴随有空白图片,只有纯色背景的图片和缺少内容的图片。如何清洗这些无用数据留下有效数据,是预处理的关键。
方法
先去除空白图片,通过计算空白区域的比例,设置合适的threshold来初筛。
# 计算空白百分比的函数
def calculate_whitespace_percentage(image_path):
    try:
        image = Image.open(image_path).convert('L')  # 将图像转换为灰度图
        np_image = np.array(image)
        white_pixels = np.sum(np_image > 240)  # 将接近白色的像素视为白色
        total_pixels = np_image.size
        return (white_pixels / total_pixels) * 100
    except UnidentifiedImageError:
        return None  # 无法识别的图像,避免报错
    except Exception as e:
        print(f"处理文件 {image_path} 时出错: {e}")
        return None  # 其他错误

# 移动空白图像和无法识别图像的函数,设置合理的threshold,建议设99.99,99.5,99每0.5一档
def move_images(source_dir, destination_dir_blank, threshold=98.5):
    # 列出源目录中的所有文件
    for root, _, files in os.walk(source_dir):
        for file in files:
            file_path = os.path.join(root, file)
            whitespace_percentage = calculate_whitespace_percentage(file_path)
            if whitespace_percentage is None:
                # 移动无法识别的图像
                destination_path = os.path.join(unidentified_image_directory, file)
                shutil.move(file_path, destination_path)
            elif whitespace_percentage >= threshold:
                # 移动空白图像
                destination_path = os.path.join(destination_dir_blank, file)
                if os.path.exists(destination_path):
                    base, extension = os.path.splitext(destination_path)
                    counter = 1
                    new_destination_path = f"{base}_{counter}{extension}"
                    while os.path.exists(new_destination_path):
                        counter += 1
                        new_destination_path = f"{base}_{counter}{extension}"
                    destination_path = new_destination_path
                shutil.move(file_path, destination_path)
99.99的threshold
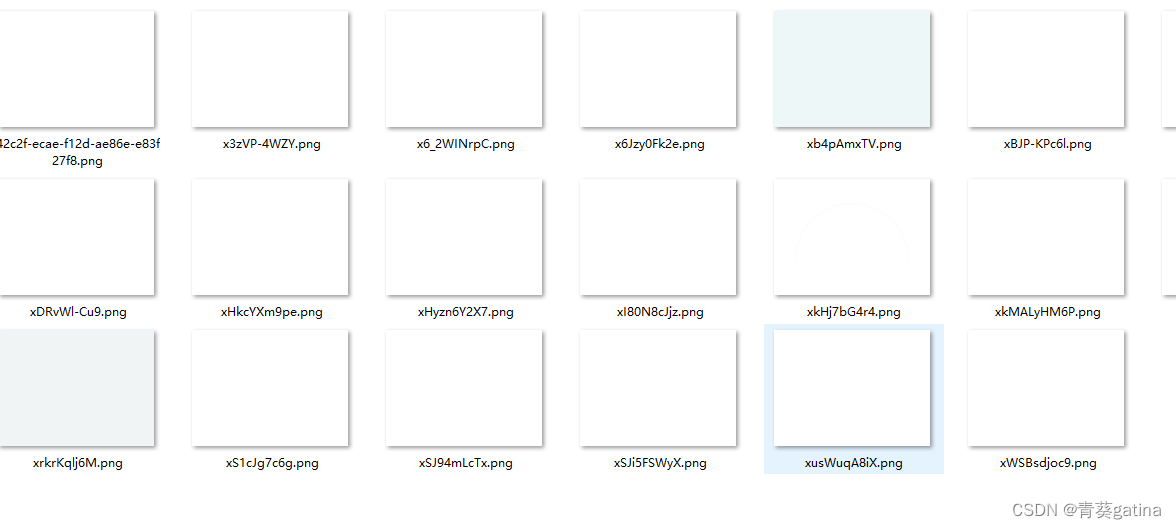
99的threshold
去除空白图片后,仍然存在大量纯色(非白色)的无用数据,下一步是去除这些
def is_image_empty(image_path):
    image = Image.open(image_path).convert('L')  # 将图像转换为灰度图
    np_image = np.array(image)
    if np.std(np_image) == 0:  #利用标准差判断纯色图片
        return True
    return False

#文件处理
def find_empty_images(image_dir):
    empty_images = []
    for filename in os.listdir(image_dir):
        if filename.endswith(('.png', '.jpg')):
            image_path = os.path.join(image_dir, filename)
            if is_image_empty(image_path):
                empty_images.append(image_path)
    return empty_images
def move_empty_images(empty_images, destination_dir):
    os.makedirs(destination_dir, exist_ok=True)
    for image_path in empty_images:
        shutil.move(image_path, os.path.join(destination_dir, os.path.basename(image_path)))
    return os.listdir(destination_dir)
方法简单,效果良好
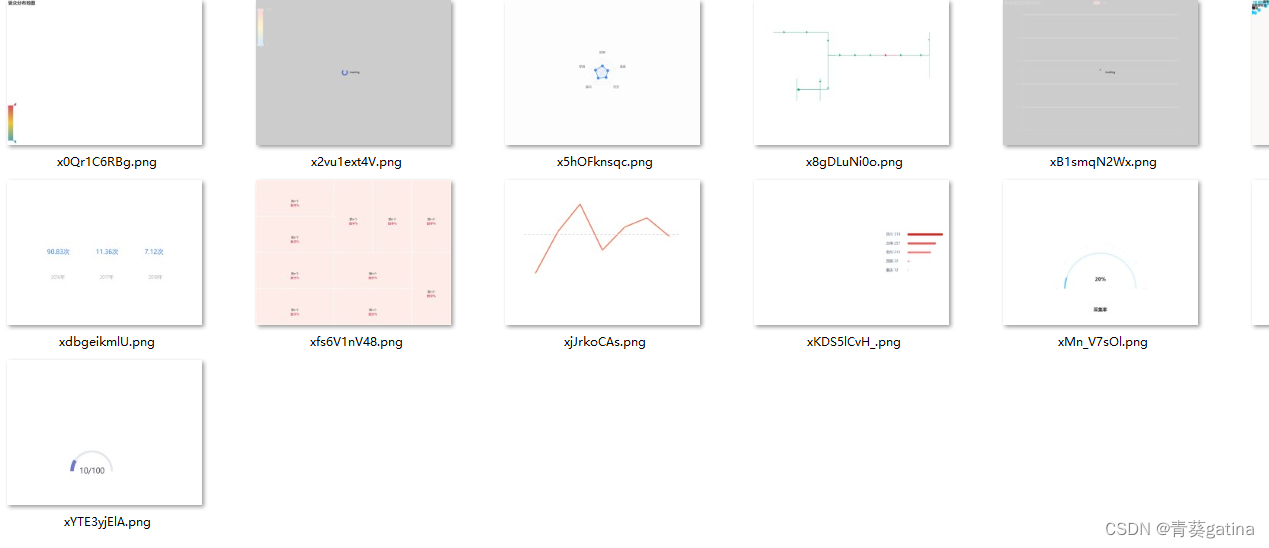
最后的也是最麻烦的,缺少大量内容的图片数据,它不能通过调整threshold来去掉,更不是纯色的图片。比如以下几张数据图片。


我在网上看到有用深度学习的方法来处理,想尝试一下
#大概思路是利用resnet来提取图片的feartures,
model = models.resnet50(pretrained=True)
model.eval()  # Set the model to evaluation mode

transform = transforms.Compose([
    transforms.Resize((224, 224)),
    transforms.ToTensor(),
    transforms.Normalize(mean=[0.485, 0.456, 0.406], std=[0.229, 0.224, 0.225])
])


def extract_features(image):
    image = transform(image).unsqueeze(0)
    with torch.no_grad():
        features = model(image)
    return features

#然后对得到的features设置score来判断图片内容的完整度。
我眼前一亮,下意识感觉可行,resnet50还能直接用,不用自己训练,就补充了后面的代码
def score_image(features):
    """基于features对图像进行打分,低于2分的不要"""
    mean_feature_value = features.mean().item()  #尝试用特征的均值来判断图像内容的完整性
    if mean_feature_value < -1.0:
        return 0
    elif mean_feature_value < -0.5:
        return 1
    elif mean_feature_value < 0.0:
        return 2
    elif mean_feature_value < 0.5:
        return 3
    elif mean_feature_value < 1.0:
        return 4
    elif mean_feature_value < 1.5:
        return 5
    elif mean_feature_value < 2.0:
        return 6
    elif mean_feature_value < 2.5:
        return 7
    elif mean_feature_value < 3.0:
        return 8
    elif mean_feature_value < 3.5:
        return 9
    else:
        return 10
第一次尝试效果很垃圾,全是高分,根本不能做区分,我又尝试添加了均值,还是不行。希望在网上找一些好的方法。
结果论文里面说ResNet50虽然是一个强大的模型,但是提取的特征主要用于分类任务,可能无法很好地捕捉图像内容完整度的特征。。。
不想放弃,考虑到没有充分利用高维特征,评分的逻辑太过简单,想引入更复杂的评分机制,反正都这样婶儿了,那要不就训练一个专门的评分模型,利用图像的高维特征向量进行预测。开整。
model = models.resnet50(weights=models.ResNet50_Weights.DEFAULT)
model.eval()
device = torch.device('cpu')
model.to(device)
# 定义图像变换
transform = transforms.Compose([
transforms.Resize((224, 224)),
transforms.ToTensor(),
transforms.Normalize(mean=[0.485, 0.456, 0.406], std=[0.229, 0.224, 0.225])
])
def extract_features(image):
# 使用预训练的ResNet模型从图像中提取特征
image = image.convert("RGB") # 确保图像为RGB格式
image = transform(image).unsqueeze(0)
with torch.no_grad():
features = model(image)
return features.cpu().numpy().flatten()
# 自己做一些示例数据用于训练回归模型
# 先用几张图片试试方法是否可行
example_images = ["image1.png", "image2.png", "image3.png"]
example_scores = [9, 5, 2] # 示例图像的完整度评分
# 提取特征并训练回归模型
X_train = []
y_train = example_scores
example_images_folder = "D:/Desktop/**"
for img_name in example_images:
img_path = os.path.join(example_images_folder, img_name)
if os.path.exists(img_path):
img = Image.open(img_path)
features = extract_features(img)
X_train.append(features)
else:
print(f"Image {img_path} not found.")
if X_train:
scaler = StandardScaler()
X_train = scaler.fit_transform(X_train)
regressor = LinearRegression()
regressor.fit(X_train, y_train)
#使用训练好的回归模型对图像内容完整度进行打分。
def score_image(image):
features = extract_features(image)
features = scaler.transform([features])
score = regressor.predict(features)[0]
return score
#处理给定文件夹中的图像,并将低评分图像复制到新文件夹看看效果
def process_images(image_folder, low_score_folder):
if not os.path.exists(low_score_folder):
os.makedirs(low_score_folder)
image_scores = {}
for filename in os.listdir(image_folder):
if filename.endswith(".png"):
image_path = os.path.join(image_folder, filename)
image = Image.open(image_path)
score = score_image(image)
image_scores[filename] = score
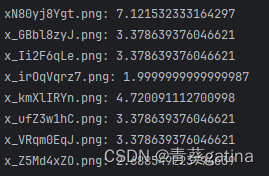
print(f"Image: {filename}, Score: {score}")
if score < 2:
new_path = os.path.join(low_score_folder, filename)
shutil.copy(image_path, new_path)
print(f"copy {filename} to {low_score_folder}")
return image_scores结果挺好!
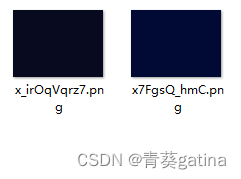
我之贴了三张标签效果就这样,确实可行,不过感觉贴标签太麻烦了。算了,换种方法再试试,实在不行再回来慢慢贴标签。
做到这一步,我觉得我这个评分方案是没问题的,但是评价体系搞麻烦了,想用更直接的方法,说不定效果更好。于是我利用图片的亮度,对比度,边缘检测和颜色丰富度这些常见的参数来设计评分。
#计算亮度V
def calculate_brightness(image):
image = np.array(image)
hsv = cv2.cvtColor(image, cv2.COLOR_RGB2HSV)
brightness = np.mean(hsv[:, :, 2])
return brightness
#计算对比度
def calculate_contrast(image):
image = np.array(image)
gray = cv2.cvtColor(image, cv2.COLOR_RGB2GRAY)
contrast = gray.std()
return contrast
#边缘检测,canny的threshold设置为常用值
def calculate_edges(image):
image = np.array(image)
gray = cv2.cvtColor(image, cv2.COLOR_RGB2GRAY)
edges = cv2.Canny(gray, threshold1=100, threshold2=200)
edge_count = np.sum(edges > 0)
return edge_count
#计算颜色丰富度
def calculate_colorfulness(image):
image = np.array(image)
rg = image[:, :, 0] - image[:, :, 1]
yb = 0.5 * (image[:, :, 0] + image[:, :, 1]) - image[:, :, 2]
std_rg = np.std(rg)
std_yb = np.std(yb)
mean_rg = np.mean(rg)
mean_yb = np.mean(yb)
colorfulness = np.sqrt(std_rg ** 2 + std_yb ** 2) + 0.3 * np.sqrt(mean_rg ** 2 + mean_yb ** 2)
return colorfulness
#标准化后计算得分,小于等于2分的不要
def score_image(image):
brightness = calculate_brightness(image)
contrast = calculate_contrast(image)
edges = calculate_edges(image)
colorfulness = calculate_colorfulness(image)
norm_brightness = brightness / 255.0
norm_contrast = contrast / 127.5
norm_edges = min(edges / 10000.0, 1.0)
norm_colorfulness = min(colorfulness / 100.0, 1.0)
#权重乱给的,感觉对比度和边缘检测更重要
score = norm_brightness * 2 + norm_contrast * 3 + norm_edges * 3 + norm_colorfulness * 2
score = min(max(int(score), 0), 10)
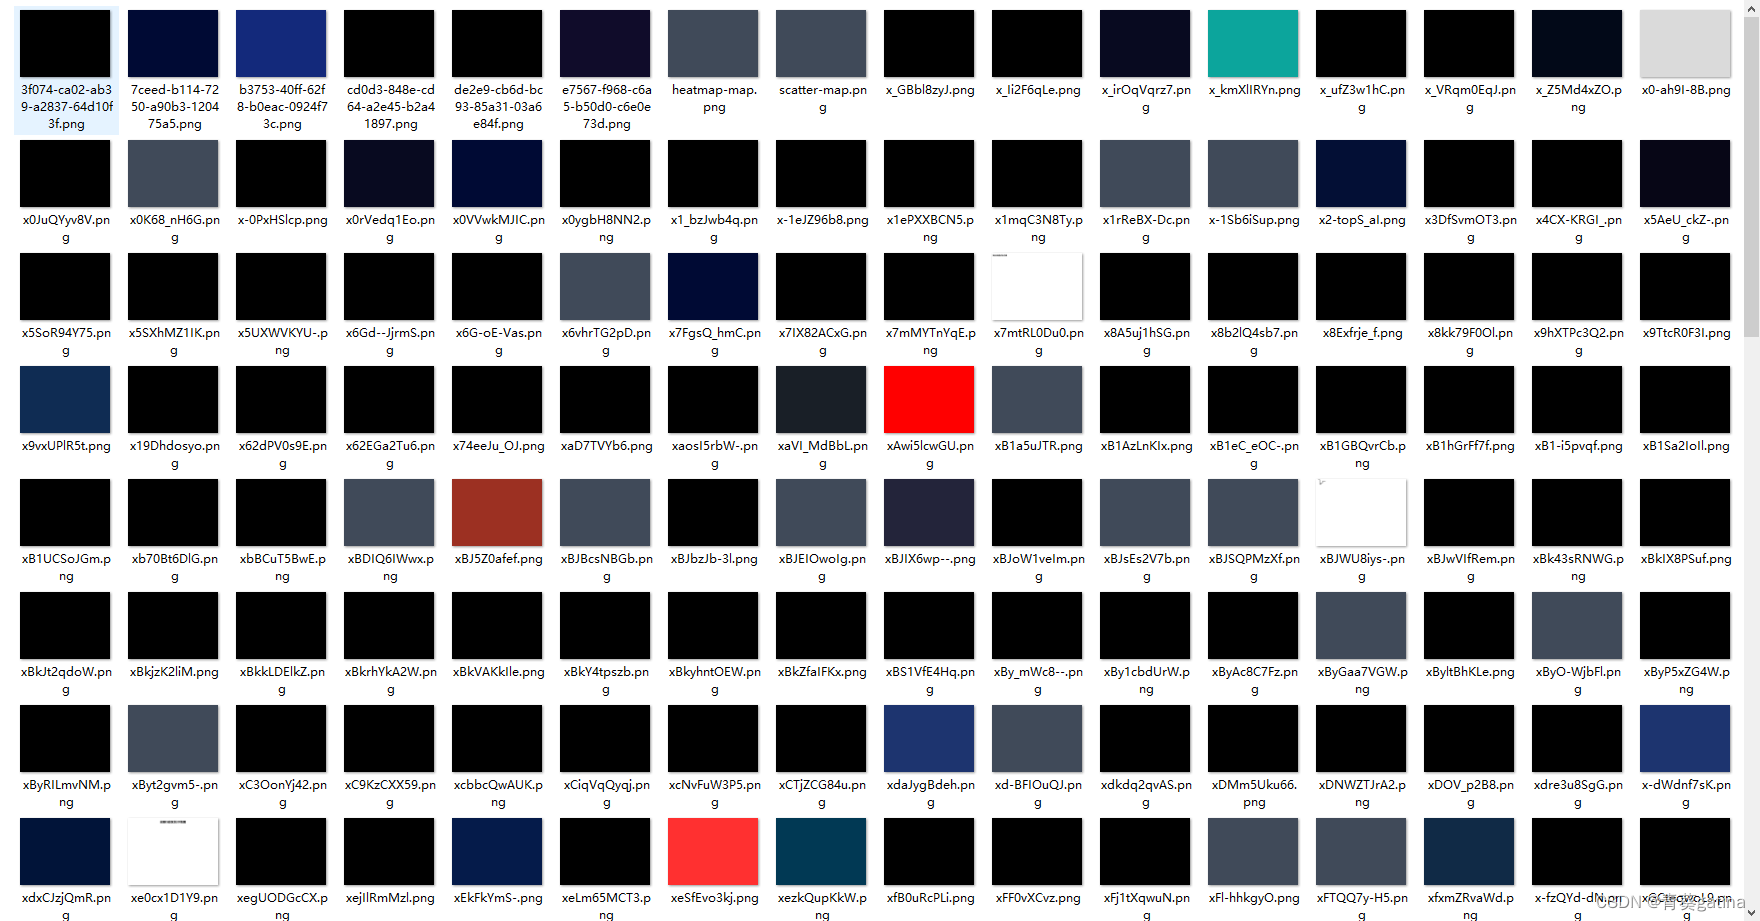
return score没想到最后得到的效果很好。

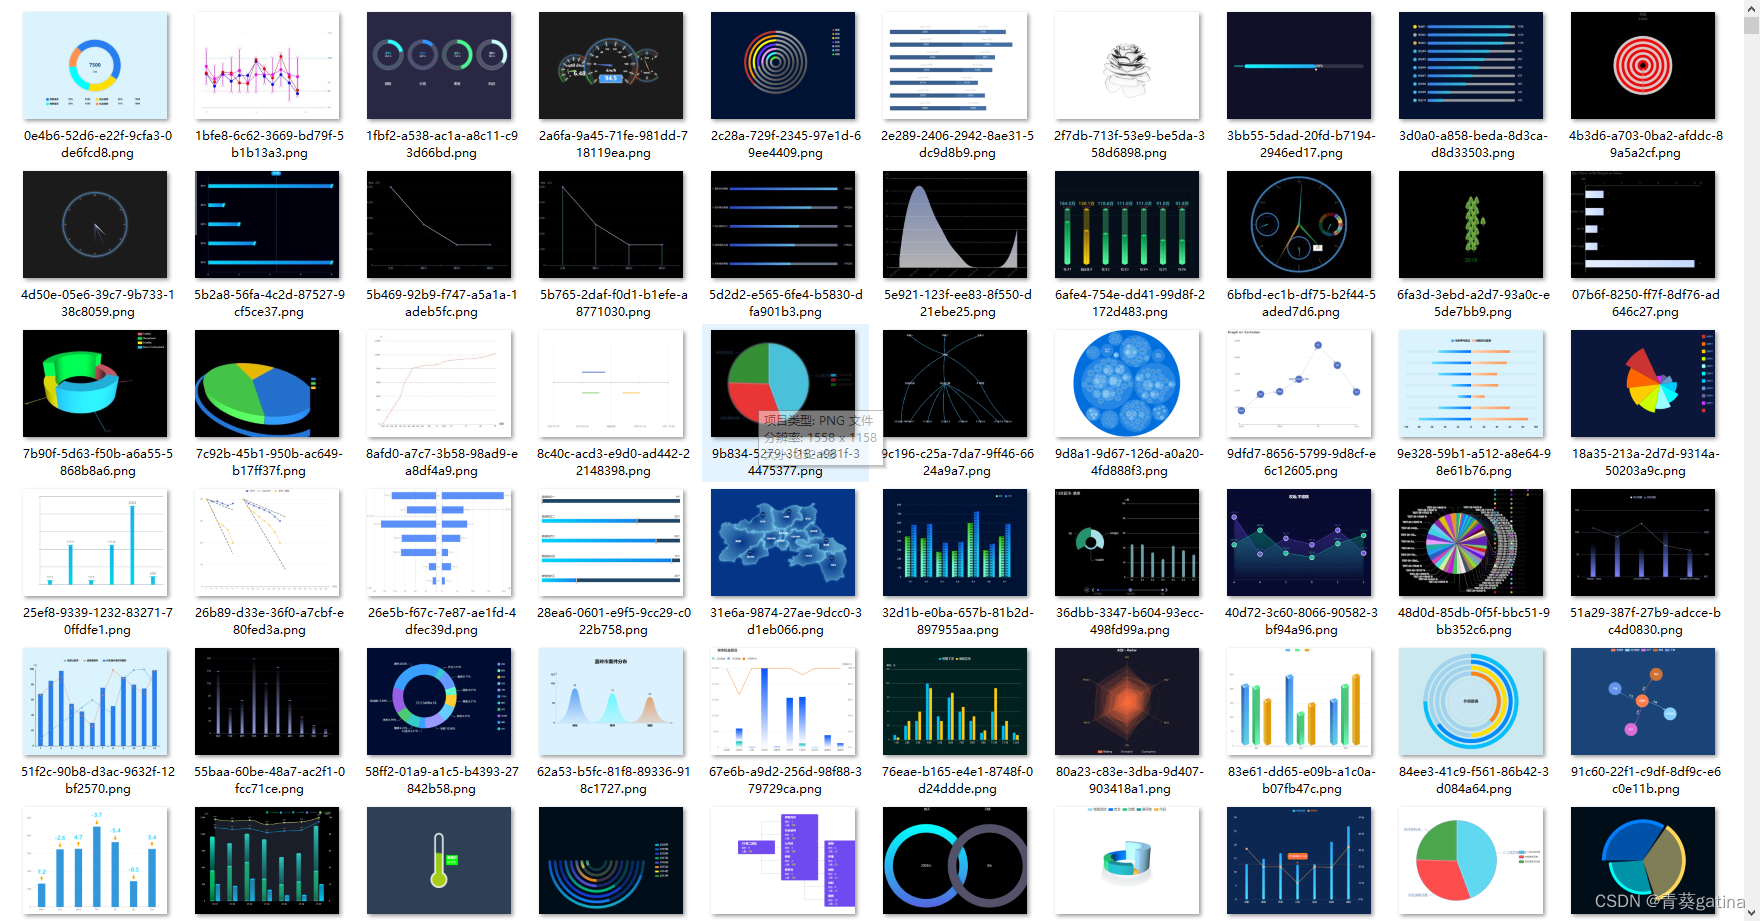
基本上没有很坏的数据了。


 4505
4505


 被折叠的 条评论
为什么被折叠?
被折叠的 条评论
为什么被折叠?
 到【灌水乐园】发言


