


C# WPF入门学习主线篇(十五)—— DockPanel布局容器
欢迎来到C# WPF入门学习系列的第十五篇。在前几篇文章中,我们探讨了 Canvas、StackPanel 和 WrapPanel 布局容器及其使用方法。本篇博客将介绍另一种强大且常用的布局容器——DockPanel。通过本文,您将学习如何使用 DockPanel 来对齐控件,并了解 DockPanel 的常见属性和应用场景。
什么是DockPanel布局容器?
DockPanel 是WPF中的一种布局容器,用于将子控件沿容器的边缘排列。DockPanel 允许子控件依次对齐到容器的顶部、底部、左侧或右侧,并且可以让最后一个子控件填充剩余的空间。DockPanel 非常适合需要将控件固定在特定位置的布局需求。
DockPanel的常见属性
DockPanel 有几个重要的属性,可以帮助开发者灵活地控制子控件的排列方式:
- DockPanel.Dock: 附加属性,控制子控件在
DockPanel中的停靠位置,取值为Top、Bottom、Left或Right。 - LastChildFill: 控制最后一个子控件是否填充
DockPanel的剩余空间,默认为true。
使用DockPanel布局容器的示例
基本使用示例
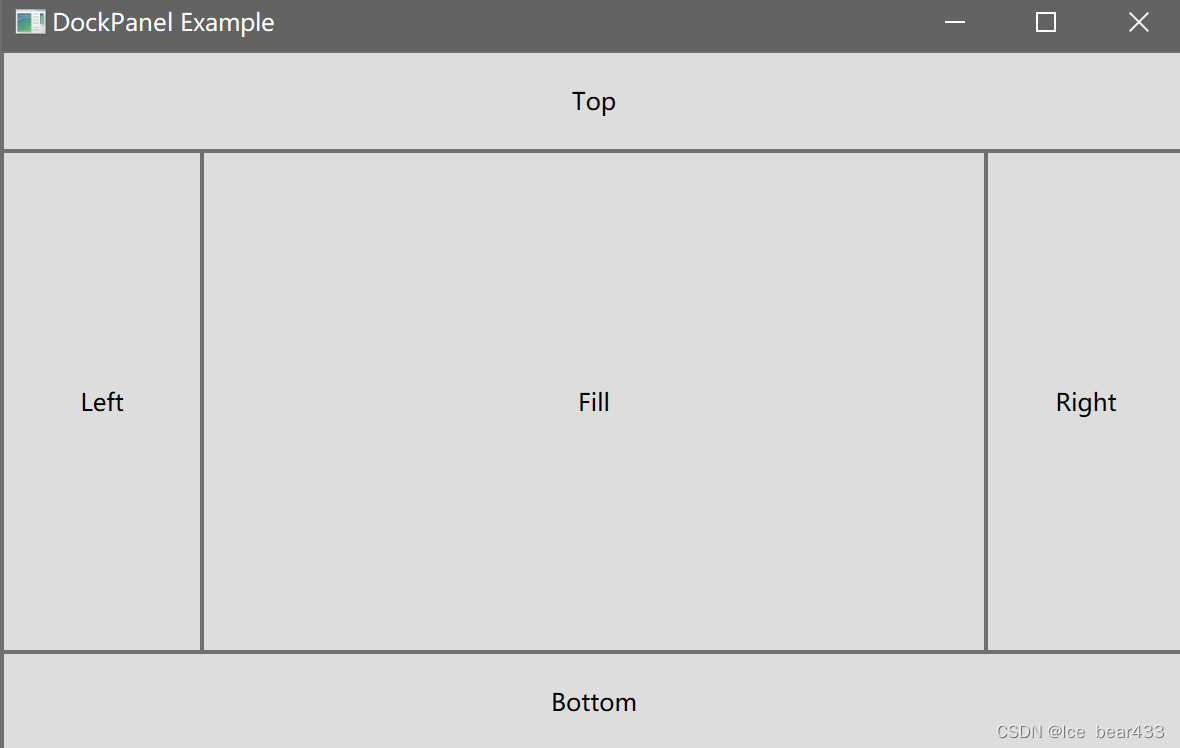
以下是一个简单的XAML代码示例,展示了如何使用 DockPanel 将几个按钮沿容器边缘排列:
<Window x:Class="WpfApp.MainWindow"
        xmlns="http://schemas.microsoft.com/winfx/2006/xaml/presentation"
        xmlns:x="http://schemas.microsoft.com/winfx/2006/xaml"
        Title="DockPanel Example" Height="350" Width="525">
    <Grid>
        <!-- 定义一个 DockPanel 布局容器 -->
        <DockPanel LastChildFill="True" Background="LightGray">
            <!-- 将按钮依次停靠到容器的边缘 -->
            <Button Content="Top" DockPanel.Dock="Top" Height="50"/>
            <Button Content="Bottom" DockPanel.Dock="Bottom" Height="50"/>
            <Button Content="Left" DockPanel.Dock="Left" Width="100"/>
            <Button Content="Right" DockPanel.Dock="Right" Width="100"/>
            <!-- 最后一个子控件将填充剩余空间 -->
            <Button Content="Fill"/>
        </DockPanel>
    </Grid>
</Window>
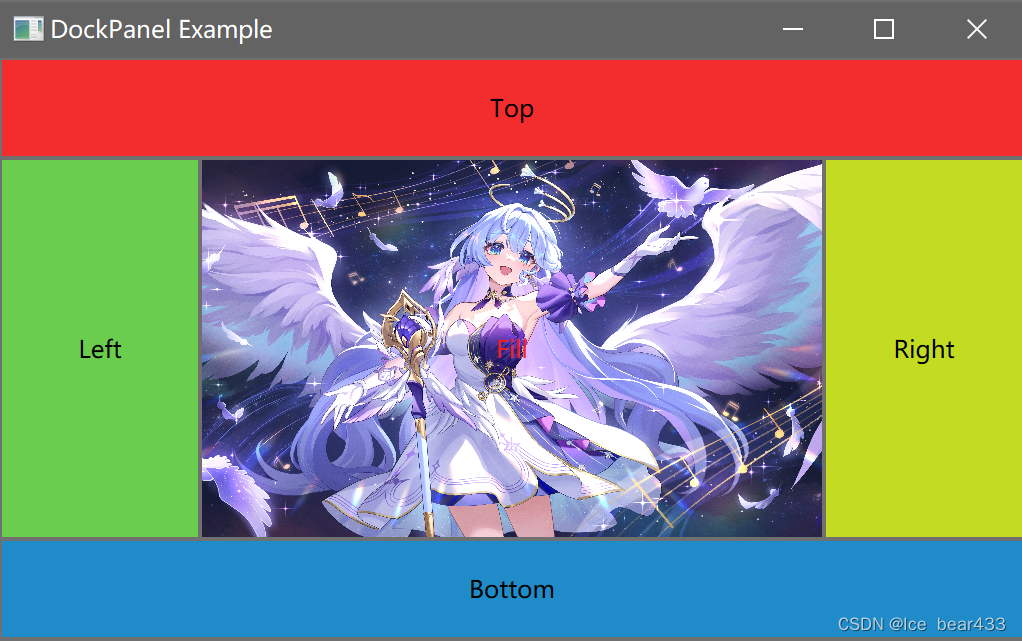
动态设置DockPanel的示例
在后台代码中,您可以动态设置或修改子控件在 DockPanel 中的排列方式:
using System.Windows;
using System.Windows.Controls;
using System.Windows.Media;

namespace WpfApp
{
    public partial class MainWindow : Window
    {
        public MainWindow()
        {
            InitializeComponent();

            // 动态创建一个 DockPanel 并设置其属性
            DockPanel dynamicDockPanel = new DockPanel
            {
                LastChildFill = true,
                Background = new SolidColorBrush(Colors.LightGray)
            };

            // 动态创建几个按钮并设置其停靠位置
            Button topButton = new Button { Content = "Top", Height = 50 };
            DockPanel.SetDock(topButton, Dock.Top);

            Button bottomButton = new Button { Content = "Bottom", Height = 50 };
            DockPanel.SetDock(bottomButton, Dock.Bottom);

            Button leftButton = new Button { Content = "Left", Width = 100 };
            DockPanel.SetDock(leftButton, Dock.Left);

            Button rightButton = new Button { Content = "Right", Width = 100 };
            DockPanel.SetDock(rightButton, Dock.Right);

            Button fillButton = new Button { Content = "Fill" };

            // 将按钮添加到 DockPanel
            dynamicDockPanel.Children.Add(topButton);
            dynamicDockPanel.Children.Add(bottomButton);
            dynamicDockPanel.Children.Add(leftButton);
            dynamicDockPanel.Children.Add(rightButton);
            dynamicDockPanel.Children.Add(fillButton);

            // 将动态创建的 DockPanel 添加到窗口的内容中
            this.Content = dynamicDockPanel;
        }
    }
}
在上面的代码中,我们动态创建了一个 DockPanel,设置其属性,并添加了几个按钮到该 DockPanel 中,最后将 DockPanel 添加到窗口的内容中。
DockPanel布局容器的优缺点
优点
- 灵活性高:
DockPanel允许子控件依次停靠在容器的边缘,非常适合需要固定控件位置的布局。 - 自动填充:
DockPanel可以自动填充剩余空间,简化了布局管理。 - 直观简单:对于需要将控件固定在特定位置的简单布局,
DockPanel使用非常直观简单。
缺点
- 不适合复杂布局:对于复杂布局或需要精确控制控件位置的场景,
DockPanel的能力有限。 - 性能问题:在包含大量子控件时,
DockPanel可能会导致性能问题,因为它需要动态计算控件的位置和大小。
总结
本文详细介绍了WPF中的 DockPanel 布局容器,包括其常见属性、使用方法及优缺点。通过 DockPanel,开发者可以轻松实现控件的固定位置排列,非常适合需要将控件固定在特定位置的布局需求。接下来,我们将继续探讨其他布局容器及其应用。


 1672
1672


 被折叠的 条评论
为什么被折叠?
被折叠的 条评论
为什么被折叠?
 到【灌水乐园】发言


