


在使用智能工具标注时,经常会出现边缘部分没有标注上mask区域的情况。会对训练的准确度造成一定程度的影响。
将mask.PN图片进行膨胀和腐蚀操作后,边角部分的mask区域没有完全补齐,因此再划定两个roi区域,通过比较mask占比来填充。
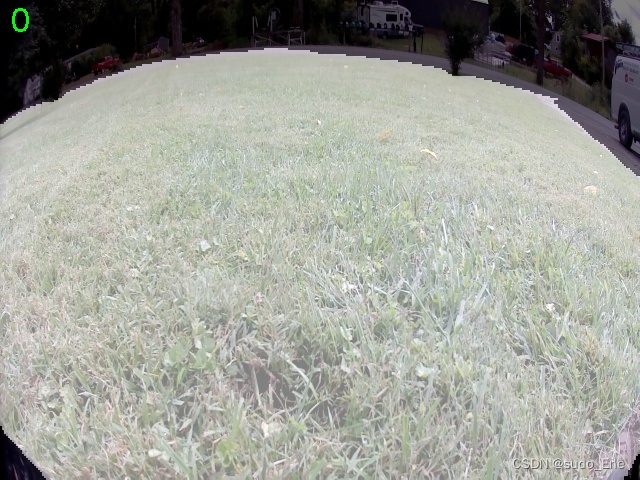
下图为将原图和mask区域重合后的图片,可以看到左右两角有黑色区域。(因为没有png的问题图片,用jpg的图片先试试看效果)
import cv2
import numpy as np
import os

# 定义膨胀和腐蚀的核
kernel = np.ones((3, 3), np.uint8)

# PNG格式原始图像路径
image_path = '/home/lxy/Desktop/test/fushi_imgae_test/mask'

# 读取PNG格式的原始图像
images = []
for file in os.listdir(image_path):
    if not file.endswith(".png"):
    # if not file.endswith(".jpg"):
        continue

    image_file = os.path.join(image_path, file)
    if not os.path.exists(image_file):
        continue

    image = cv2.imread(image_file)
    images.append(image)

# 对原始图像进行膨胀和腐蚀操作
processed_images = []
for image in images:
    dilated_image = cv2.dilate(image, kernel, iterations=10)
    eroded_dilated_image = cv2.erode(dilated_image, kernel, iterations=10)
    processed_images.append(eroded_dilated_image)

# 定义ROI区域的坐标
roi1_tl = (0, 400)  # 区域一左上角坐标
roi1_br = (80, 480)  # 区域一右下角坐标
roi2_tl = (560, 400)  # 区域二左上角坐标
roi2_br = (640, 480)  # 区域二右下角坐标

# 在图像上绘制两个ROI区域
for i in range(len(images)):
    processed_images[i] = cv2.rectangle(processed_images[i], roi1_tl, roi1_br, (0, 255, 0), 2)
    processed_images[i] = cv2.rectangle(processed_images[i], roi2_tl, roi2_br, (0, 255, 0), 2)

# 计算mask区域所占比例,并将整个ROI区域划为mask
for i in range(len(images)):
    # 提取ROI区域
    roi1 = processed_images[i][roi1_tl[1]:roi1_br[1], roi1_tl[0]:roi1_br[0]]
    roi2 = processed_images[i][roi2_tl[1]:roi2_br[1], roi2_tl[0]:roi2_br[0]]

    # 计算ROI区域的总像素数量
    total_pixels_roi1 = roi1.shape[0] * roi1.shape[1]
    total_pixels_roi2 = roi2.shape[0] * roi2.shape[1]

    # 计算mask区域的像素数量
    mask_pixels_roi1 = np.count_nonzero(roi1)
    mask_pixels_roi2 = np.count_nonzero(roi2)

    # 计算mask区域所占比例,避免除以零错误
    mask_ratio_roi1 = mask_pixels_roi1 / total_pixels_roi1 if total_pixels_roi1 != 0 else 0
    mask_ratio_roi2 = mask_pixels_roi2 / total_pixels_roi2 if total_pixels_roi2 != 0 else 0

    # 如果mask区域所占比例超过70%,则将整个ROI区域划为mask
    if mask_ratio_roi1 > 0.7:
        processed_images[i][roi1_tl[1]:roi1_br[1], roi1_tl[0]:roi1_br[0]] = 255
    if mask_ratio_roi2 > 0.7:
        processed_images[i][roi2_tl[1]:roi2_br[1], roi2_tl[0]:roi2_br[0]] = 255


# 创建一个蓝色的间隔框
blue_line = np.zeros((processed_images[0].shape[0], 5, 3), dtype=np.uint8)
blue_line[:] = (255, 0, 0)  # 蓝色

# 显示原始图像和处理后的图像
current_index = 0
while True:
    combined_image = np.hstack((images[current_index], blue_line, processed_images[current_index]))
    cv2.imshow('Original vs Processed', combined_image)
    key = cv2.waitKey(0) & 0xFF

    if key == ord('a'):
        current_index = (current_index - 1) % len(images)
    elif key == ord('d'):
        current_index = (current_index + 1) % len(images)
    elif key == 27:  # ESC键
        break

# 关闭所有窗口
cv2.destroyAllWindows()
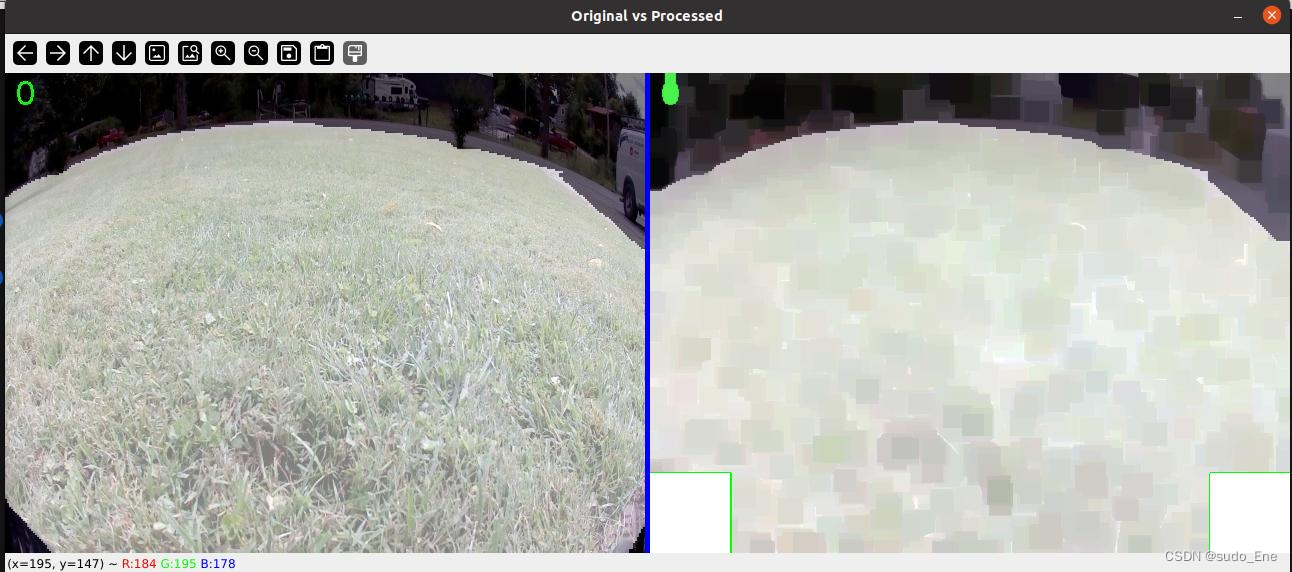
结果:
得到的图片为png格式或jpg格式,如有需要json格式还需要再进行转换。
附:
根据labelme.json文件和jpg文件来进行腐蚀和膨胀操作。
import cv2
import numpy as np
import os
import json
from tqdm import tqdm
from PIL import Image, ImageDraw, ImagePath
# 读取原始图像
jpg = '/home/lxy/Desktop/test/fushi_imgae_test/jpg/'
labelme_json = '/home/lxy/Desktop/test/fushi_imgae_test/labelme_json/'

# 遍历 LabelMe 格式的 JSON 文件夹中的所有文件,只处理 JSON 格式的文件
for file in tqdm(os.listdir(labelme_json)):
    if not file.endswith(".json"):
        continue

    # 根据 JSON 文件名生成对应的图像文件名,并检查该图像文件是否存在。
    image_name = file.replace(".json", ".jpg")
    image_file = os.path.join(jpg, image_name)
    if not os.path.exists(image_file):
        continue

    # 读取图像文件
    image = cv2.imread(image_file)
    cv2.imshow('image_file',image)
    # cv2.waitKey(6000)
    # cv2.destroyAllWindows(27)
    mask_img = np.zeros_like(image)

    with open(os.path.join(labelme_json, file), 'r') as f:
        data = f.read()
        # convert str to json objs
        data = json.loads(data)

        # 遍历 JSON 文件中的标注信息,获取标签和边界点
        for idx,d in enumerate(data['shapes']):
            label = d['label']
            points = d['points']
            path = tuple(map(tuple, points))

            # 将边界点连接起来并填充为白色,以创建标注掩码图像
            mask_img = cv2.drawContours(mask_img, [np.array(points)], 0, (255, 255, 255), -1)

            kernel = np.ones((3, 3), np.uint8)  # 定义膨胀的核大小

            # 对标注掩码图像进行腐蚀操作
            eroded_mask_img = cv2.erode(mask_img, kernel, iterations=10)
            # kernel = np.ones((5, 5), np.uint8)  # 定义腐蚀的核大小

            # 对标注掩码图像进行膨胀操作
            dilated_mask_img = cv2.dilate(mask_img, kernel, iterations=10)
            # result = mask_img - eroded_mask_img

            # 先膨胀再腐蚀
            dilated_mask_img = cv2.dilate(mask_img, kernel, iterations=15)
            eroded_dilated_mask_img = cv2.erode(dilated_mask_img, kernel, iterations=10)

            # 计算腐蚀后的区域大小
            gray_img = cv2.cvtColor(eroded_mask_img, cv2.COLOR_BGR2GRAY)
            _, binary_img = cv2.threshold(gray_img, 1, 255, cv2.THRESH_BINARY)
            contours, _ = cv2.findContours(binary_img, cv2.RETR_EXTERNAL, cv2.CHAIN_APPROX_NONE)
            area = cv2.contourArea(contours[0])

            # 如果区域大小达到 1000,则保留;否则涂黑
            if area >= 1800:
                # 保留标签区域
                final_img = eroded_mask_img
                border_points = [tuple(point[0]) for point in contours[0]]
                # 输出边界坐标点列表
                # print(border_points)

        # 修改标签区域以外的像素的 RGB 值
        for i in range(image.shape[0]):
            for j in range(image.shape[1]):
                if eroded_mask_img[i, j, 0] != 255:
                    # 修改标签区域以外的像素的 RGB 值为你想要的颜色
                    image[i, j] = [0, 0, 0]  # 将像素修改为全黑色

            # 保存结果图像
        cv2.imwrite(jpg+'/'+str(idx)+'mask_img.jpg',mask_img)
        cv2.imwrite(jpg+'/'+str(idx)+'_dilated.jpg', dilated_mask_img)
        cv2.imwrite(jpg+'/'+str(idx)+'_eroded.jpg',eroded_mask_img)
        # 保存经过先膨胀再腐蚀处理的图像
        cv2.imwrite(jpg+'/'+str(idx)+'_eroded_dilated.jpg', eroded_dilated_mask_img)
2024.3.25新增:
import cv2
import numpy as np
import os
import json
from tqdm import tqdm

'''
    读取 LabelMe 格式的 JSON 文件,并根据标注信息创建标注掩码图像
    对标注掩码图像进行膨胀和腐蚀操作
    划定两块roi区域
    在这两块roi区域中 分别求取mask区域所占比例 如果超过70% 则将整个roi区域划为mask
'''


# 读取 LabelMe 格式的 JSON 文件夹和保存标注掩码图像的文件夹
labelme_json_dir = '/home/lxy/Desktop/test/fushi_imgae_test/labelme_json'
mask_output_dir = '/home/lxy/Desktop/test/fushi_imgae_test/mask'

# 定义膨胀和腐蚀的核
kernel = np.ones((3, 3), np.uint8)

# 遍历 LabelMe 格式的 JSON 文件夹中的所有文件,只处理 JSON 格式的文件
for file in os.listdir(labelme_json_dir):
    if not file.endswith(".json"):
        continue

    # 读取 JSON 文件
    with open(os.path.join(labelme_json_dir, file), 'r') as f:
        data = json.load(f)

    # 创建与图像相同大小的空白图像作为标注掩码图像
    mask_img = np.zeros((data['imageHeight'], data['imageWidth']), dtype=np.uint8)

    # 根据 JSON 文件中的标注信息创建标注掩码图像
    for shape in data['shapes']:
        points = np.array(shape['points'], np.int32)
        cv2.fillPoly(mask_img, [points], 255)

    # 对标注掩码图像进行膨胀和腐蚀操作
    dilated_mask_img = cv2.dilate(mask_img, kernel, iterations=1)
    eroded_dilated_mask_img = cv2.erode(dilated_mask_img, kernel, iterations=1)

    # 定义两块 ROI 区域
    roi1_tl = (0, 400)  # 区域一左上角坐标
    roi1_br = (80, 480)  # 区域一右下角坐标
    roi2_tl = (560, 400)  # 区域二左上角坐标
    roi2_br = (640, 480)  # 区域二右下角坐标

    # 计算两块 ROI 区域中 mask 区域所占比例,并根据条件将整个 ROI 区域划为 mask
    mask_ratio_roi1 = np.count_nonzero(eroded_dilated_mask_img[roi1_tl[1]:roi1_br[1], roi1_tl[0]:roi1_br[0]]) / ((roi1_br[1] - roi1_tl[1]) * (roi1_br[0] - roi1_tl[0]))
    mask_ratio_roi2 = np.count_nonzero(eroded_dilated_mask_img[roi2_tl[1]:roi2_br[1], roi2_tl[0]:roi2_br[0]]) / ((roi2_br[1] - roi2_tl[1]) * (roi2_br[0] - roi2_tl[0]))

    if mask_ratio_roi1 > 0.7:
        eroded_dilated_mask_img[roi1_tl[1]:roi1_br[1], roi1_tl[0]:roi1_br[0]] = 255
    if mask_ratio_roi2 > 0.7:
        eroded_dilated_mask_img[roi2_tl[1]:roi2_br[1], roi2_tl[0]:roi2_br[0]] = 255

    # 保存处理后的标注掩码图像
    mask_output_path = os.path.join(mask_output_dir, file.replace('.json', '_mask.png'))
    cv2.imwrite(mask_output_path, eroded_dilated_mask_img)
对新的掩码图像(labelme.png)转回json文件(labelme.json)
import cv2
import numpy as np
import os
import json

# 读取膨胀和腐蚀后的标注掩码图像的文件夹和保存恢复的 LabelMe JSON 文件的文件夹
mask_output_dir = '/home/lxy/Desktop/test/fushi_imgae_test/mask'
restored_json_dir = '/home/lxy/Desktop/test/fushi_imgae_test/picture'

# 遍历膨胀和腐蚀后的标注掩码图像的文件夹中的所有文件
for file in os.listdir(mask_output_dir):
    if not file.endswith("_mask.png"):
        continue

    # 读取标注掩码图像
    mask_img = cv2.imread(os.path.join(mask_output_dir, file), cv2.IMREAD_GRAYSCALE)

    # 创建一个空的 LabelMe 格式 JSON 数据
    labelme_data = {
        "version": "5.0.1",
        "flags": {},
        "shapes": [],
        "imagePath": file.replace('_mask.png', '.png'),
        "imageData": None,
        "imageHeight": mask_img.shape[0],
        "imageWidth": mask_img.shape[1]
    }

    # 根据标注掩码图像恢复标注信息
    contours, _ = cv2.findContours(mask_img, cv2.RETR_EXTERNAL, cv2.CHAIN_APPROX_SIMPLE)
    for contour in contours:
        shape = {
            "label": "0",
            "points": contour.reshape(-1, 2).tolist(),
            "group_id": None,
            "shape_type": "polygon",
            "flags": {}
        }
        labelme_data["shapes"].append(shape)

    # 保存恢复的 LabelMe JSON 文件
    restored_json_path = os.path.join(restored_json_dir, file.replace('_mask.png', '_restored.json'))
    with open(restored_json_path, 'w') as f:
        json.dump(labelme_data, f, indent=4)


 742
742


 被折叠的 条评论
为什么被折叠?
被折叠的 条评论
为什么被折叠?
 到【灌水乐园】发言


