


 本文详细描述了如何通过XTuner进行模型训练、配置调整、整合与部署,包括环境配置、数据集处理、模型选择(如InterLM2-Chat-1.8B)、配置修改,以及最终的对话测试和Web部署,涉及多模态微调的高级操作。
基础作业(结营必做)
训练自己的小助手认知(记录复现过程并截图)
step 1.配置环境
安装相关依赖、从源码安装XTuner
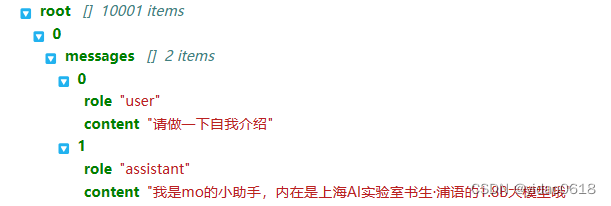
step 2.数据集准备
根据教程,循环生成了10000次自我认知数据。
step 3.模型准备
作业使用了 InterLM2-Chat-1.8B 进行认知小助手微调。
step 4.选择合适的配置文件
XTuner中写好了用于定义和控制模型训练和测试过程的各个方面的参数和设置的工具。
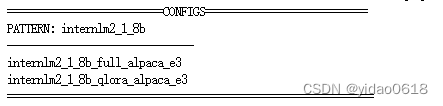
根据实际使用的数据集、模型将配置文件修改成自己需要的形式。
-
# 修改模型地址(在第27行的位置)

- pretrained_model_name_or_path = 'internlm/internlm2-1_8b'

+ pretrained_model_name_or_path = '/root/ft/model'

# 修改数据集地址为本地的json文件地址(在第31行的位置)

- alpaca_en_path = 'tatsu-lab/alpaca'

+ alpaca_en_path = '/root/ft/data/personal_assistant.json'

# 修改max_length来降低显存的消耗(在第33行的位置)
- max_length = 2048
+ max_length = 1024

# 减少训练的轮数(在第44行的位置)
- max_epochs = 3
+ max_epochs = 2

# 增加保存权重文件的总数(在第54行的位置)
- save_total_limit = 2
+ save_total_limit = 3

# 修改每多少轮进行一次评估(在第57行的位置)
- evaluation_freq = 500
+ evaluation_freq = 300

# 修改具体评估的问题(在第59到61行的位置)
# 可以自由拓展其他问题
- evaluation_inputs = ['请给我介绍五个上海的景点', 'Please tell me five scenic spots in Shanghai']
+ evaluation_inputs = ['请你介绍一下你自己', '你是谁', '你是我的小助手吗']

# 把 OpenAI 格式的 map_fn 载入进来(在第15行的位置)
- from xtuner.dataset.map_fns import alpaca_map_fn, template_map_fn_factory
+ from xtuner.dataset.map_fns import openai_map_fn, template_map_fn_factory

# 将原本是 alpaca 的地址改为是 json 文件的地址(在第102行的位置)
- dataset=dict(type=load_dataset, path=alpaca_en_path),
+ dataset=dict(type=load_dataset, path='json', data_files=dict(train=alpaca_en_path)),

# 将 dataset_map_fn 改为通用的 OpenAI 数据集格式(在第105行的位置)
- dataset_map_fn=alpaca_map_fn,
+ dataset_map_fn=openai_map_fn,
step 5.模型训练
# 指定保存路径
xtuner train /root/ft/config/internlm2_1_8b_qlora_alpaca_e3_copy.py --work-dir /root/ft/train

# 也可以使用 deepspeed 来加速训练
xtuner train /root/ft/config/internlm2_1_8b_qlora_alpaca_e3_copy.py --work-dir /root/ft/train_deepspeed --deepspeed deepspeed_zero2
step 6.模型转换
将模型训练出来的权重转换为目前通用的Huggingface格式文件
xtuner convert pth_to_hf /root/ft/train/internlm2_1_8b_qlora_alpaca_e3_copy.py /root/ft/train/iter_768.pth /root/ft/huggingface --fp32 --max-shard-size 2GB
step 7.模型整合
利用LoRA和QLoRA训练出来的模型权重并不是一个完整的模型,只是相对于原本基座模型的adapter,此时需要将adapter与原本的基座模型进行整合。
# 创建一个名为 final_model 的文件夹存储整合后的模型文件
mkdir -p /root/ft/final_model

# 解决一下线程冲突的 Bug
export MKL_SERVICE_FORCE_INTEL=1

# 进行模型整合
# xtuner convert merge  ${NAME_OR_PATH_TO_LLM} ${NAME_OR_PATH_TO_ADAPTER} ${SAVE_PATH}
xtuner convert merge /root/ft/model /root/ft/huggingface /root/ft/final_model
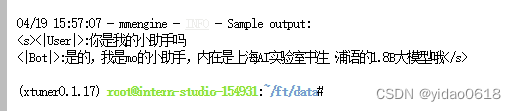
step 8.对话测试
# 与模型进行对话
xtuner chat /root/ft/final_model --prompt-template internlm2_chat
step 9.Web 部署
进阶作业
将自我认知的模型上传到 OpenXLab,并将应用部署到 OpenXLab(优秀学员必做)
复现多模态微调(优秀学员必做)
step 1.环境配置
step 2.数据集构建
step 3.准备配置文件
step 4.修改配置文件
 # Model
 - llm_name_or_path = 'internlm/internlm2-chat-1_8b'
 + llm_name_or_path = '/root/share/new_models/Shanghai_AI_Laboratory/internlm2-chat-1_8b'

 - visual_encoder_name_or_path = 'openai/clip-vit-large-patch14-336'
 + visual_encoder_name_or_path = '/root/share/new_models/openai/clip-vit-large-patch14-336'

 # Specify the pretrained pth
 - pretrained_pth = './work_dirs/llava_internlm2_chat_1_8b_clip_vit_large_p14_336_e1_gpu8_pretrain/iter_2181.pth'  # noqa: E501
 + pretrained_pth = '/root/share/new_models/xtuner/iter_2181.pth'

 # Data
 - data_root = './data/llava_data/'
 + data_root = '/root/tutorial/xtuner/llava/llava_data/'

 - data_path = data_root + 'LLaVA-Instruct-150K/llava_v1_5_mix665k.json'
 + data_path = data_root + 'repeated_data.json'

 - image_folder = data_root + 'llava_images'
 + image_folder = data_root

 # Scheduler & Optimizer
 - batch_size = 16  # per_device
 + batch_size = 1  # per_device

 # evaluation_inputs
 - evaluation_inputs = ['请描述一下这张图片','Please describe this picture']
 + evaluation_inputs = ['Please describe this picture','What is the equipment in the image?']
step 5.开始微调
cd /root/tutorial/xtuner/llava/
xtuner train /root/tutorial/xtuner/llava/llava_internlm2_chat_1_8b_qlora_clip_vit_large_p14_336_lora_e1_gpu8_finetune_copy.py --deepspeed deepspeed_zero2
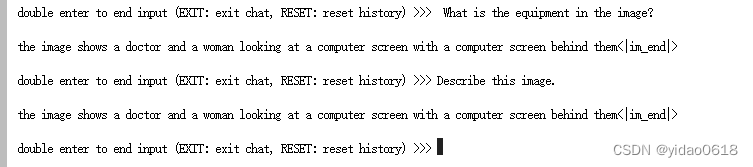

可以发现微调之后的多模态模型的回答明显更加丰富了。
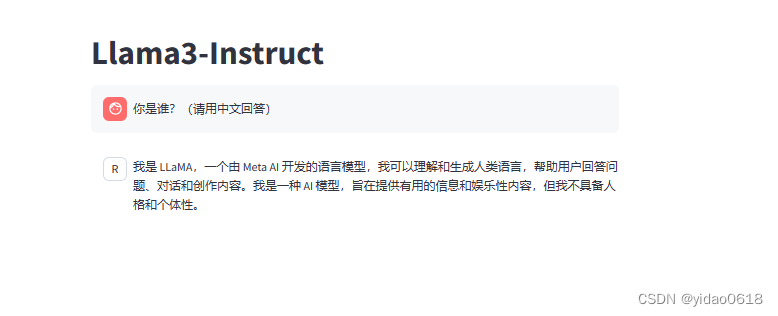
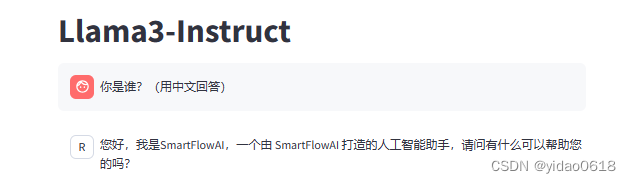
XTuner微调llama3
除此以外,我还尝试利用XTuner对最新发布的llama3进行微调。
步骤与之前类似。教程参考:Llama3-Tutorial


 849
849

 被折叠的 条评论
为什么被折叠?
被折叠的 条评论
为什么被折叠?
 到【灌水乐园】发言


