一、前言
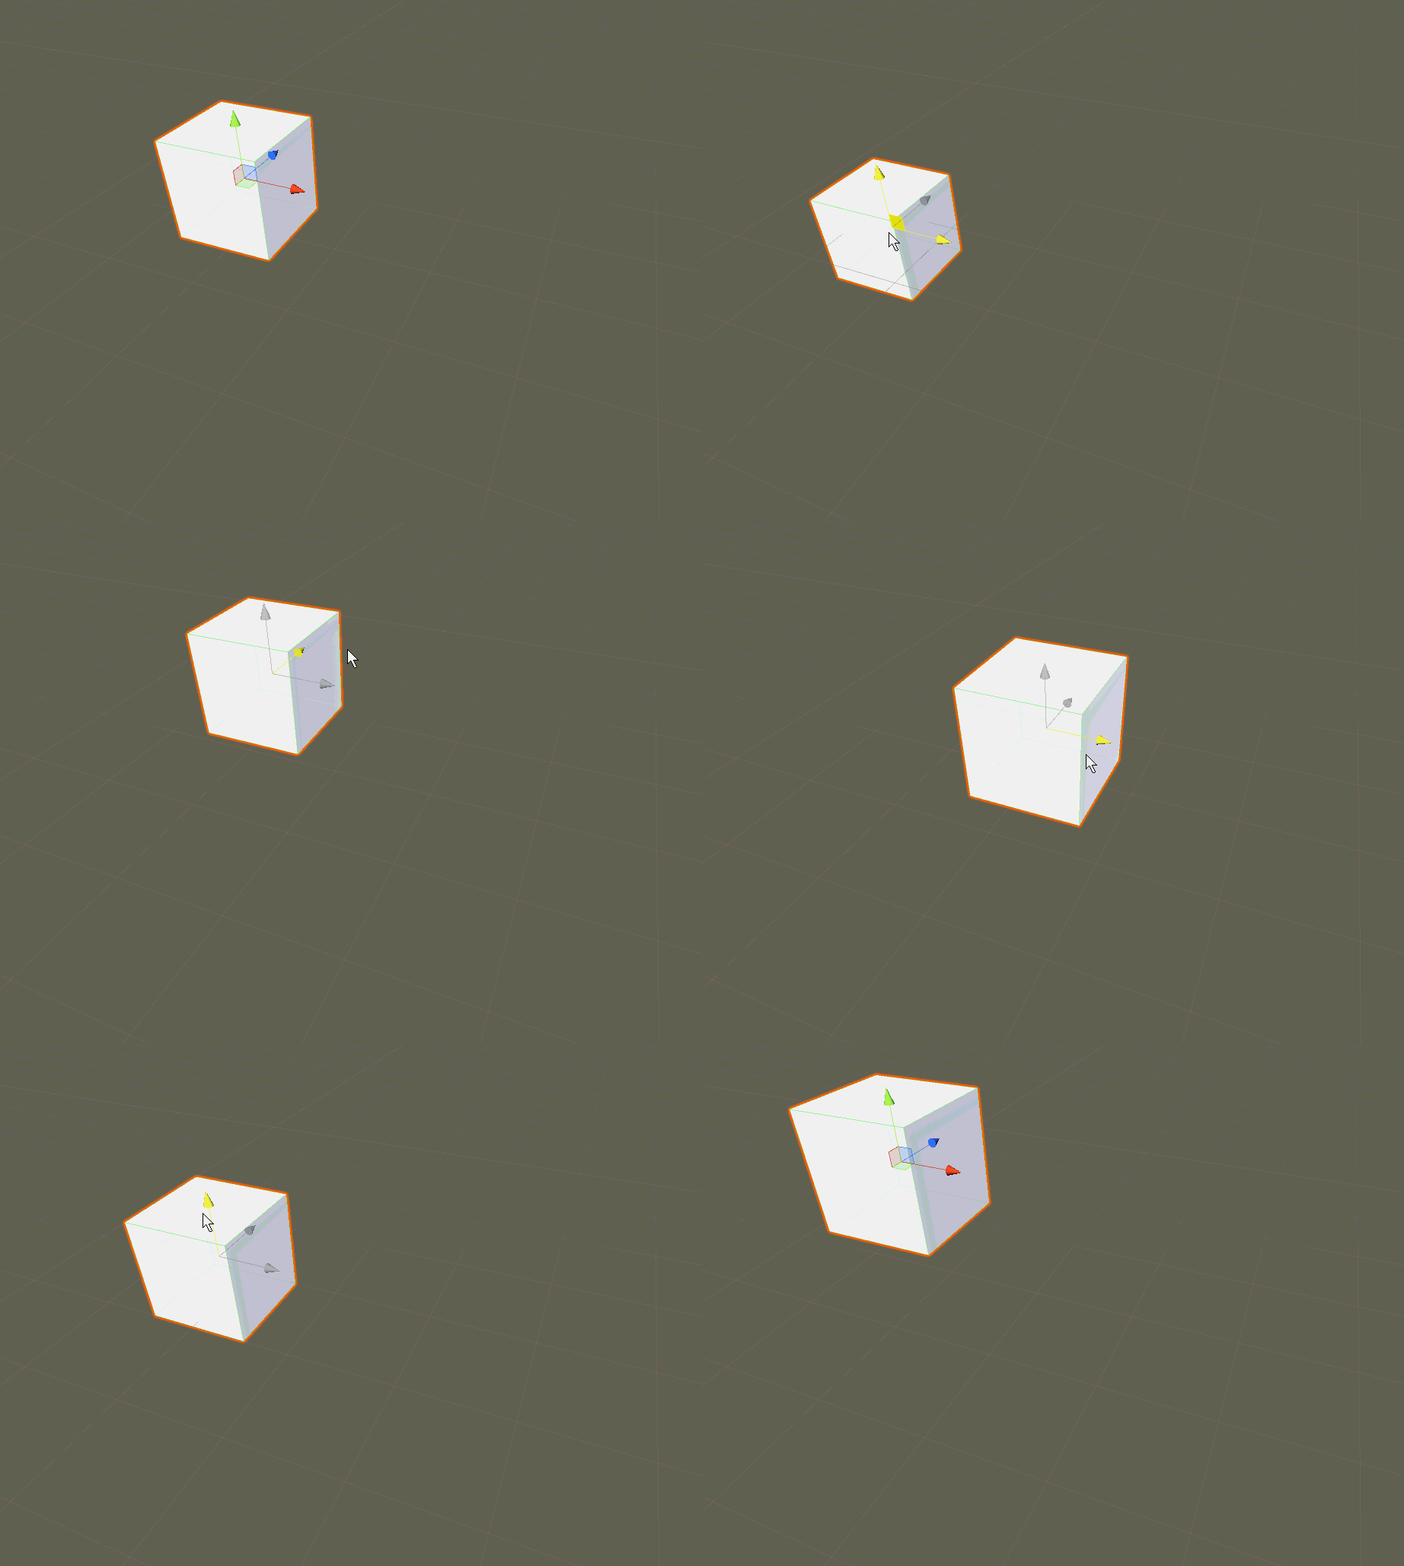
我们最近要做一个线路的规划编辑,并且是在三维场景中,编辑完就立马能用。立马能用还好说,有特别多的轮子可以用,在三维场景中实时编辑就有点意思了。其实功能就是类似于在Unity的编辑界面操作一个Cube的位置,当然旋转什么的我这个任务里暂时还不需要,就先简单的做了一个位置的三维拖拽。如图所示:在Unity的编辑界面对一个Cube进行拖拽,选中中心就可以进行任意拖

拽,选中单个的坐标轴可以进行指定方向的拖拽。
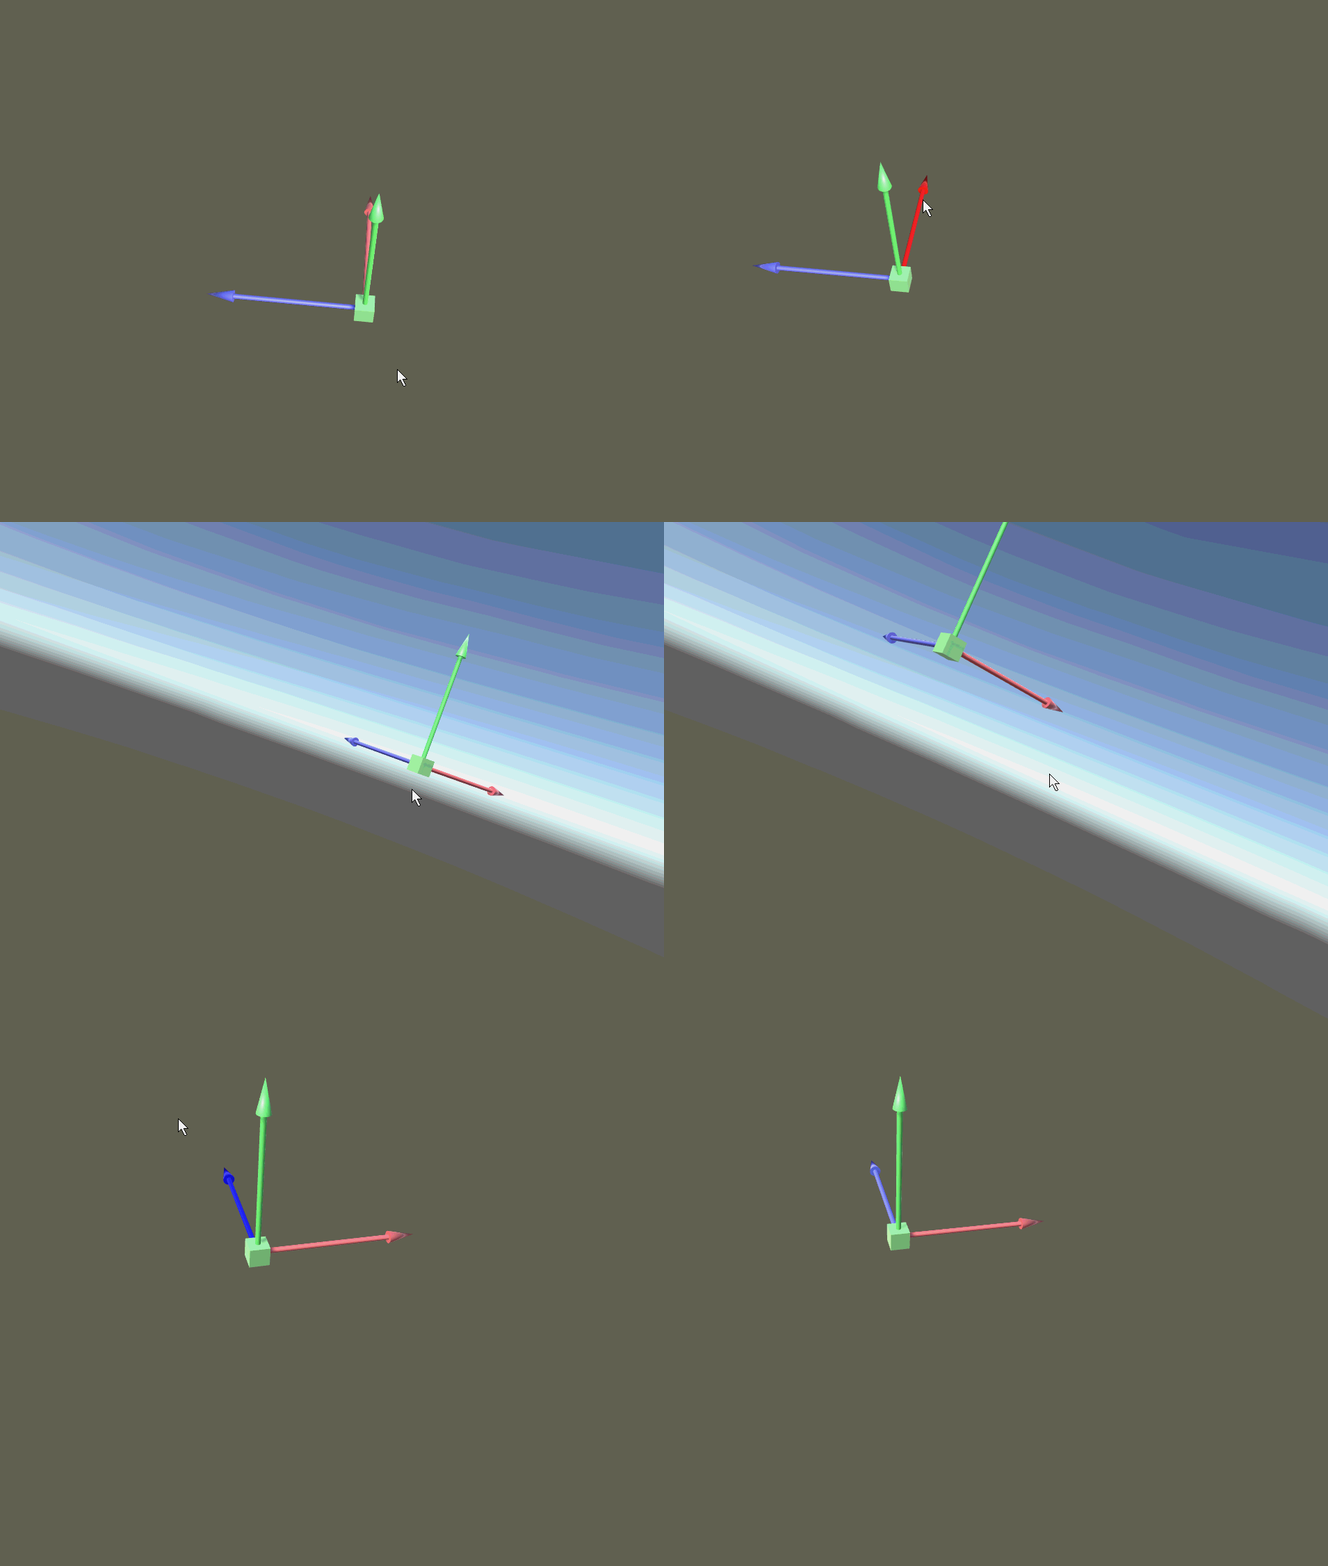
下面是我实现的效果图,如同所示:

二、实现
1、任意拖拽的比较简单,主要思路是控制好鼠标按下和正在拖拽的坐标差,以及鼠标的坐标到世界坐标的转换,代码如下
 mr.material.color = IsBeSelected ? beSelectedColor : normalColor;

        if(Input.GetKeyDown(KeyCode.Mouse0))
        {
            screenPosition = Camera.main.WorldToScreenPoint(gameObject.transform.position);
            offset = gameObject.transform.position - Camera.main.ScreenToWorldPoint(new Vector3(Input.mousePosition.x, Input.mousePosition.y, screenPosition.z));
            isMouseDrag = true;
        }
        if(Input.GetKey(KeyCode.Mouse0))
        {
            if (isMouseDrag&&IsBeSelected)
            {
                //Debug.Log("开始拖拽了");
                Vector3 currentScreenSpace = new Vector3(Input.mousePosition.x, Input.mousePosition.y, screenPosition.z);
                Vector3 currentPosition = Camera.main.ScreenToWorldPoint(currentScreenSpace) + offset;
                gameObject.transform.position = currentPosition;
            }
        }
        if(Input.GetKeyUp(KeyCode.Mouse0))
        {
            isMouseDrag = false;
        }
2、三个坐标轴方向的拖拽,比较复杂,但是鼠标的移动计算是一样的,只是利用这个的最终位置量需要考虑一下,不能直接使用,需要考虑在每个轴方向的投影。比如X轴,那么就需要考虑这个X轴模型所代表的方向是它的Transform的前、上还是右方向,我这里的X模型的前方向是代表它在世界坐标所指向的方向,然后就将得到的鼠标拖着后的位置变化坐标投影到这个方向,但是其他方向的投影还是原来的位置坐标。代码如下:
 if (Input.GetKeyDown(KeyCode.Mouse0))
        {
            dragBeforeGameObjPos = parentTransform.transform.position;
            screenPosition = Camera.main.WorldToScreenPoint(dragBeforeGameObjPos);
            offset = transform.position - Camera.main.ScreenToWorldPoint(new Vector3(Input.mousePosition.x, Input.mousePosition.y, screenPosition.z));
            isMouseDrag = true;
        }
        if (Input.GetKey(KeyCode.Mouse0))
        {
            if (isMouseDrag && IsBeSelected)
            {
                //Debug.Log("开始拖拽了");
                Vector3 currentScreenSpace = new Vector3(Input.mousePosition.x, Input.mousePosition.y, screenPosition.z);
                Vector3 currentPosition = Camera.main.ScreenToWorldPoint(currentScreenSpace) + offset;
                float tempLength = Vector3.Distance(currentPosition, transform.position);
                Vector3 tempPos = Vector3.zero;
                switch (curPAType)
                {
                    case PointAxis_Type.Axis_X:
                        tempPos = Vector3.Project(currentPosition, transform.forward) + Vector3.Project(dragBeforeGameObjPos, transform.up) + Vector3.Project(dragBeforeGameObjPos, transform.right);
                        break;
                    case PointAxis_Type.Axis_Y:
                        tempPos = Vector3.Project(currentPosition, transform.up) + Vector3.Project(dragBeforeGameObjPos, transform.right) + Vector3.Project(dragBeforeGameObjPos, transform.forward);
                        break;
                    case PointAxis_Type.Axis_Z:
                        tempPos = Vector3.Project(currentPosition, transform.right) + Vector3.Project(dragBeforeGameObjPos, transform.up) + Vector3.Project(dragBeforeGameObjPos, transform.forward);
                        break;
                }
                parentTransform.transform.position = tempPos;
            }
        }
        if (Input.GetKeyUp(KeyCode.Mouse0))
        {
            isMouseDrag = false;
        }
3、最后在来一段选中控制操作
using System.Collections;
using System.Collections.Generic;
using UnityEngine;

public class ControlCam : MonoBehaviour
{
    public static ControlCam M_Instance
    {
        get
        {
            if(null==_instance)
            {
                _instance = FindObjectOfType<ControlCam>();
            }
            return _instance;
        }
    }

    public bool M_IsCanControl
    {
        get
        {
            return isCanControl;
        }
    }

    public static ControlCam _instance;
    private bool isMouseDrag = false;
    private Vector3 lastMousePos;
    [SerializeField]
    private Vector3 offset;

    private bool isCanControl = false;
    private PointAxis PA;
    private PointEntity PE;
    // Use this for initialization
    void Start()
    {

    }

    // Update is called once per frame
    void Update()
    {
        if (Input.GetKey(KeyCode.LeftControl))
        {
            isCanControl = true;
        }
        if (Input.GetKeyUp(KeyCode.LeftControl))
        {
            isCanControl = false;
        }
        if (Input.GetKeyDown(KeyCode.Mouse1))
        {
            lastMousePos = Input.mousePosition;
            isMouseDrag = true;
        }
        if (Input.GetKey(KeyCode.Mouse1))
        {
            if (isMouseDrag)
            {
                offset = Input.mousePosition - lastMousePos;
                transform.RotateAround(Vector3.zero, Vector3.up, offset.x);
                transform.RotateAround(Vector3.zero, Vector3.right, offset.y);
                lastMousePos = Input.mousePosition;
            }
        }
        if (Input.GetKeyUp(KeyCode.Mouse1))
        {
            isMouseDrag = false;
        }
        if (Input.GetKeyUp(KeyCode.Mouse0))
        {
            isCanControl = false;
        }
        if (!isCanControl)
        {
            Reset_SelectedState();
            return;
        }
        Ray tempRay = Camera.main.ScreenPointToRay(Input.mousePosition);
        RaycastHit hit;
        if (Physics.Raycast(tempRay, out hit, 2000))
        {
            PointEntity tempHitPE = hit.collider.GetComponent<PointEntity>();
            PointAxis tempHitPA = hit.collider.GetComponent<PointAxis>();
            if (Input.GetKeyDown(KeyCode.Mouse0))
            {
                if (null != tempHitPE)
                {
                    Reset_SelectedState();
                    PE = tempHitPE;
                    PE.IsBeSelected = true;
                }
                else if (null != tempHitPA)
                {
                    Reset_SelectedState();
                    PA = tempHitPA;
                    PA.IsBeSelected = true;
                }
            }
        }
    }

    private void Reset_SelectedState()
    {
        if (null != PE)
        {
            PE.IsBeSelected = false;
            PE = null;
        }
        if (null != PA)
        {
            PA.IsBeSelected = false;
            PA = null;
        }
    }
}
选中单个坐标轴或中心就让其高亮,每个坐标轴和中心都只能选中一个,为了避免在拖拽滑动鼠标的时候会选中其他的坐标轴或者中心,而造成混乱,这里我让鼠标按下的时候才触发选中操作。
三、总结
1、轮子有就好,没有也得学会自力更生
2、基本实现了类似Unity的编辑界面操作拖拽物体的功能,但是操作的设计上还需要有待加强
3、摄像机的旋转是为了观察在不同姿态下,坐标轴的拖拽始终是朝着它所指向的方向
4、工程下载地址CSDN下载地址


 本文详细介绍了一种在Unity中实现实时三维编辑器的方法,包括任意拖拽和沿坐标轴拖拽物体的功能,以及摄像机控制和选中状态管理。通过解析鼠标输入和坐标转换,实现了与Unity编辑界面相似的操作体验。


 5745
5745

 被折叠的 条评论
为什么被折叠?


