


Unity5 AssetBundle打包
关于AssetBundle 是什么,干什么用,在网上到处是,在此就不过多赘述了。
下面直接上代码,本篇只包含如何打包 AssetBundle,下篇为AB加载
打包AB
Unity5 打AssetBundle 将要打包的资源通过 AssetImporter 设置 assetBundleName。
如
    // 打 AB 资源路径 path
    // 通过文件路径获取 AssetImporter
    AssetImporter assetImport = AssetImporter.GetAtPath (path);
    if (assetImport == null) {
        return;
    }

    // 将路径名修改后缀为 .unity3d
    string assetBundleName = Path.ChangeExtension (path, "unity3d");
    // 设置 assetBundleName
    assetImport.assetBundleName = assetBundleName;
预设、贴图、材质球、配置表、场景等只要是要打成 AB 包的资源都要设置 assetBundleName。否则无法将其打包AB。
方法一:
先设置需要打包资源的路径,获取路径下所有文件,通过后缀名排除掉不需要打包的资源,如每个资源都有一个 对应的 .meta,该文件就需要排除掉。
    // 获取路径 path 下所有的文件
    string[] filesPath = Directory.GetFiles(path, "*.*", SearchOption.AllDirectories);
    for (int i = 0; i < filesPath.Length; ++i)
    {
        string filePath = filesPath[i];
        // 获取后缀名
        string ex = System.IO.Path.GetExtension(filePath);
        if (后缀名无效)
        {
            continue;
        }

        AssetImporter assetImport = AssetImporter.GetAtPath(filePath);
        path = Path.ChangeExtension(path, "unity3d");
        assetImport.assetBundleName = path;
    }
方法二:
添加编辑器脚本继承 AssetPostprocessor
添加 如下方法
static void OnPostprocessAllAssets(string[] importedAssets, string[] deletedAssets, string[] movedAssets, string[] movedFromAssetPaths)当将资源添加到Unity时会主动调用 OnPostprocessAllAssets 方法,此时导入到Unity的所有资源的路径名都包含在 string[] importedAssets 数组中
同理 对应路径数组 如下
导入资源:string[] importedAssets
删除资源:string[] deletedAssets
移动资源:string[] movedAssets (转移资源目录)
当有资源加入,发生变化,或者主动执行 Reimport 方法 等都会触发此方法,这样只需要在该方法中加入设置 assetBundleName 的方法即可
using System.Collections.Generic;
using UnityEditor;
using System.IO;

public class AutoPostProcessorAsset : AssetPostprocessor {

    static void OnPostprocessAllAssets(string[] importedAssets, string[] deletedAssets, string[] movedAssets, string[] movedFromAssetPaths)
    {
        SetAssetBundleNames(importedAssets);
        SetAssetBundleNames(movedAssets);
    }

    private static void SetAssetBundleNames(string[] paths)
    {
        for (int i = 0; i < paths.Length; ++i)
        {
            SetAssetBundleName(paths[i]);
        }
    }

    private static void SetAssetBundleName(string path)
    {
        // 判断路径是否有效,判断文件后缀是否有效
        if (path 路径无效) {
            return;
        }

        AssetImporter assetImport = AssetImporter.GetAtPath (path);
        if (assetImport == null) {
            return;
        }

        //path 路径是从 Assets/ 开始的,此处从第 7 个字符开始截取路径,取Assets下的相对路径
        path = path.Substring(7);
        path = Path.ChangeExtension (path, "unity3d");
        assetImport.assetBundleName = path;
    }
打包资源(预设、材质、贴图、场景等)都可以使用如下方法打包
BuildPipeline.BuildAssetBundles(string outputPath, BuildAssetBundleOptions assetBundleOptions, BuildTarget targetPlatform);场景还可以使用下面方法打包
BuildPipeline.BuildPlayer(string[] levels, string locationPathName, BuildTarget target, BuildOptions options);添加打包类
using UnityEngine;
using System.Collections.Generic;
using UnityEditor;
using System.IO;

public static class BuildAssetBundle
{
    //导出包路径
    private static string AssetBundleOutPsth = Application.streamingAssetsPath;
    //打AB包
    public static void BuildABAsset(int type = 0)
    {
        //在测试情况下你可能会频繁的打包生成Assetbundle,如果忘记改版本号的话可能会读取之前的缓存,
        //可能就会看不到新的效果,所以建议在打包的时候强制清空一下缓存。
        // 打包前先清除一下缓存
        Caching.CleanCache();

        BuildAsset(type);

        BuildScene();

        //刷新资源路径,避免生成的文件不显示
        AssetDatabase.Refresh();
    }

    /// <summary>
    /// 打包资源
    /// </summary>
    /// <param name="type">0 增量打包,1 重新打包</param>
    public static void BuildAsset(int type = 0)
    {
        //根据不同平台拼接不同平台导出路径
        string outPath = GetABPath();

        //如果不存在到处路径文件,创建一个
        if (!Directory.Exists(outPath))
        {
            Directory.CreateDirectory(outPath);
        }

        if (type == 0)       //增量打包
        {
            BuildPipeline.BuildAssetBundles(outPath, BuildAssetBundleOptions.None, EditorUserBuildSettings.activeBuildTarget);
        }
        else if (type == 1)  // 强制重新打包
        {
            BuildPipeline.BuildAssetBundles(outPath, BuildAssetBundleOptions.ForceRebuildAssetBundle, EditorUserBuildSettings.activeBuildTarget);
        }
        Debug.Log("资源打包完成");
    }

    // 打包场景
    public static void BuildScene()
    {
        //根据不同平台拼接不同平台导出路径
        string outPath = GetABPath();

        outPath = Path.Combine(outPath, "Scene");

        //如果不存在到处路径文件,创建一个
        if (!Directory.Exists(outPath))
        {
            Directory.CreateDirectory(outPath);
        }

        // 获取场景个数
        int sceneCount = EditorBuildSettings.scenes.Length;
        List<string> scenePathList = new List<string>();
        for (int i = 0; i < sceneCount; ++i)
        {
            EditorBuildSettingsScene sceneAsset = EditorBuildSettings.scenes[i];
            // 将 BuildSetting 中勾选的场景排除掉
            if (sceneAsset.enabled)
            {
                continue;
            }
            scenePathList.Add(sceneAsset.path);
        }

        for (int i = 0; i < scenePathList.Count; ++i)
        {
            string path = Path.Combine(outPath, Path.GetFileNameWithoutExtension(scenePathList[i]) + ".unity3d");
            string[] scenes = { scenePathList[i] };

            BuildPipeline.BuildPlayer(scenes, path, EditorUserBuildSettings.activeBuildTarget, BuildOptions.BuildAdditionalStreamedScenes);
            EditorUtility.DisplayProgressBar("BuildPlayer", "BuildSceneAssetBundle", i * 1.0f / scenePathList.Count);
        }
        EditorUtility.ClearProgressBar();
        Debug.Log("场景打包完成");
    }

    private static string GetABPath()
    {
        string path = Path.Combine(AssetBundleOutPsth, "AssetBundle");
        return path;
    }

    public static void DeleteOldAB()
    {
        string outPath = GetABPath();
        if (Directory.Exists (outPath)) {
            DirectoryInfo dirInfo = new DirectoryInfo (outPath);
            dirInfo.Delete (true);
        }

        AssetDatabase.Refresh();
    }

    private static void ClearAssetBundlesName()
    {
        int length = AssetDatabase.GetAllAssetBundleNames().Length;
        string[] oldAssetBundleNames = new string[length];
        for (int i = 0; i < length; i++)
        {
            oldAssetBundleNames[i] = AssetDatabase.GetAllAssetBundleNames()[i];
        }

        for (int j = 0; j < oldAssetBundleNames.Length; j++)
        {
            AssetDatabase.RemoveAssetBundleName(oldAssetBundleNames[j], true);
        }
    }
}
添加编辑器调用打包方法
public class BuildAssetBundleEditor : Editor {
/// <summary>
/// 增量打包
/// </summary>
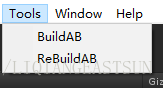
[MenuItem("Tools/BuildAB")]
static void BuildAB()
{
BuildAssetBundle.BuildABAsset(0);
}
/// <summary>
/// 重新打包
/// </summary>
[MenuItem("Tools/ReBuildAB")]
static void ReBuildAB()
{
BuildAssetBundle.BuildABAsset(1);
}
}
打包完成,生成位置为 StreamingAssets/AssetBundle
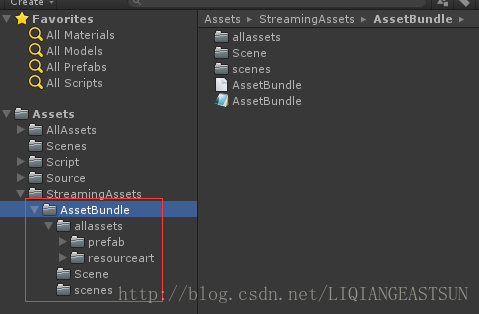
在 AssetBundle 下生成总依赖文件 类型为 AssetBundleManifest 文件名 AssetBundle.manifest
用 记事本 等打开 AssetBundle.manifest
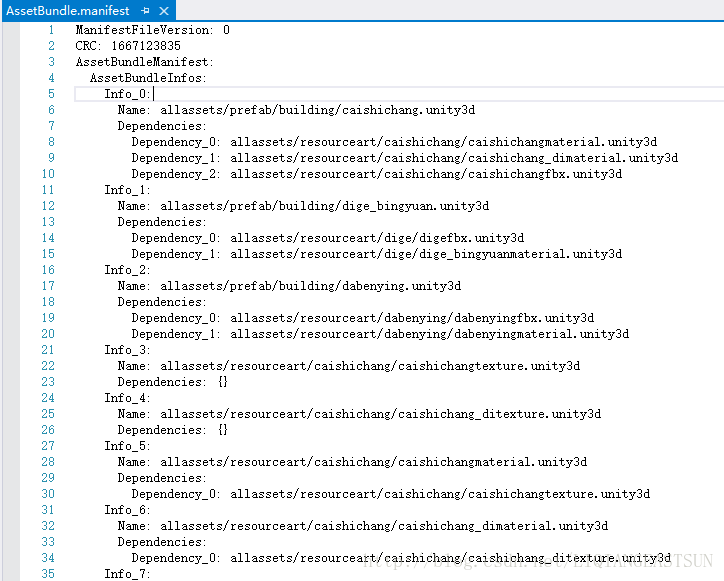
在 AssetBundleInfos: 下 Info_0、Info_1、等是一个个打包的资源
Name:为assetBundleName
Dependencies:为该资源依赖的其他资源
生成 AB 时设置的扩展名为 .unity3d
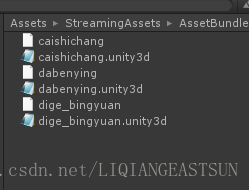
每个资源会生成两个文件
一个 *.unity3d
一个 .unity3d.manifest
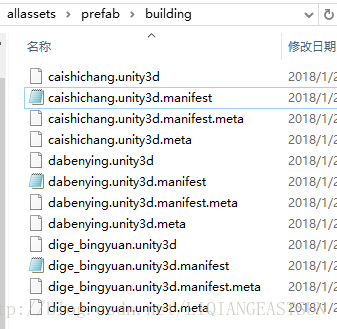
打开一个预设的 .unity3d.manifest
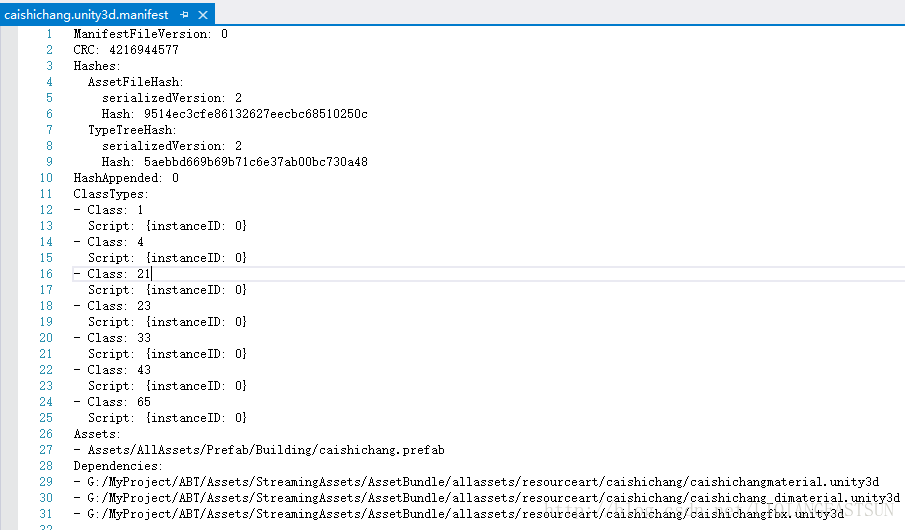
包含一些文件的 Hash 值,
Dependencies:为该资源的直接依赖资源
- G:/MyProject/ABT/Assets/StreamingAssets/AssetBundle/allassets/resourceart/caishichang/caishichangmaterial.unity3d
- G:/MyProject/ABT/Assets/StreamingAssets/AssetBundle/allassets/resourceart/caishichang/caishichang_dimaterial.unity3d
- G:/MyProject/ABT/Assets/StreamingAssets/AssetBundle/allassets/resourceart/caishichang/caishichangfbx.unity3d
该预设上直接关联了
两个材质球 caishichangmaterial.unity3d caishichang_dimaterial.unity3d
一个 Fbx caishichangfbx.unity3d
其实caishichangmaterial.unity3d caishichang_dimaterial.unity3d 还分别依赖他们自己的贴图,但是在此处就不体现出来了,因为材质球依赖的贴图不是 预设直接依赖的资源
为了测试,我将场景也设置了 assetBundleName,打包时会将场景也打包为两个文件
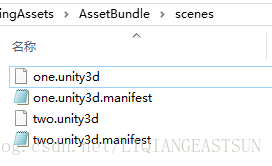
还通过 BuildPipeline.BuildPlayer 将 Two 场景打包,
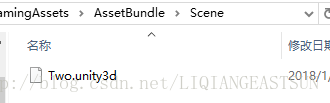
发现只有 一个文件 Two.unity3d
BuildPipeline.BuildPlayer 打包场景,会将整个场景打包为一个文件,不再保留依赖文件,所以不生成 `*.unity3d.manifest`到此Unity5打包 AB 完成,由于篇幅太长,本篇只写了 打包 AB,下篇将完成对 AB 资源的加载


 12万+
12万+

 被折叠的 条评论
为什么被折叠?
被折叠的 条评论
为什么被折叠?
 到【灌水乐园】发言


