


1.查看电脑显卡配置,我的电脑显示的是12.7,因此cuda的配置应该小于12.7,本次部署将采用cuda12.1
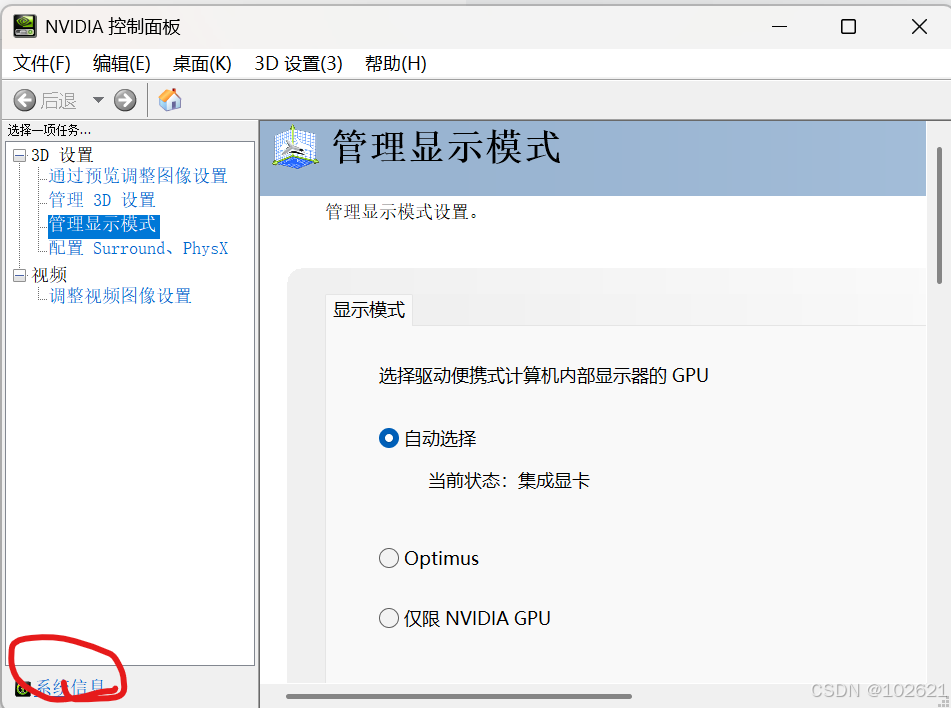
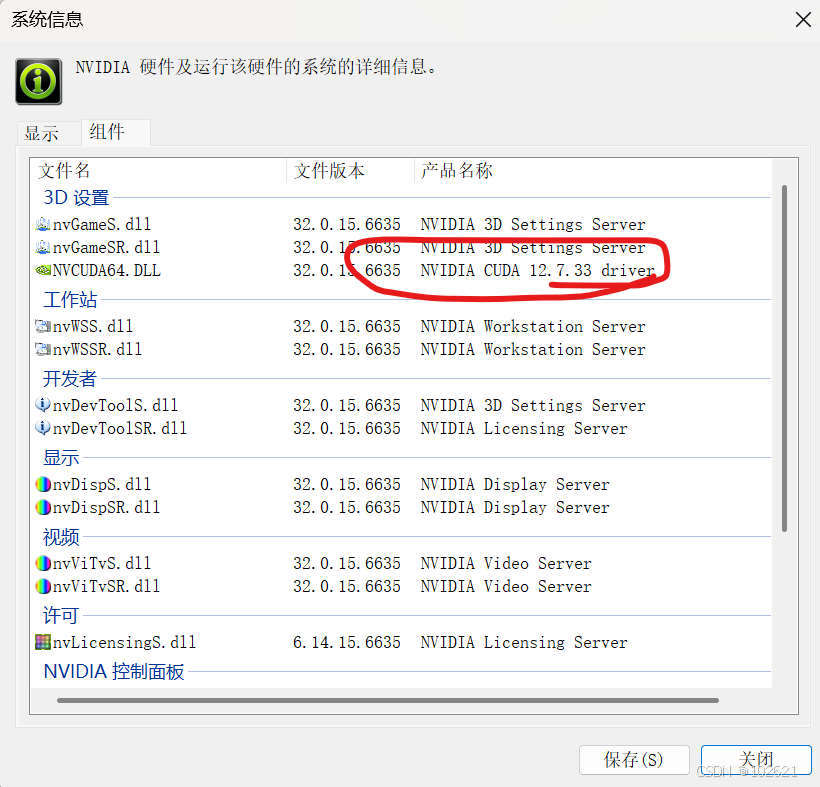
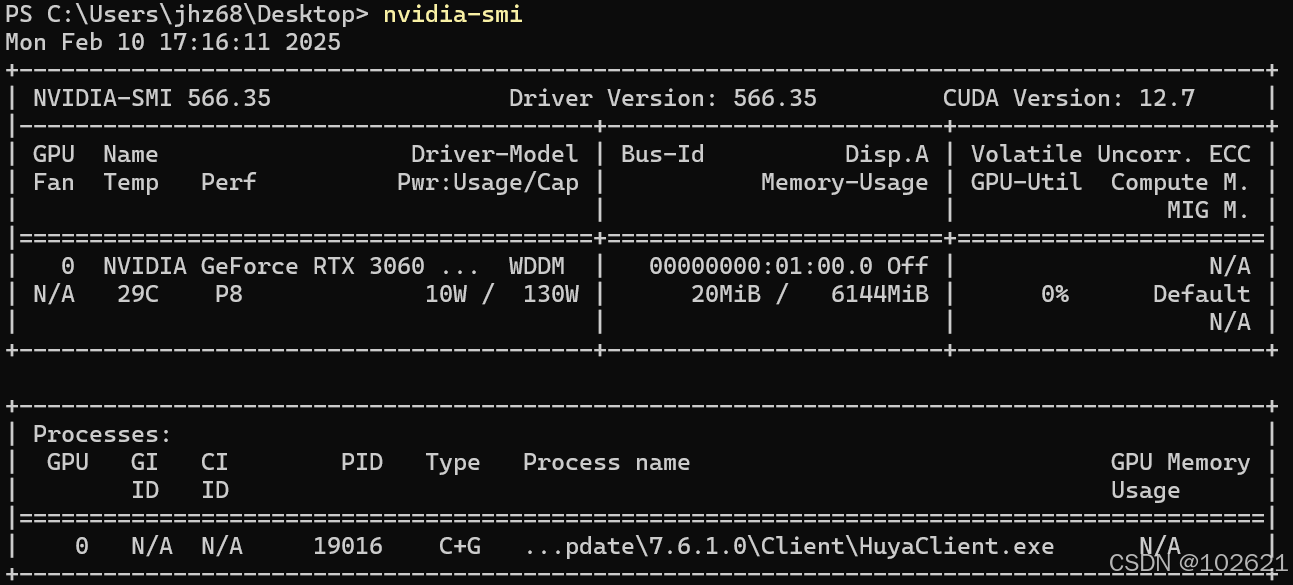
感觉麻烦的也可以直接在终端输入nvidia-smi:
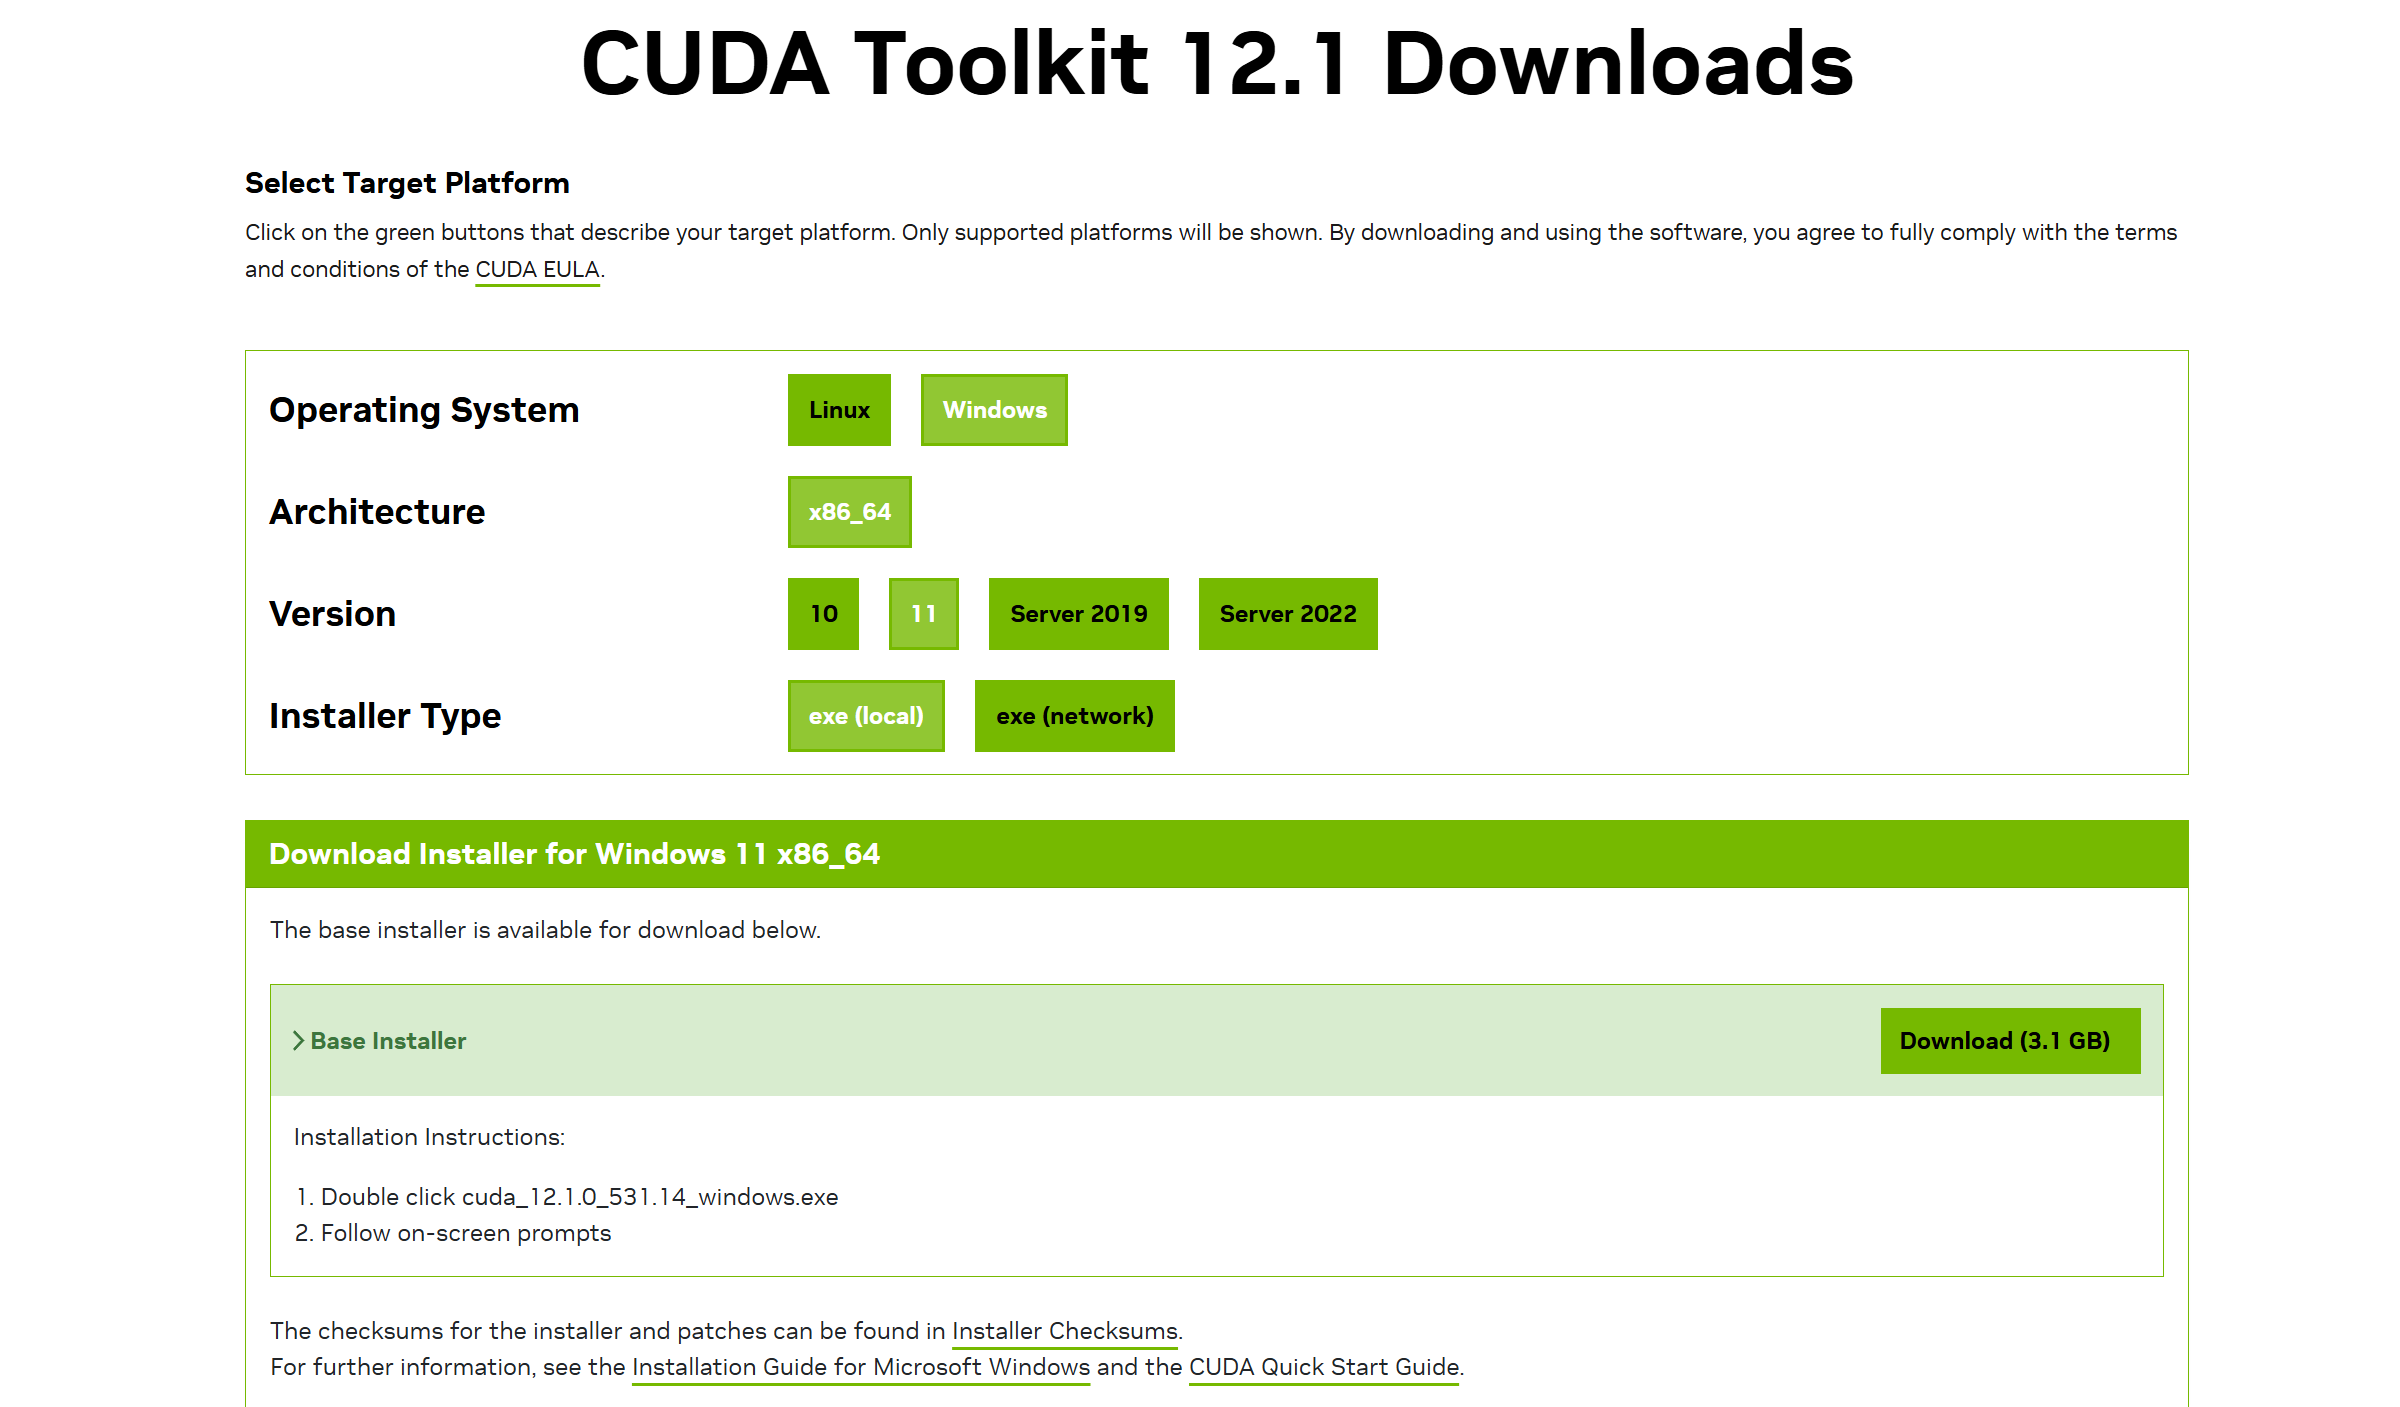
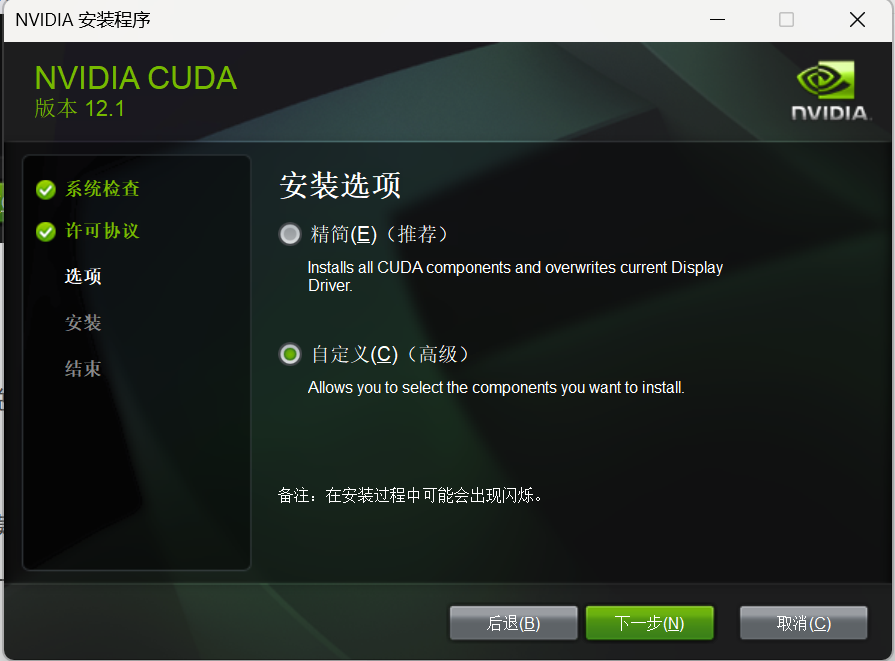
2.安装cuda12.1
链接:CUDA Toolkit 12.6 Update 1 Downloads | NVIDIA DeveloperCUDA Toolkit 12.1 Downloads | NVIDIA DeveloperCUDA Toolkit 12.6 Update 1 Downloads | NVIDIA Developer。下载exe(local),后直接运行exe文件,安装即可。
 点击继续
点击继续
选择下一步
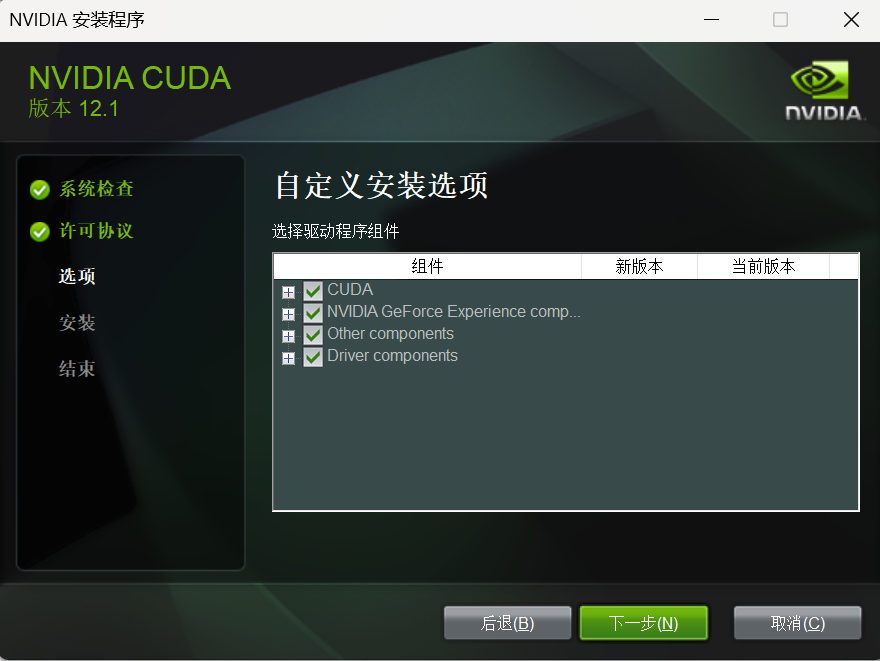
选择下一步,安装路径按照系统默认就行
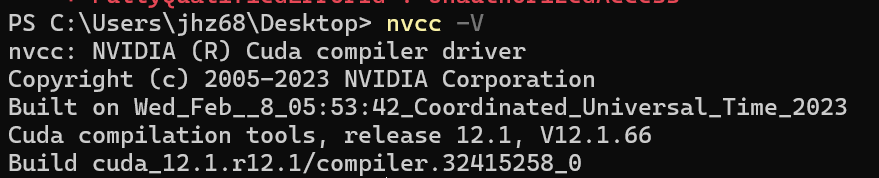
安装完成cuda,在终端输入 nvcc -V 验证是否安装成功,看到如下信息说明安装成功。
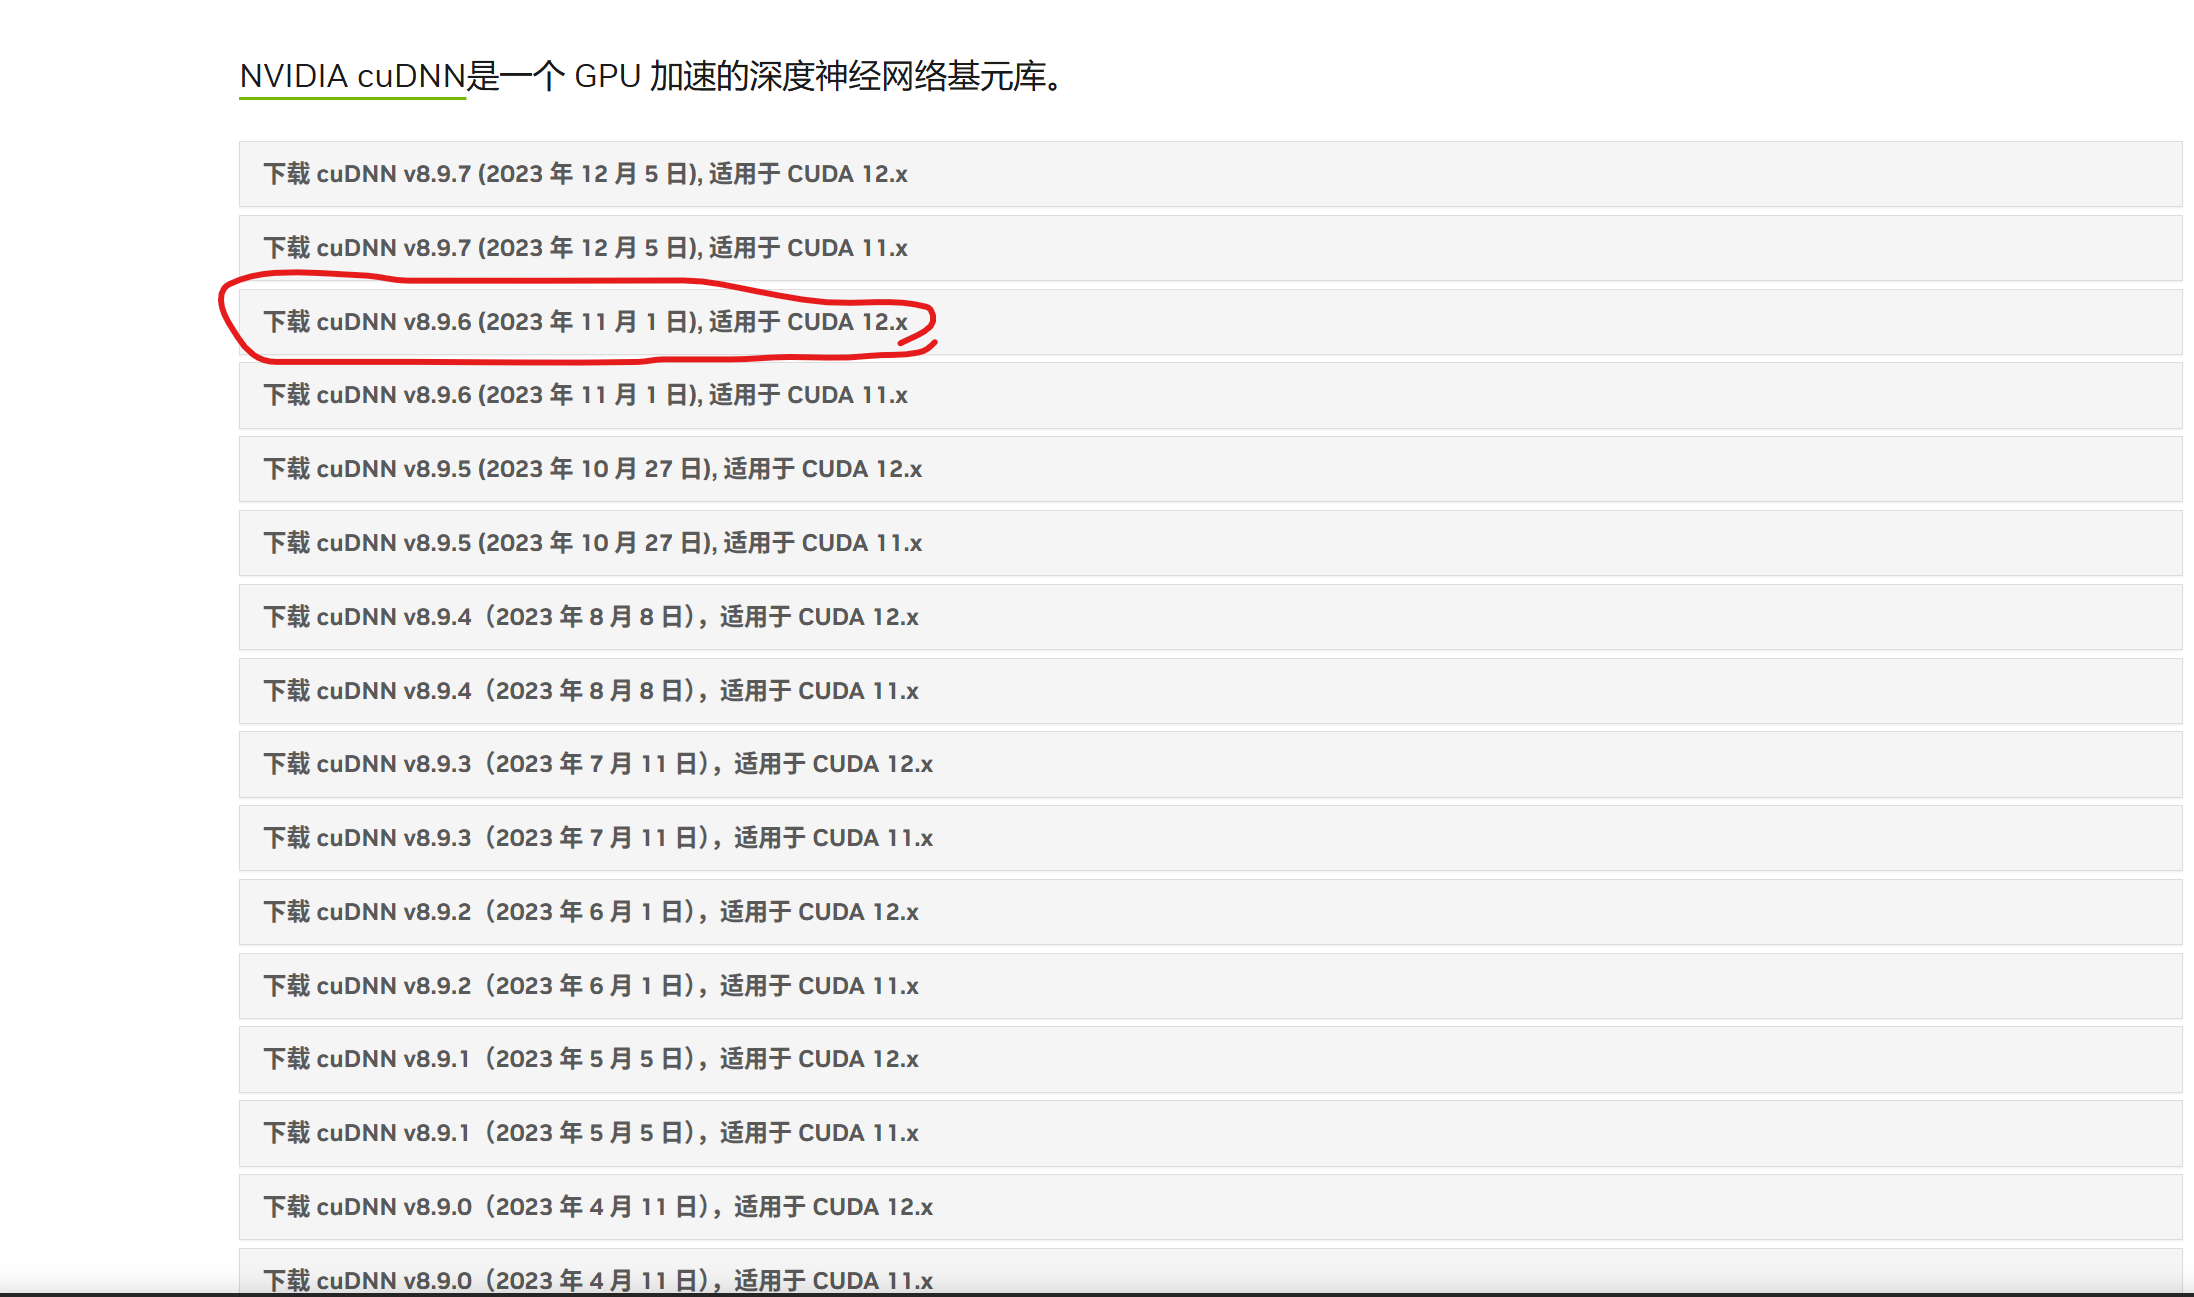
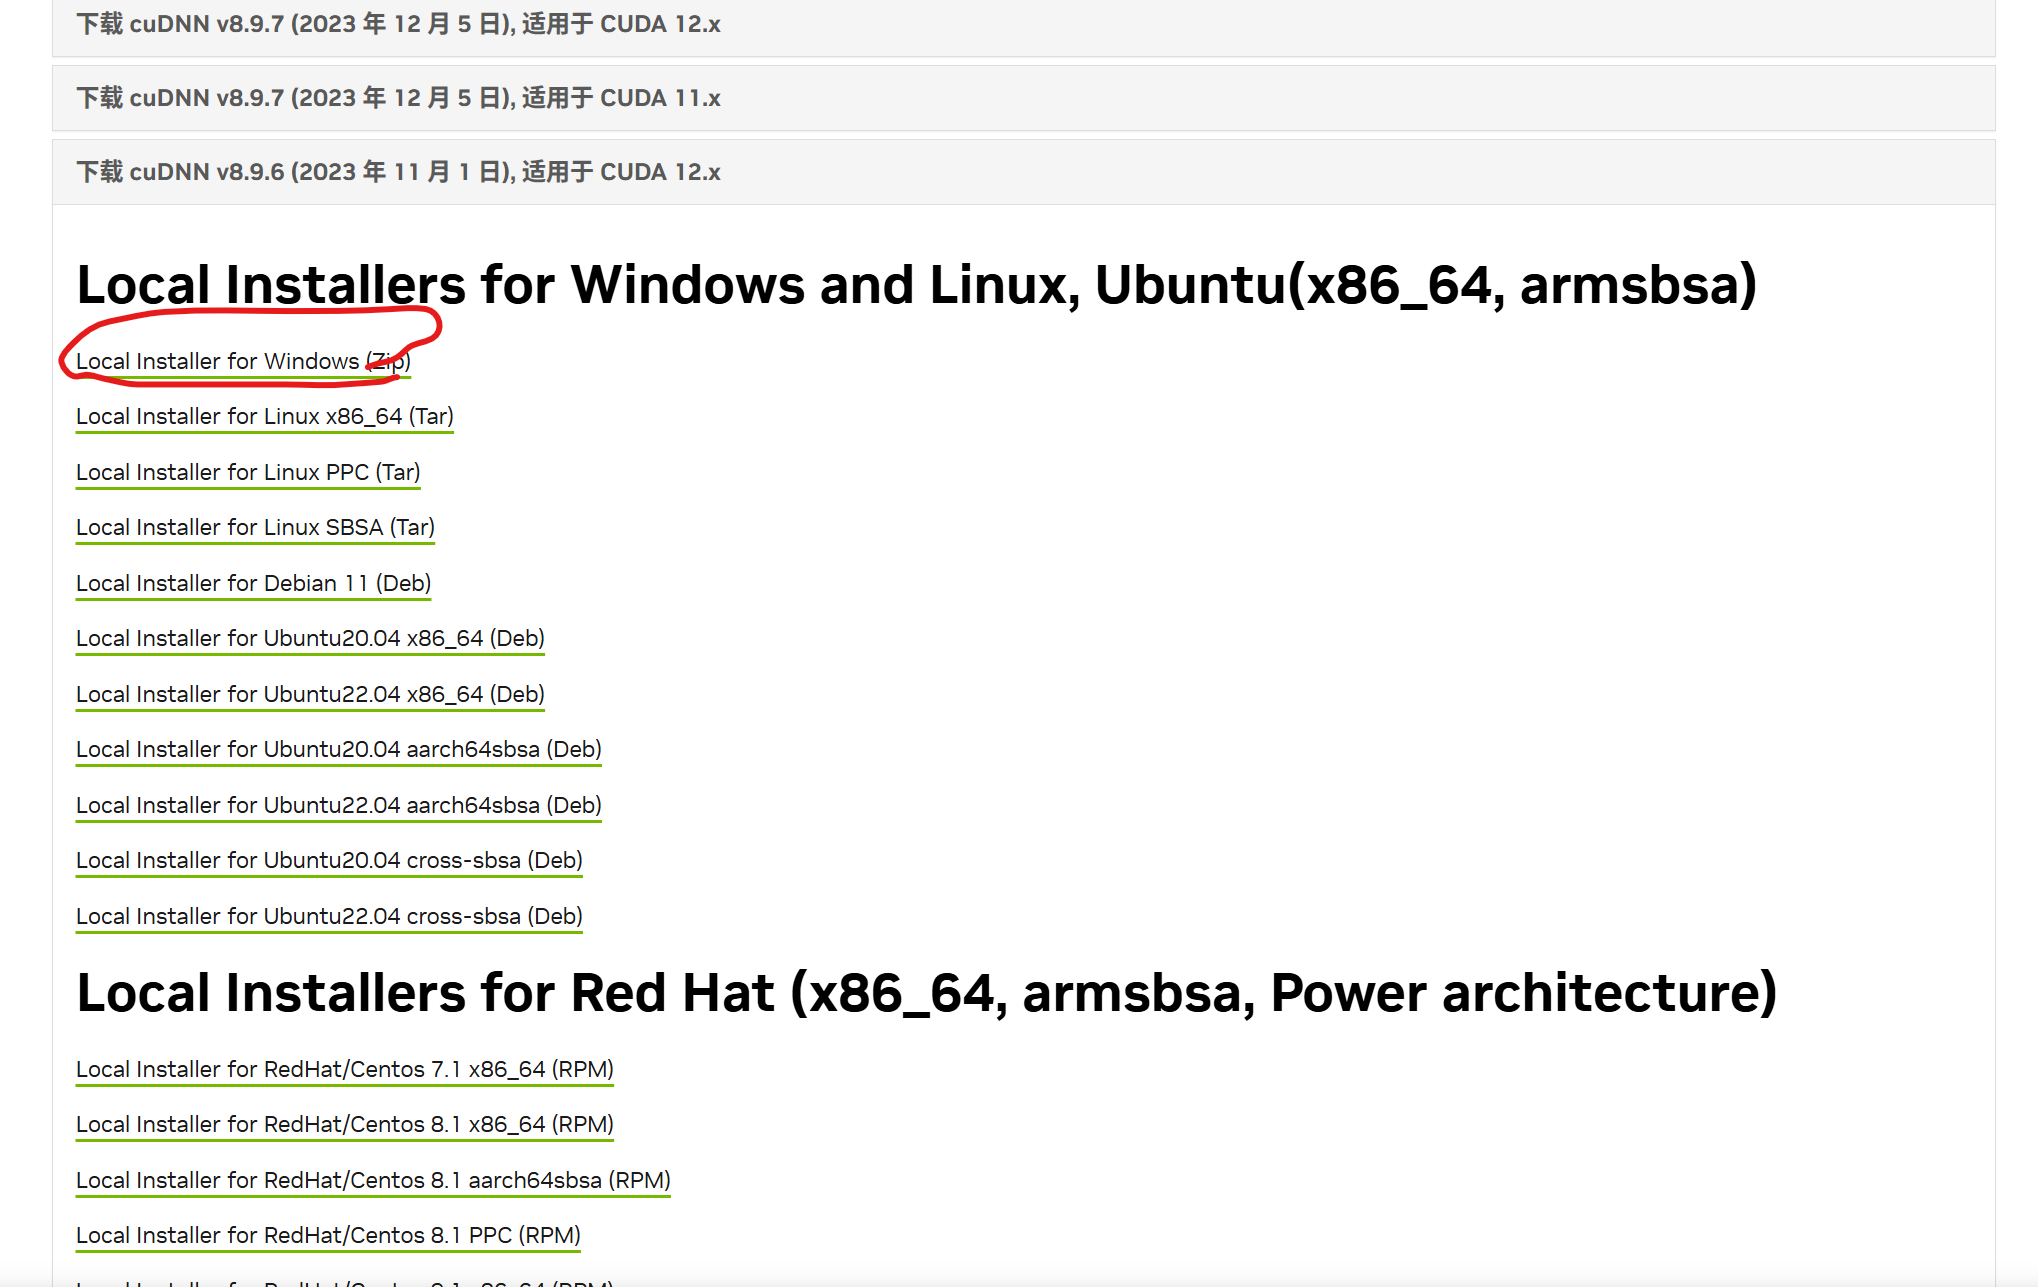
3.安装cudnn8.9.6
介绍:cuDNN提供了高效的算法和优化技巧,可以极大地提升深度学习模型的训练和推理速度。
链接:cuDNN 历史版本 | NVIDIA 开发者。找到对应的cudnn版本,点击下载安装即可,下载完成后,解压到容易找到的路径
4.配置cudnn
将下载好的cudnn文件夹中的include,bin,lib分别放到cuda对应的文件夹中C:\Program Files\NVIDIA GPU Computing Toolkit\CUDA\v12.1。

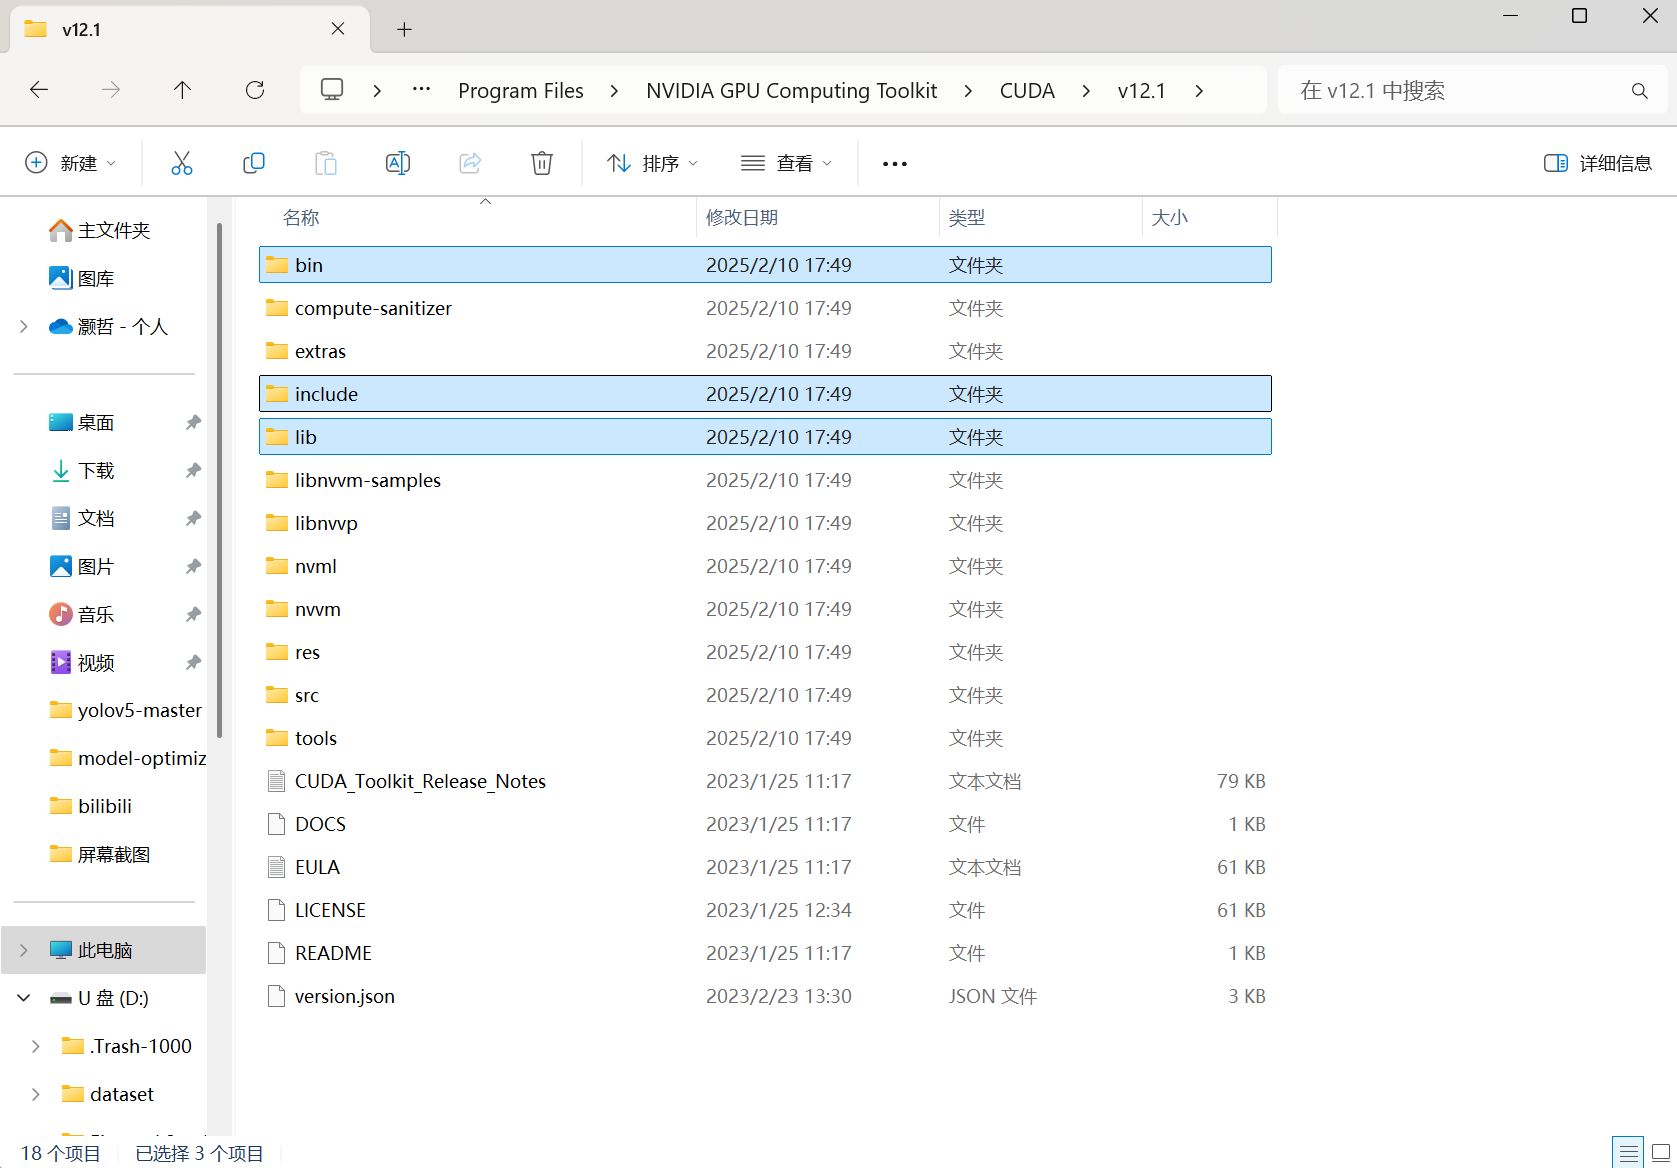
到此已完成cudnn的配置。
5.添加cuda的系统环境变量
在菜单栏中搜索“系统环境变量”
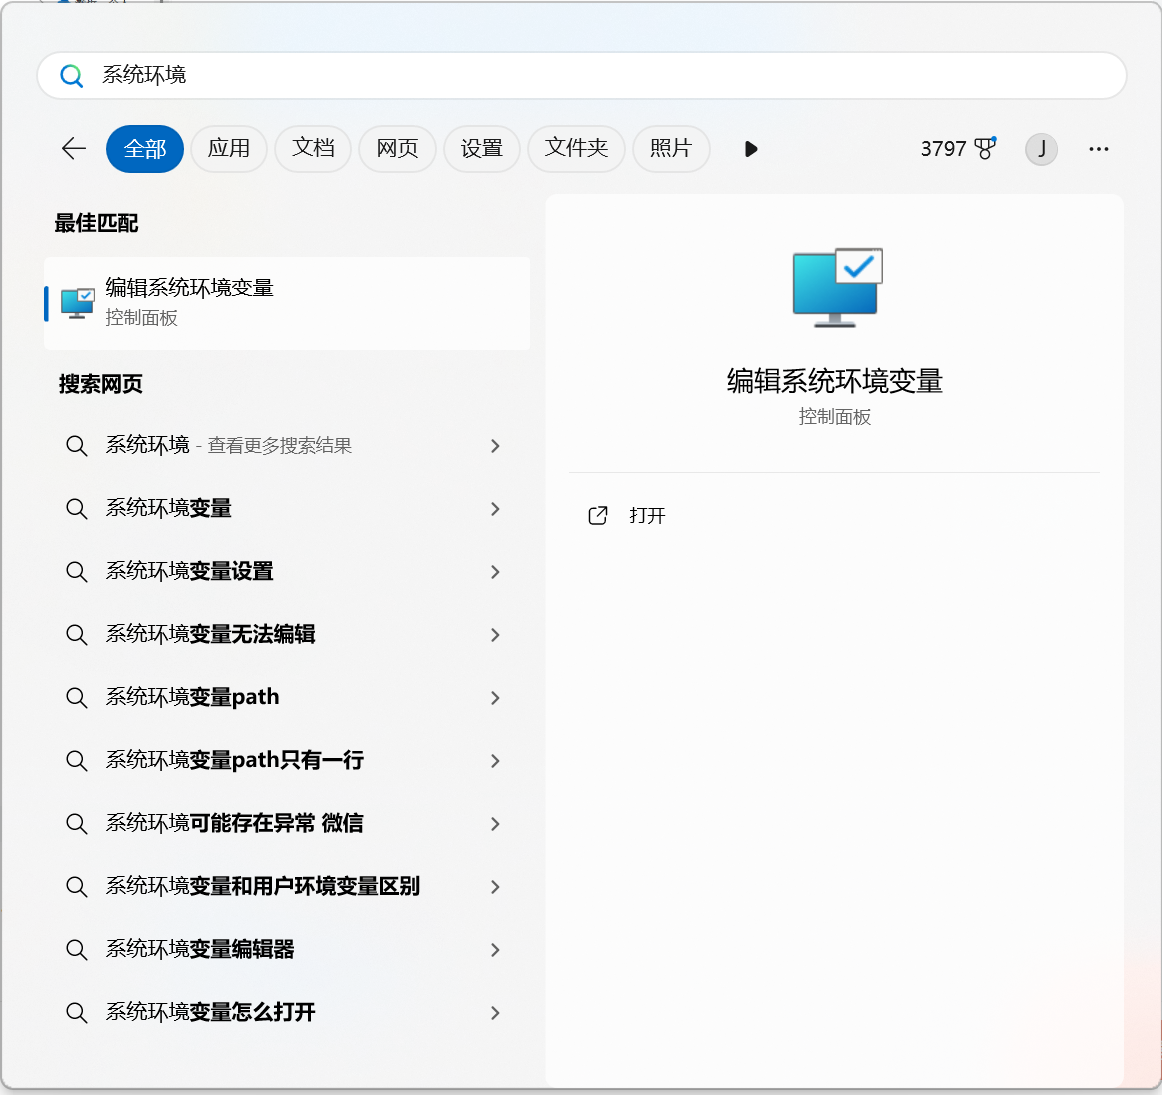
打开后右下角点击环境变量,找到:
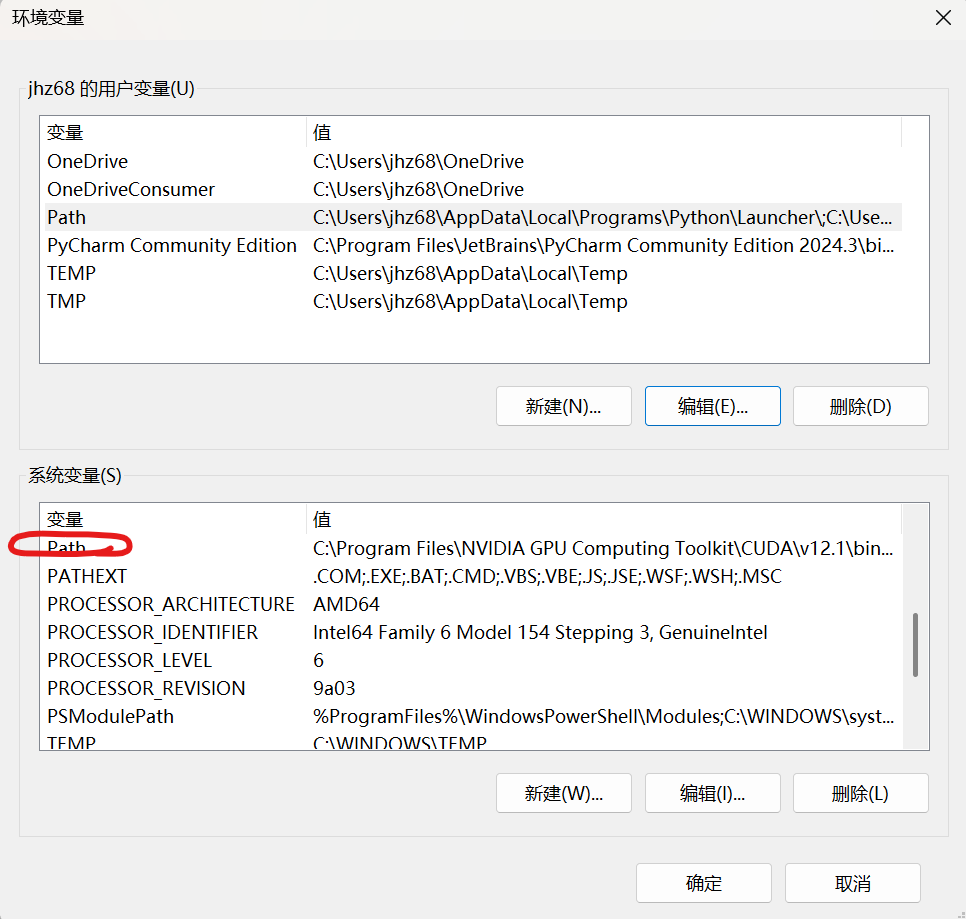
点击编辑
分别插入cuda文件夹中对应的bin和libnvvp路径:
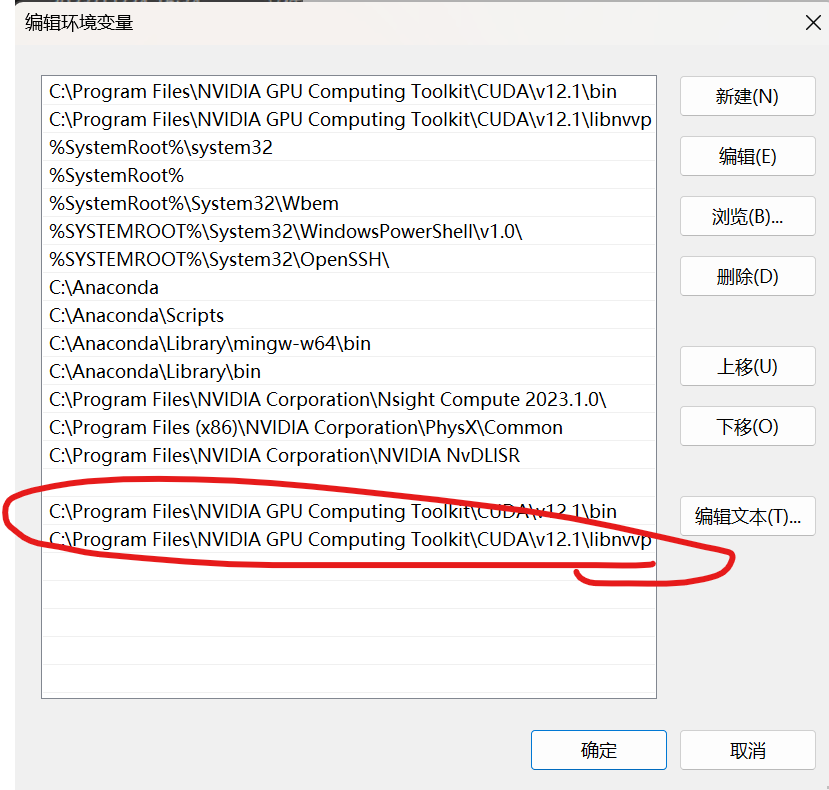
至此,cuda部分配置完毕!
6.安装anaconda并配置系统变量
链接:Index of /anaconda/archive/ | 清华大学开源软件镜像站 | Tsinghua Open Source Mirror
找到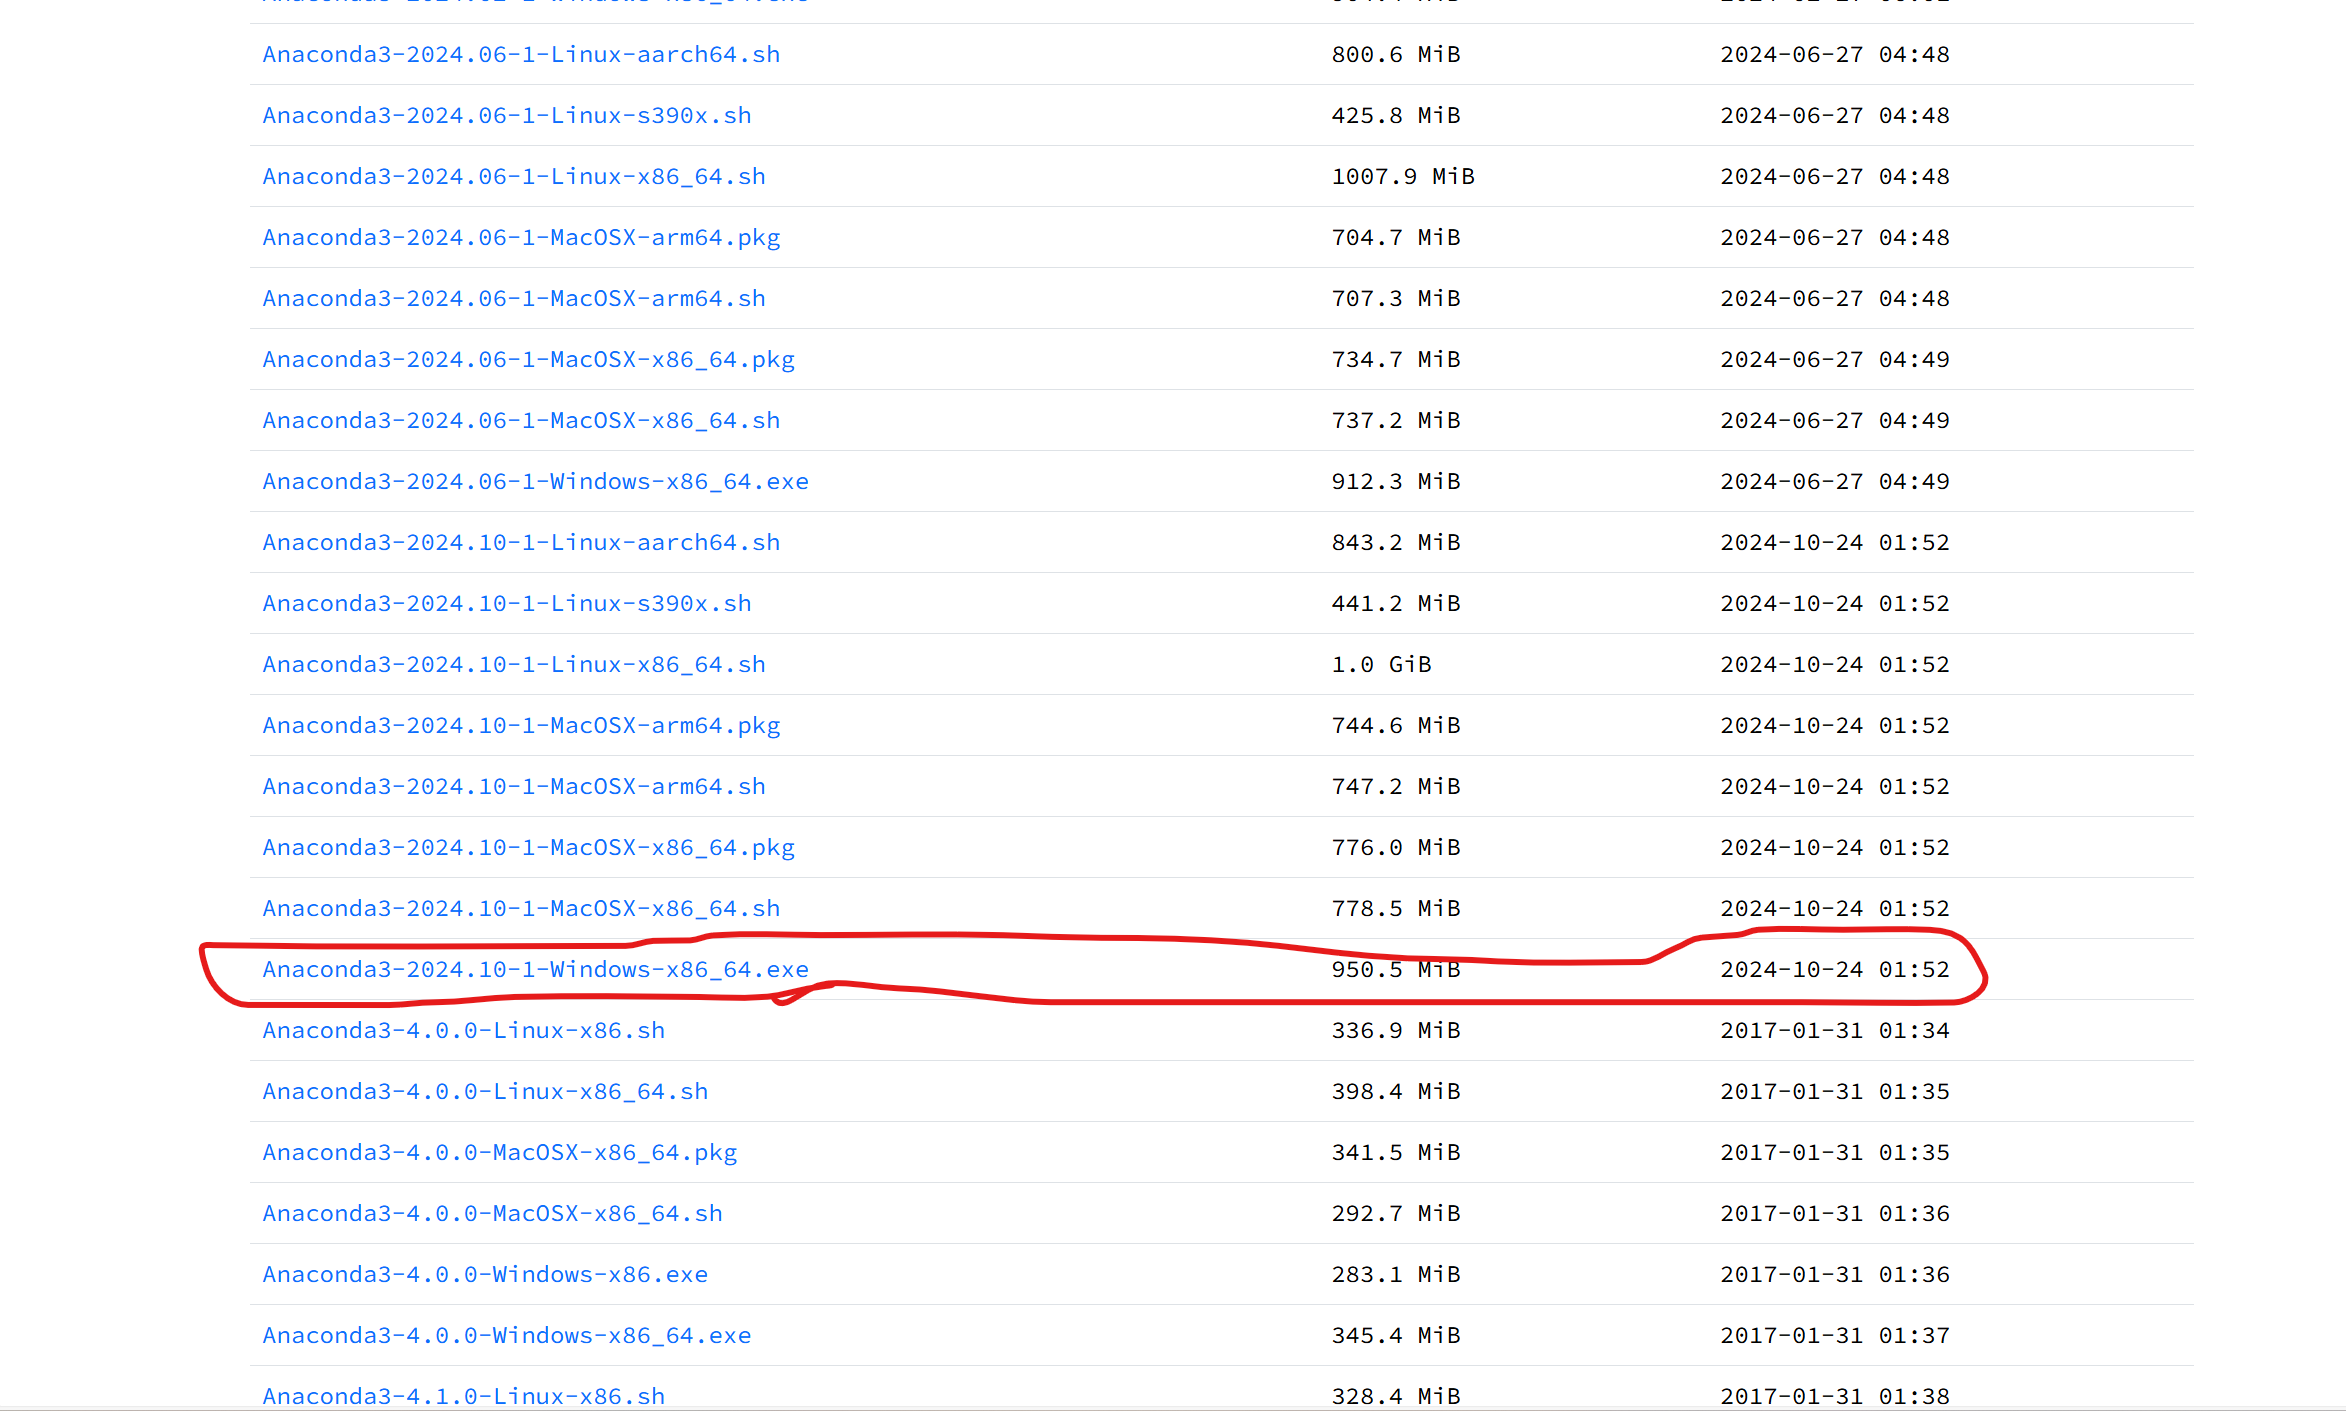
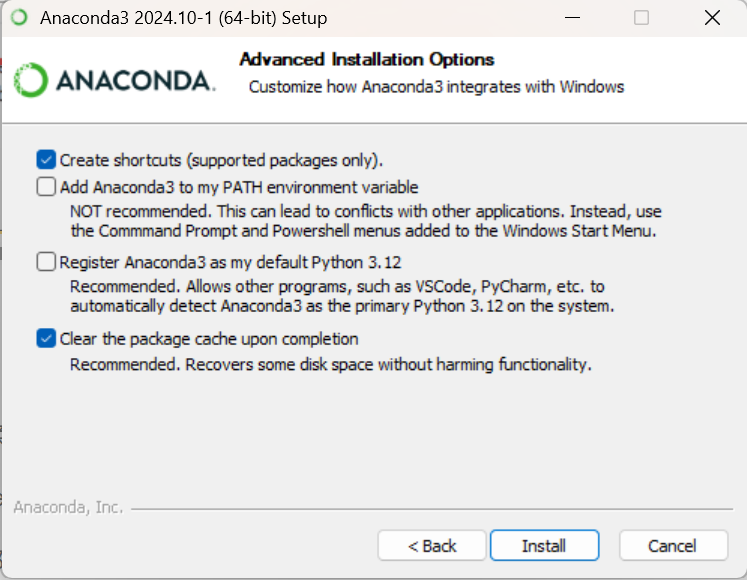
点击安装并下载
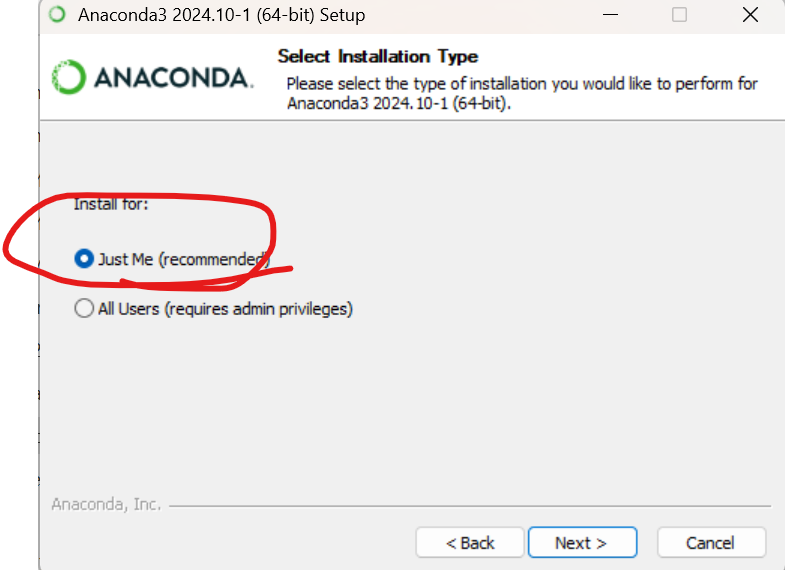
这一步的路径尽量不要使用系统默认,可以单独在C盘或者其他盘建立一个文件夹储存
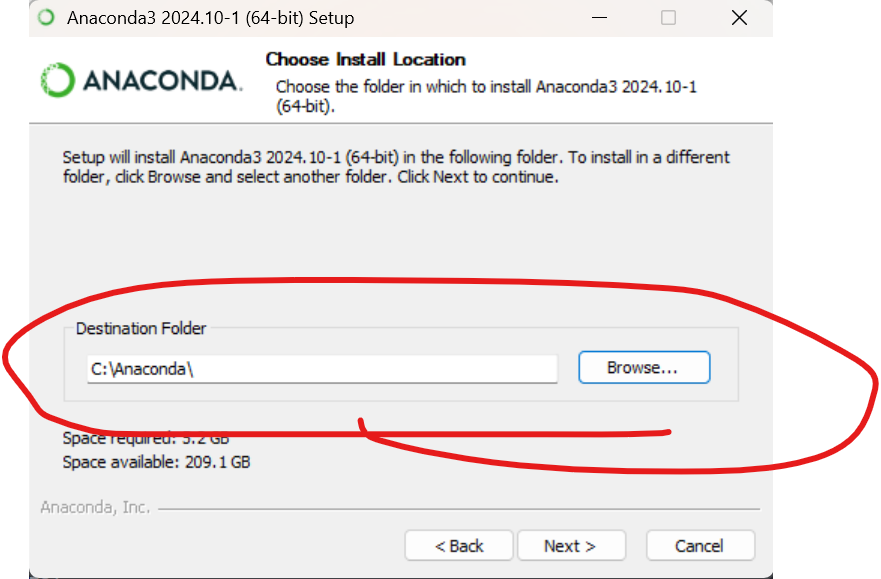
到此,annaconda已经安装好了,接下来进行路径配置
仍然是先找到编辑系统环境变量
打开环境变量,注意,这次是在上面的栏目找到path,点击进行编辑
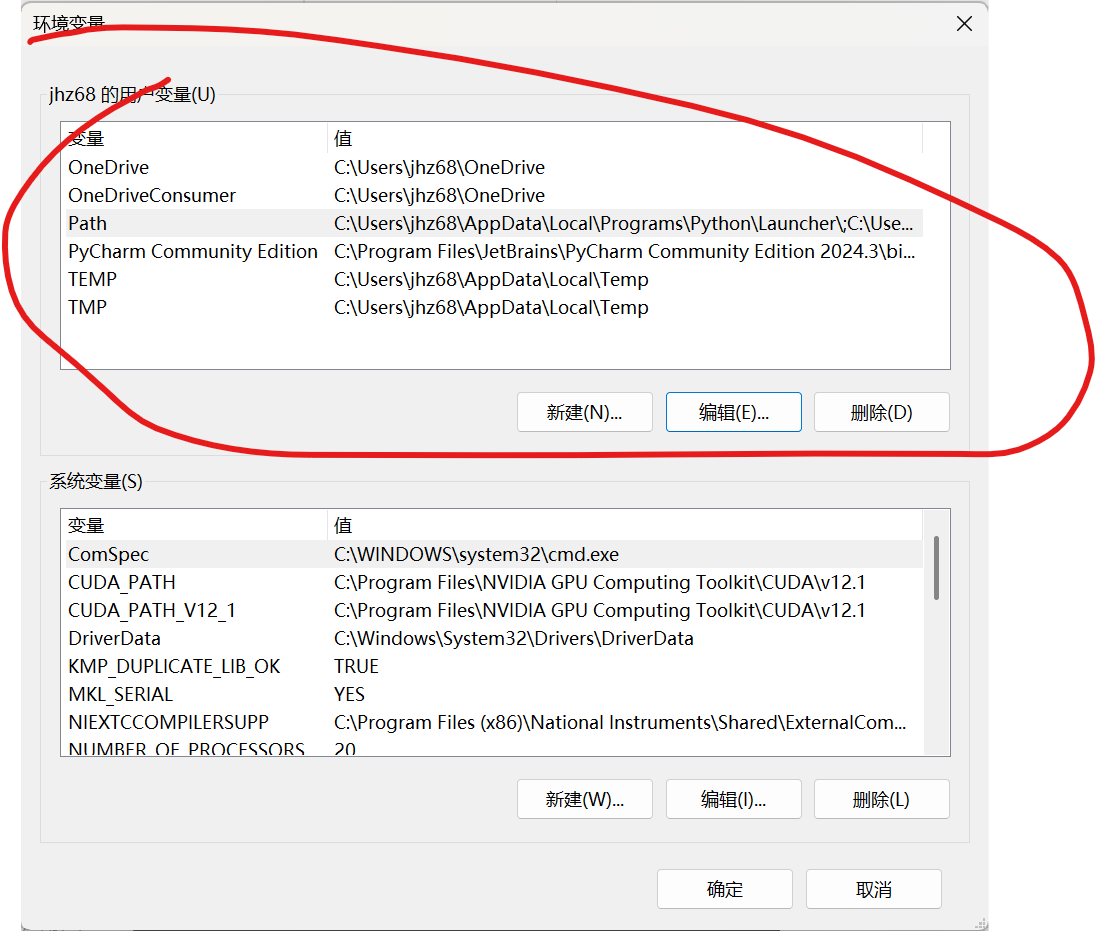
接着分别把anaconda文件中一些指定文件路径放到里面,分别如下:
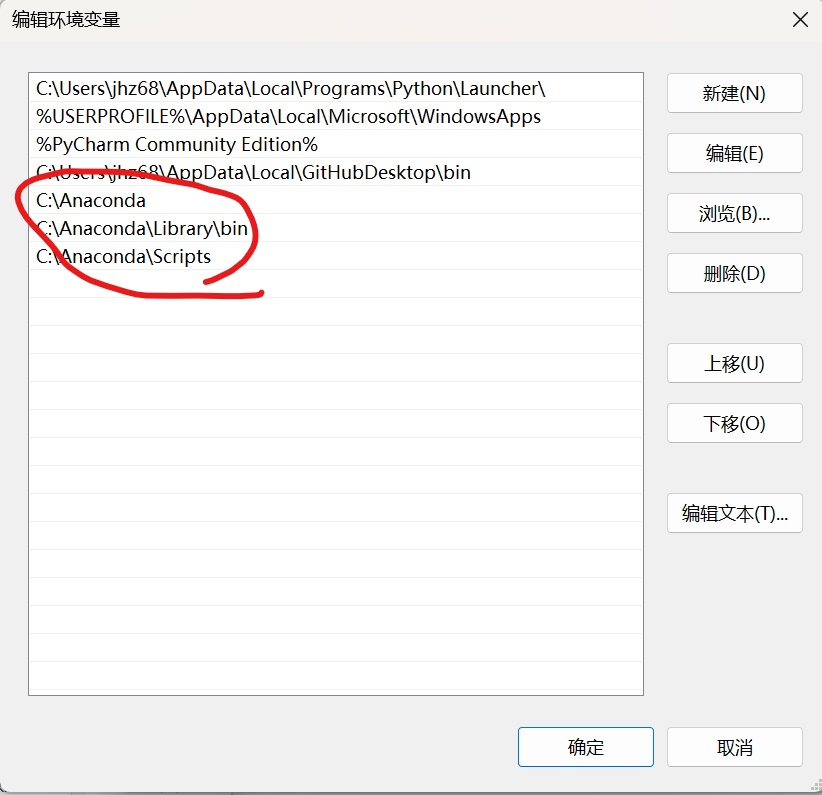
至此,anaconda已经安装完毕
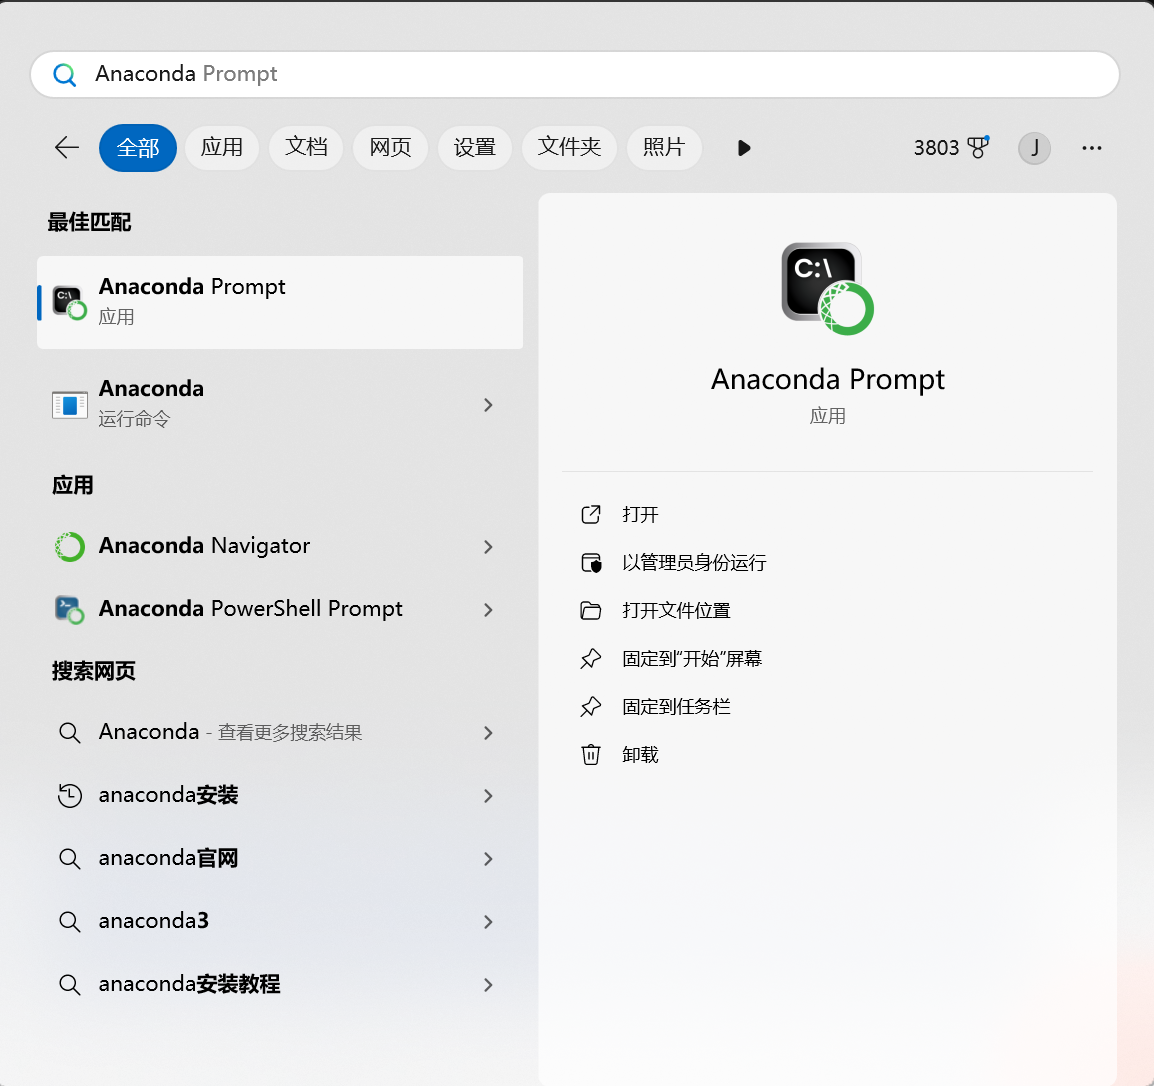
接下来打开菜单栏,找到Anaconda Prompt
接着输入
conda create -n yolov5 python=3.12.7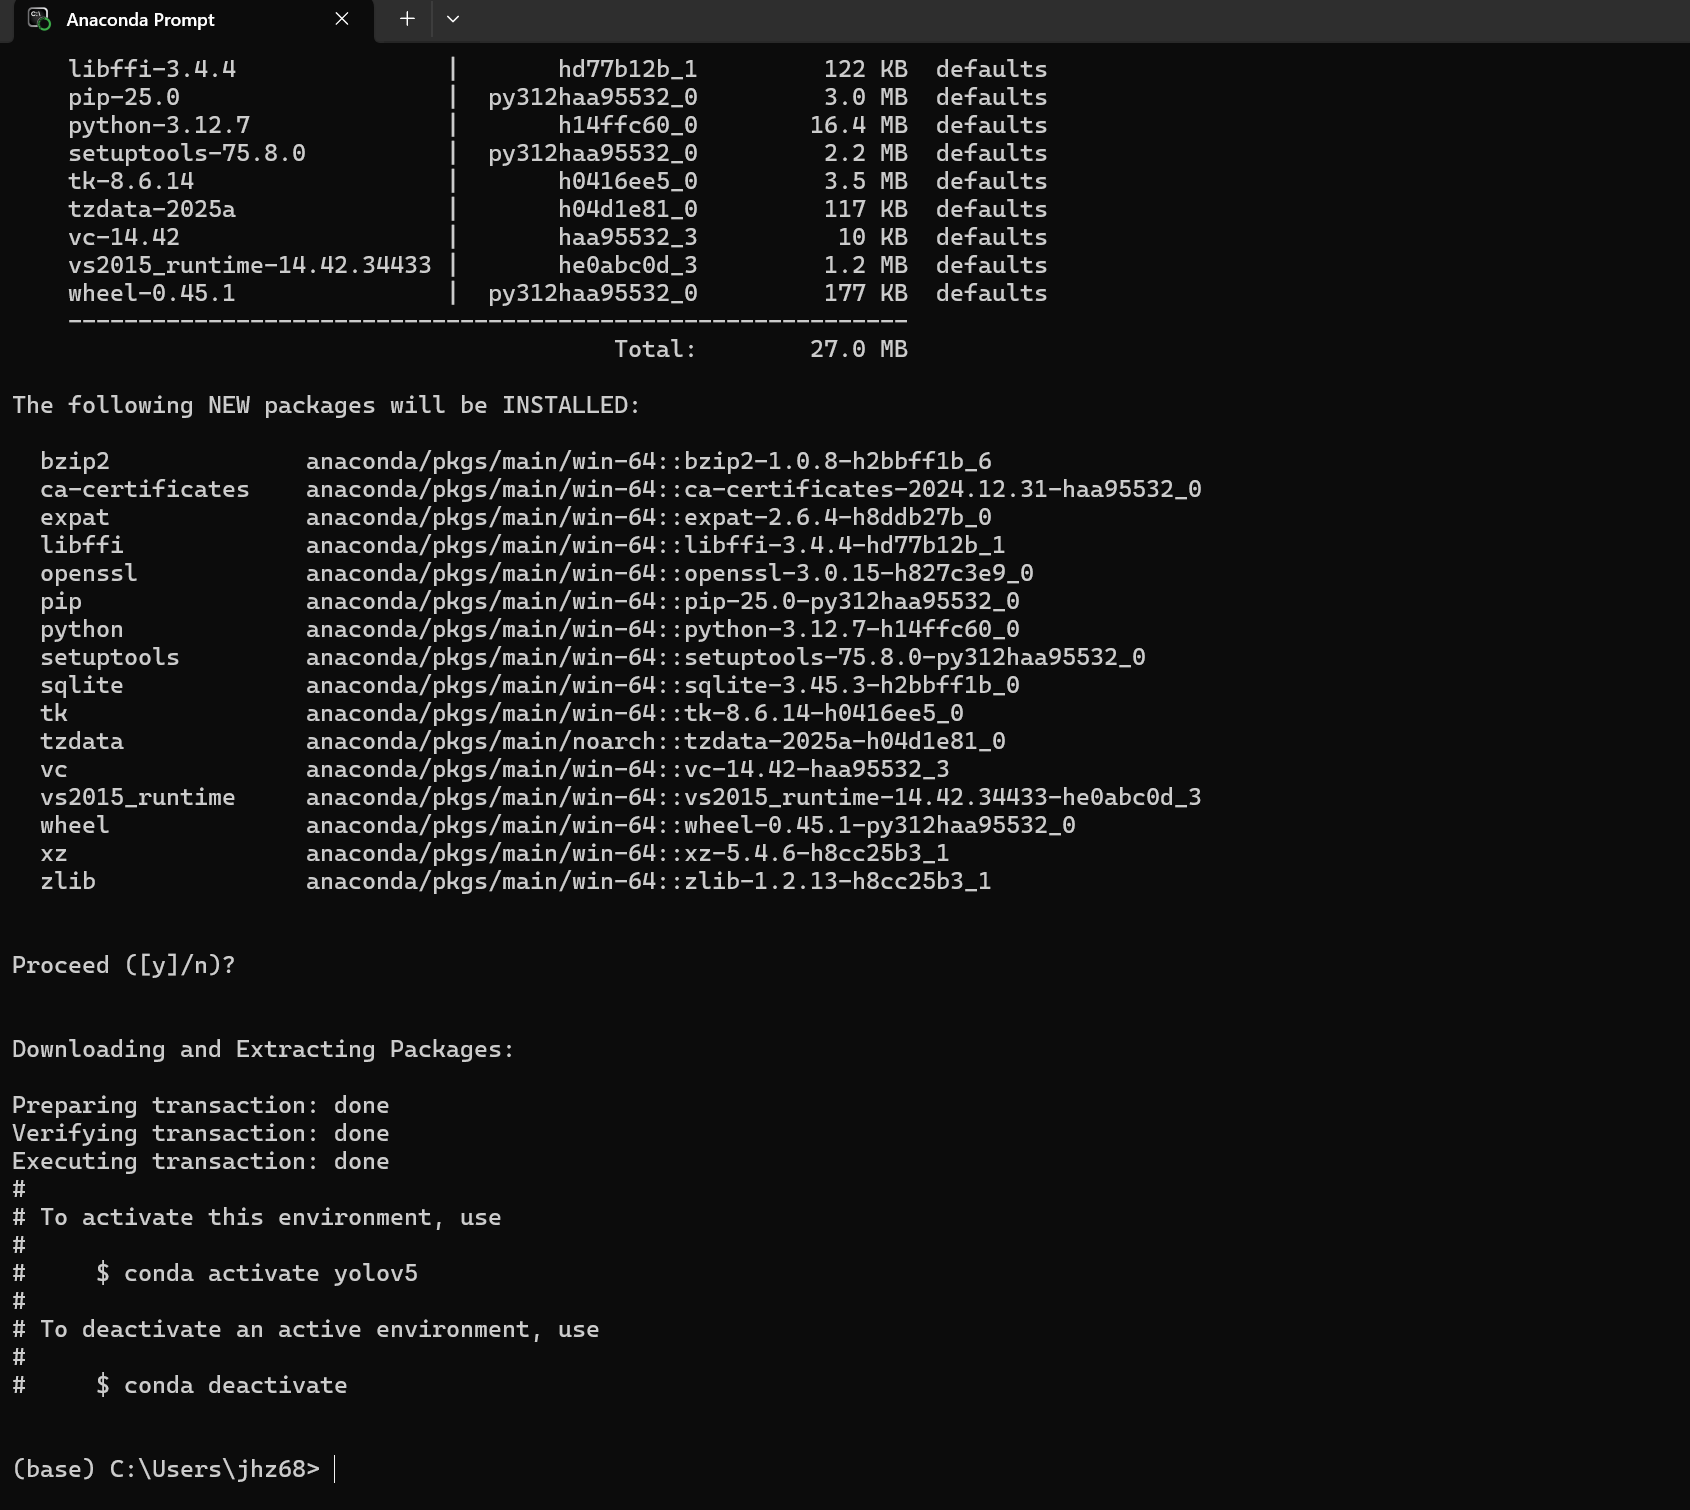
接着输入
conda activate yolov5
7.安装pycharm
教程链接:PyCharm下载、安装及相关配置(Windows 11)详细教程_windows11支持pycharm-CSDN博客
8.下载Pytorch
在此之前需要更换通道,使下载速度更快。
1.在此路径C:\Users\jhz68(不同的电脑路径有点差异)找到.condarc文件并以txt形式编辑
2.将如下代码全部复制进该文件:
channels:
  - defaults

show_channel_urls: true

default_channels:
  - https://mirrors.tuna.tsinghua.edu.cn/anaconda/pkgs/main
  - https://mirrors.tuna.tsinghua.edu.cn/anaconda/pkgs/r
  - https://mirrors.tuna.tsinghua.edu.cn/anaconda/pkgs/msys2
custom_channels:
  conda-forge: https://mirrors.tuna.tsinghua.edu.cn/anaconda/cloud
  msys2: https://mirrors.tuna.tsinghua.edu.cn/anaconda/cloud
  bioconda: https://mirrors.tuna.tsinghua.edu.cn/anaconda/cloud
  menpo: https://mirrors.tuna.tsinghua.edu.cn/anaconda/cloud
  pytorch: https://mirrors.tuna.tsinghua.edu.cn/anaconda/cloud
  simpleitk: https://mirrors.tuna.tsinghua.edu.cn/anaconda/cloud`
然后开始安装pytorch
链接:PyTorch。往下翻:
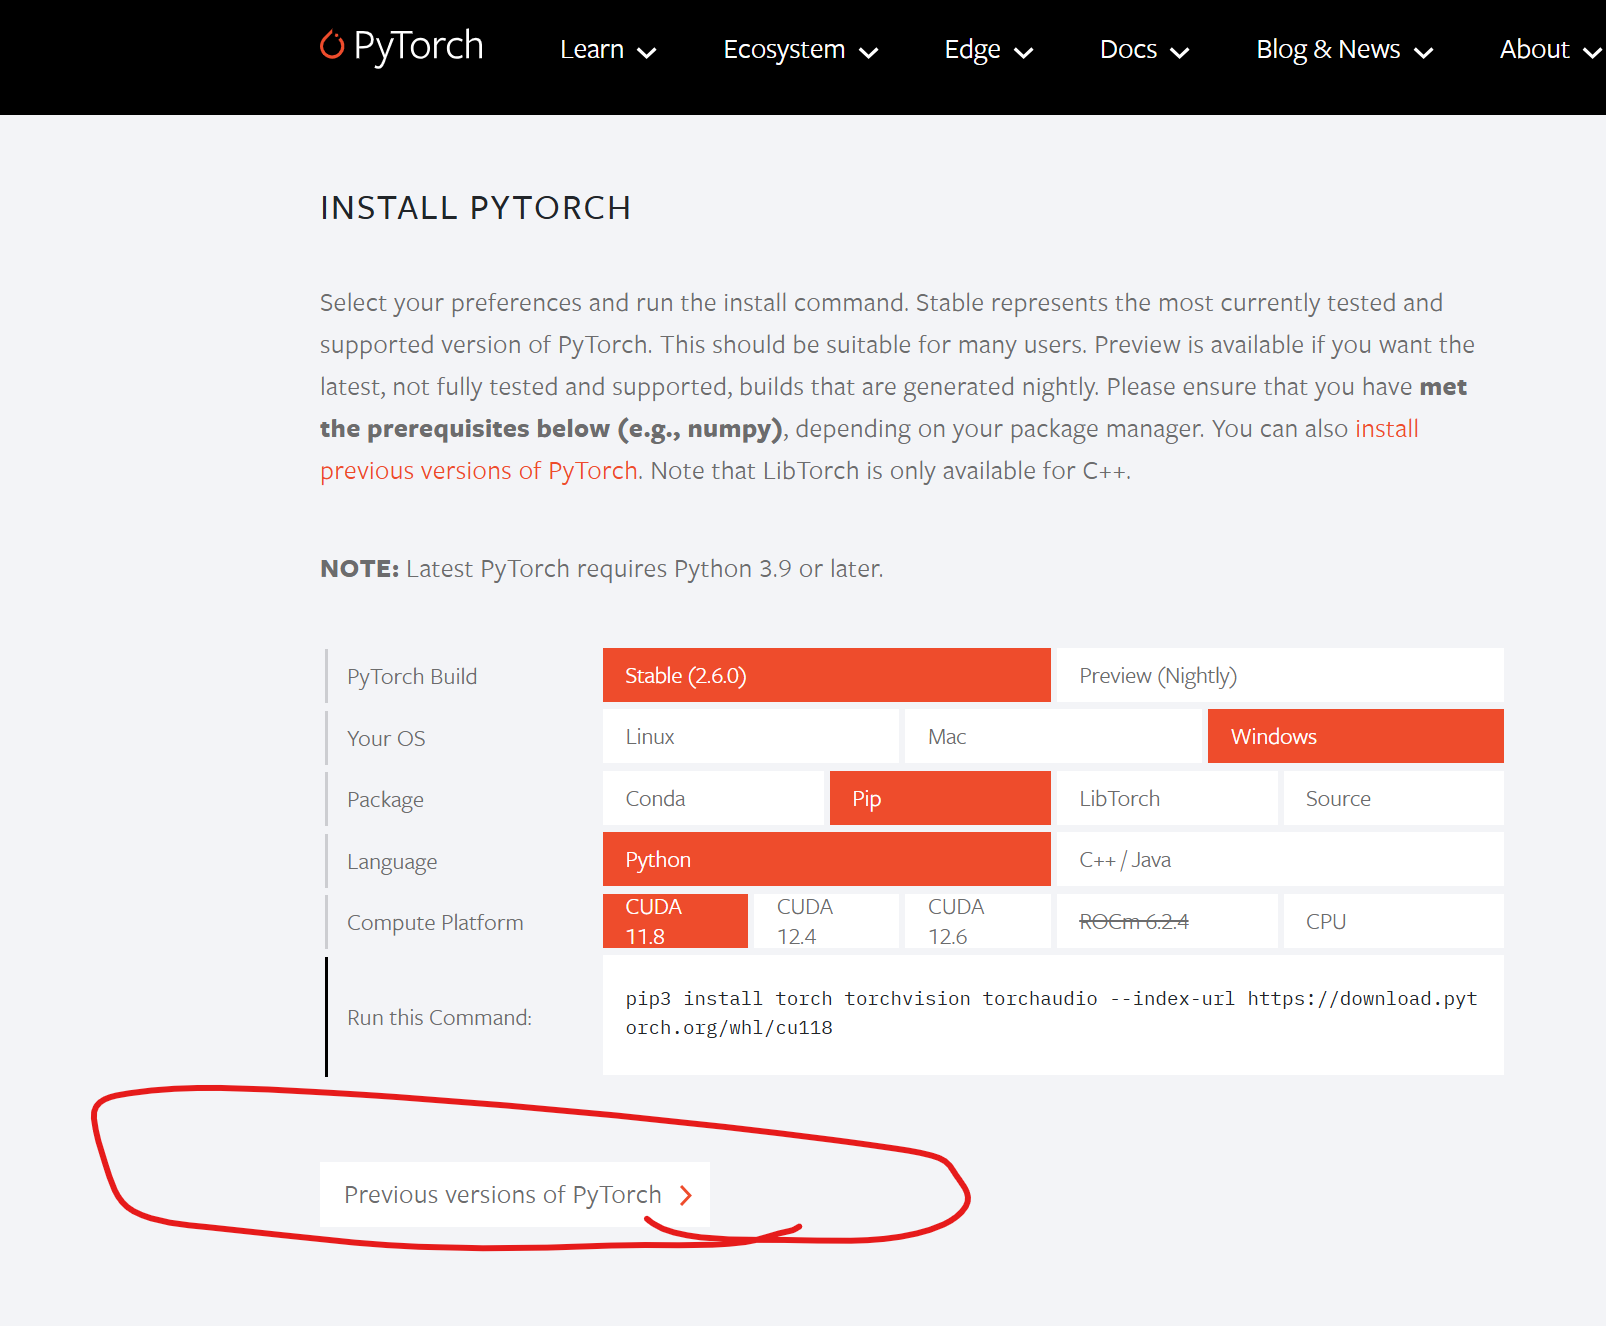
因为我之前安装的是cuda12.1和cudnn8.9.6,所以接下来需要找到对应的版本:
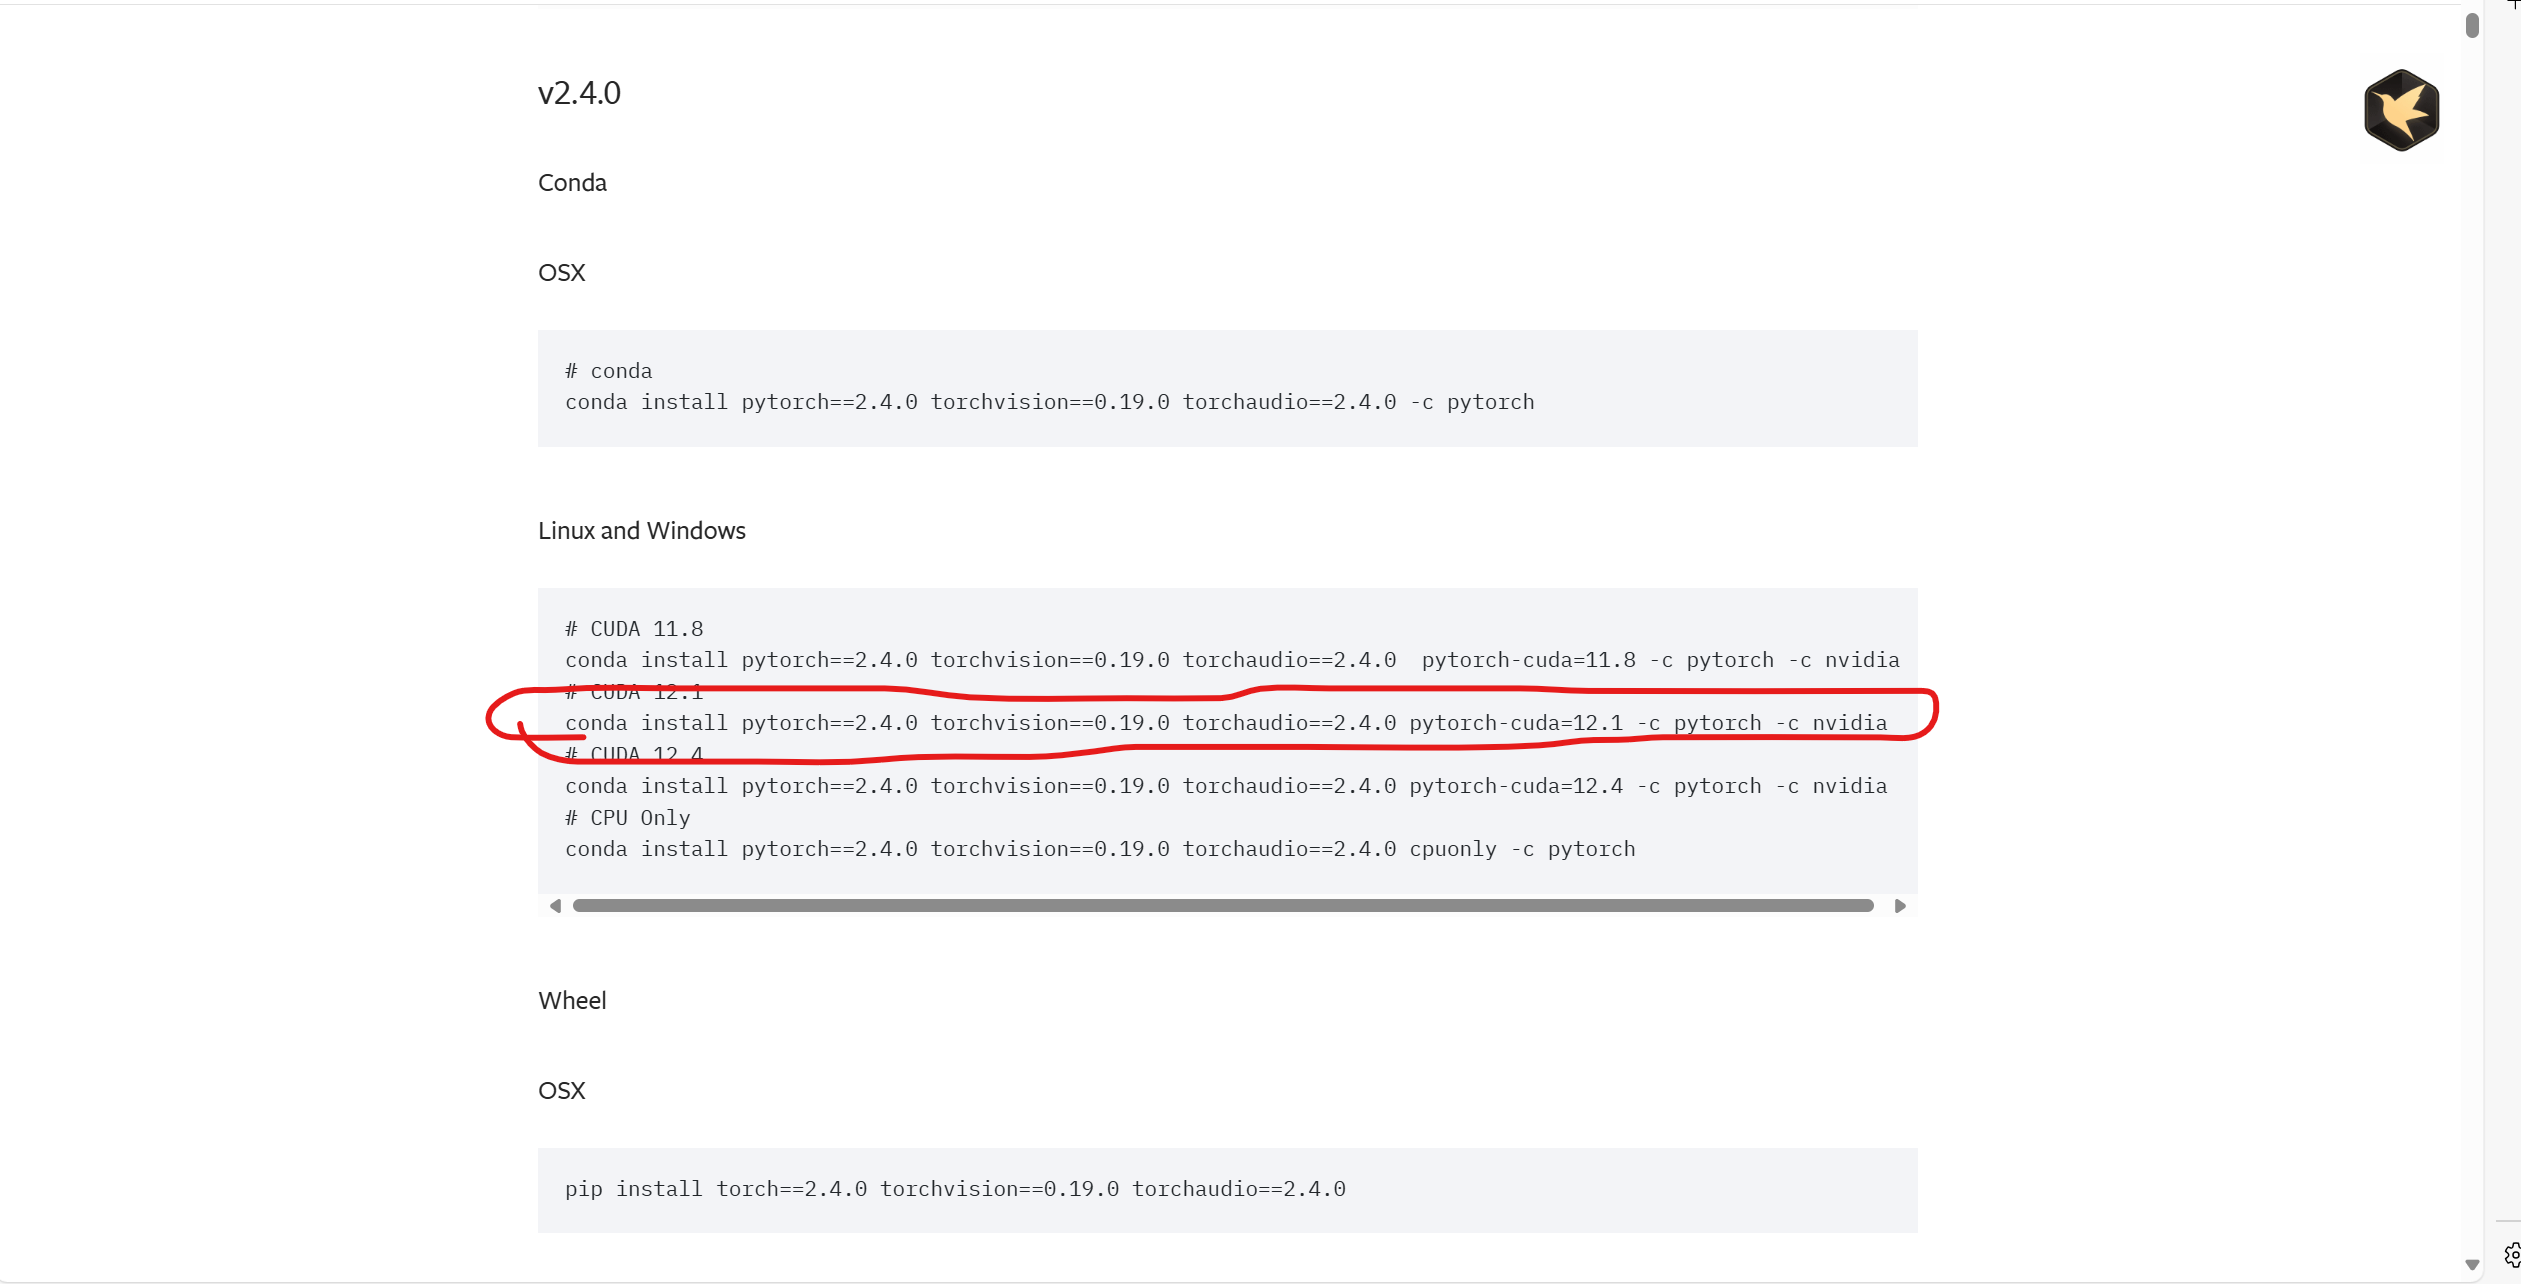
复制粘贴,并在Anaconda prompt运行:
conda install pytorch==2.4.0 torchvision==0.19.0 torchaudio==2.4.0 pytorch-cuda=12.1 -c pytorch -c nvidia 需要等待一会儿
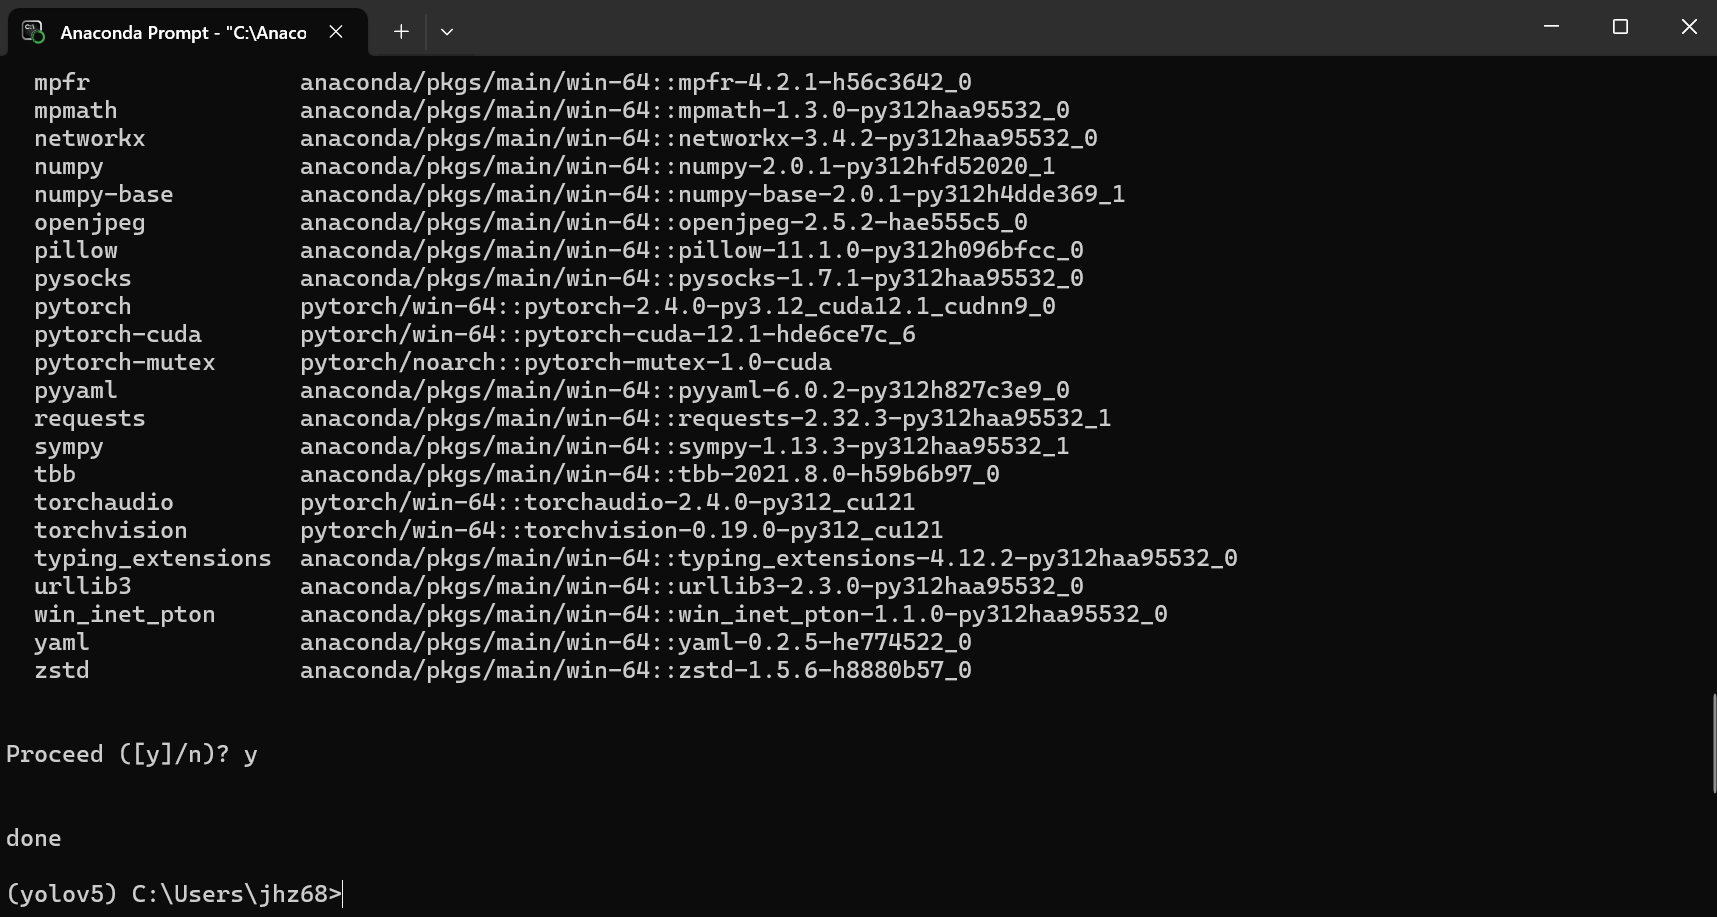
完成!
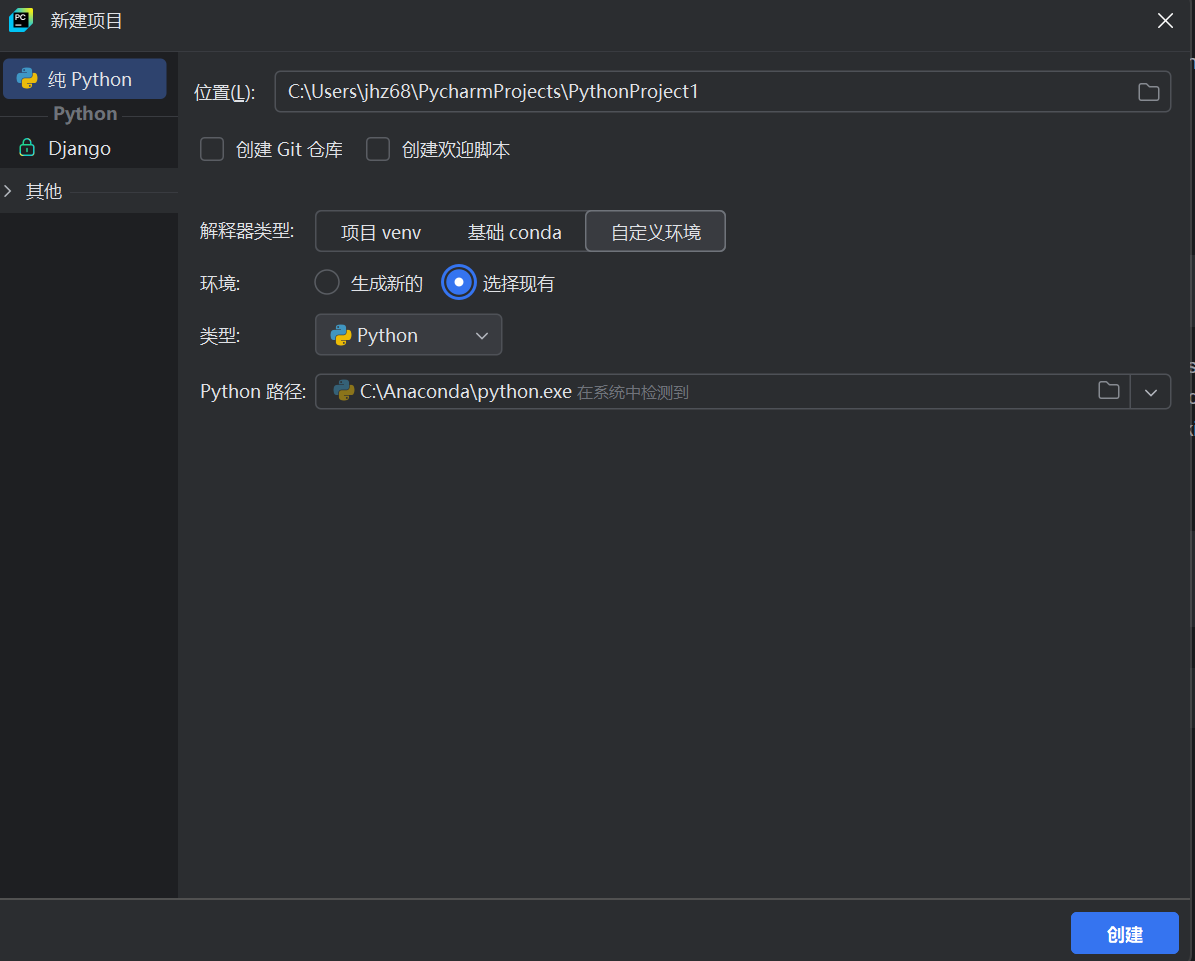
9.部署yolov5
首先打开pycharm,新建项目,如下图所示,找到下载好的anaconda文件夹中python路径,接着点击创建
找到yolov5官方文件
链接:ultralytics/yolov5: YOLOv5 🚀 in PyTorch > ONNX > CoreML > TFLite
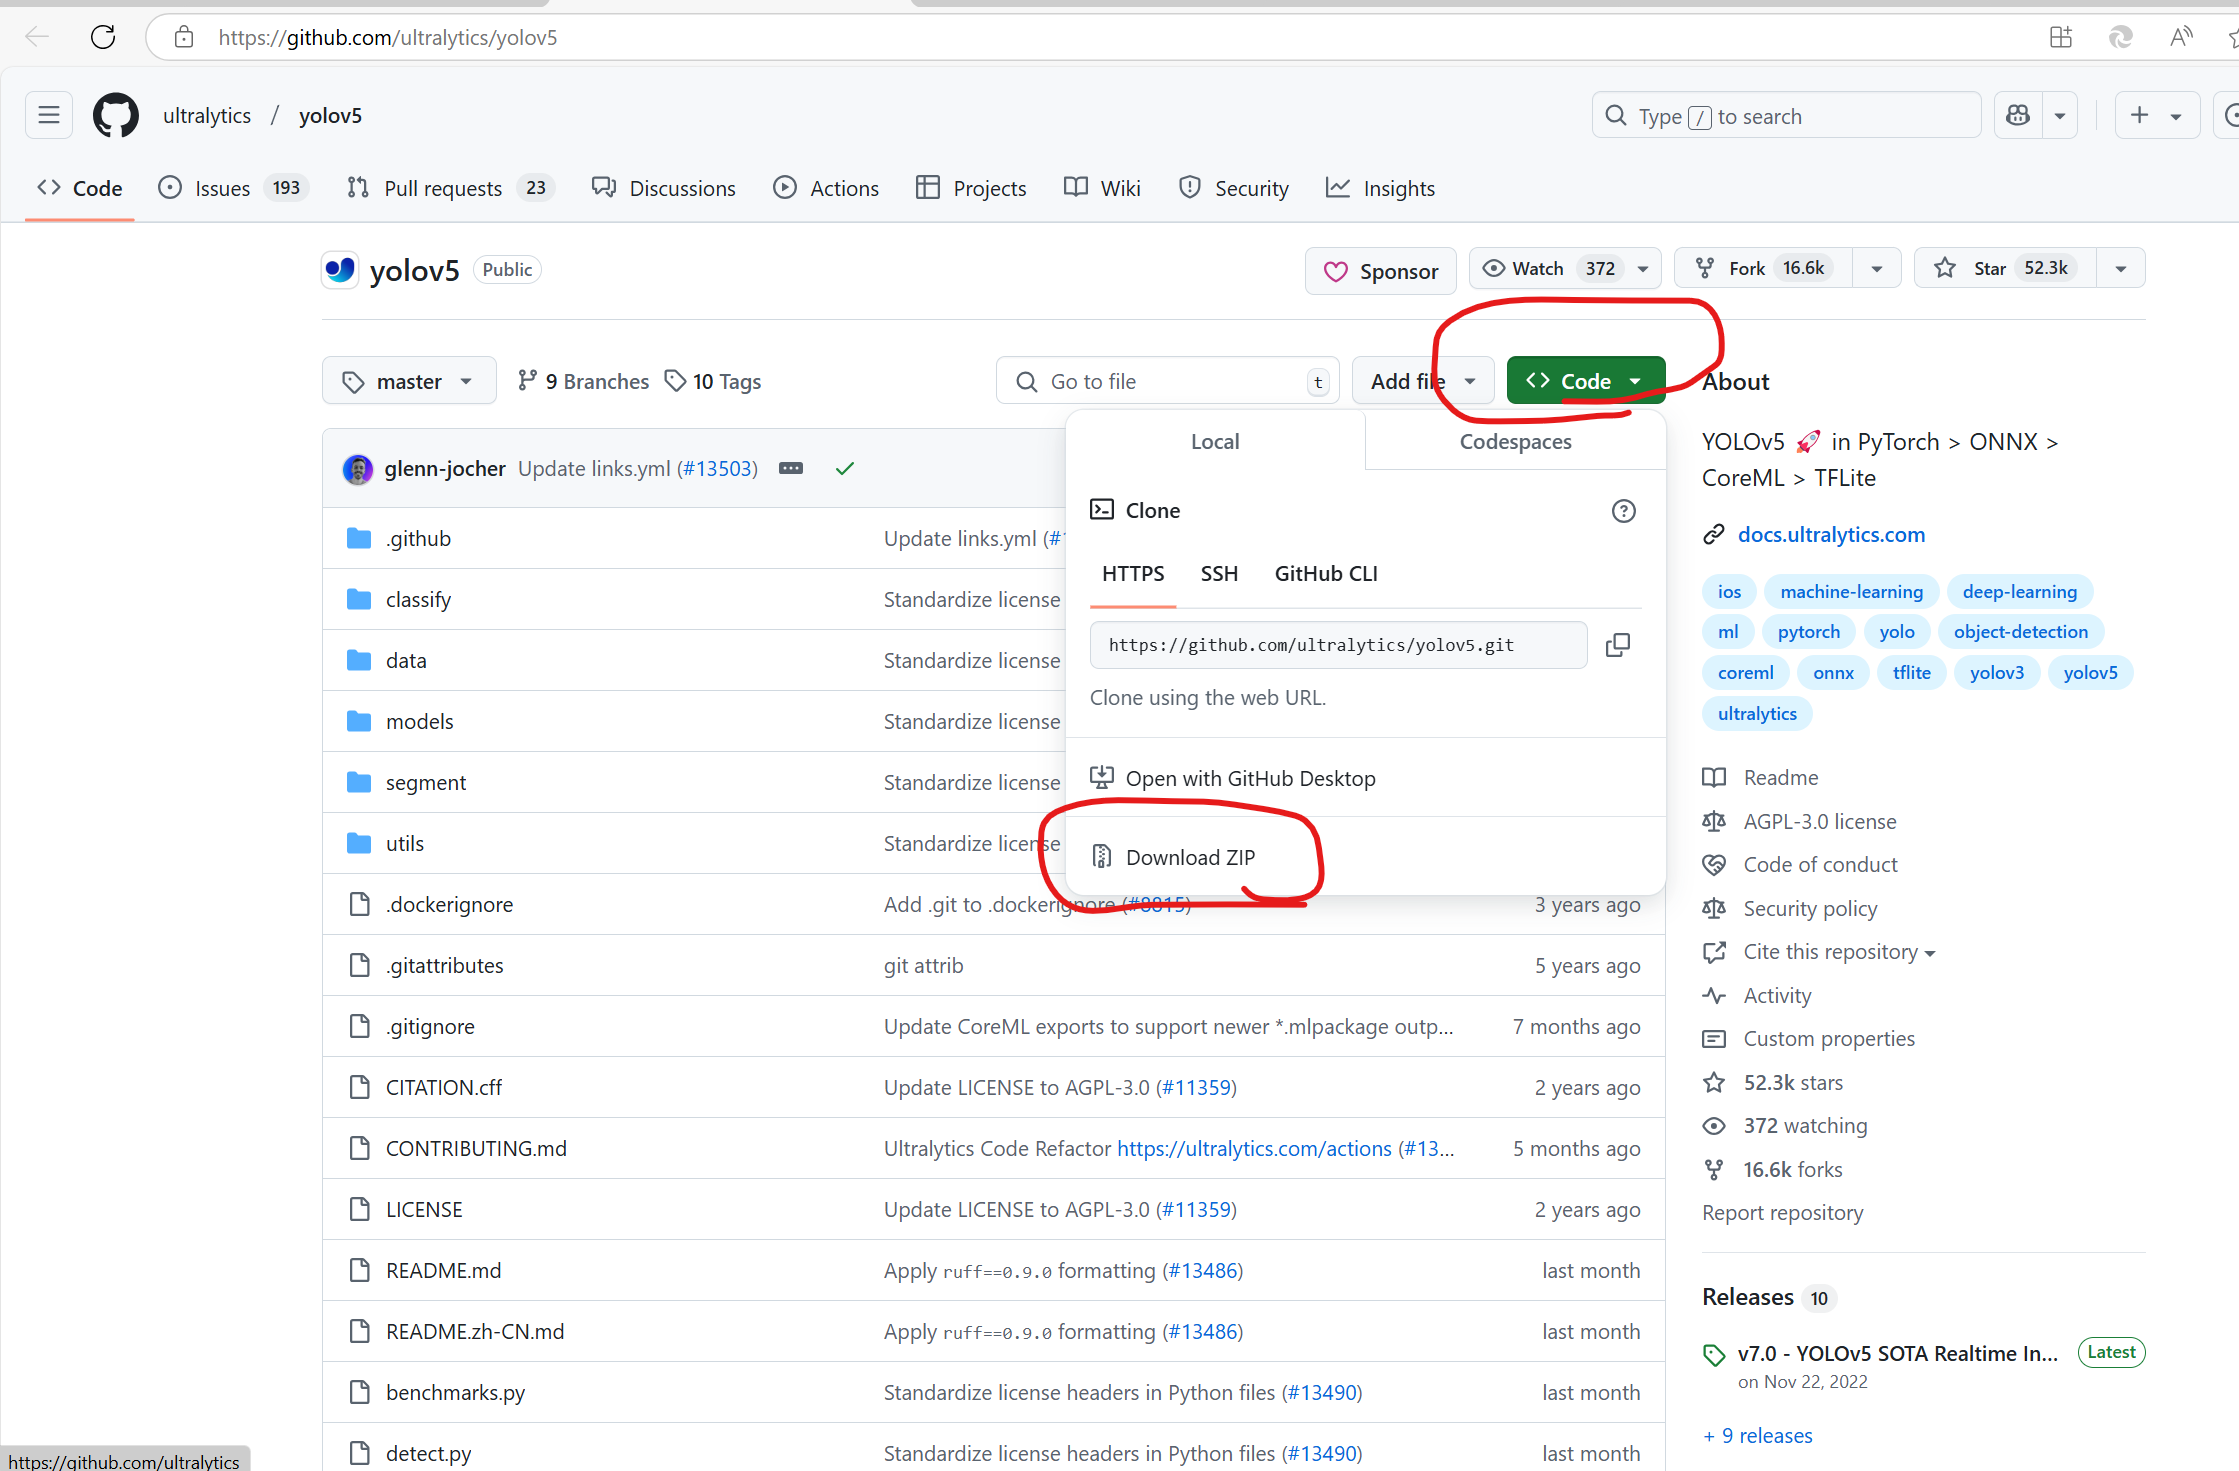
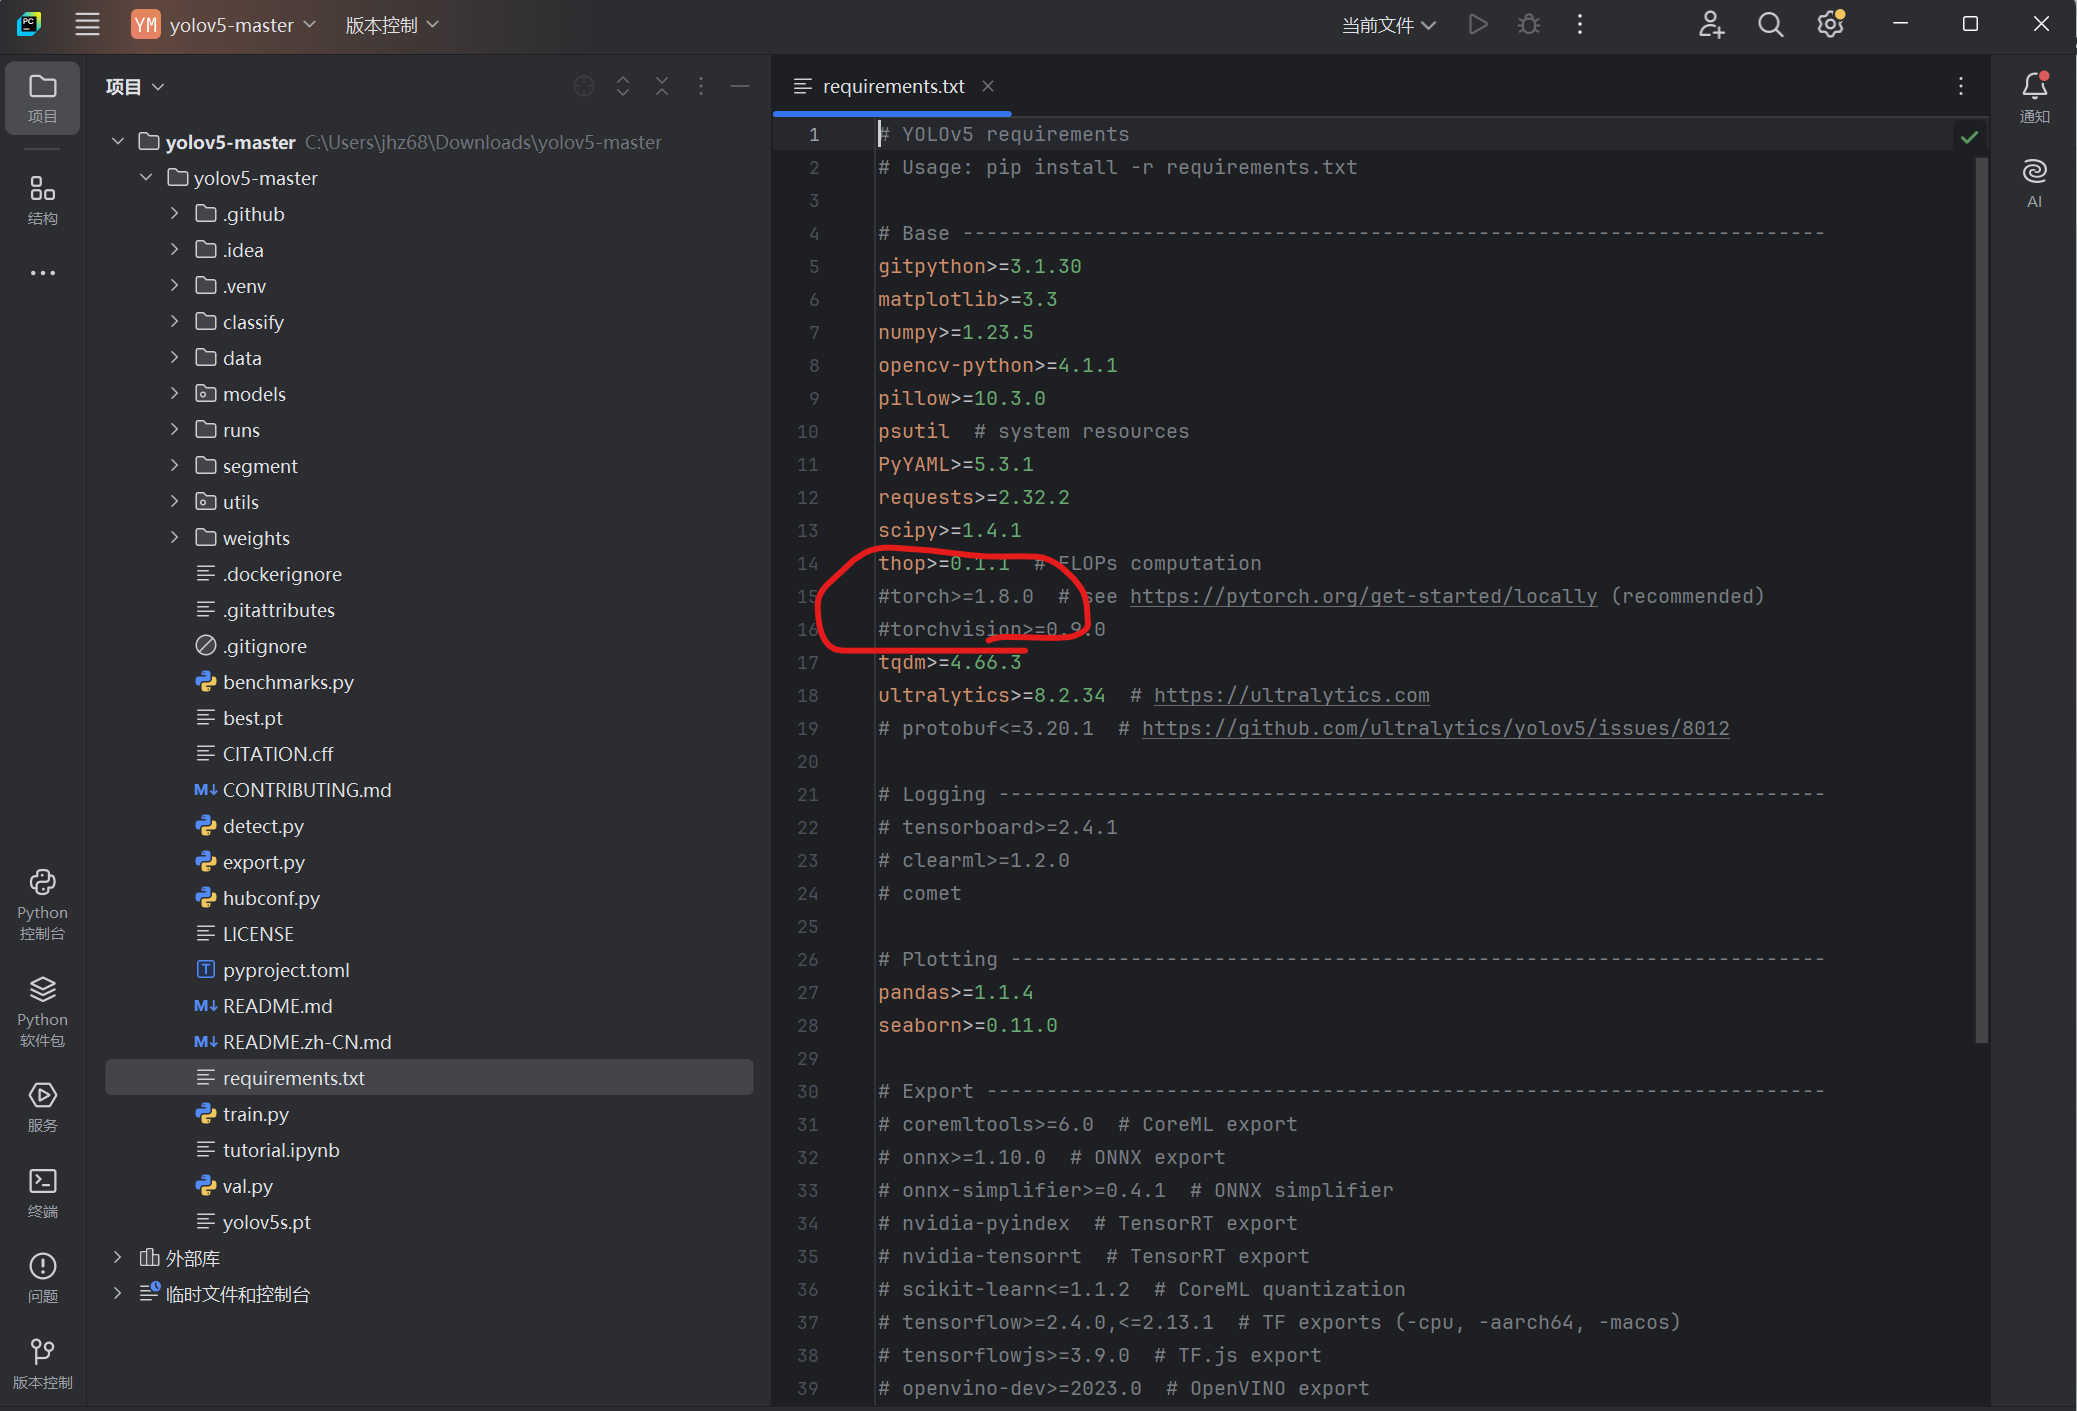
解压后,在pycharm中打开该文件夹,找到requirement.txt,记得注释掉torch和torchvisionn
接着打开终端,运行以下代码
conda activate yolov5
pip install -r requirements.txt
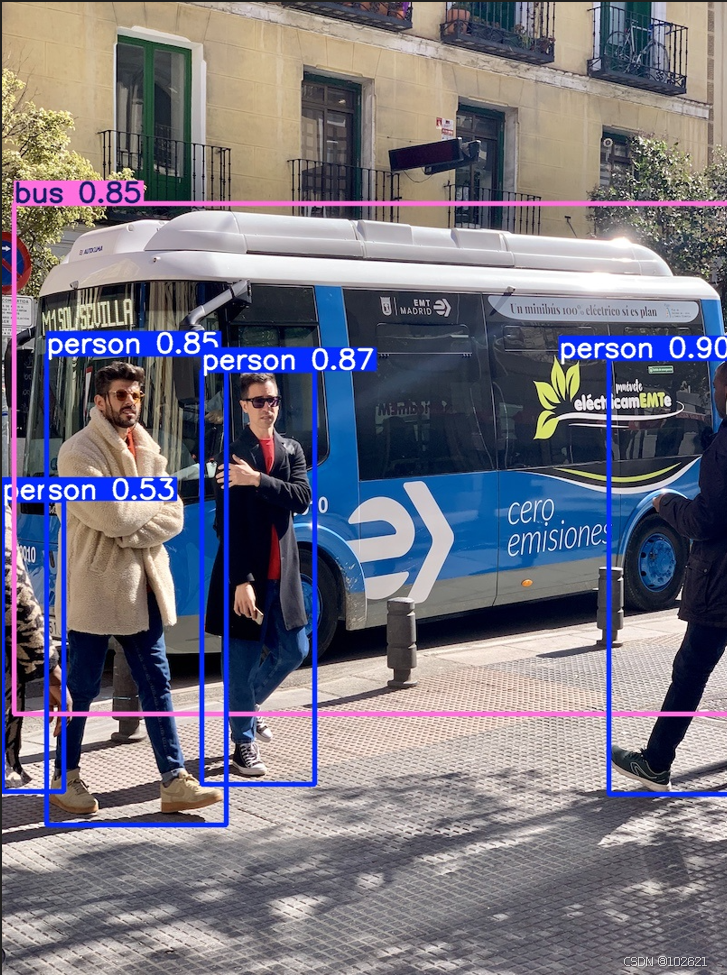
 完成后,运行python detect.py即可,在runs/detect/exp文件路径下,能够显示以下图片,表示yolov5部署成功。
10.准备数据集
在yolov5根目录下创建一些文件夹,具体配置如下:
VOCData/
├── train
    ├──images     # 存放图像文件
    ├──labels     # 存放标注文件
├── val
    ├──images     # 存放图像文件
    ├──labels     # 存放标注文件
接着修改data/VOC.yaml文件
# Ultralytics 🚀 AGPL-3.0 License - https://ultralytics.com/license

# PASCAL VOC dataset http://host.robots.ox.ac.uk/pascal/VOC by University of Oxford
# Example usage: python train.py --data VOC.yaml
# parent
# ├── yolov5
# └── datasets
#     └── VOC  ← downloads here (2.8 GB)

# Train/val/test sets as 1) dir: path/to/imgs, 2) file: path/to/imgs.txt, or 3) list: [path/to/imgs1, path/to/imgs2, ..]
#路径根据自己的情况修改
path: C:\Users\jhz68\Downloads\yolov5-master\yolov5-master\VocData
train: # train images (relative to 'path')  16551 images
  - train\images
val: # val images (relative to 'path')  4952 images
  - val\images

# Classes
names:
  0: fire
  1: smoke
# Download script/URL (optional) ---------------------------------------------------------------------------------------
download: |
  import xml.etree.ElementTree as ET

  from tqdm import tqdm
  from utils.general import download, Path


  def convert_label(path, lb_path, year, image_id):
      def convert_box(size, box):
          dw, dh = 1. / size[0], 1. / size[1]
          x, y, w, h = (box[0] + box[1]) / 2.0 - 1, (box[2] + box[3]) / 2.0 - 1, box[1] - box[0], box[3] - box[2]
          return x * dw, y * dh, w * dw, h * dh

      in_file = open(path / f'VOC{year}/Annotations/{image_id}.xml')
      out_file = open(lb_path, 'w')
      tree = ET.parse(in_file)
      root = tree.getroot()
      size = root.find('size')
      w = int(size.find('width').text)
      h = int(size.find('height').text)

      names = list(yaml['names'].values())  # names list
      for obj in root.iter('object'):
          cls = obj.find('name').text
          if cls in names and int(obj.find('difficult').text) != 1:
              xmlbox = obj.find('bndbox')
              bb = convert_box((w, h), [float(xmlbox.find(x).text) for x in ('xmin', 'xmax', 'ymin', 'ymax')])
              cls_id = names.index(cls)  # class id
              out_file.write(" ".join([str(a) for a in (cls_id, *bb)]) + '\n')


  # Download
  dir = Path(yaml['path'])  # dataset root dir
  url = 'https://github.com/ultralytics/assets/releases/download/v0.0.0/'
  urls = [f'{url}VOCtrainval_06-Nov-2007.zip',  # 446MB, 5012 images
          f'{url}VOCtest_06-Nov-2007.zip',  # 438MB, 4953 images
          f'{url}VOCtrainval_11-May-2012.zip']  # 1.95GB, 17126 images
  download(urls, dir=dir / 'images', delete=False, curl=True, threads=3)

  # Convert
  path = dir / 'images/VOCdevkit'
  for year, image_set in ('2012', 'train'), ('2012', 'val'), ('2007', 'train'), ('2007', 'val'), ('2007', 'test'):
      imgs_path = dir / 'images' / f'{image_set}{year}'
      lbs_path = dir / 'labels' / f'{image_set}{year}'
      imgs_path.mkdir(exist_ok=True, parents=True)
      lbs_path.mkdir(exist_ok=True, parents=True)

      with open(path / f'VOC{year}/ImageSets/Main/{image_set}.txt') as f:
          image_ids = f.read().strip().split()
      for id in tqdm(image_ids, desc=f'{image_set}{year}'):
          f = path / f'VOC{year}/JPEGImages/{id}.jpg'  # old img path
          lb_path = (lbs_path / f.name).with_suffix('.txt')  # new label path
          f.rename(imgs_path / f.name)  # move image
          convert_label(path, lb_path, year, id)  # convert labels to YOLO format
接着修改models/yolov5.yaml文件
# Ultralytics 🚀 AGPL-3.0 License - https://ultralytics.com/license

# Parameters
#只需要修改下面这个类别数目
nc: 2 # number of classes
depth_multiple: 0.33 # model depth multiple
width_multiple: 0.50 # layer channel multiple
anchors:
  - [10, 13, 16, 30, 33, 23] # P3/8
  - [30, 61, 62, 45, 59, 119] # P4/16
  - [116, 90, 156, 198, 373, 326] # P5/32

# YOLOv5 v6.0 backbone
backbone:
  # [from, number, module, args]
  [
    [-1, 1, Conv, [64, 6, 2, 2]], # 0-P1/2
    [-1, 1, Conv, [128, 3, 2]], # 1-P2/4
    [-1, 3, C3, [128]],
    [-1, 1, Conv, [256, 3, 2]], # 3-P3/8
    [-1, 6, C3, [256]],
    [-1, 1, Conv, [512, 3, 2]], # 5-P4/16
    [-1, 9, C3, [512]],
    [-1, 1, Conv, [1024, 3, 2]], # 7-P5/32
    [-1, 3, C3, [1024]],
    [-1, 1, SPPF, [1024, 5]], # 9
  ]

# YOLOv5 v6.0 head
head: [
    [-1, 1, Conv, [512, 1, 1]],
    [-1, 1, nn.Upsample, [None, 2, "nearest"]],
    [[-1, 6], 1, Concat, [1]], # cat backbone P4
    [-1, 3, C3, [512, False]], # 13

    [-1, 1, Conv, [256, 1, 1]],
    [-1, 1, nn.Upsample, [None, 2, "nearest"]],
    [[-1, 4], 1, Concat, [1]], # cat backbone P3
    [-1, 3, C3, [256, False]], # 17 (P3/8-small)

    [-1, 1, Conv, [256, 3, 2]],
    [[-1, 14], 1, Concat, [1]], # cat head P4
    [-1, 3, C3, [512, False]], # 20 (P4/16-medium)

    [-1, 1, Conv, [512, 3, 2]],
    [[-1, 10], 1, Concat, [1]], # cat head P5
    [-1, 3, C3, [1024, False]], # 23 (P5/32-large)

    [[17, 20, 23], 1, Detect, [nc, anchors]], # Detect(P3, P4, P5)
  ]
打开pycharm
conda activate yolov5 #激活环境接着运行下列代码:
python train.py --weights weights/yolov5s.pt --cfg models/yolov5s.yaml --data data/VOC.yaml --epoch 200 --batch-size 8 --img 640 --device 0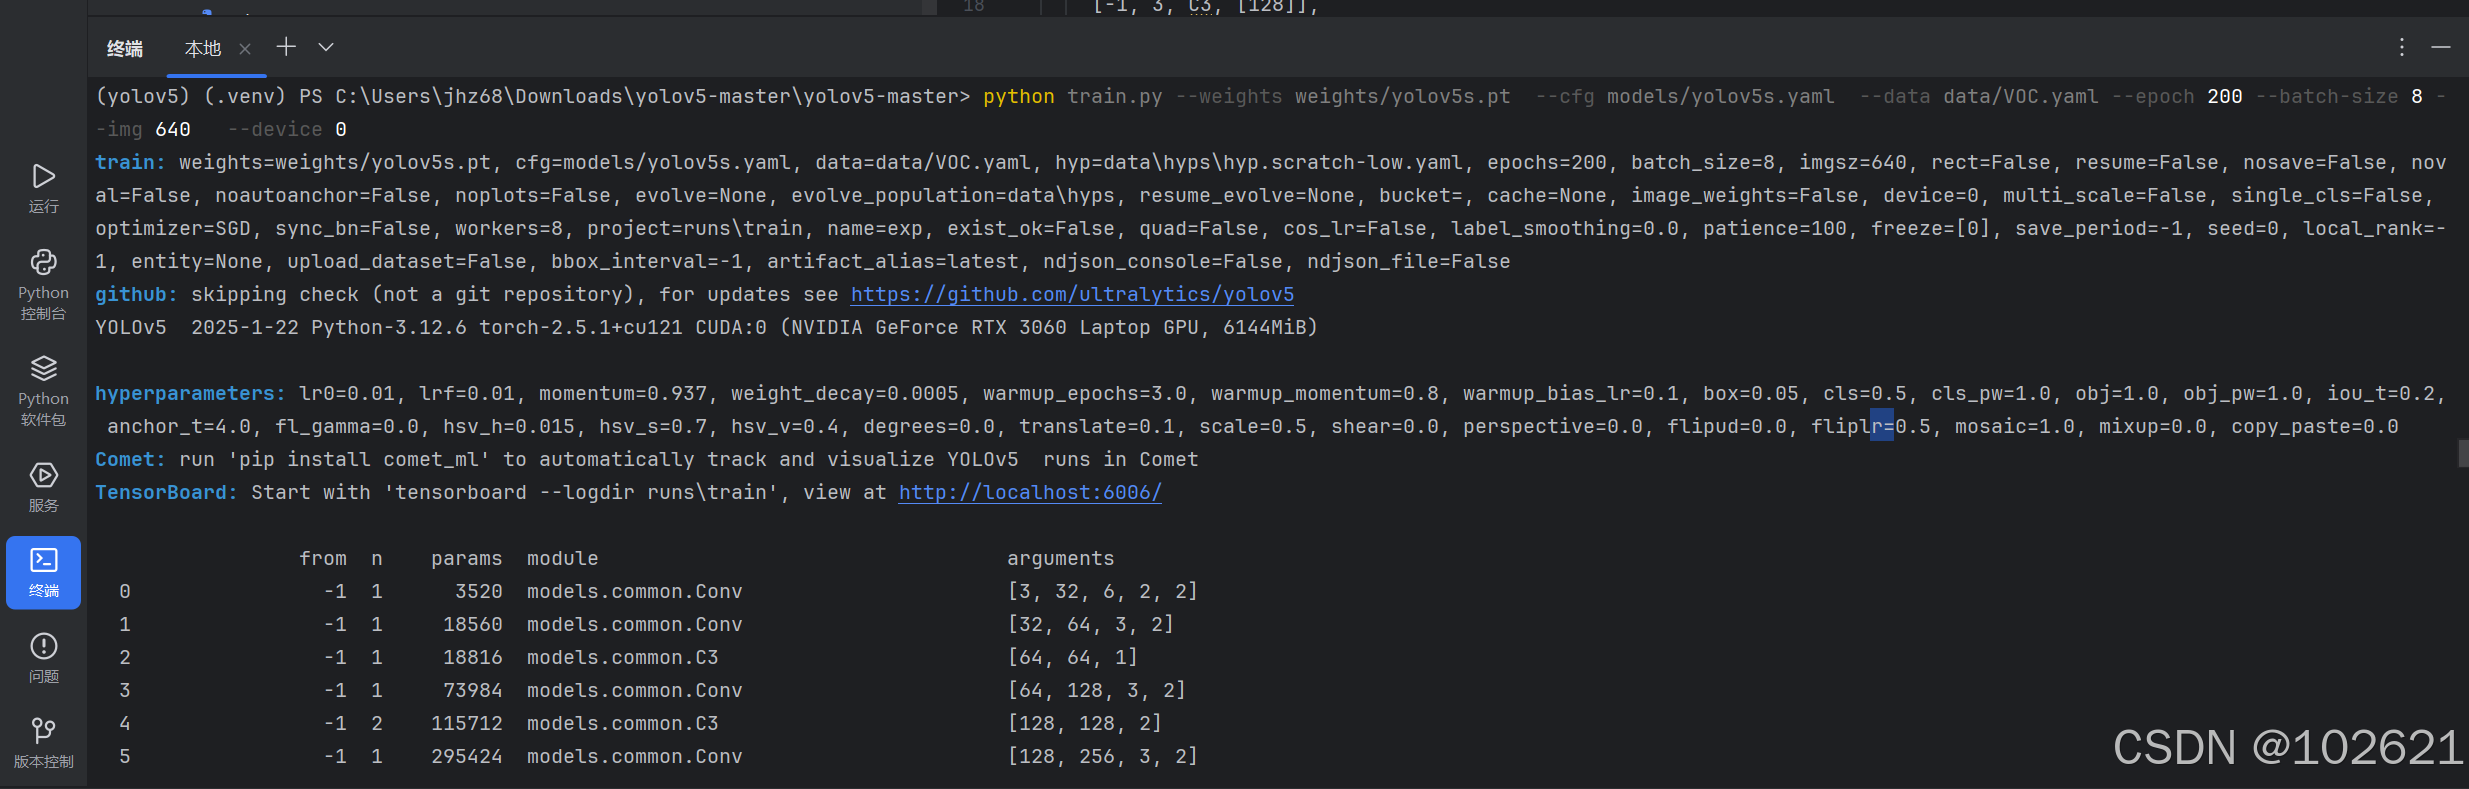
首次训练需要下载一些压缩包,需要等待一段时间。


 5万+
5万+

 被折叠的 条评论
为什么被折叠?
被折叠的 条评论
为什么被折叠?
 到【灌水乐园】发言


