


深度学习目标检测Yolo算法训练可见光海上船只船舶检测数据集 建立基于深度学习YOLOv8 船舶检测系统
文章目录
以下文字及代码可供参考。
船舶目标检测数据集 高精度目标检测模型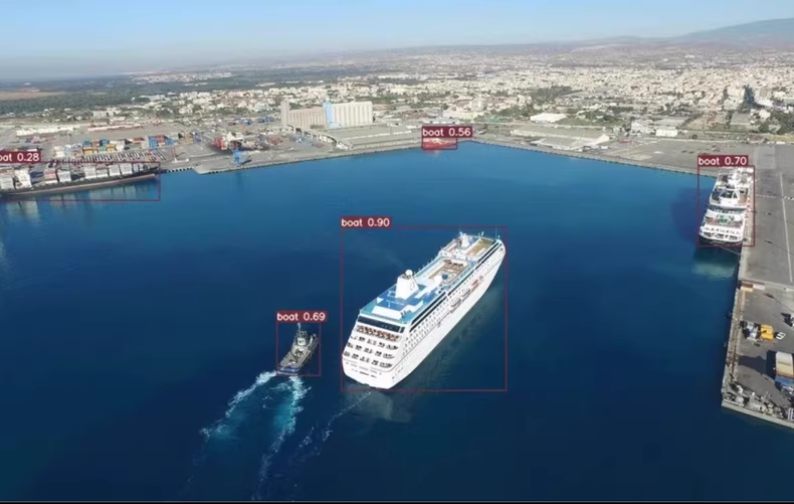
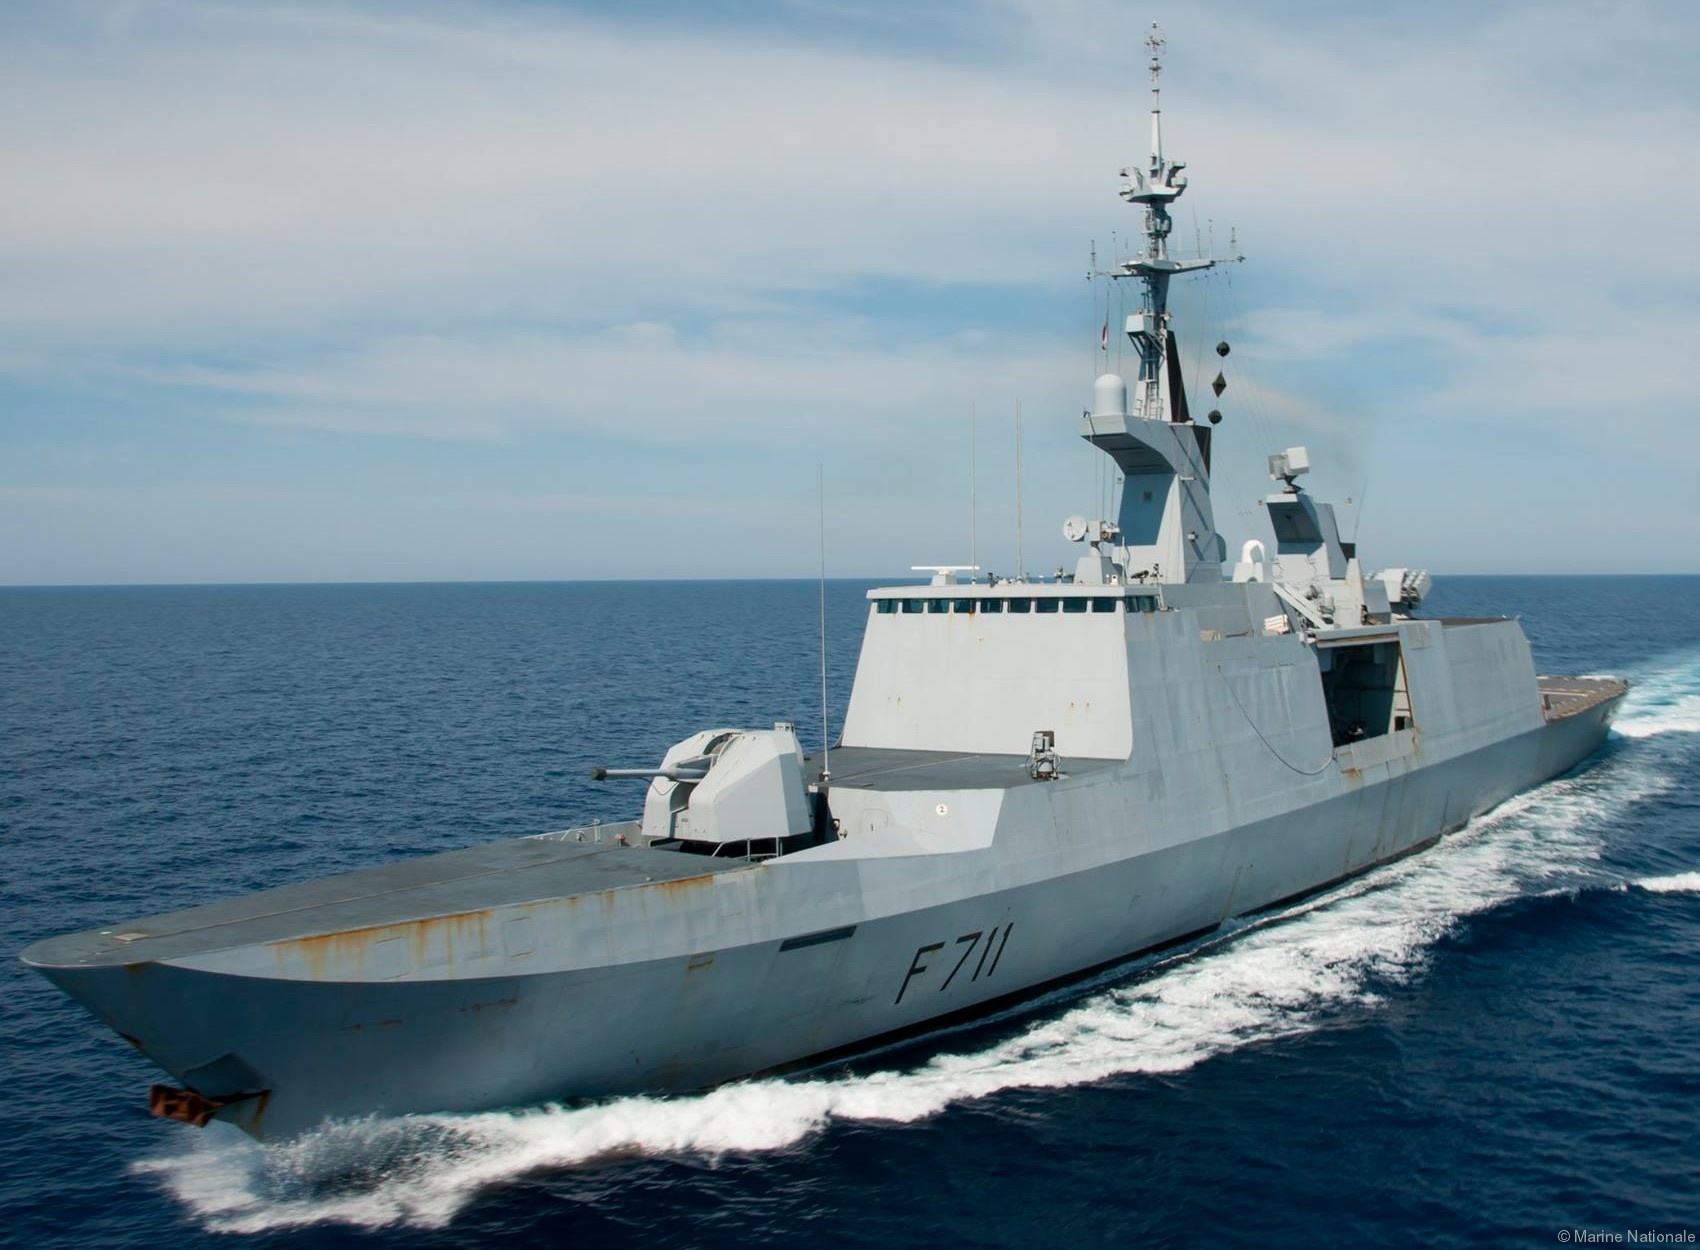
海上船只检测数据集
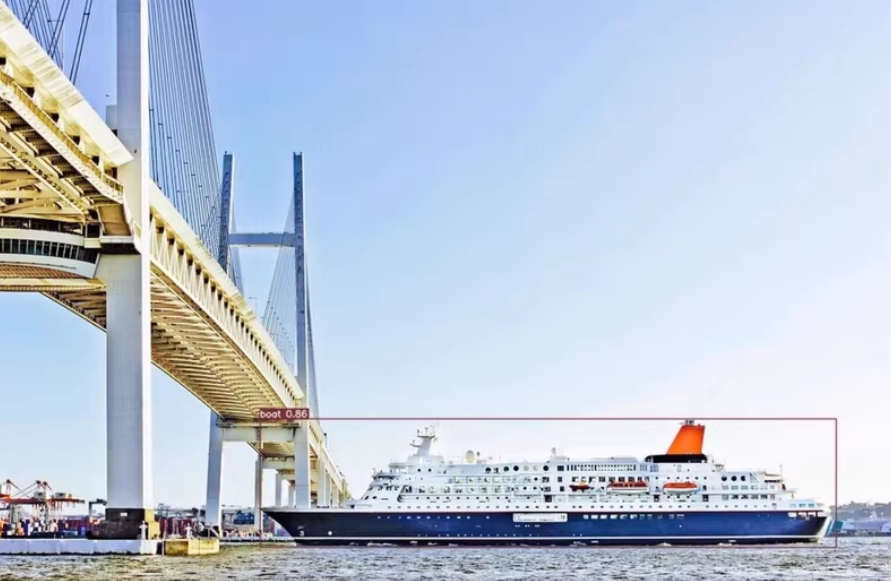
类型:船。 5000张图6800 个标准框
要使用 YOLOv8 构建一个船舶检测系统,从数据集准备到构建 GUI 应用程序,以下是详细的步骤和代码示例。
—仅供参考。
1. 数据集准备
假设你的数据集包含 5000 张图片和对应的 XML 标注文件(Pascal VOC 格式)。需要将 XML 转换为 YOLOv8 的标注格式(txt 文件)。
XML 转 YOLO 格式
YOLO 格式的标注是每行一个目标,格式如下:
<class_id> <x_center> <y_center> <width> <height>
以下是一个 Python 脚本,用于将 Pascal VOC 格式的 XML 文件转换为 YOLO 格式:
import os
import xml.etree.ElementTree as ET

def convert_annotation(xml_file, output_dir, class_mapping):
    tree = ET.parse(xml_file)
    root = tree.getroot()

    size = root.find('size')
    img_w = int(size.find('width').text)
    img_h = int(size.find('height').text)

    yolo_lines = []
    for obj in root.findall('object'):
        cls_name = obj.find('name').text
        if cls_name not in class_mapping:
            continue
        cls_id = class_mapping[cls_name]

        bbox = obj.find('bndbox')
        xmin = float(bbox.find('xmin').text)
        ymin = float(bbox.find('ymin').text)
        xmax = float(bbox.find('xmax').text)
        ymax = float(bbox.find('ymax').text)

        # Normalize coordinates
        x_center = (xmin + xmax) / 2.0 / img_w
        y_center = (ymin + ymax) / 2.0 / img_h
        width = (xmax - xmin) / img_w
        height = (ymax - ymin) / img_h

        yolo_lines.append(f"{cls_id} {x_center:.6f} {y_center:.6f} {width:.6f} {height:.6f}")

    # Save to txt file
    filename = os.path.splitext(os.path.basename(xml_file))[0]
    with open(os.path.join(output_dir, f"{filename}.txt"), 'w') as f:
        f.write("\n".join(yolo_lines))

# Example usage
xml_dir = "path/to/xml"
output_dir = "path/to/yolo_labels"
class_mapping = {"ship": 0}  # Define your classes here

os.makedirs(output_dir, exist_ok=True)
for xml_file in os.listdir(xml_dir):
    if xml_file.endswith(".xml"):
        convert_annotation(os.path.join(xml_dir, xml_file), output_dir, class_mapping)
2. 数据集预处理
将数据集划分为训练集和验证集(例如 8:2),并创建 train.txt 和 val.txt 文件,列出图像路径。
import os
import random

image_dir = "path/to/images"
output_dir = "path/to/split"

images = [f for f in os.listdir(image_dir) if f.endswith(".jpg")]
random.shuffle(images)

split_idx = int(len(images) * 0.8)
train_images = images[:split_idx]
val_images = images[split_idx:]

with open(os.path.join(output_dir, "train.txt"), "w") as f:
    f.write("\n".join([os.path.join(image_dir, img) for img in train_images]))

with open(os.path.join(output_dir, "val.txt"), "w") as f:
    f.write("\n".join([os.path.join(image_dir, img) for img in val_images]))
3. 安装依赖
安装 YOLOv8 和其他必要的库:
pip install ultralytics
pip install opencv-python
pip install PyQt5
4. 配置 YOLOv8
创建一个配置文件 dataset.yaml,定义数据集路径和类别:
train: path/to/train.txt
val: path/to/val.txt

nc: 1  # number of classes
names: ['ship']  # class names
5. 训练模型
使用 YOLOv8 进行训练:
from ultralytics import YOLO

# Load a pretrained model
model = YOLO("yolov8n.pt")  # You can choose other models like yolov8s, yolov8m, etc.

# Train the model
model.train(data="path/to/dataset.yaml", epochs=50, imgsz=640, batch=16)
6. 评估模型
在验证集上评估模型性能:
metrics = model.val()
print(metrics)
7. 构建 GUI 应用程序
使用 PyQt5 构建一个简单的 GUI 应用程序,读取图像、运行模型并显示结果。
import sys
import cv2
from PyQt5.QtWidgets import QApplication, QMainWindow, QLabel, QPushButton, QFileDialog, QVBoxLayout, QWidget
from PyQt5.QtGui import QImage, QPixmap
from ultralytics import YOLO

class ShipDetectionApp(QMainWindow):
    def __init__(self):
        super().__init__()
        self.initUI()
        self.model = YOLO("path/to/best.pt")  # Load your trained model

    def initUI(self):
        self.setWindowTitle("Ship Detection")

        self.label = QLabel(self)
        self.label.setText("Select an image to detect ships.")
        self.label.setScaledContents(True)

        self.btn_load = QPushButton("Load Image", self)
        self.btn_load.clicked.connect(self.load_image)

        layout = QVBoxLayout()
        layout.addWidget(self.label)
        layout.addWidget(self.btn_load)

        container = QWidget()
        container.setLayout(layout)
        self.setCentralWidget(container)

    def load_image(self):
        options = QFileDialog.Options()
        file_path, _ = QFileDialog.getOpenFileName(self, "Select Image", "", "Images (*.png *.jpg *.jpeg)", options=options)
        if file_path:
            self.detect_ships(file_path)

    def detect_ships(self, image_path):
        img = cv2.imread(image_path)
        results = self.model(img)

        for result in results:
            boxes = result.boxes.cpu().numpy()
            for box in boxes:
                x1, y1, x2, y2 = map(int, box.xyxy[0])
                cv2.rectangle(img, (x1, y1), (x2, y2), (0, 255, 0), 2)

        # Convert to QImage and display
        height, width, channel = img.shape
        bytes_per_line = 3 * width
        q_img = QImage(img.data, width, height, bytes_per_line, QImage.Format_RGB888).rgbSwapped()
        self.label.setPixmap(QPixmap.fromImage(q_img))
        self.label.adjustSize()

if __name__ == "__main__":
    app = QApplication(sys.argv)
    window = ShipDetectionApp()
    window.show()
    sys.exit(app.exec_())
8. 运行应用程序
运行上述脚本,加载图像并查看检测结果。
python gui_app.py
以上是从数据集准备到构建 GUI 应用程序的完整流程。


 3012
3012

 被折叠的 条评论
为什么被折叠?
被折叠的 条评论
为什么被折叠?
 到【灌水乐园】发言


