


前沿
今天菜鸟和大家一起来讨论一下3D入门的基础性知识:「Mesh」它是3D模型能正常展现的重要因素。(文末有奖问卷调查,感谢各位老铁支持!)

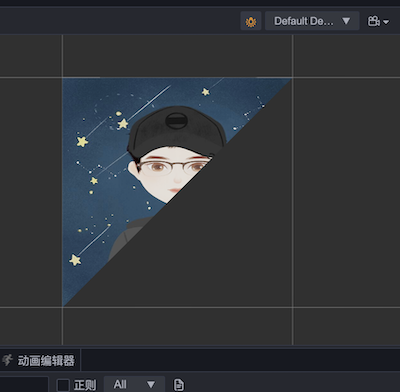
上边这个小姐姐模型,大家想知道它是怎么构成的吗?今天菜鸟带大家了解一下3D模型组成之顶点数据,UV 数据,法线数据等一系列数据。
数据结构
首先,咱们基于 Cococ Creator 3.x 中几何体信息数据结构,了解一下,一个普通的 Mesh 中到底有哪些数据:
export interface IGeometry {
    positions: number[];
    normals?: number[];
    uvs?: number[];
    tangents?: number[];
    colors?: number[];
    attributes?: gfx.Attribute[];
    customAttributes?: {
        attr: gfx.Attribute;
        values: number[];
    }[];
    boundingRadius?: number;
    minPos?:{x: number;y: number;z: number;};
    maxPos?: {x: number;y: number;z: number;};
    indices?: number[];
    primitiveMode?: gfx.PrimitiveMode;
    doubleSided?: boolean;
}上边的数据结构是直接从引擎代码拷贝过来的,其实从字面意思也可以理解到其中包含了:「顶点,法线,uv切线,顶点颜色,索引,包围盒坐标等一系列数据」
数据解析
关键的来了,下边我们就会对以上主要的的数据结构进行解释。
1. 顶点positions
大家可能都知道,一个网格体(Mesh)是由多个彼此相连的三角面组成,而三角面则是由三个顶点组成,就比如一个简单的平面,大家看一下下边的图:
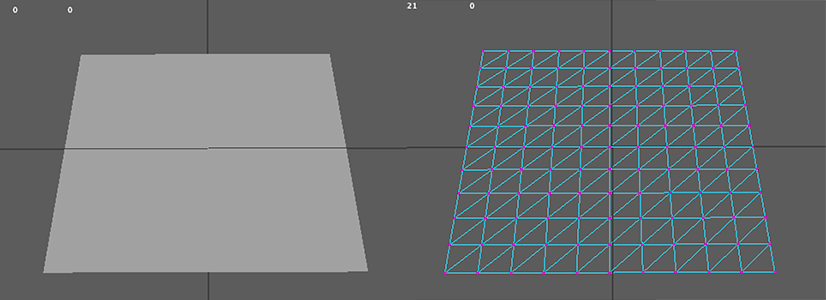
所以顶点数据决定了网格体的基本形状。下面我们通过顶点数据创建一个简单的三角形:
let point = [
    0, 0, 0,  //点1  x,y,z
    0, 0, 1,  //点2  x,y,z
    1, 0, 1   //点3  x,y,z
];
let mesh = utils.createMesh({
    positions:point
});
通过上边的代码,我们就可以创建一个简单的三角形,我们需要注意的是:
1. positions 是一个数字类型的数组
2. 每3个数据组成一个点,分别表示x,y,z
3. 每3个点组成一个面
4. 组成面的3个应是逆时针方向
2. UV
UV 实际上是U、V纹理贴图的坐标简称。所有的图像文件都是二维的一个平面,水平方向是U,垂直方向是V。UV 就是将图像上每一个点精确对应到模型物体的表面.在点与点之间的间隙位置由软件进行图像光滑插值处理。
接下来咱们简单介绍一下 UV 坐标的原理,在 Cocos 中 UV 的分布是这样的:
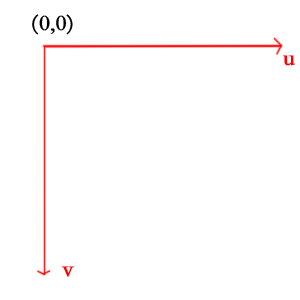
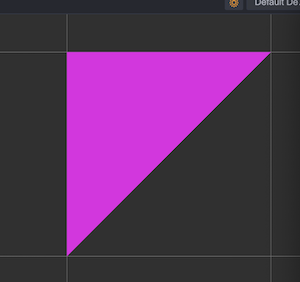
左上角为(0,0)点,那么对于下边的三角形:
我们已知三个顶点分别是:
let point = [
0, 0, 0, //点1 x,y,z
0, 0, 1, //点2 x,y,z
1, 0, 0, //点3 x,y,z
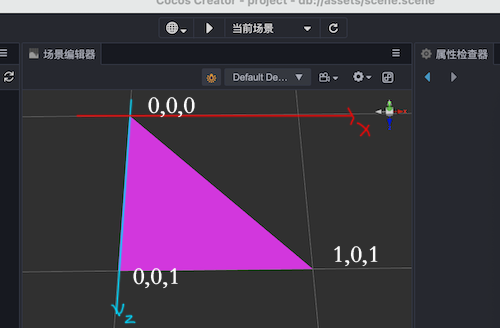
];我们需要将顶点坐标和 UV 坐标相对应,为顶点设置对应 UV 的坐标:
let uvs = [
    0,0, //对应第一个顶点
    0,1, //第二个顶点
    1,0, //第三个顶点
];
最终的效果就是这样
再看看咱们的立方体

3. 法线 normals
法线:它是一个向量,和 UV 一样,它都属于顶点的属性。它的数量和 UV 一样都是与顶点一一对应的。在网格中,法线通常被用来进行光照效果计算,同时在一些自定义的材质中也会用到法线去实现一些效果
let point = [
    0, 0, 0,  //点1  x,y,z
    0, 0, 1,  //点2  x,y,z
    1, 0, 0, //点3  x,y,z
    1, 0, 0, //点3  x,y,z
    0, 0, 1,  //点2  x,y,z
    1, 0, 1,
];
let uvs = [
    0, 0,
    0, 1,
    1, 0,
    1, 0,
    0, 1,
    1, 1,
];
let normals = [
    0, 1, 0,
    0, 1, 0,
    0, 1, 0,
    0, 1, 0,
    0, 1, 0,
    0, 1, 0,
];
let mesh = utils.createMesh({
    positions: point,
    uvs: uvs,
    normals: normals,
});
4. 索引indices
接下来咱们说说索引,索引到底是干什么用的呢,下边咱们用一个立方体来给大家展示一下: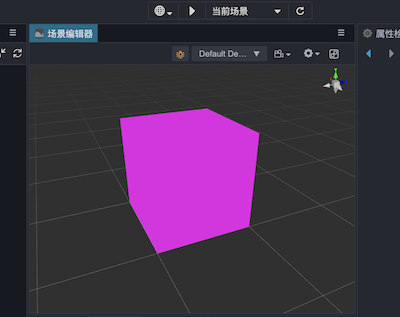
先给大家看看代码:
let point = [
    //bottom
    0, 0, 0,    0, 0, 1,    1, 0, 0,
    1, 0, 0,    0, 0, 1,    1, 0, 1,
    //top
    0, 1, 0,    0, 1, 1,    1, 1, 0,
    1, 1, 0,    0, 1, 1,    1, 1, 1,
    //left
    0, 0, 0,    0, 0, 1,    0, 1, 0,
    0, 1, 0,    0, 0, 1,    0, 1, 1,
    //right
    1, 0, 0,    1, 0, 1,    1, 1, 0,
    1, 1, 0,    1, 0, 1,    1, 1, 1,
    //back
    0, 0, 0,    1, 0, 0,    0, 1, 0,
    0, 1, 0,    1, 0, 0,    1, 1, 0,
    //front
    0, 0, 1,    1, 0, 1,    0, 1, 1,
    0, 1, 1,    1, 0, 1,    1, 1, 1,
];
let mesh = utils.createMesh({
    positions: point
});
一个立方体6个面。一个面最少两个三角形,那么就是6个顶点。6个面36个顶点,但是仔细的小伙伴会发现有好多点是重复出现的,那么有一种方式可以避免顶点的重复出现嘛,答案当然是有的,就是咱们要说的索引。
索引的原理就是 positions 中的坐标点都是唯一的,通过索引来代替重复的点,直接看使用吧:
let point = [
    0, 0, 0,  //0
    0, 0, 1,  //1
    1, 0, 0,  //2
    1, 0, 1,  //3
    0, 1, 0,  //4
    1, 1, 0,  //5
    0, 1, 1,  //6
    1, 1, 1,  //7
];
let indices = [
    //bottom
    0, 1, 2,
    2, 1, 3,
    //top
    4,6,5,
    5,6,7,
    //left
    0,1,4,
    4,1,6,
    //right
    2,3,5,
    5,3,7,
    //back
    0,2,4,
    4,2,5,
    //front
    1,3,6,
    6,3,7,

];
let mesh = utils.createMesh({
    positions: point,
    indices:indices,
});需要注意的是,「position中每三个值代表一组,也就是一个坐标点,uv中每两个值代表一个坐标点」,indices 中的值代表的是 position,UV 中的「第几个坐标点」,而不是直观的下标。
利用索引,咱们就可以将 position 中的重复点优化掉。通过索引来控制,作为顶点属性的 UV 和法线,以至于顶点颜色都会同时也会受到索引的影响,也就是索引同时控制了顶点以及uv和法线,简单的平面:
let point = [
    0, 0, 0,
    0, 0, 1,
    1, 0, 0,
    1, 0, 1,
];
let uvs = [
    0, 0,
    0, 1,
    1, 0,
    1, 1,
];
let normals = [
    0, 1, 0,
    0, 1, 0,
    0, 1, 0,
    0, 1, 0,
];
let indices = [
    0, 1, 2, 2, 1, 3
];
let mesh = utils.createMesh({
    positions: point,
    uvs: uvs,
    normals: normals,
    indices: indices,
});
5.minPos,maxPos
minPos、maxPos 字面意思就是最大点和最小点,那么什么是最大点和最小点呢?
先看看源码:
let minPosition = geometry.minPos;
if (!minPosition && options.calculateBounds) {
  minPosition = Vec3.set(new Vec3(), Infinity, Infinity, Infinity);
  for (let iVertex = 0; iVertex < vertCount; ++iVertex) {
    Vec3.set(v3_1, positions[iVertex * 3 + 0], positions[iVertex * 3 + 1], positions[iVertex * 3 + 2]);
    Vec3.min(minPosition, minPosition, v3_1);
  }
}
let maxPosition = geometry.maxPos;
if (!maxPosition && options.calculateBounds) {
  maxPosition = Vec3.set(new Vec3(), -Infinity, -Infinity, -Infinity);
  for (let iVertex = 0; iVertex < vertCount; ++iVertex) {
    Vec3.set(v3_1, positions[iVertex * 3 + 0], positions[iVertex * 3 + 1], positions[iVertex * 3 + 2]);
    Vec3.max(maxPosition, maxPosition, v3_1);
  }
}
通过模型的顶点数据,计算顶点中x、y、z三个方向同时最小和最大的坐标,通过最大点和 最小点可以模拟出一个将整个模型包含在内的矩形来,也就是咱们所说的包围盒。至于包围盒的作用,首先想到的就是相机对物体的剔除,也上一段源码吧!
if (model.node && ((visibility & model.node.layer) === model.node.layer)
  || (visibility & model.visFlags)) {
 // shadow render Object
 if (dirShadowObjects != null && model.castShadow && model.worldBounds) {
  // frustum culling
  if (shadows.fixedArea) {
   AABB.transform(_ab, model.worldBounds, shadows.matLight);
   if (intersect.aabbFrustum(_ab, camera.frustum)) {
    dirShadowObjects.push(getDirShadowRenderObject(model, camera));
   }
  } else {
   // eslint-disable-next-line no-lonely-if
   if (intersect.aabbFrustum(model.worldBounds, _dirLightFrustum)) {
    dirShadowObjects.push(getDirShadowRenderObject(model, camera));
   }
  }
 }
 // frustum culling
 if (model.worldBounds && !intersect.aabbFrustum(model.worldBounds, camera.frustum)) {
  continue;
 }

 renderObjects.push(getRenderObject(model, camera));
}
同时一直有一个问题,在原生平台进行静态合批后,网格的包围盒貌似有问题,场景中的模型剔除会出现异常。
实操
上面说了这么多,那么在实际开发中都会有哪些操作呢?
1. NavMesh 数据
顺带在这里给自己的导航寻路打个广告导航寻路
在集成 NavMesh 时,最常见的需求就是:我的场景中存在好多子物体,有从外部导入的,也有用引擎自带的,在构建导航数据之前我们需要将这些子物体进行网格数据的整理
public addStaticModle (node: Node): void;我们只需要拿到顶点,索引就可以进行数据整理
let position = mesh.readAttribute(0, gfx.AttributeName.ATTR_POSITION);
let indices = [];
mesh.copyIndices(0, indices);
接下来的大家可以去菜鸟的寻路源码中了解奥
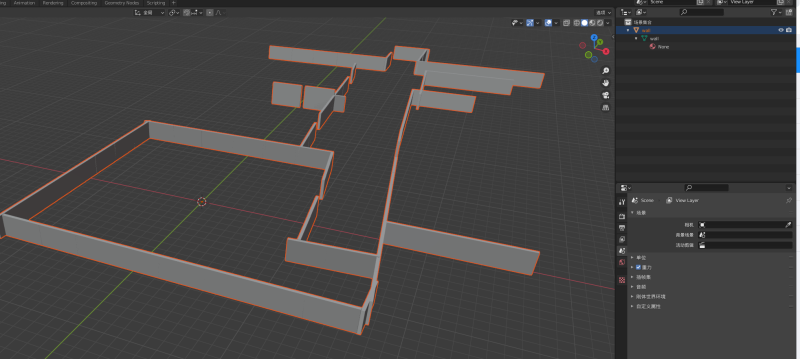
2.mesh数据导出obj
需求永远是那么的奇怪!在一个比较大的游戏场景中。
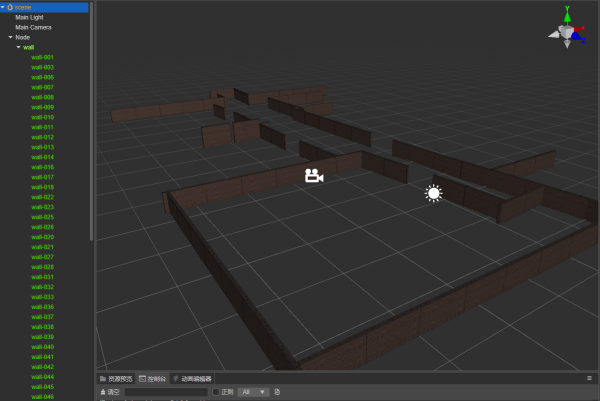
会出现使用大量的相同物体,拼凑出一个布局。那么一个场景中可能会出现大量的节点个数,节点数量过多会导致一些性能问题,比如序列化慢等。
平时我们都是用三方软件建好模型,导入到编辑器中,那么反之是不是可以「将我们场景中的模型导出为三方软件识别的模型文件」答案肯定是可以的。
首先 OBJ 文件是一种文本文件,文本编辑器打开就可以看见内容,而且大多数建模软件都可以打开
v 0.123 0.234 0.345 1.0
v ...
vt 0.500 1 [0]
vt ...
vn 0.707 0.000 0.707
vn ...
f 3/1 4/2 5/3
f 6/4/1 3/5/3 7/6/5
f 7//1 8//2 9//3
f ..
我们我可拿到场景中网格的基本数据
let positions = mesh.readAttribute(0, gfx.AttributeName.ATTR_POSITION);
let normals = mesh.readAttribute(0, gfx.AttributeName.ATTR_NORMAL);
let uvs = mesh.readAttribute(0, gfx.AttributeName.ATTR_TEX_COORD);
let indices = mesh.readIndices(0);
菜鸟整理了一下,通过一个简单的脚本对所有的子物体先进行了网格数据的合并,然后点击保存数据将网格数据导出为obj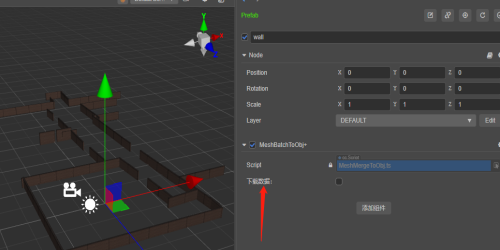

源码
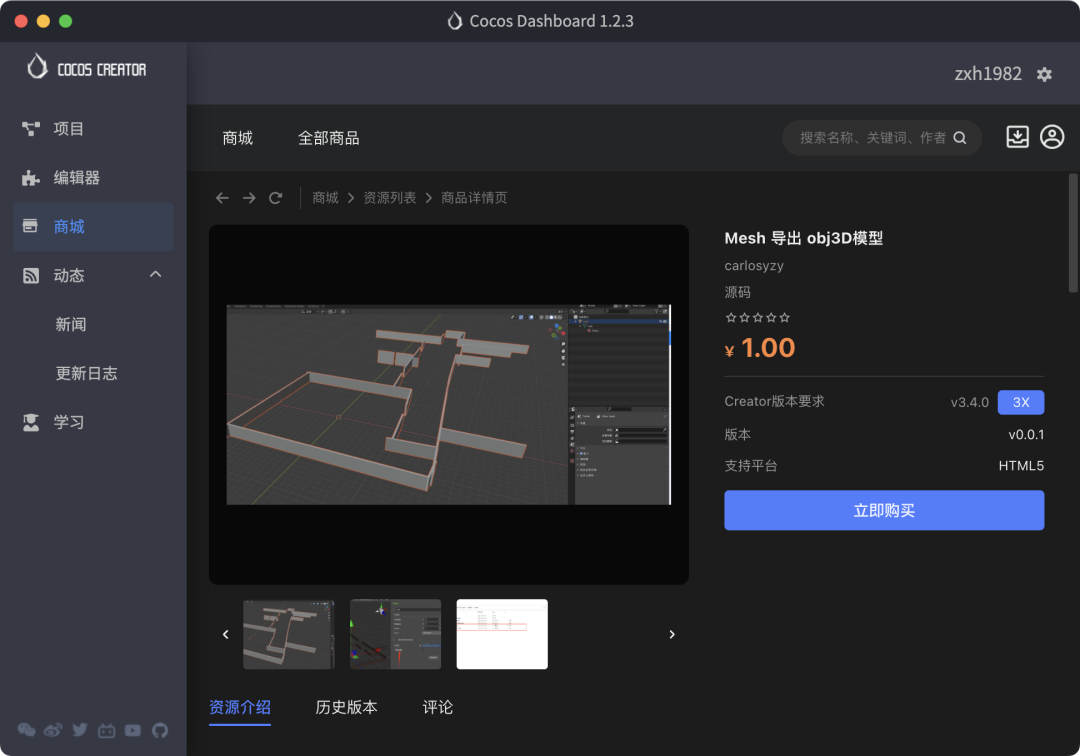
链接:
https://store.cocos.com/app/detail/3666
2022 年即将结束,2023 年即将到来。
感恩老铁们对公众号的支持!
在此叨扰下各位,填写一份 Cocos Store 问卷调查(有奖)!

 2023年我们会倍加努力,一起共绘成长蓝图~


 6718
6718


 被折叠的 条评论
为什么被折叠?
被折叠的 条评论
为什么被折叠?
 到【灌水乐园】发言


