


Cocos Creator 使用AssetBundle管理资源
AssetBundle介绍
- 官方文档内容:
- 从 v2.4 开始,Creator 正式支持 Asset Bundle 功能。Asset Bundle 作为资源模块化工具,允许开发者按照项目需求将贴图、脚本、场景等资源划分在多个 Asset Bundle 中,然后在游戏运行过程中,按照需求去加载不同的 Asset Bundle,以减少启动时需要加载的资源数量,从而减少首次下载和加载游戏时所需的时间。
- Asset Bundle 可以按需求随意放置,比如可以放在远程服务器、本地、或者小游戏平台的分包中。也可以跨项目复用,用于加载子项目中的 Asset Bundle。
AssetBundle资源管理与普通资源管理对比(AI生成)
1、资源管理方式的差异
-
普通的资源管理:
-
在Cocos Creator的早期版本中,资源管理可能相对简单,没有像AssetBundle那样灵活和强大的资源模块化工具。
-
资源通常被直接放置在项目的assets目录下,并通过资源管理器进行管理和组织。
-
在游戏运行时,资源可能需要一次性加载到内存中,这可能导致游戏启动时间变长,内存占用增加,甚至可能出现游戏卡顿的情况。
-
使用AssetBundle进行资源管理:
-
从Cocos Creator v2.4版本开始,引入了AssetBundle功能,实现了资源的模块化管理。
-
开发者可以将资源(如贴图、脚本、场景等)按照项目需求划分在多个AssetBundle中。
-
这些AssetBundle可以在游戏运行过程中根据需要动态加载,从而减少了启动时需要加载的资源数量,提高了游戏的性能和稳定性。
2、资源加载和引用的差异
- 普通的资源管理:
- 资源加载可能缺乏灵活性,通常需要在游戏启动时一次性加载所有必要的资源。
- 资源引用可能相对直接,但缺乏模块化的优势,难以进行高效的资源管理和复用。
- 使用AssetBundle进行资源管理:
- 提供了更灵活的加载方式,如同步加载和异步加载,可以根据不同场景和需求选择合适的加载方式。
- 通过AssetBundle的优先级配置,可以更有效地管理资源的加载顺序和依赖关系。例如,当多个AssetBundle引用同一个资源时,资源会被优先放置在优先级高的AssetBundle中,低优先级的AssetBundle只会存储一条记录信息,从而避免了资源的重复加载和内存浪费。
- 实现了资源的跨项目复用和远程加载,提高了资源的利用效率和游戏的可扩展性。
3、构建和发布的差异
- 普通的资源管理:
- 构建过程可能相对简单,但缺乏针对不同平台和设备的优化。
- 发布时可能需要手动处理资源的打包和分发,增加了发布流程的复杂性和工作量。
- 使用AssetBundle进行资源管理:
- 提供了更丰富的构建选项和配置,可以根据不同平台和设备的性能特点进行优化。
- 支持资源的自动打包和分发,简化了发布流程,提高了发布效率。
- 允许开发者将AssetBundle放置在远程服务器或本地,灵活控制资源的加载和更新。
综上所述,Cocos Creator使用AssetBundle进行资源管理相比普通的资源管理具有显著的优势。它提供了更灵活、高效和模块化的资源管理方式,有助于开发者优化游戏性能、提高资源利用率和降低发布成本。
AssetBundle 基本使用(基础示例、有基础可跳过)
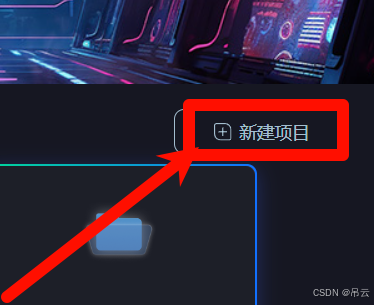
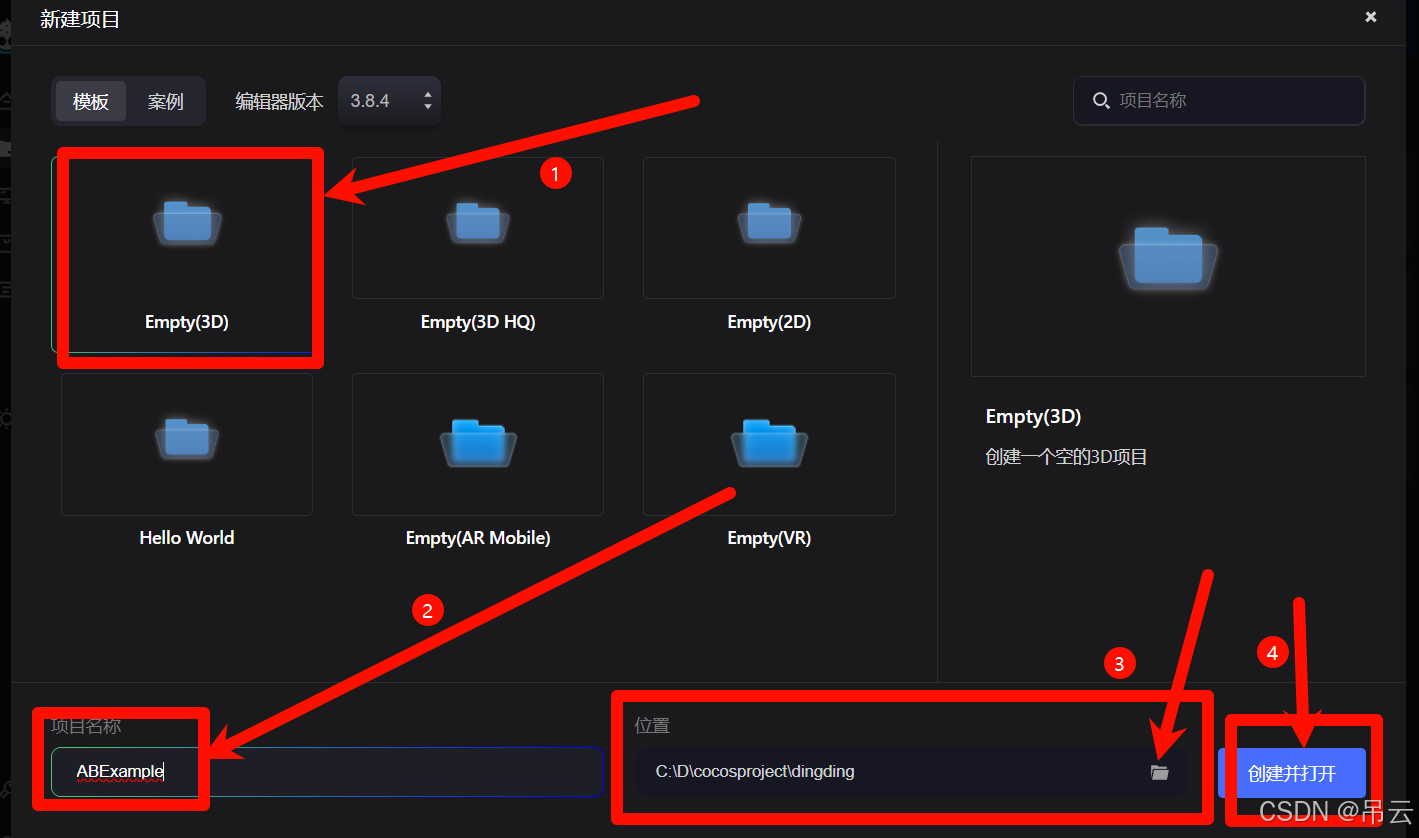
1、新建项目
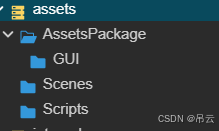
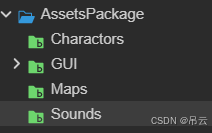
2、创建项目结构:
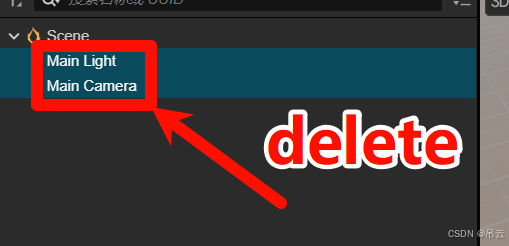
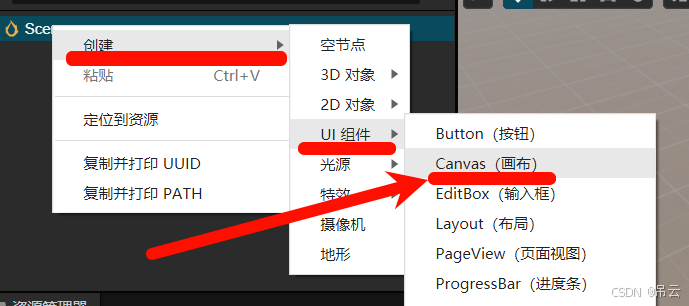
3、清空场景,添加Canvas
清空场景
添加canvas
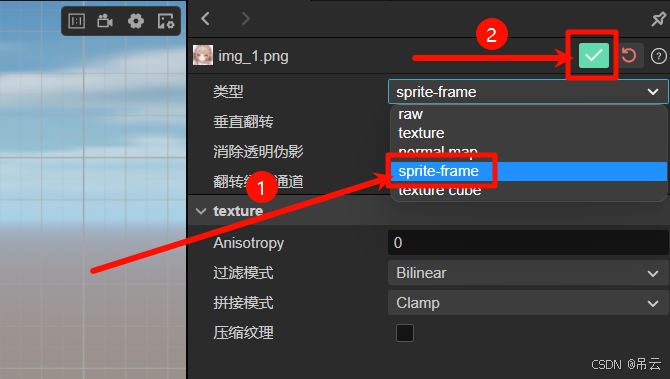
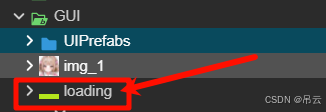
4、导入图片、自定义预制体
拖拽图片到GUI文件夹下,单击图片,如果右侧属性检查器中的类型为texture则改为sprite-frame
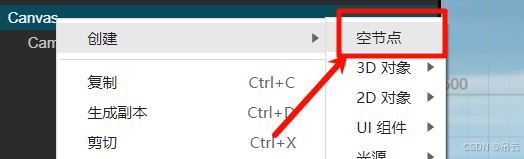
在Canvas下添加node,命名为my_img:
拖拽新加入的图片到my_img节点下。
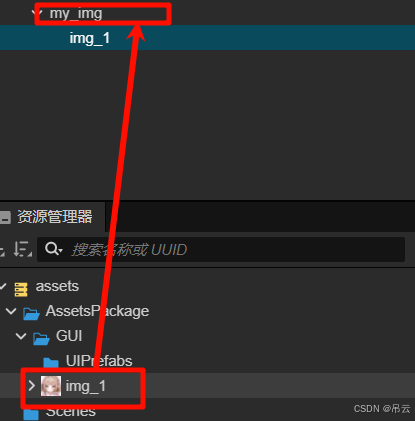
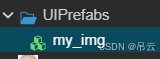
将my_img节点拖拽到UIPrefabs文件夹下做成预制体。
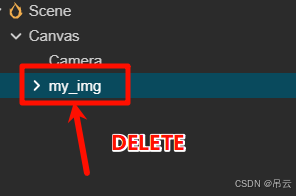
删除场景中的my_img节点
按ctrl+s保存当前场景到Scenes文件夹下
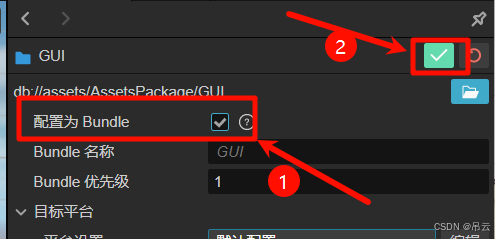
5、配置Bundle
单击GUI文件夹,在属性检查器中勾选上配置为Bundle
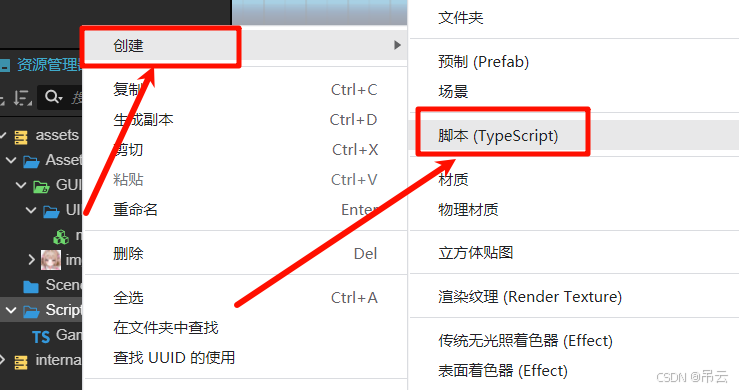
6、编写脚本
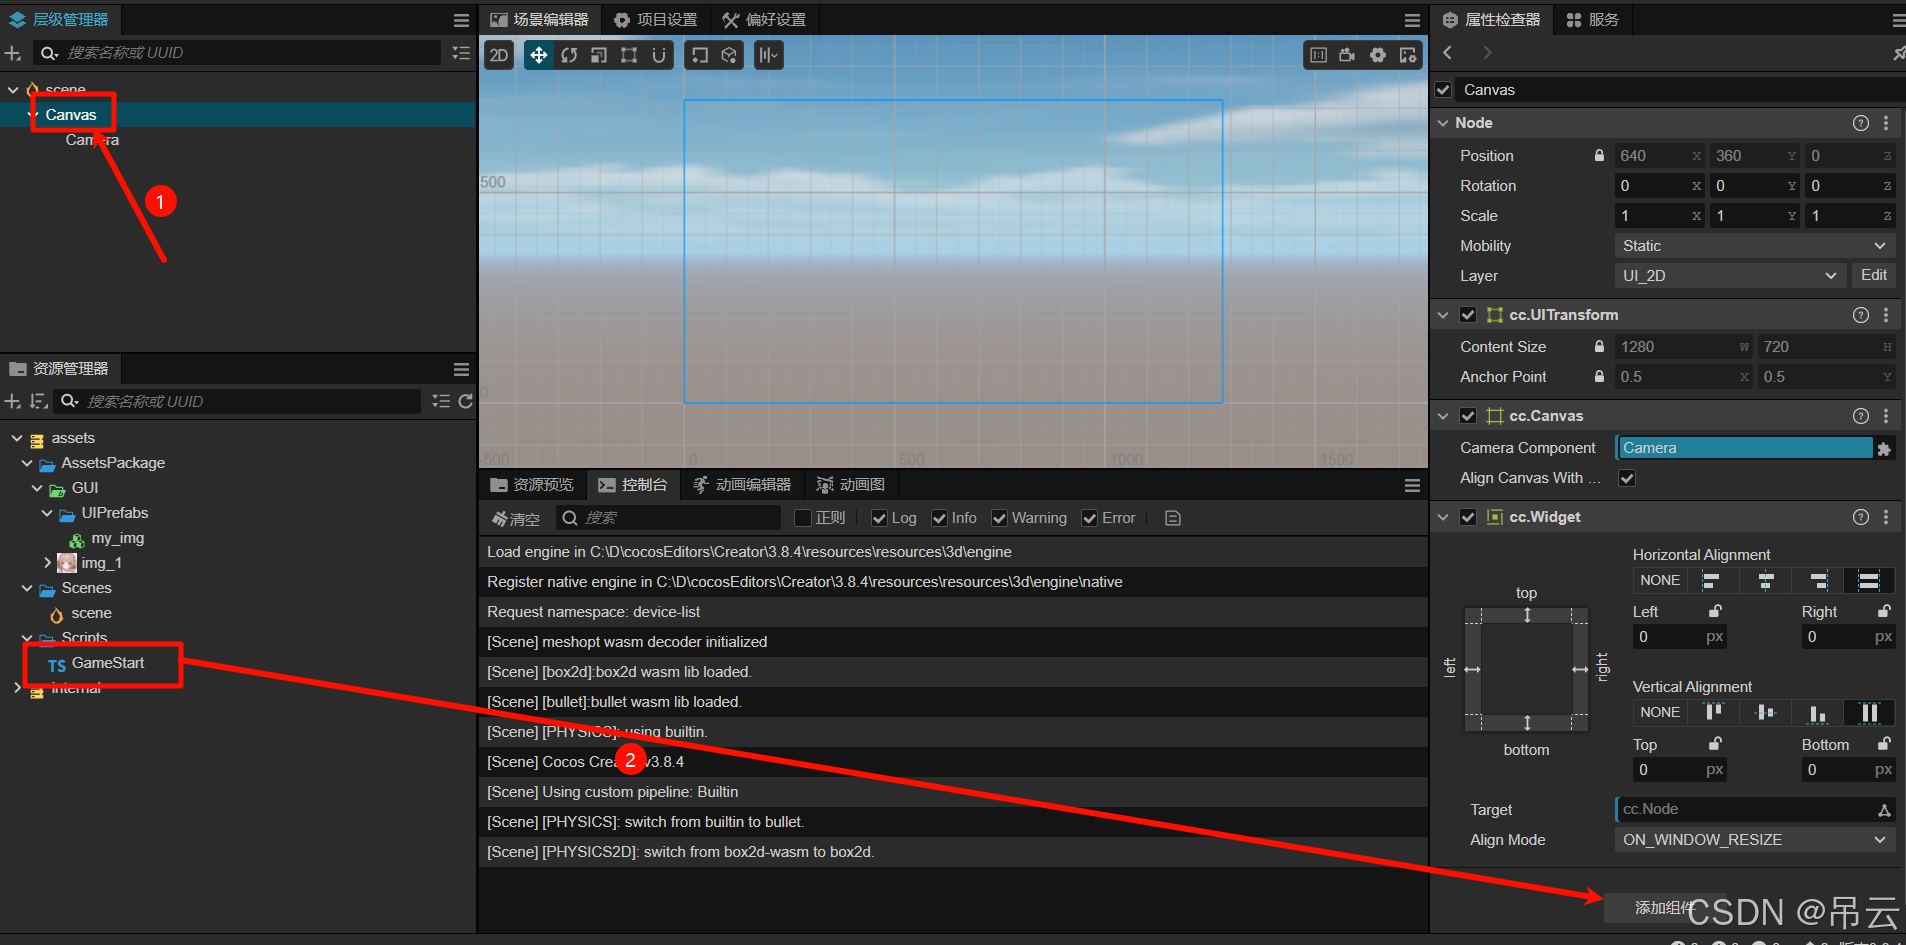
在Scripts文件夹下新建脚本,命名为GameStart
点击Canvas节点,将创建的GameStart脚本挂载到节点下。
双击GameStart脚本进行编辑,编辑内容如下:
import { _decorator, assetManager, Component, instantiate, Node, Prefab } from 'cc';
const { ccclass, property } = _decorator;
@ccclass('GameStart')
export class GameStart extends Component {
//刚刚配置为Bundle的文件夹名字
AssetBundleName: string = "GUI";
//GUI内需要加载的资源的路径
GUIUrls: string = "UIPrefabs/my_img";
//GUI内需要加载的资源的类型
GUIResType = Prefab;
//用于存储加载的AssetsBundle
private abBunds = {};
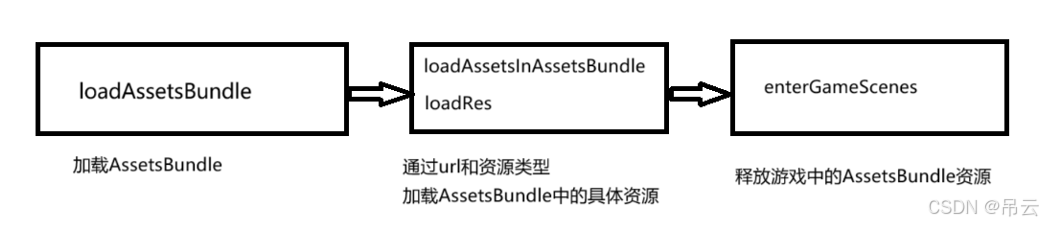
protected onLoad() {
//1、加载AssetsBundle(GUI)
this.loadAssetsBundle(this.AssetBundleName,()=>{
//2、加载AssetsBundle内的资源
this.loadAssetsInAssetsBundle();
});
}
enterGameScenes(){
//释放游戏的AssetsBundle资源
var bundle = assetManager.getBundle(this.AssetBundleName);
if(bundle === null){
console.log("没有找到",this.AssetBundleName);
return ;
}
var my_img = instantiate(bundle.get(this.GUIUrls));
this.node.addChild(my_img);
}
private loadAssetsBundle(abName:string,endfunc):void{
//加载AssetsBundle
assetManager.loadBundle(abName,(err,bundle)=>{
if(err){
console.log("加载AssetsBundle失败",err);
return;
}
//将加载返回的bundle存储在abBunds中
this.abBunds[abName] = bundle;
console.log("加载AssetsBundle成功",bundle);
endfunc();
})
}
private loadAssetsInAssetsBundle(){
//获取urls并加载里面的资源
this.loadRes(this.abBunds[this.AssetBundleName],this.GUIUrls,this.GUIResType);
}
private loadRes(bundle,url,type):void{
try{
//加载资源
bundle.load(url,type,(err,res)=>{
if(err){
console.log("加载资源",url,"失败,error:",err);
return;
}else{
console.log("加载资源",url,"成功");
}
//加载成功后,实例化资源
this.enterGameScenes();
})
}catch(e){
console.log("加载资源",url,"失败,error:",e);
}
}
}
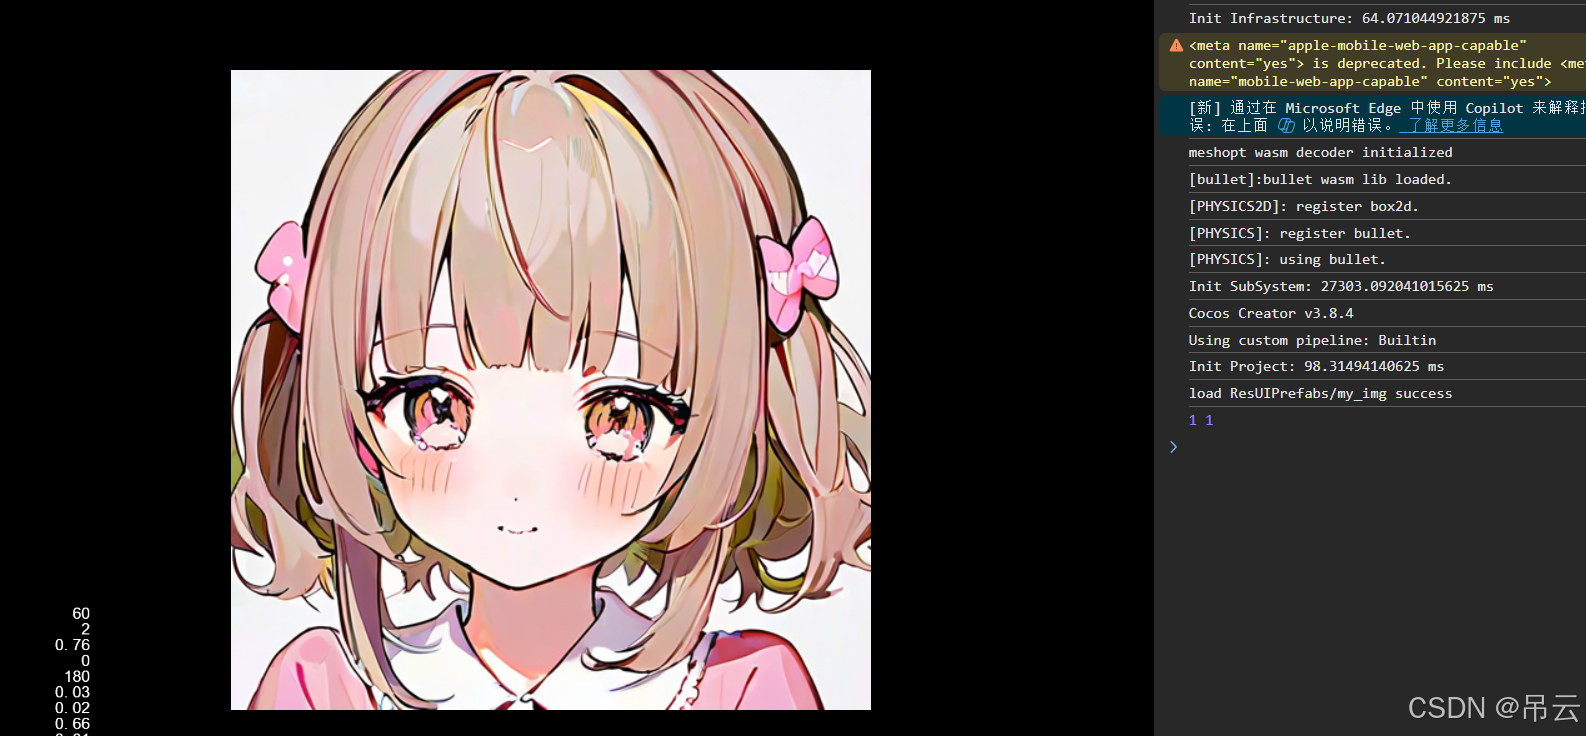
ctrl+s保存后回到Cocos编辑器界面,点击运行,效果如下:
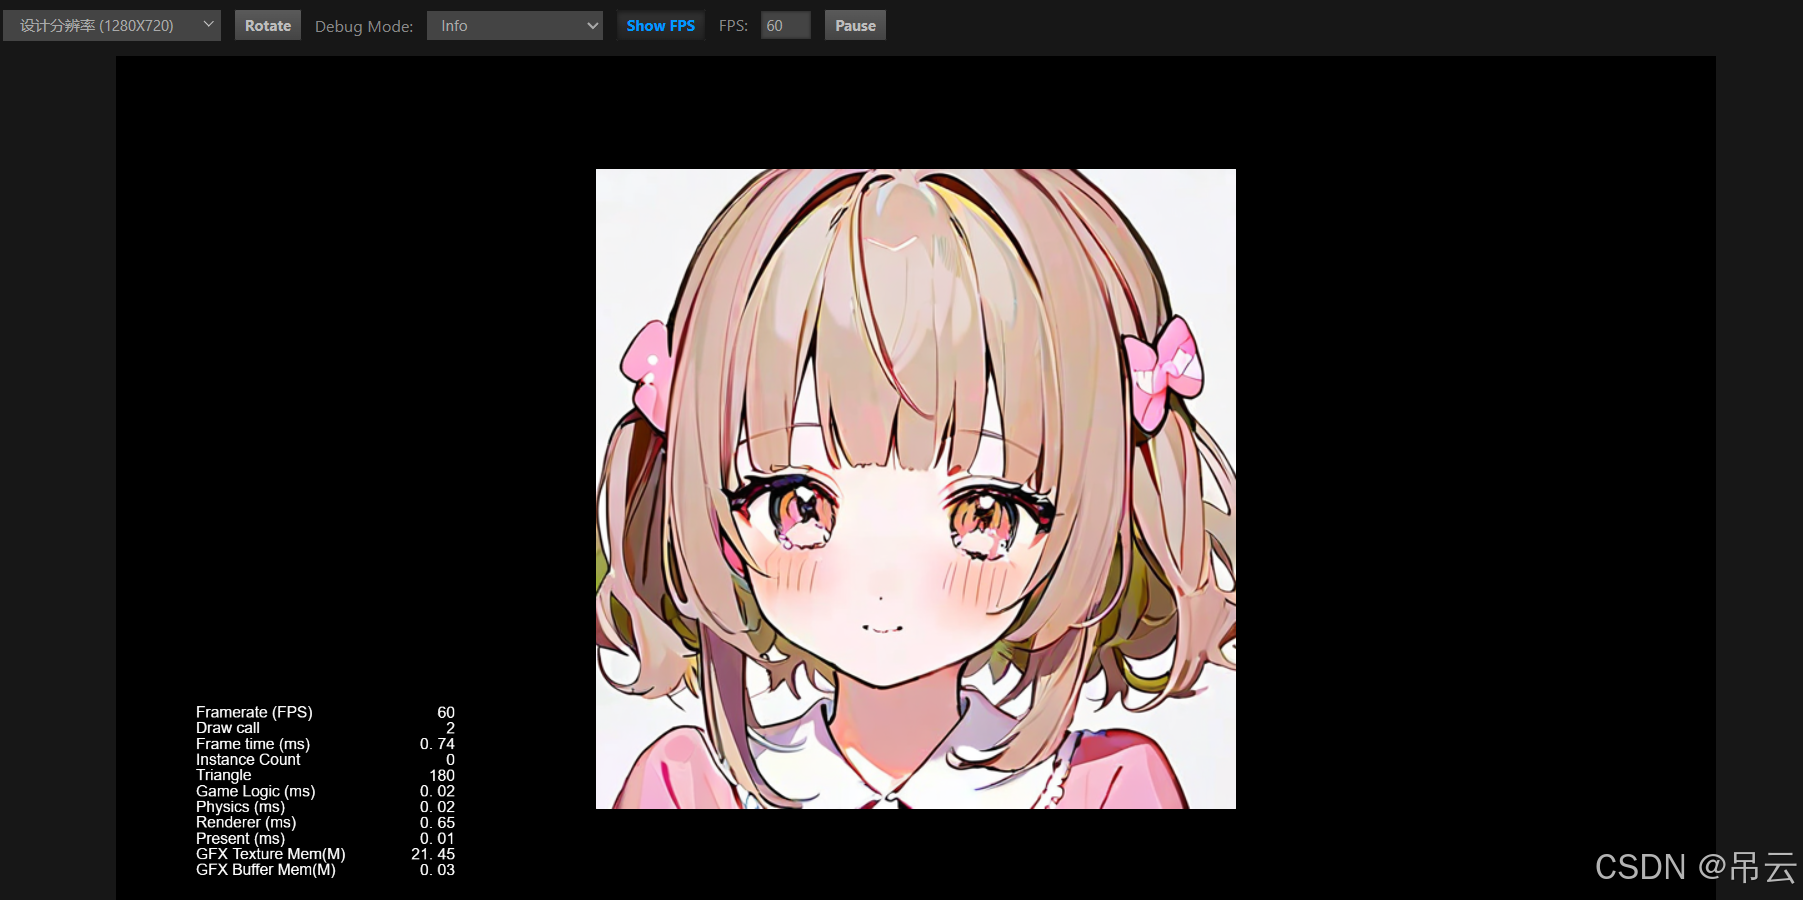
可以看到想要加载的预制体已经成功显示到场景中。
在使用assetManager的load方法和loadBundle方法时,一定要注意资源加载的时机和资源释放的时机,一定要确保资源包加载完成后再加载资源,可以向上面的代码一样,在函数的回调中添加后续要进行的操作。
如果没有在资源包加载完成后再加载资源,在加载资源时很可能会出现调用的load为undefined的错误,例如下面的错误:
加载资源 UIPrefabs/my_img 失败,error: TypeError: Cannot read properties of undefined (reading 'load')
    at GameStart.loadRes (GameStart.ts:73:20)
    at GameStart.loadAssetsInAssetsBundle (GameStart.ts:67:18)
    at GameStart.onLoad (GameStart.ts:25:14)
    at node-activator.ts:82:17
    at OneOffInvoker._invoke (component-scheduler.ts:247:13)
    at OneOffInvoker.invoke (component-scheduler.ts:162:14)
    at NodeActivator.activateNode (node-activator.ts:162:29)
    at Scene._activate (scene.ts:199:42)
    at Director.runSceneImmediate (director.ts:362:15)
    at main.js:1:4332
可以新增一个标志位来跟踪资源包是否加载完成,或者使用现在加载的资源数和总资源数相比较的方法来实现游戏加载进度条的功能,也可以判断资源包是否加载完毕。
针对上面的代码,可以梳理出大致的资源加载流程:
AssetBundle资源管理框架
为了更方便地进行资源管理,可以新建ResMgr单例来将AB包资源加载的操作封装起来。
import { _decorator, assetManager, Component, error, Node } from 'cc';

export default class ResMgr extends Component {
    //单例
    public static Instance: ResMgr = null;

    //资源总数
    private total:number = 0;
    //当前加载资源数
    private now:number = 0;

    //ab包总数
    private totalAb:number = 0;
    //当前加载ab包数
    private nowAb:number = 0;

    //进程函数
    private progressFunc:Function = null;
    //完成回调函数
    private endFunc:Function = null;
    //ab包
    private abBunds= {};

    /**
     * 单例初始化
     * @returns
     */
    protected onLoad(): void {
        if(ResMgr.Instance === null){
            ResMgr.Instance = this;
        }else{
            this.destroy();
            return;
        }
    }

    /**
     * 加载资源包中的资源
     * @param resPkg 资源包
     */
    private loadAssetsInAssetsBundle(resPkg):void{
        for(var key in resPkg){
            var urlSet = resPkg[key].urls;
            var typeClass = resPkg[key].assetType;

            for(var i = 0;i<urlSet.length;i++){
                this.loadRes(this.abBunds[key],urlSet[i],typeClass);
            }
        }
    }
    /**
     * 加载单个资源
     * @param abBundle 资源包
     * @param url 资源路径
     * @param typeClass 资源类型
     */
    private loadRes(abBundle,url,typeClass):void{
        abBundle.load(url,typeClass,(error,asset)=>{
            this.now++;
            if(error){
                console.log("load Res"+ url+" error:"+error);
            }
            else{
                console.log("load Res"+ url+" success");
            }
            if(this.progressFunc){
                this.progressFunc(this.now,this.total);
            }
            console.log(this.now,this.total);
            if(this.now >= this.total){
                if(this.endFunc!=null){
                    this.endFunc();
                }
            }
        })
    }

    /**
     * 加载AssetBundle资源包
     * @param abName 资源包名
     * @param endFunc 回调函数
     */
    private loadAssetsBundle(abName:string,endFunc:Function):void{
        assetManager.loadBundle(abName,(err,bundle)=>{
            if(err!=null){
                this.abBunds[abName] = null;
            }
            else{
                this.abBunds[abName] = bundle;
            }
            if(endFunc){
                endFunc();
            }
        });

    }

    /**
     * 预加载资源包
     * @param resPkg 资源包
     * @param progressFunc 进程函数
     * @param endFunc 回调函数
     */
    preloadResPkg(resPkg, progressFunc ,endFunc):void{
        this.total = 0;
        this.now = 0;

        this.totalAb = 0;
        this.nowAb = 0;

        this.progressFunc = progressFunc;
        this.endFunc = endFunc;

        for(var key in resPkg){
            this.totalAb++;//ab包总数
            this.total += resPkg[key].urls.length;//资源总数
        }

        for(var key in resPkg){
            this.loadAssetsBundle(key,()=>{
                this.nowAb++;
                if(this.nowAb === this.totalAb){
                    this.loadAssetsInAssetsBundle(resPkg);
                }
            })
        }

    }

    /**
     * 获取资源
     * @param abName 资源包名
     * @param url 资源路径
     * @returns
     */
    getAsset(abName,url):any{
        var bundle = assetManager.getBundle(abName);
        if(bundle === null){
            console.log("[error]:"+abName+"AssetBundle not load !");
            return null;
        }
        return bundle.get(url);
    }
}
上面单例的使用方法是先调用preloadResPkg加载资源包和资源,然后通过getAsset获取资源:
//预加载资源包和资源
ResMgr.Instance.preloadResPkg(ResPkg,null,()=>{
    //此处进行资源获取操作
    var res = ResMgr.Instance.getAsset("AssetBundle包名","资源url路径");
    //实例化节点等操作
    // instantiate(res)
});
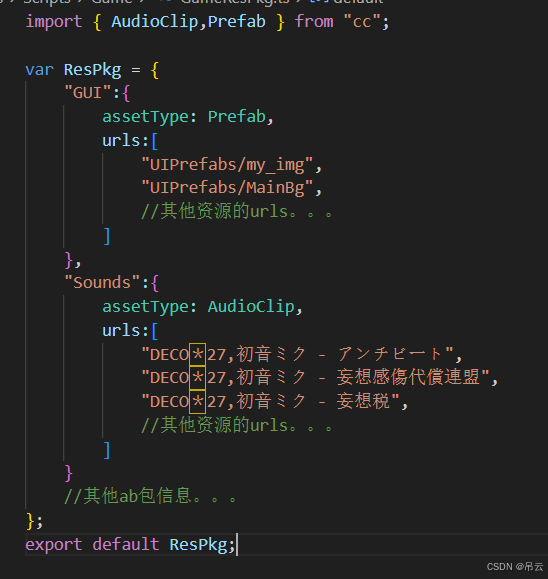
关于ResPkg的输入内容,可以创建一个包含资源包配置信息的对象,新建一个GameResPkg脚本,内容如下:
import { Prefab } from "cc";

var ResPkg = {
    "GUI":{
        assetType: Prefab,
        urls:[
            "UIPrefabs/my_img",
            //其他资源的urls。。。
        ]
    },
    //其他ab包信息。。。
};
export default ResPkg;
有了上面的资源包配置信息对象,我们就可以统一管理要加载的资源包了。
针对上面的小案例,我们可以把scrpits文件夹内结构改成下面的结构:
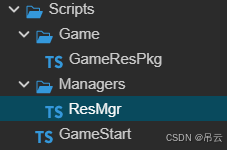
GameStart中的内容如下:
import { _decorator, assetManager, Component, instantiate, Node, Prefab } from 'cc';
import ResMgr from './Managers/ResMgr';
import ResPkg from './Game/GameResPkg';
const { ccclass, property } = _decorator;

@ccclass('GameStart')
export class GameStart extends Component {

    protected onLoad() {
        //注册资源管理器
        this.node.addComponent(ResMgr);
    }

    protected start(): void {
        //预加载资源包和资源
        ResMgr.Instance.preloadResPkg(ResPkg,null,()=>{
            this.enterGameScenes();
        });
    }
    enterGameScenes(){
        //此处进行资源获取操作
        var myImgPrefabs = ResMgr.Instance.getAsset("GUI","UIPrefabs/my_img");
        //实例化节点等操作
        // instantiate(res)
        var myImg = instantiate(myImgPrefabs);
        this.node.addChild(myImg);
    }
}
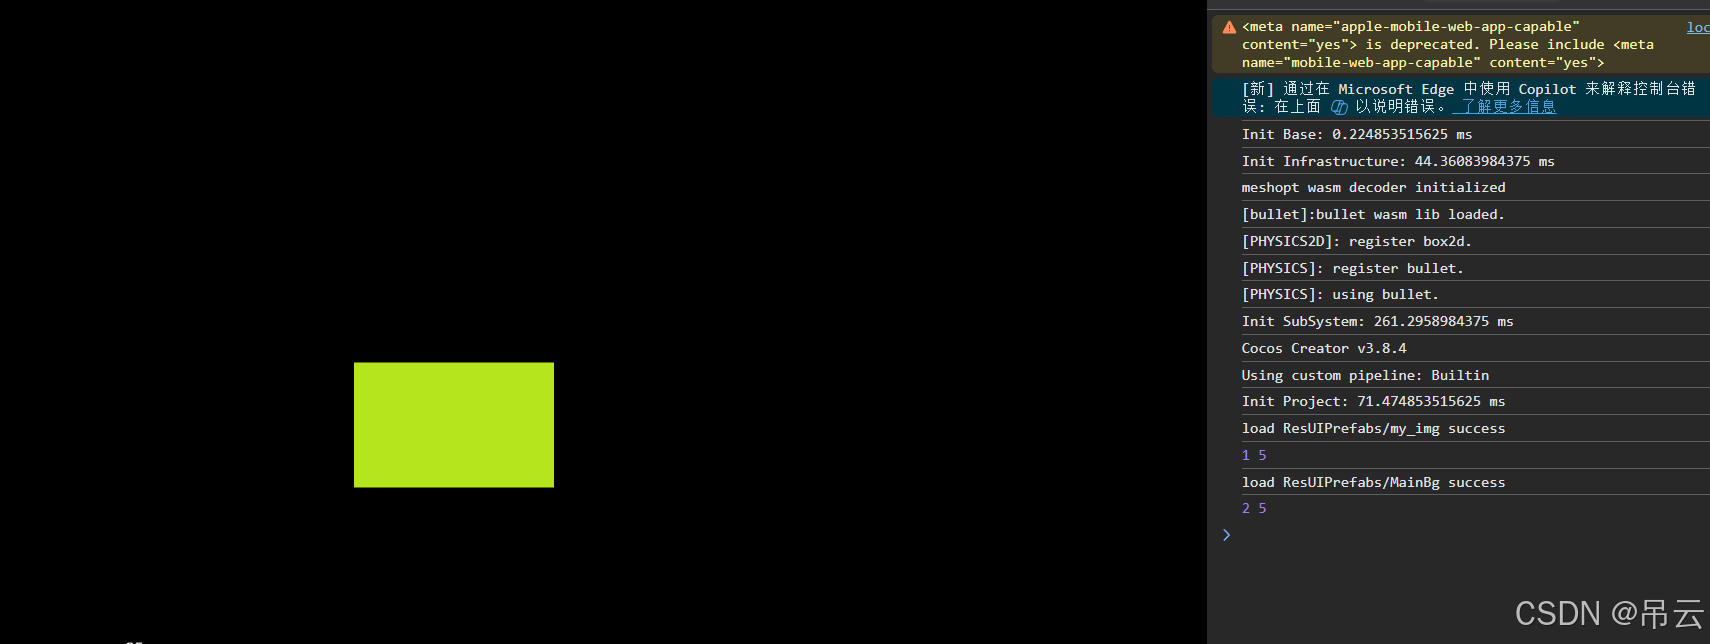
在运行之前一定要注意Canvas节点上要挂载GameStart脚本。运行效果如下:
如果有更多的资源,也可以通过设置更多的AssetBundle文件夹来进行分类:
然后在ResPkg 中增加需要加载的资源包配置信息。
实现进度条加载功能:
我们可以通过now/total的值来实现进度条加载的百分比功能:
1、导入进度条图片、创建进度条节点
在GUI下导入进度条图片:
在Canvas节点下创建空节点ResourcesLoading,在ResourcesLoading节点下创建空节点bg,在空节点中添加组件Sprite.在Sprite属性中修改SpriteFrame的图片,然后将Color调整为黑色。
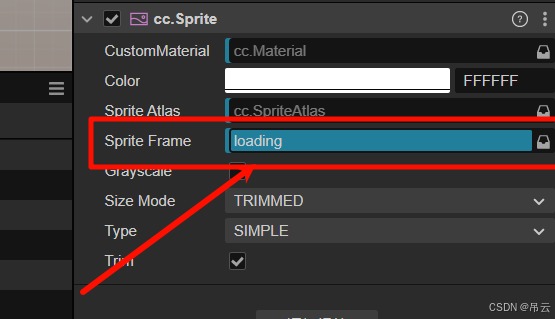
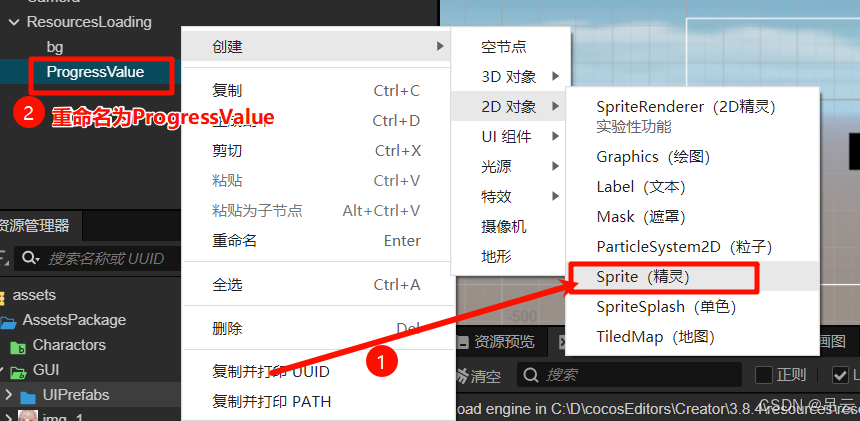
在ResourcesLoading节点下创建Sprite,并重命名为ProgressValue
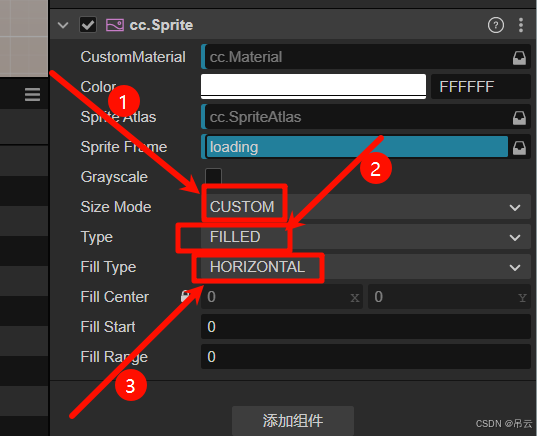
同样,在右侧修改ProgressValue的Sprite Frame为自己导入的图片,将Size Mode修改为CUSTOM,Type修改为FILLED,Fill Type修改为HORIZONTAL。
ctrl+s保存场景。
2、编写进度条脚本代码
进入到GameStart类中的start()方法,修改代码如下:
protected start(): void {

        var loading = this.node.getChildByName("ResourcesLoading");
        var progressValue = loading.getChildByName("ProgressValue").getComponent(Sprite);

        //预加载资源包和资源
        ResMgr.Instance.preloadResPkg(ResPkg,(now,total)=>{
            progressValue.fillRange = now/total;
        },()=>{
            //加载完成
            loading.destroy();
            this.enterGameScenes();
        });
    }
ctrl+s保存代码后,返回cocos creator点击运行,可以看到图片成功加载了进来,由于我们加载的资源过少,所以进度条加载很快,如果加载不明显,我们可以自己在AssetsBundle中多添加一些资源,最好是一些比较大的照片或者是音乐,这样效果比较明显。
如果是mp3的音乐,则资源的类型为AudioClip:
添加资源后,进度条效果如下所示:
以上就是AssetBundle资源管理框架的内容了,第一次写cocos creator的博客,如有错误,请多指正,我会虚心接纳的,谢谢大家。


 2510
2510

 被折叠的 条评论
为什么被折叠?
被折叠的 条评论
为什么被折叠?
 到【灌水乐园】发言


