


一般情况我们会在素材的根目录下建立一个Animation文件夹用于存放动画效果
Animation里一般有两类动画效果
Player and Enemey
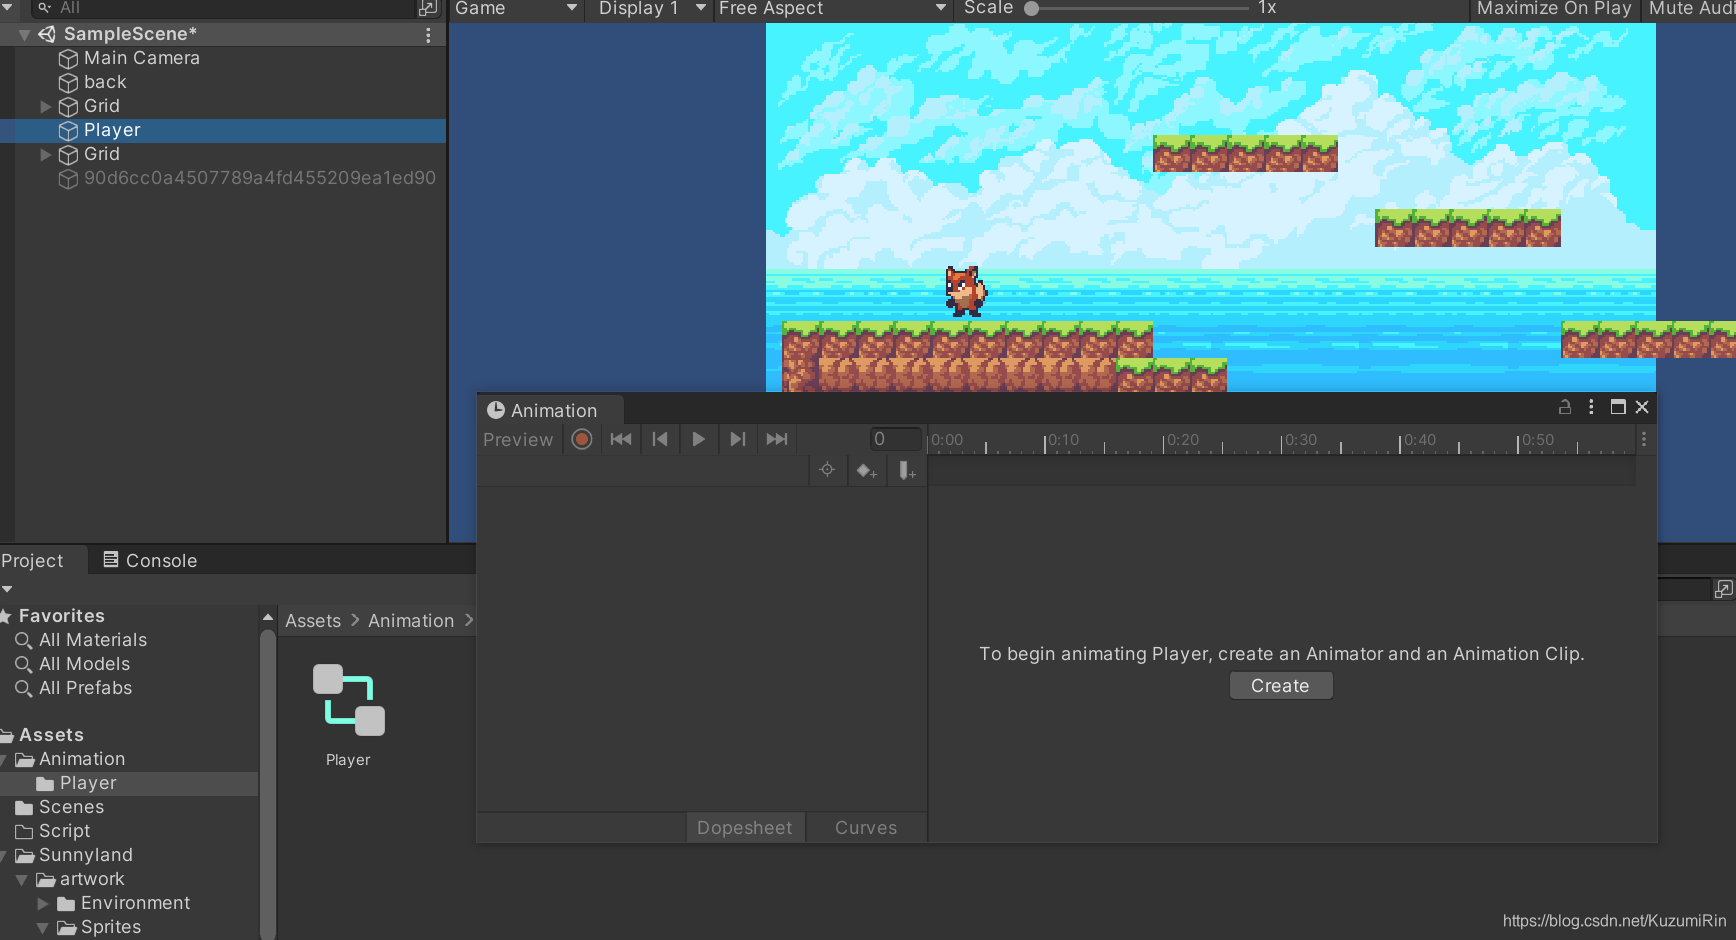
然后在此文件夹中右键,创建,animator controller
接着我们点击这个创建的animator controller,拖拽到检查工具(没有就add Animator Component),Animator项的Controller里面进行连接
创建动画效果:
Windows Animation Animation
点击Create创建动画,以站立动画idle举例
我们需要在这个动画的每一帧里放上我们需要的动画效果,这个一般在Player文件夹中的idle找到
(Assests -> sunnyland -> artwork -> sprites -> player -> idel)
不要忘了使用之前要将其调整为合适的pixels per units (这里以16为标准值)
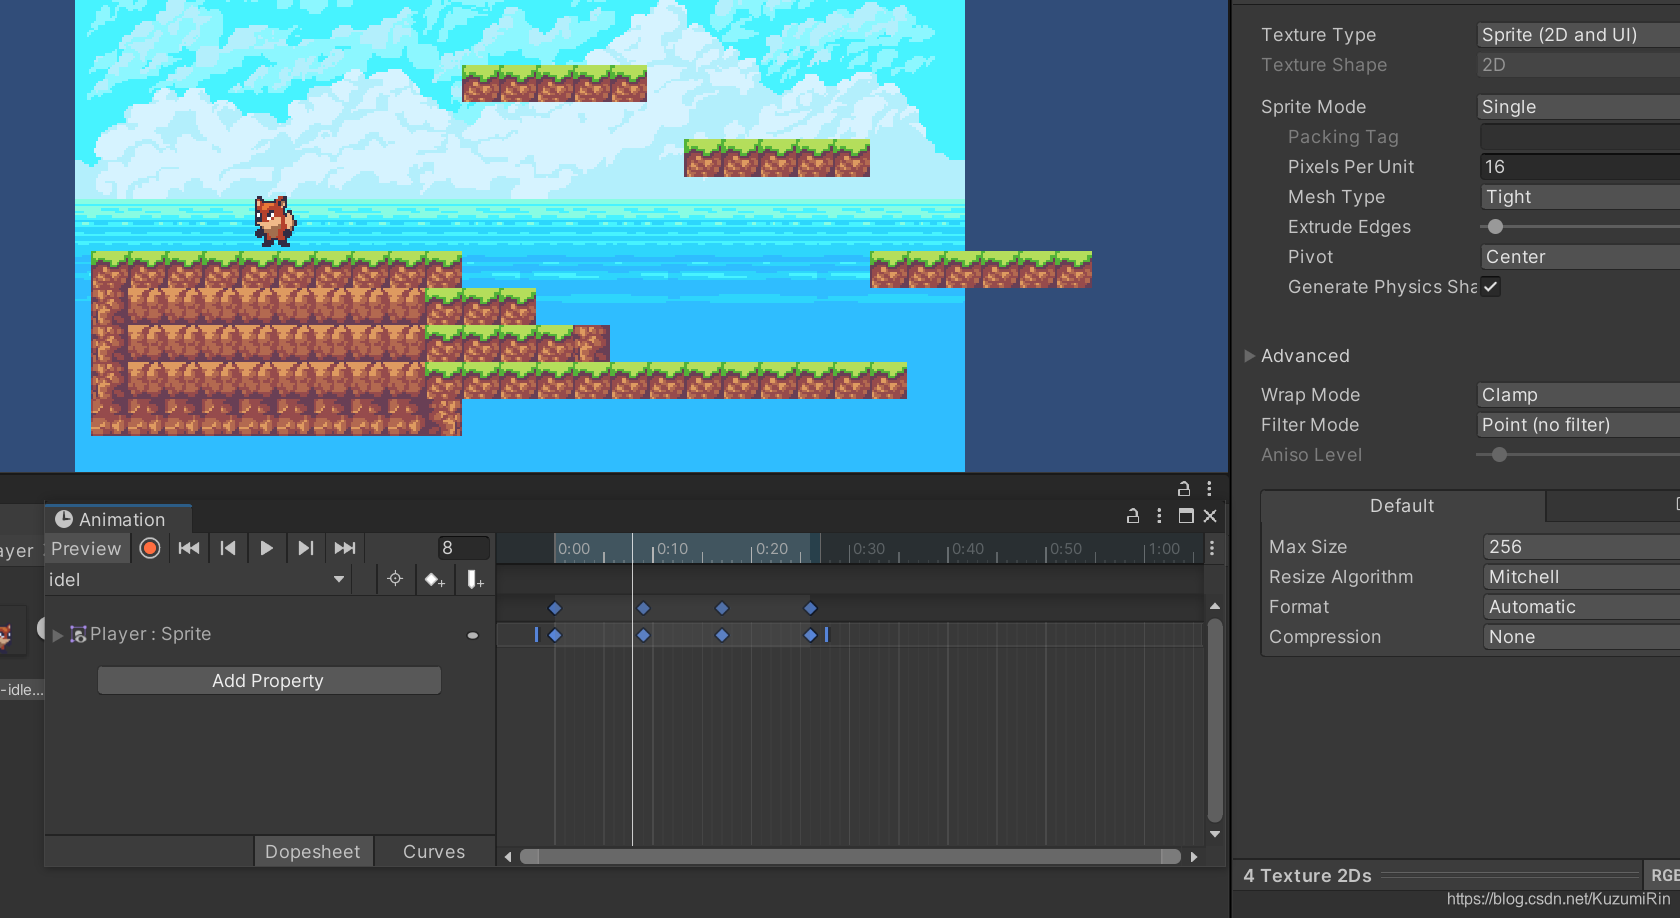
可以通过拖拽来调整每帧动画
动画时机设定
Windows Animation Animator
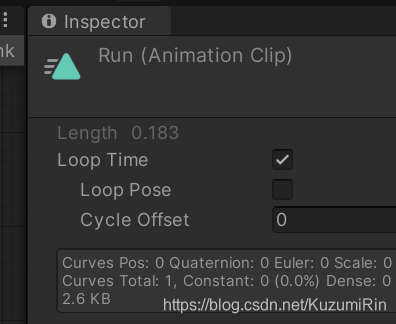
这个Loop Time 要勾选
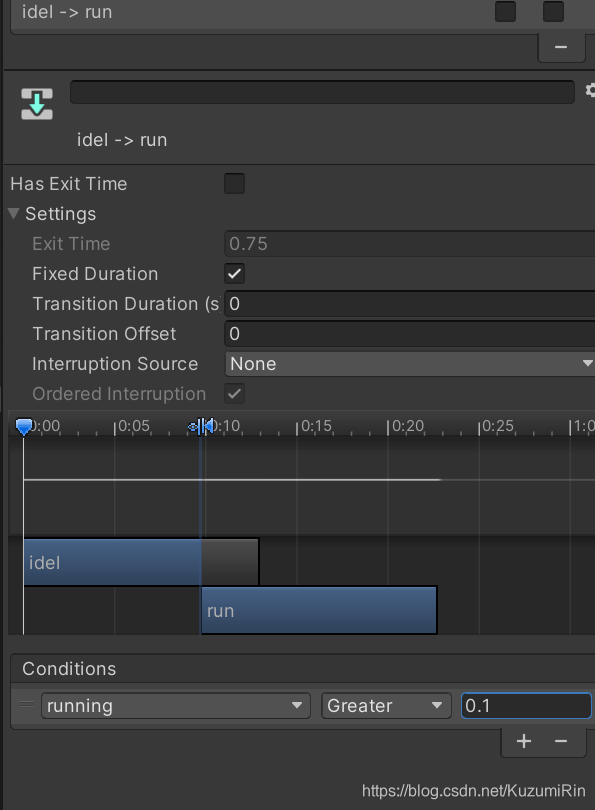
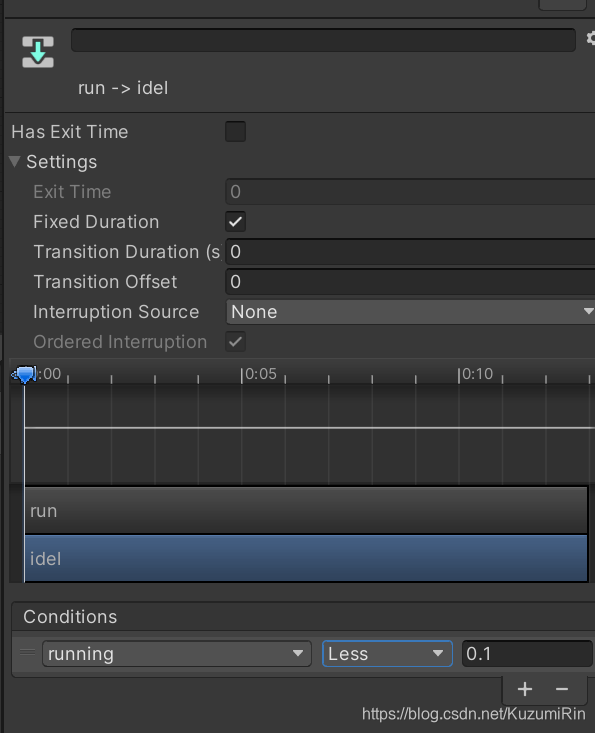
为了设置跑步条件,首先我们需要右键Run Make transiton to idel (since run 和 idel 状态是会切换的)
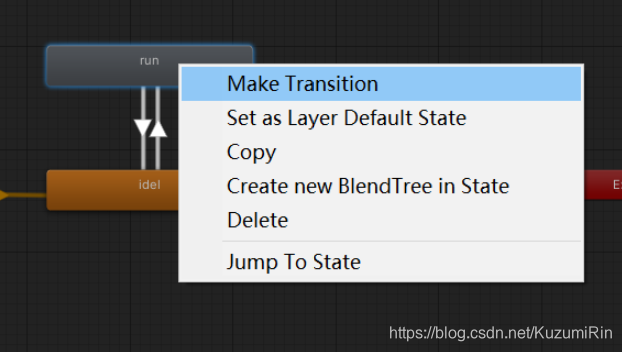
参数在animator中的parameter项可以选择设置
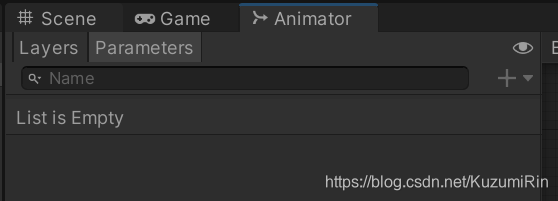
(如果无法添加参数,首先要停止游戏....)
对于idel转换到run的参数设定
同理,run变成idel动作的设置
之后,我们需要在PlayerController.cs中设置动作
实例化对象后,需要将Animator拖拽(link)实例化的对象上
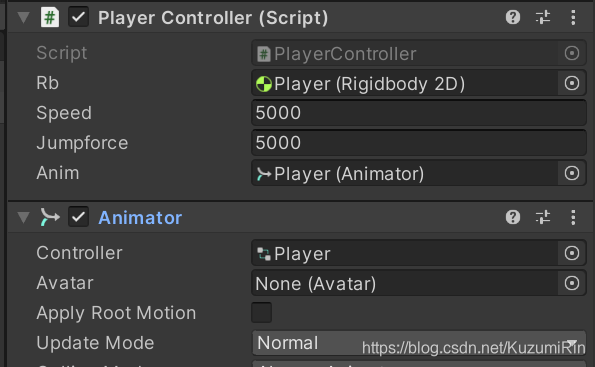
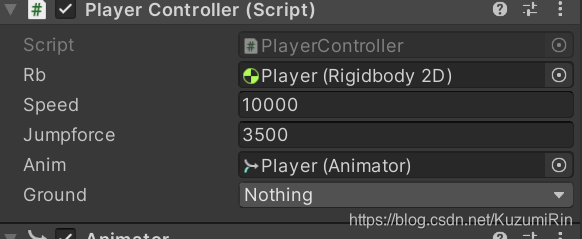
public Rigidbody2D rb;
public float speed;
public float jumpforce;
//向上跳跃需要一个向上的力
public Animator anim;
//实例化Animator对象后,在Unity的检查工具里就会出现Anim选项
// Start is called before the first frame update
void Start()
{
}
void Update()
{
Movement();
}
void Movement()
{
float horizontalmove;
float direction = Input.GetAxisRaw("Horizontal");
//和GetAxis不同的是,这个只获取-1 || 0 || 1 这三个整数
// Input.GetAxis 当按下你设置的建则会返回一个类似加速度的值
horizontalmove = Input.GetAxis("Horizontal");
//-1 向左, 1向右,0就是不动
//角色移动
if(horizontalmove != 0)
{
rb.velocity = new Vector2(horizontalmove * speed *Time.deltaTime, rb.velocity.y);
//刚体的速度 = Vector2 (X轴上速度的变化[方向*速率*物理时钟运行百分比=速度],Y轴上速度的变化)
// (2D平面上的速度变化)
//对anim中的running变量(刚刚在unity创建的)设置一个值
anim.SetFloat("running", Mathf.Abs(direction));
//为了避免向右向左等改变方向使得值变成负值,我们需要绝对值操作
}
if (direction != 0)
{
transform.localScale = new Vector3(direction, 1, 1);
//因为这个localscale包含三个维度的值
}
//角色跳跃
if (Input.GetButtonDown("Jump"))
{
rb.velocity = new Vector2(rb.velocity.x, jumpforce * Time.deltaTime);
}
}
}
跳跃动作
跳跃有跳起和下落两个动作
所以需要单独创建jump fall两个动作
在animator中连接起这几个动作
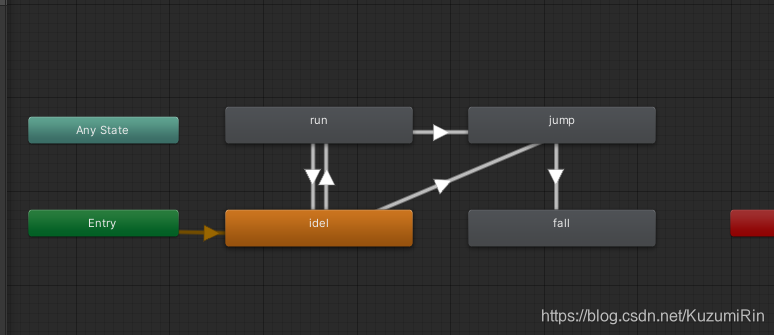
跑步,站立都可以跳跃,
但是下落只在跳跃后的过程中产生(实际上是y轴的加速度为负值)
落到地面需要变回站立姿态
参数里面创建两个bool,jumping and falling
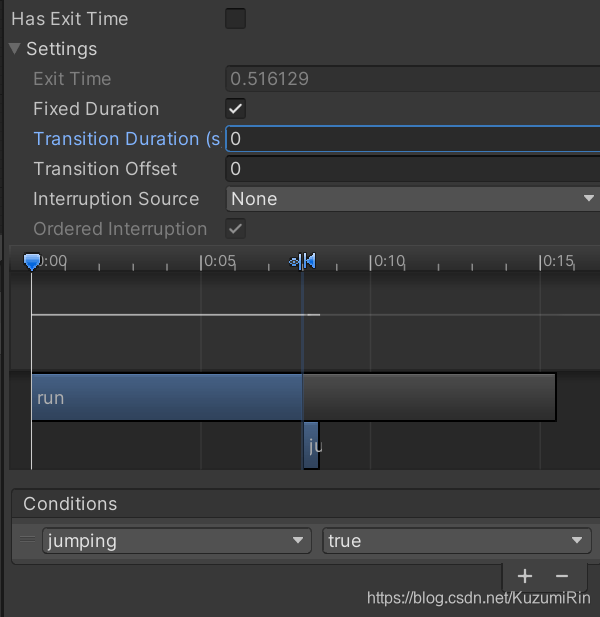
run to jump conditions jumping -> true
jump to fall conditions jumping -> false, falling -> true
fall to idel conditions falling -> false, idel -> true
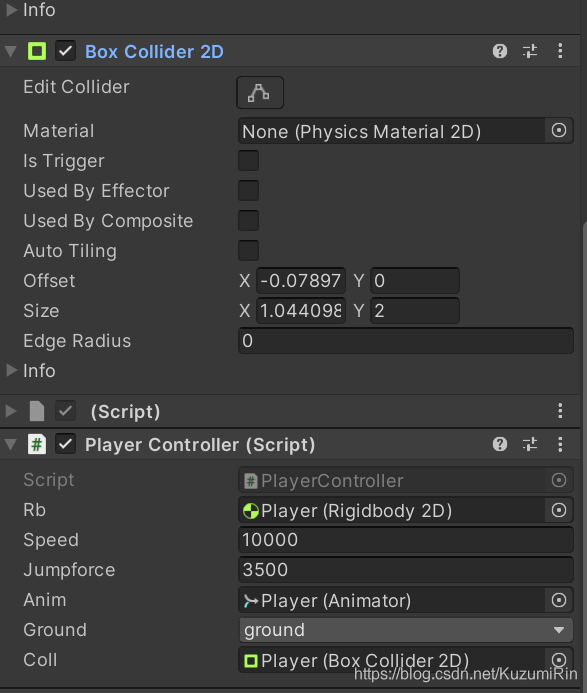
public LayerMask Ground;
//实例化Animator对象后,在Unity的检查工具里就会出现ground选项
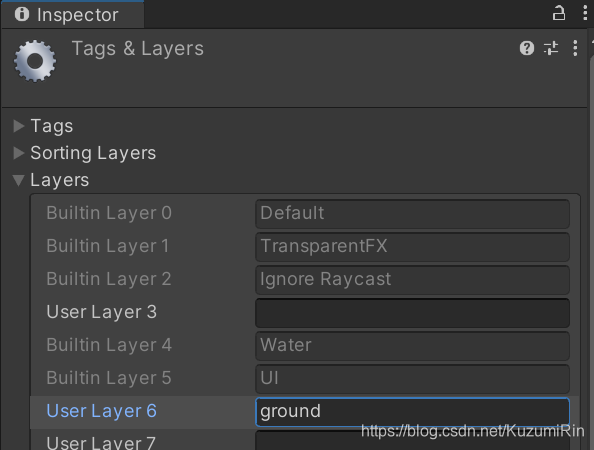
为了实现落地动作,我们需要创建一个layermask对象
同样,实例化后可以在检查工具里找到
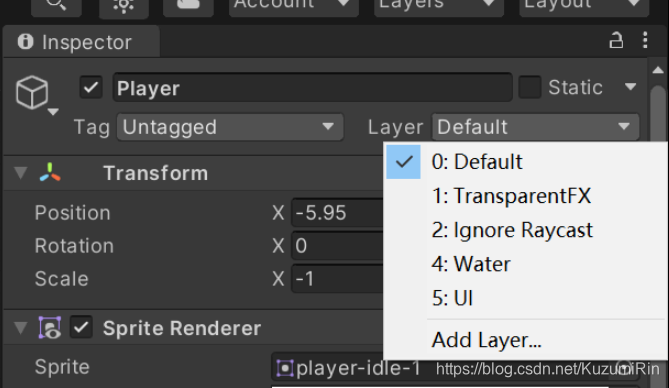
添加ground,首先需要在检查工具的Layer中设置新Layer


public Collider2D coll;
//获取碰撞体信息
实例化碰撞体后,要link一下
using System.Collections;
using System.Collections.Generic;
using UnityEngine;
public class PlayerController : MonoBehaviour
{
public Rigidbody2D rb;
public float speed;
public float jumpforce;
//向上跳跃需要一个向上的力
public Animator anim;
//实例化Animator对象后,在Unity的检查工具里就会出现Anim选项
public LayerMask Ground;
//实例化Animator对象后,在Unity的检查工具里就会出现ground选项
public Collider2D coll;
//获取碰撞体信息
// Start is called before the first frame update
void Start()
{
}
void Update()
{
Movement();
SwitchAnim();
}
void Movement()
{
float horizontalmove;
float direction = Input.GetAxisRaw("Horizontal");
//和GetAxis不同的是,这个只获取-1 || 0 || 1 这三个整数
// Input.GetAxis 当按下你设置的建则会返回一个类似加速度的值
horizontalmove = Input.GetAxis("Horizontal");
//-1 向左, 1向右,0就是不动
//角色移动
if(horizontalmove != 0)
{
rb.velocity = new Vector2(horizontalmove * speed *Time.deltaTime, rb.velocity.y);
//刚体的速度 = Vector2 (X轴上速度的变化[方向*速率*物理时钟运行百分比=速度],Y轴上速度的变化)
// (2D平面上的速度变化)
//对anim中的running变量(刚刚在unity创建的)设置一个值
anim.SetFloat("running", Mathf.Abs(direction));
//为了避免向右向左等改变方向使得值变成负值,我们需要绝对值操作
}
if (direction != 0)
{
transform.localScale = new Vector3(direction, 1, 1);
//因为这个localscale包含三个维度的值
}
//角色跳跃
if (Input.GetButtonDown("Jump"))
{
rb.velocity = new Vector2(rb.velocity.x, jumpforce * Time.deltaTime);
anim.SetBool("jumping", true);
}
}
void SwitchAnim()
{
anim.SetBool("idle", false);
//进入switchanim中,要首先将idel设置为false。具体看下文
if (anim.GetBool("jumping"))
{
if (rb.velocity.y < 0)
{
anim.SetBool("jumping", false);
anim.SetBool("falling", true);
}
}
else if (coll.IsTouchingLayers(Ground))
{
anim.SetBool("falling", false);
anim.SetBool("idle", true);//如果只是设置这一句的话,当他掉落地面后会一直保持idel为true的效果
//因此进入switchanim中,要首先将idel设置为false
}
}
}


 2842
2842

 被折叠的 条评论
为什么被折叠?
被折叠的 条评论
为什么被折叠?
 到【灌水乐园】发言


