


unity中,实现编译后继续操作Xcode文件夹的主要方法是使用
PostProcessBuildAttribute
官方文档:
https://docs.unity3d.com/ScriptReference/Callbacks.PostProcessBuildAttribute.html
用法十分简单,只有1个参数,作用是规定有多个后执行方法时,这些方法的执行顺序。
被 [PostProcessBuildAttribute] 标记的静态方法,会在编辑器编译好项目后被调用,这个时候我们就可以进行很多操作了。
就例如ios被unity编译出来时是一个xcode项目的文件夹,但是这个xcode项目很多时候我们是不能拿来直接用的。
比如我们配置了分享,第三方登录这种sdk时,就可能需要对xcode项目挂在的库文件,oc代码,plist配置文件等等进行修改,这时候就需要用这种方法来进行实现了。
这里举例怎么对 xcode 项目下的 plist 文件进行修改:
首先是我们的入口类,也就是用 PostProcessBuildAttribute 来启动的类(记得把这个脚本丢在 Editor 文件夹下,因为它是个编辑器类)
Code:
using UnityEngine;
using System.Collections;
using UnityEditor;
using UnityEditor.Callbacks;
using System.IO;

namespace PostProcessBuilder
{
    public class SDKPostProcessBuild
    {
        [PostProcessBuildAttribute]
        private static void OnBuild_1(BuildTarget target, string pathToBuiltProject)
        {
            // xcode工程路径
            string path = Path.GetFullPath(pathToBuiltProject);
            Debug.Log("xcode工程路径 = " + path);

            if (target == BuildTarget.iOS)
            {
                // 编辑plist 文件
                EditorPlist(path);
            }
        }

        private static void EditorPlist(string filePath)
        {
            using (IOS.IOSPlist plist = new IOS.IOSPlist(filePath))
            {
                string bundle = "com.xxx.xxx";

                string PlistAdd = @"
    <key>MyTestKey</key>
    <string>123456</string>";

                //在plist里面增加一行
                plist.AddKey(PlistAdd);
                //在plist里面替换一行
                plist.ReplaceKey("<string>com.xxx.${PRODUCT_NAME}</string>", "<string>" + bundle + "</string>");
                //保存
                plist.Save();
            }
        }
    }
}
处理 plist 内容的类,这个类就不用非放在Editor文件夹下了,因为它并没有使用编辑器的方法
Code:
using UnityEngine;
using System.Collections;
using System.Collections.Generic;
using System.IO;

namespace PostProcessBuilder.IOS
{
    public partial class IOSPlist : System.IDisposable
    {
        private List<string> m_contentList;
        private string m_filePath;

        public IOSPlist(string path)
        {
            m_contentList = new List<string>();

            m_filePath = Path.Combine(path, "info.plist");
            if (!System.IO.File.Exists(m_filePath))
            {
                Debug.LogError(m_filePath + "路径下文件不存在");
                return;
            }

            FileInfo projectFileInfo = new FileInfo(m_filePath);
            StreamReader sr = projectFileInfo.OpenText();
            while (sr.Peek() >= 0)
            {
                m_contentList.Add(sr.ReadLine());
            }
            sr.Close();
        }
        // 回收
        void System.IDisposable.Dispose()
        {
            if (m_contentList != null)
            {
                m_contentList.Clear();
                m_contentList = null;
            }
        }

        public void AddKey(string key)
        {
            if (m_contentList.Count < 2)
                return;
            m_contentList.Insert(m_contentList.Count - 2, key);
        }

        public void ReplaceKey(string key, string replace)
        {
            for (int i = 0; i < m_contentList.Count; i++)
            {
                if (m_contentList[i].IndexOf(key) != -1)
                {
                    m_contentList[i] = m_contentList[i].Replace(key, replace);
                }
            }
        }

        public void Save()
        {
            StreamWriter saveFile = File.CreateText(m_filePath);
            foreach (string line in m_contentList)
                saveFile.WriteLine(line);
            saveFile.Close();
        }
    }
}
最后生成的 plist 文件:
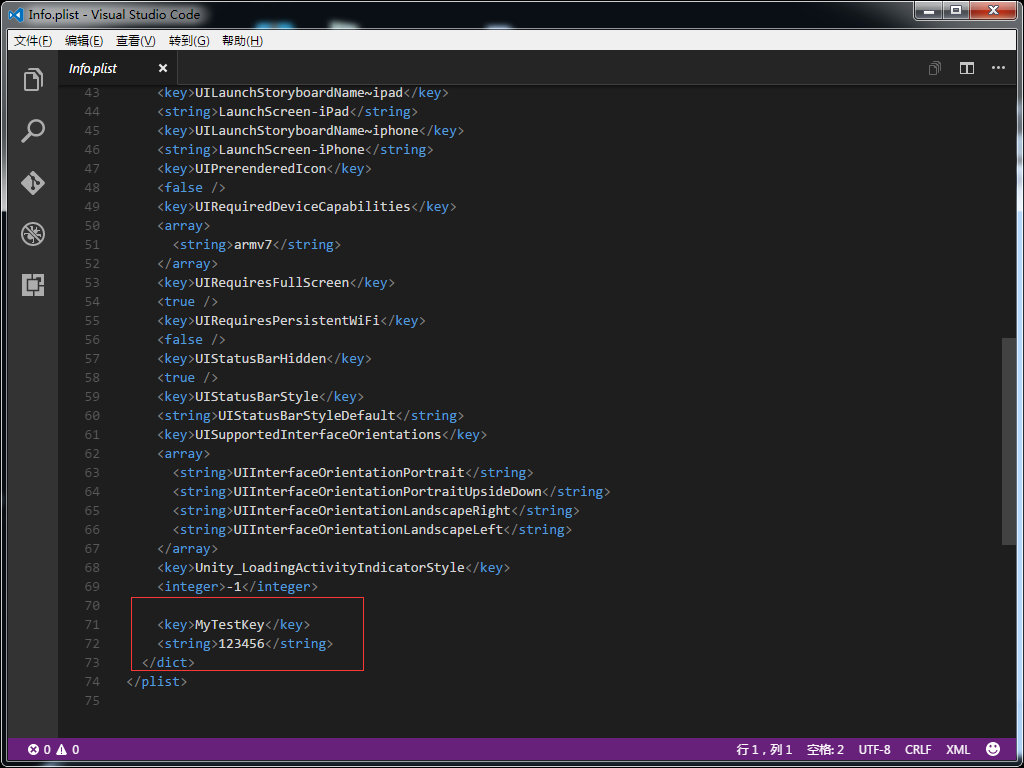
可以看到我们自己添加的key节点已经存在了,操作plist文件就是这么简单,本质上就是根据 plist 所规定的格式,直接读写文件。
PS:这里举一个自动配置Xcode项目的例子,后面整理一下配库,buildPhase的方法再单独说说~


 4065
4065

 被折叠的 条评论
为什么被折叠?
被折叠的 条评论
为什么被折叠?
 到【灌水乐园】发言


