


1. 在Hierarchy窗口创建一个新的摄像机,命名为Bg Camera
2. 新建空游戏体,命名为Background Image,并添加GUI Texture组件

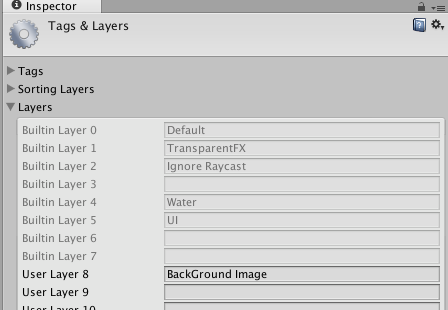
3. 在Background Image的Inspector面板中点击Layer下拉窗口,选择“Add Layer”
4. 在打开的面板中的 User Layer 8(如果你之前没有创建的话默认可以使用的第一个就是它!),添加一个新的层名称为“Background Image”
5. 在Hierachy面板中选择Background Image,并将你准备的背景图片添加给它,在Pixel Inset面板中设定X,Y,Width与Height值,使其可以适当的填充界面。 这里我们在代码中设置他的值。
6. 现在将该GameObject的Layer值设置为之前你添加的Background Image

7. 现在在Hierarchy面板中选择Bg Camera,并在Inspector面板中做如下的调整:
A. 取消选择除GUILayer以外的 Flare Layer与Audio Listener
B. 将Clear Flags设置为Solid Color
C. 设置Depth的值为-2,如果你将主摄像机的Depth设置为-1的话,这里设置的数字比主摄像机的数字小。

D. 设置Culling Mask,第一步选Nothing然后选择Background Image,最终设置好的情况如下:

8. 现在选择另外一个Camera(默认是Main Camera),在Inspector面板中进行如下设置:
A. 将Clear Flags设置为“Depth Only”
B. 设置Culling Mask,取消选择“Background Image”,这将会导致Culling Mask的选项显示为Mixed…
这将形成GUI Texture用Bg Camera来进行渲染,其他都由Main Camera进行渲染,且对于其他Camera(例如:其他Camera角度)你想要使用的,只要重复以上两上步骤就可以了!
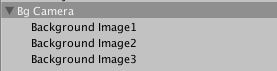
9. 复制BackGround Image两份,此时有三个background image游戏体。将其关联到background脚本中。

10. 程序部分:
using UnityEngine;
using System.Collections;
public class Background : MonoBehaviour {
[SerializeField]
private Transform background1;
[SerializeField]
private Transform background2;
[SerializeField]
private Transform background3;
private GUITexture texture1;
private GUITexture texture2;
private GUITexture texture3;
private Vector3 leftPos = new Vector3 (-1, 0, 0);
private Vector3 rightPos = new Vector3 (1, 0, 0);
private float damp = 0.02f;
void Start () {
texture1 = background1.GetComponent<GUITexture> ();
texture2 = background2.GetComponent<GUITexture> ();
texture3 = background3.GetComponent<GUITexture> ();
float width = Screen.width;
float height = Screen.height;
texture1.pixelInset = new Rect (width / 2, height / 2, 0, 0);
texture2.pixelInset = new Rect (width / 2, height / 2, 0, 0);
texture3.pixelInset = new Rect (width / 2, height / 2, 0, 0);
background1.position = Vector3.zero;
background2.position = rightPos;
background3.position = new Vector3 (2, 0, 0);
}
// Update is called once per frame
void Update () {
background1.position -= new Vector3 (1f, 0, 0) * Time.deltaTime * damp;
background2.position -= new Vector3 (1f, 0, 0) * Time.deltaTime * damp;
background3.position -= new Vector3 (1f, 0, 0) * Time.deltaTime * damp;
if (background1.position.x <= leftPos.x) {
background1.position = rightPos + background3.position;
}
if (background2.position.x < leftPos.x) {
background2.position = rightPos + background1.position;
}
if (background3.position.x < leftPos.x) {
background3.position = rightPos + background2.position;
}
}
}
此时背景就很好的运行起来了,无缝衔接,就像一张背景图一样。
--Rocky


 645
645

 被折叠的 条评论
为什么被折叠?
被折叠的 条评论
为什么被折叠?
 到【灌水乐园】发言


