


http://techny.tumblr.com/post/39928642180/building-ogre-in-windows-7-8-using-visual-studio
Building Ogre in Windows 7/8 using Visual Studio 2012

Since there are no prebuilt Ogre SDK’s targeting Visual Studio 2012 I decided to build it myself from source.
This is a guide on how to build Ogre in Windows using CMake and Visual Studio.
Prerequisites
This guide assumes you are running Windows 7/8 and have Visual Studio 2012 installed.
Needed software
CMake
You will need this to configure Ogre and it’s dependencies. Download and install it fromhttp://www.cmake.org/cmake/resources/software.html
Mercurial
You will need this as Ogre uses this as their source code versioning system. Install it using the big blue button over at http://mercurial.selenic.com
DirectX SDK / Windows SDK
If you want to build Ogre with support for DirectX you will need to install the DirectX SDK for Windows 7 or just the Windows SDK if you are running Windows 8.
You can download the DirectX Software Development Kit from http://www.microsoft.com/en-us/download/details.aspx?id=6812
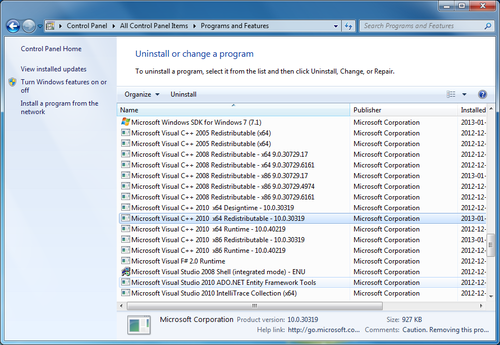
If the DirectX SDK or WindowsSDK installer fails with something like error S1023 you should follow thisguide on how to uninstall and re-install the "Visual C++ 2010 Redistributable Package "
You can skip this and only build the Ogre OpenGL rendering system.
Download and build the Ogre dependencies
Here we will clone and build the Ogre dependencies project fromhttps://bitbucket.org/cabalistic/ogredeps using Mercrial and CMake.
clone the Ogre dependencies repository
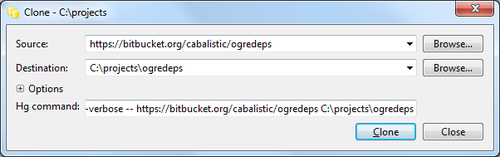
Create the directory c:/projects/ and open it in the windows explorer, right click and choose “TortoiseHg > Clone…”
Set “https://bitbucket.org/cabalistic/ogredeps” as the source and “c:\projects\ogredeps” as the destination, click clone and let it finish.
Configure the dependencies project using CMake
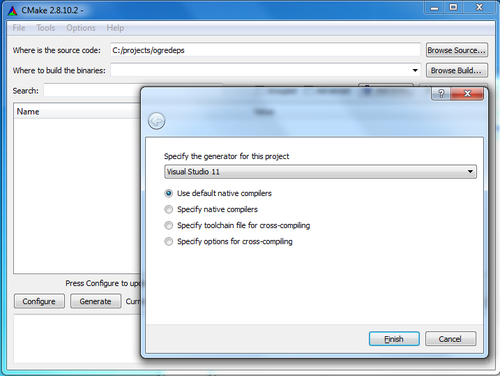
Start CMake and set “Where is the source code” to c:/projects/ogredeps. Click on the “Configure” button at the lower left.
In the dialog choose “Visual Studio 11” in the dropdown and click “Finish”
Set “CMAKE_INSTALL_PREFIX” to c:/projects/ogredeps/install
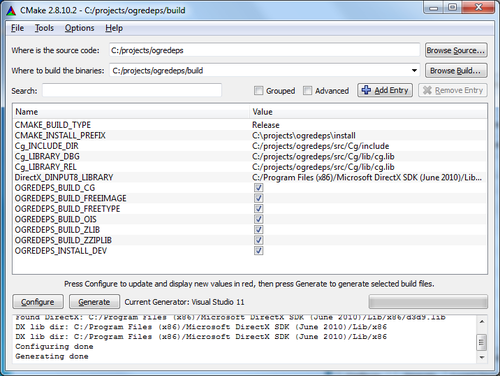
Set “Where to build the binaries” to “c:/projects/ogredeps/build” and click on “Generate”, it will create solution files for you in c:/projects/ogredeps/build
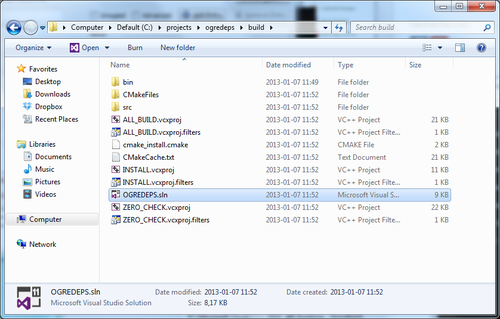
Build the Ogre Dependencies using Visual Studio
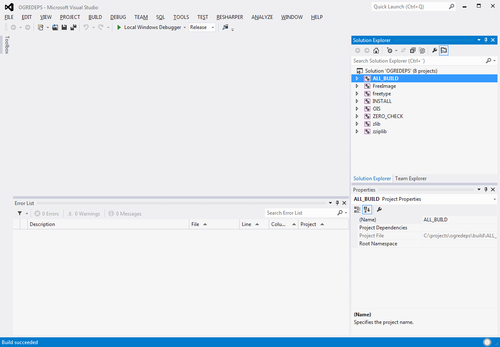
open the solution file c:/projects/ogredeps/build/OGREDEPS.sln and build the “ALL_BUILD” project using both debug and release mode, then build the “INSTALL” project using both release and debug, this will build and install the dependencies toc:/projects/ogredeps/install
Download and build Ogre
We now have all of the tools and dependencies needed to build Ogre.
clone the Ogre repository
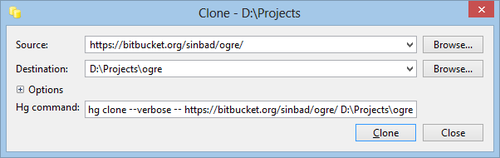
Open the c:/projects folder in the windows explorer, using TortoiseHg clone “https://bitbucket.org/sinbad/ogre/ -u v1-8” into c:/projects/ogre/
This will create a clone of the latest unstable branch, right click on the folder c:/projects/ogre/, choose TortoiseHg > Update and change the branch version to “v1-8” and click the update button.
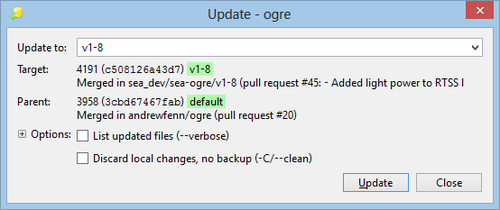
v1-8 is the latest stable version of Ogre as I am writing this, checkhttp://www.ogre3d.org/developers/mercurial if this has changed when you are reading this.
Configure Ogre using CMake
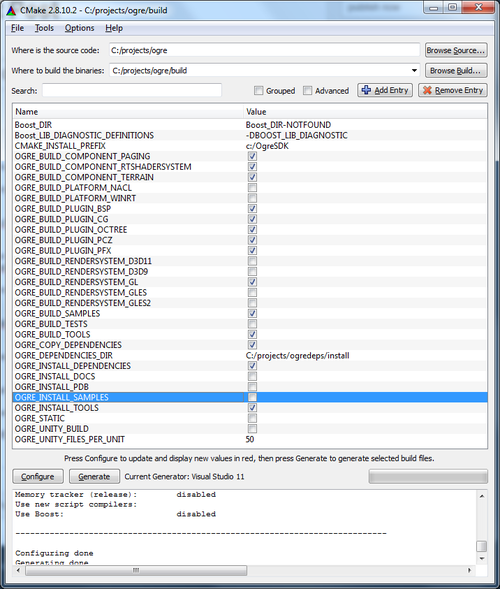
Start CMake and set “Where is the source code” to c:/projects/ogre. Click on the “Configure” button at the lower left.
In the dialog choose “Visual Studio 11” in the drop-down and click “Finish”
CMake will fail, this is ok, we will fix it.
set “Where to build the binaries” to c:/projects/ogre/build
set “OGRE_DEPENDENCIES_DIR” to c:/projects/ogredeps/install
set “CMAKE_INSTALL_PREFIX” to c:/OgreSDK
make sure to check both “OGRE_BUILD_SAMPLES” and “OGRE_INSTALL_SAMPLES” if you wanna test Ogre after the build/install.
now click on “Configure” and then on “Generate” and it will generate the solution files for us inc:/projects/ogre/build
Build Ogre using Visual Studio
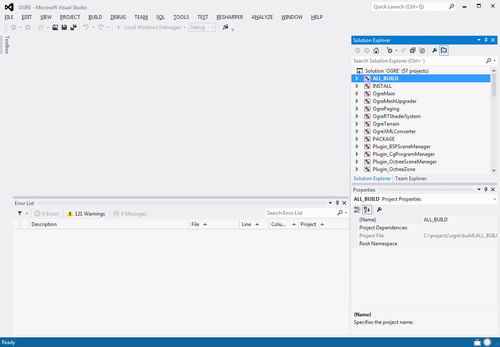
Open the solution file c:/projects/ogre/build/OGRE.sln and build the “ALL_BUILD” project using both debug and release mode, then build the “INSTALL” project using both release and debug, this will build and install the Ogre SDK and Samples into c:/OgreSDK
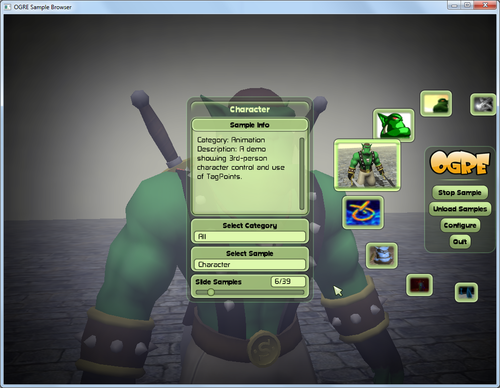
All done! you have now successfully built and installed Ogre into c:/OgreSDK
Execute C:\OgreSDK\bin\release\SampleBrowser.exe to view the prebuilt demos.


 被折叠的 条评论
为什么被折叠?
被折叠的 条评论
为什么被折叠?
 到【灌水乐园】发言


