前言
很久以前,我们已经对经典的视察映射方法做过笔记。
在以往的方案中,更多的是一种基于实际viewDir和pos,去求解相对准确的虚拟uv的近似方法。
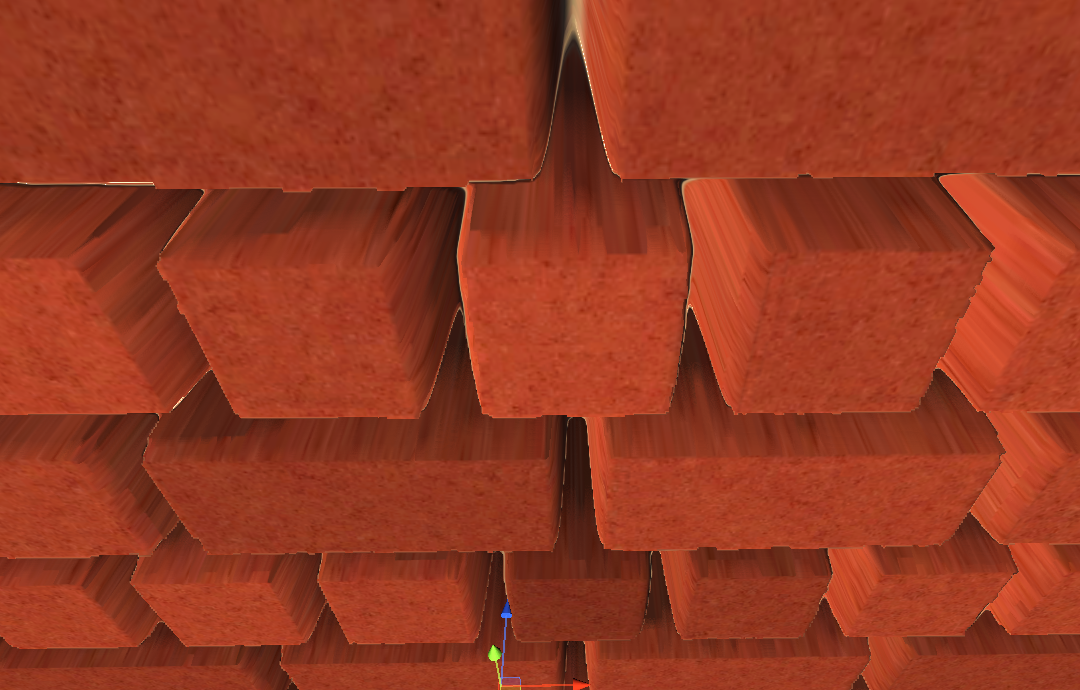
可以看到在观察角度相对与平面的夹角越小时,视差映射的离散分层的效果就越明显。

relief mapping(浮雕映射)则提供了一种更实际的求解方法,确保求解到的虚拟uv更加的准确。
relief mapping的原理和实现
对于浮雕映射,我们最重要的目标就是,比以往的方法求解更精确的虚拟uv点。该uv点对应的便是viewDir和我们需要的虚拟物体表面的接触位置,基于该位置进行采样到的高度图的值才是我们想要的值。
我们将求解到的虚拟uv返回,更新原本的实际uv,用以采样高度图。
对于真实平面,我们能够通过特定观察方向(蓝线),得到其实际观察位置(黑色平面上的某点)对应的uv。

对于视差映射,我们需要在真实平面(黑色平面上)投影出有高度变化的平面的效果(红色)。

如果我们直接使用真实uv采样高度贴图,得到的结果是不正确的,因为其对应的并不是沿着viewDir和虚拟平面的交点。

我们需要沿着viewDir的方向,求解其与虚拟平面(红色)的交点,即虚拟uv的位置,用虚拟uv来采样高度图,就能得到真实uv处的位置应得的高度值结果。

求解viewDir和虚拟平面的交点
首先我们采用的是一种类似于ray marching的方法,每走一步,都会采样其高度图(height map)的值,并累计深度值:
//最大步进数,避免特殊情况下出现无限迭代
int maxstep= 40;
//当前步进深度
int recentsetp = 0;
float currentLayerDepth = 0;
//
float currentDepthMapValue, lastDepthValue;

//deltaDepth 单位高度偏移,每迈进一步,增加一单位偏移
//deltaTexCoords 单位水平偏移,同上
float deltaDepth =  _height_scale / maxstep;
float2 deltaTexCoords = viewDir.xy * _height_scale/ maxstep;
float2 currentTexCoords = texCoords * _Scale;

//outerUV 记录虚拟平面以外的最后uv值,即最接近uv平面的uv值,每次迭代都会更新
//innerUV 记录虚拟平面以内的第一个uv值
float2 innerUV;
float2 outerUV = currentTexCoords;

//currentDepthMapValue 当前采样深度,随uv变化而变化
currentDepthMapValue = tex2D(_DispTex, currentTexCoords);
while(currentLayerDepth < currentDepthMapValue)
{
    outerUV = currentTexCoords;
    currentTexCoords -= deltaTexCoords;
    lastDepthValue = currentDepthMapValue;
    currentDepthMapValue = tex2Dlod(_DispTex, float4(currentTexCoords, 0.0, 0.0)).r;
    //currentLayerDepth 记录当前步进深度,逐步累加
    currentLayerDepth += deltaDepth;
    recentsetp += 1;
    if (recentsetp == maxstep) return currentTexCoords;
}
当累计深度值小于高度图采样值时,说明当前步进点仍在虚拟平面之外。(如下图s1,s2,s3三次步进)

当累计深度值大于高度图采样值时,说明当前步进点已经进入到了虚拟平面之内。

就目前来说,步进的思想实际上与视差遮蔽映射的差别不算大,区别较大的是求解到虚拟平面内外两个点后,确定交叉点的部分。
relief mapping这边使用了近似于二分查找法的思想。
二分查找是非常经典的查找算法,如果是美术同学可以直接百度搜索到非常多相关的案例,这里就不详细展开了。

总的来说,就是根据不同的深度值大小关系,交替迭代更新left, mid, right的值,最终检索到符合要求的uv坐标。
float2 midUV = 0.5 * (outerUV + innerUV);
float midDepthValue = tex2D(_DispTex, midUV).r;
while ( 0.5 * (lastDepthValue + currentDepthMapValue) !=  midDepthValue)
{
	//divideTimes 迭代次数限制
    divideTimes -= 1;
    //即中值uv的采样深度在中值深度以下,说明交叉点交叉点位于左区间
    if (0.5 * (lastDepthValue + currentDepthMapValue) <  midDepthValue)
    {
        outerUV = midUV;
        lastDepthValue = 0.5 * (lastDepthValue + currentDepthMapValue);

        midUV = 0.5 * (outerUV + innerUV);
        midDepthValue = tex2Dlod(_DispTex, float4(midUV, 0.0, 0.0)).r;
    }
    //即中值uv的采样深度在中值深度以上,说明交叉点交叉点位于右区间
    else
    {
        innerUV = midUV;
        currentDepthMapValue = 0.5 * (lastDepthValue + currentDepthMapValue);

        midUV = 0.5 * (outerUV + innerUV);
        midDepthValue = tex2Dlod(_DispTex, float4(midUV, 0.0, 0.0)).r;
    }
    if(divideTimes == 0) break;
}
蓝色点,即交点位于中点右边的情况:
0.5 * (lastDepthValue + currentDepthMapValue) < midDepthValue

蓝色点,即交点位于中点左边的情况:
0.5 * (lastDepthValue + currentDepthMapValue) > midDepthValue

那么到这里,基本的relief mapping已经实现。
下图是relief mapping(左)和ParallaxOcclusion Mapping(右)的对比。
可以看到在整体深度尺寸较大,观察角度较大(即相对贴平于平面)的情况下,relief mapping渲染的高度视差的分层感更弱。

更极限的情况下,relief mapping的效果优势更明显。

实现动态步进距离
但是凑得足够近了,我们仍能发现relief mapping有分层的瑕疵。
这是由于步进距离相对固定,导致的采样精度的原因导致的,就像steep_Parallax Mapping一样的千层糕一般的层次感。

在离交叉点较远时,虽然仍有进行步进,但此时的步进计算由于得不到交点,基本上都属于前期的无用计算。
而到了后期步进到快接近交点的位置时,则由于步进幅度太大,导致精度不够。
动态步进的核心思想就是,在前期离交点远时,加快步幅,提高计算效率。在后期离交点近时,缩小步幅以提高精度。

currentDepthMapValue = tex2D(_DispTex, currentTexCoords);
while(currentLayerDepth < currentDepthMapValue)
{
	//这里我们把累计深度和采样深度的插值,作为判断当前步进点离交叉点距离的依据
	//动态调整moveScale,以动态控制步幅
    moveScale = max(0.1, 3 * (currentDepthMapValue - currentLayerDepth));

    outerUV = currentTexCoords;
    currentTexCoords -= deltaTexCoords * moveScale;
    lastDepthValue = currentDepthMapValue;
    currentDepthMapValue = tex2Dlod(_DispTex, float4(currentTexCoords, 0.0, 0.0)).r;
    currentLayerDepth += deltaDepth * moveScale;
    recentsetp += 1;
    if (recentsetp == maxstep) return currentTexCoords;
}
固定步幅 vs 动态步幅


完整的Relief Mapping源码如下:
float2 ReliefMapping(float2 texCoords, fixed3 viewDir)
{
    int divideTimes = 2;
    int maxstep= 40;
    float currentLayerDepth = 0;
    float currentDepthMapValue, lastDepthValue;
    float deltaDepth =  _height_scale / maxstep;
    float2 deltaTexCoords = viewDir.xy * _height_scale/ maxstep;
    float2 currentTexCoords = texCoords * _Scale;
    float2 innerUV;
    float2 outerUV = currentTexCoords;
    int recentsetp = 0;
    float moveScale;

    currentDepthMapValue = tex2D(_DispTex, currentTexCoords);
    while(currentLayerDepth < currentDepthMapValue)
    {
        moveScale = max(0.1, 3 * (currentDepthMapValue - currentLayerDepth));
        // moveScale = 1;
        outerUV = currentTexCoords;
        currentTexCoords -= deltaTexCoords * moveScale;
        lastDepthValue = currentDepthMapValue;
        currentDepthMapValue = tex2Dlod(_DispTex, float4(currentTexCoords, 0.0, 0.0)).r;
        currentLayerDepth += deltaDepth * moveScale;
        recentsetp += 1;
        if (recentsetp == maxstep) return currentTexCoords;
    }

    innerUV = currentTexCoords;

    float2 midUV = 0.5 * (outerUV + innerUV);
    float midDepthValue = tex2D(_DispTex, midUV).r;
    while ( 0.5 * (lastDepthValue + currentDepthMapValue) !=  midDepthValue)
    {
        divideTimes -= 1;
        if (0.5 * (lastDepthValue + currentDepthMapValue) <  midDepthValue)
        {
            outerUV = midUV;
            lastDepthValue = 0.5 * (lastDepthValue + currentDepthMapValue);

            midUV = 0.5 * (outerUV + innerUV);
            midDepthValue = tex2Dlod(_DispTex, float4(midUV, 0.0, 0.0)).r;
        }
        else
        {
            innerUV = midUV;
            currentDepthMapValue = 0.5 * (lastDepthValue + currentDepthMapValue);

            midUV = 0.5 * (outerUV + innerUV);
            midDepthValue = tex2Dlod(_DispTex, float4(midUV, 0.0, 0.0)).r;
        }
        if(divideTimes == 0) break;
    }

    return midUV;
}


 6532
6532

 被折叠的 条评论
为什么被折叠?


