


1. 建图
1.1 绘制地图
绘制地图需要什么?
1.配备以下设备的机器人: LIDAR和Odometry 2.机器人环境
我们使用cartographer_ros这个 cartographer 的 ROS 封装器,来建图。
在ROS2中启动cartographer,需要启动两个节点
import os
from launch import LaunchDescription
from ament_index_python.packages import get_package_share_directory
from launch_ros.actions import Node

def generate_launch_description():

    cartographer_config_dir = os.path.join(get_package_share_directory('cartographer_slam'), 'config')
    configuration_basename = 'cartographer.lua'

    return LaunchDescription([

        Node(
            package='cartographer_ros',
            executable='cartographer_node',
            name='cartographer_node',
            output='screen',
            parameters=[{'use_sim_time': True}],
            arguments=['-configuration_directory', cartographer_config_dir,
                       '-configuration_basename', configuration_basename]),

        Node(
            package='cartographer_ros',
            executable='occupancy_grid_node',
            output='screen',
            name='occupancy_grid_node',
            parameters=[{'use_sim_time': True}],
            arguments=['-resolution', '0.05', '-publish_period_sec', '1.0']
        ),
    ])
第一个节点指定建图的配置,使用lua语言:
include "map_builder.lua"
include "trajectory_builder.lua"

options = {
  map_builder = MAP_BUILDER,
  trajectory_builder = TRAJECTORY_BUILDER,
  map_frame = "map",                  # 用于发布子地图的frame。通常设置为poses的父帧,常用"map"。
  tracking_frame = "base_footprint",  # SLAM算法跟踪机器人状态的frame,通常选择"base_link"或"base_footprint"
  published_frame = "odom",
  odom_frame = "odom",
  provide_odom_frame = false,
  publish_frame_projected_to_2d = true,
  use_odometry = true,   #  如果启用,Cartographer将订阅odom话题,使用里程计数据进行SLAM。
  use_nav_sat = false,
  use_landmarks = false,
  num_laser_scans = 1,  # 订阅的激光扫描主题数量
  num_multi_echo_laser_scans = 0,
  num_subdivisions_per_laser_scan = 1,
  num_point_clouds = 0,
  lookup_transform_timeout_sec = 0.2,
  submap_publish_period_sec = 0.3,
  pose_publish_period_sec = 5e-3,
  trajectory_publish_period_sec = 30e-3,
  rangefinder_sampling_ratio = 1.,
  odometry_sampling_ratio = 1.,
  fixed_frame_pose_sampling_ratio = 1.,
  imu_sampling_ratio = 1.,
  landmarks_sampling_ratio = 1.,
}

MAP_BUILDER.use_trajectory_builder_2d = true

TRAJECTORY_BUILDER_2D.min_range = 0.12
TRAJECTORY_BUILDER_2D.max_range = 3.5
TRAJECTORY_BUILDER_2D.missing_data_ray_length = 3.0
TRAJECTORY_BUILDER_2D.use_imu_data = false
TRAJECTORY_BUILDER_2D.use_online_correlative_scan_matching = true
TRAJECTORY_BUILDER_2D.motion_filter.max_angle_radians = math.rad(0.1)

POSE_GRAPH.constraint_builder.min_score = 0.65
POSE_GRAPH.constraint_builder.global_localization_min_score = 0.7

-- POSE_GRAPH.optimize_every_n_nodes = 0

return options
Cartographer 可与多种机器人和传感器配合使用。要获得最佳的地图效果,需要对其进行正确配置,所有配置都可以通过 Lua 配置文件给出。
Cartographer 会自动订阅以下主题,如果机器人不在这些主题上发布信息,则必须重新映射:
/scan 用于激光数据
/odom 用于里程测量数据
/imu 用于 IMU 数据
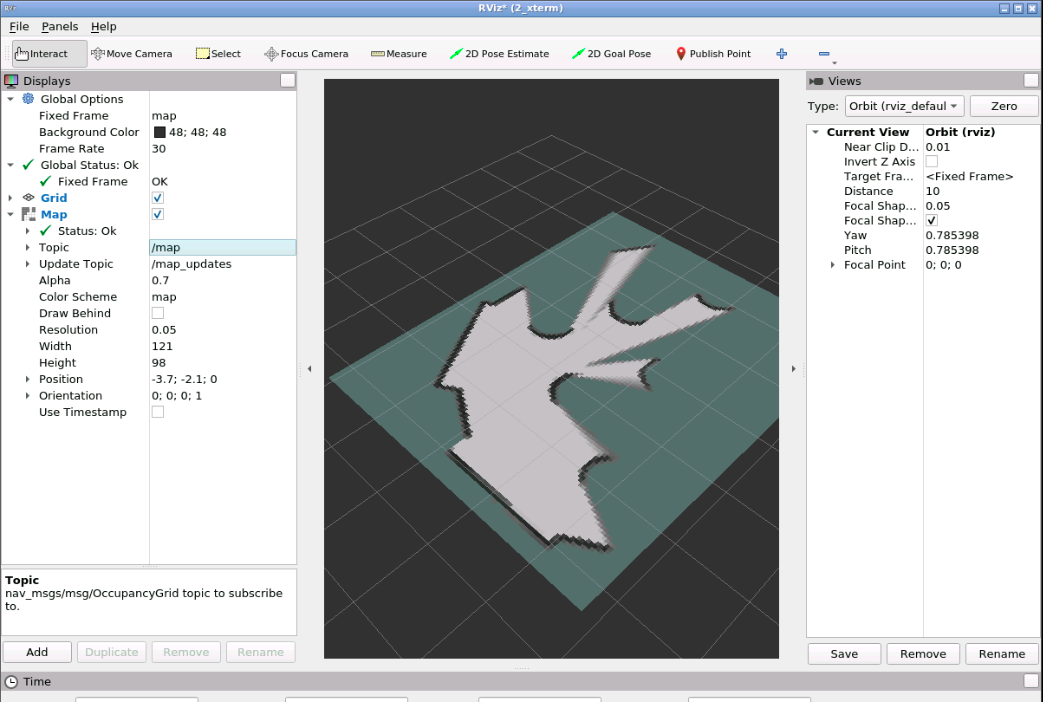
第二个节点occupancy_grid_node 用来发布建图的地图数据,地图精度为0.05米,发布频率1s/次。
使用 ros2 run teleop_twist_keyboard teleop_twist_keyboard 控制小车运动,把环境跑一遍。
1.2 保存地图
在目标文件夹下使用
ros2 run nav2_map_server map_saver_cli -f turtlebot_area
在调用 map_saver_cli 之前,不要关闭cartographer节点 。这个命令将生成turtlebot_area.pgm 图像文件和 turtlebot_area.yaml 文件。
包含有关地图分辨率的详细信息。
image: 包含生成地图图像的文件名。
resolution: 分辨率: 地图的分辨率(单位:米/像素)。
origin: 地图左下角像素的坐标。这些坐标以二维(x、y、z)形式给出。第三个值表示旋转。如果没有旋转,该值将为 0。
occupied_thresh: 数值大于此值的像素将被视为被占区域(标记为障碍物)。
free_thresh: 小于此值的像素将被视为完全自由区域。
negate: 反转地图的颜色。默认情况下,白色表示完全自由,黑色表示完全被占用。
1.3 使用保存好的地图
使用保存好的地图,需要启动map_server 和 nav2_lifecycle_manager 两个节点。
map_server 用来发布地图数据, nav2_lifecycle_manager 用来管理nav2中有关节点的生命周期
import os
from ament_index_python.packages import get_package_share_directory
from launch import LaunchDescription
from launch_ros.actions import Node

def generate_launch_description():

    map_file = os.path.join(get_package_share_directory('map_server'), 'config', 'turtlebot_area.yaml')

    return LaunchDescription([
        Node(
            package='nav2_map_server',
            executable='map_server',
            name='map_server',
            output='screen',
            parameters=[{'use_sim_time': True},
                        {'yaml_filename':map_file}
                       ]),

        Node(
            package='nav2_lifecycle_manager',
            executable='lifecycle_manager',
            name='lifecycle_manager_mapper',
            output='screen',
            parameters=[{'use_sim_time': True},
                        {'autostart': True},
                        {'node_names': ['map_server']}])
        ])
2. 在环境中定位机器人
定位是指了解相对于环境的当前位置,在ROS中使用AMCL(自适应蒙特卡洛定位),发布 /map和 /odom 之间的变换,由于/odom一般和/base_link相连,因此可以定位机器人的位置。
2.1 局部定位
在ROS2中使用定位,相较于1.3使用保存好的地图,多了一个localization算法的节点,同时 lifecycle_manager节点中要加入amcl
import os

from ament_index_python.packages import get_package_share_directory
from launch import LaunchDescription
from launch_ros.actions import Node

def generate_launch_description():

    nav2_yaml = os.path.join(get_package_share_directory('localization_server'), 'config', 'amcl_config.yaml')
    map_file = os.path.join(get_package_share_directory('map_server'), 'config', 'turtlebot_area.yaml')

    return LaunchDescription([
        Node(
            package='nav2_map_server',
            executable='map_server',
            name='map_server',
            output='screen',
            parameters=[{'use_sim_time': True},
                        {'yaml_filename':map_file}]
        ),

        Node(
            package='nav2_amcl',
            executable='amcl',
            name='amcl',
            output='screen',
            parameters=[nav2_yaml]
        ),

        Node(
            package='nav2_lifecycle_manager',
            executable='lifecycle_manager',
            name='lifecycle_manager_localization',
            output='screen',
            parameters=[{'use_sim_time': True},
                        {'autostart': True},
                        {'node_names': ['map_server', 'amcl']}]
        )
    ])
使用的定位节点采用AMCL算法来定位,配置下面的参数
amcl:
  ros__parameters:
    use_sim_time: True
    alpha1: 0.2              # 机器人运动的旋转分量对里程测量旋转估算值产生的预期噪声
    alpha2: 0.2
    alpha3: 0.2
    alpha4: 0.2
    alpha5: 0.2
    base_frame_id: "base_footprint"      # 机器人基座
    beam_skip_distance: 0.5
    beam_skip_error_threshold: 0.9
    beam_skip_threshold: 0.3
    do_beamskip: false
    global_frame_id: "map"
    lambda_short: 0.1
    laser_likelihood_max_dist: 2.0
    laser_max_range: 100.0
    laser_min_range: -1.0
    laser_model_type: "likelihood_field"
    max_beams: 60
    max_particles: 8000
    min_particles: 200
    odom_frame_id: "odom"
    pf_err: 0.05
    pf_z: 0.99
    recovery_alpha_fast: 0.0
    recovery_alpha_slow: 0.0
    resample_interval: 1
    robot_model_type: "differential"    # differential小车或者 omnidirectional 小车
    save_pose_rate: 0.5
    sigma_hit: 0.2
    tf_broadcast: true
    transform_tolerance: 1.0
    update_min_a: 0.2
    update_min_d: 0.25
    z_hit: 0.5
    z_max: 0.05
    z_rand: 0.5
    z_short: 0.05
    set_initial_pose: true  # 使 AMCL 从 initial_pose参数设置初始姿态,而不是等待 initial_pose 消息。也就是说可以通过其他方式来确定初始位置
    initial_pose:
        x: -4.44264
        y: 2.32243
        yaw: 0.328028
每次机器人开始工作时,都必须标明它的初始位置,可以通过rviz的点击的方式确定。也可以使用命令行的方式:
ros2 topic pub -1 /initialpose geometry_msgs/msg/PoseWithCovarianceStamped "{header: {stamp: {sec: 0}, frame_id: 'map'}, pose: {pose: {position: {x: 0.2, y: 0.0, z: 0.0}, orientation: {w: 1.0}}}}"
同理,通过编程的方式也是可以的。
2.2 全局定位
全局定位是在既没有人也没有机器人知道机器人在地图上的位置时使用的技术。机器人必须尝试确定自己的位置。使用全局定位,机器人将尝试在地图上识别自己的位置。
要使用全局定位,需要两个步骤:
- 将滤波器的所有粒子分布在地图上。这一步通过调用名为 /reinitialize_global_localization 的服务来实现。
- 移动机器人,直到它检测到自己的位置。这一步可以通过随机移动机器人并避免障碍物来实现。如果环境简单,还可以通过使机器人在原地旋转(安全解决方案)来实现。
(a) 打开 amcl_config 配置文件并更新粒子的值。
max_particles: 80000 min_particles: 2000 记得重新编译,以便将新的配置文件安装到安装目录中。
(b) 现在运行定位程序。
© 启动 rviz 并添加显示以可视化粒子云(ParticleCloud)。
(d) 发布 2D_pose_estimate 主题,并观察机器人粒子。
(e) 现在调用 reinitialize_global_localization 服务并观察粒子的扩散。
在 命令行中执行以下命令:
ros2 service call /reinitialize_global_localization std_srvs/srv/Empty
在调用服务后,你应该在 RVIZ 中看到类似以下的情况:
https://s3.eu-west-1.amazonaws.com/notebooks.ws/ros2-navigation-galactic-109/gifs/reinitialize_global_localization.gif
(f) 现在,使用键盘来移动机器人,并观察粒子开始积聚。在某个时刻,粒子应该全部位于机器人的位置。
3.机器人路径规划
路径规划是指规划从 A 点到 B 点的轨迹,避开沿途的障碍物。
在ROS2中,为了启动路径规划,在实现定位的基础上还要启动
plannernodecontrollernodemanager of recovery behaviorsnodebehavior tree navigatornode
3.1 planner节点
Nav2中的 planner 任务是为机器人找到一条从 A 点到 B 点的路径,是全局规划器。当机器人接受到一个2d_Goal_Pose时, planner 会根据地图上的已知障碍物规划路径
节点配置文件的参数如下:
planner_server:
  ros__parameters:
    expected_planner_frequency: 10.0
    use_sim_time: True
    planner_plugins: ["GridBased"]
    GridBased:
      plugin: "nav2_navfn_planner/NavfnPlanner"
      tolerance: 0.5
      use_astar: false
      allow_unknown: true
规划器默认使用的是Nav2Fn_Planner ,基于网格搜索的方式规划。它可以使用 A* 或 Dijkstra 算法查找两点之间的路径。
在 Dijkstra 模式(use_astar = false)下,Dijkstra 搜索算法保证在任何条件下都能找到最短路径。
在 A* 模式(use_astar = true)下,A* 的搜索算法并不保证能找到最短路径,但它会使用启发式方法来扩大通向目标的潜在区域,从而更快地找到可能的路径。
目标姿势与路径终点之间的容差为0.5m, allow_unknown指的是允许在未知空间进行规划。
3.2 controllers节点
Nav2中的 controller 相当于局部规划器,其主要任务是从当前位置到几米前方(直到传感器范围)执行反应式路径规划。然后,它会构建一个轨迹,以避开动态障碍物(这些障碍物不会出现在地图上,但可以通过传感器数据检测到),同时尝试遵循全局计划。它还负责生成轮子的控制命令,使机器人遵循轨迹。
节点配置文件的参数如下:
controller_server:
  ros__parameters:
    use_sim_time: True
    controller_frequency: 10.0
    min_x_velocity_threshold: 0.001  # 控制器要考虑的最小 X 速度。低于此值将被视为 0.0 m/s
    min_y_velocity_threshold: 0.5
    min_theta_velocity_threshold: 0.001
    failure_tolerance: 0.3
    progress_checker_plugin: "progress_checker"
    goal_checker_plugins: ["general_goal_checker"]
    controller_plugins: ["FollowPath"]

    # Progress checker parameters
    progress_checker:     # 检查机器人在完成目标的过程中是被卡住了还是取得了进展。
      plugin: "nav2_controller::SimpleProgressChecker"
      required_movement_radius: 0.5				# 机器人向目标前进所需的最小移动量
      movement_time_allowance: 10.0
    # Goal checker parameters
    general_goal_checker:
      stateful: True
      plugin: "nav2_controller::SimpleGoalChecker"
      xy_goal_tolerance: 0.25
      yaw_goal_tolerance: 0.25
    # DWB parameters
    FollowPath:
      plugin: "dwb_core::DWBLocalPlanner"  # dwb_controller适用于差分小车
      debug_trajectory_details: True
      min_vel_x: 0.0
      min_vel_y: 0.0
      max_vel_x: 0.26
      max_vel_y: 0.0
      max_vel_theta: 1.0
      min_speed_xy: 0.0
      max_speed_xy: 0.26
      min_speed_theta: 0.0
      acc_lim_x: 2.5
      acc_lim_y: 0.0
      acc_lim_theta: 3.2
      decel_lim_x: -2.5
      decel_lim_y: 0.0
      decel_lim_theta: -3.2
      vx_samples: 20
      vy_samples: 5
      vtheta_samples: 20
      sim_time: 1.7
      linear_granularity: 0.05
      angular_granularity: 0.025
      transform_tolerance: 0.2
      xy_goal_tolerance: 0.25  # 控制着机器人移动的速度和敏捷度。
      trans_stopped_velocity: 0.25
      short_circuit_trajectory_evaluation: True
      stateful: True
      critics: ["RotateToGoal", "Oscillation", "BaseObstacle", "GoalAlign", "PathAlign", "PathDist", "GoalDist"]
      BaseObstacle.scale: 0.02
      PathAlign.scale: 32.0
      PathAlign.forward_point_distance: 0.1
      GoalAlign.scale: 24.0
      GoalAlign.forward_point_distance: 0.1
      PathDist.scale: 32.0
      GoalDist.scale: 24.0
      RotateToGoal.scale: 32.0
      RotateToGoal.slowing_factor: 5.0
      RotateToGoal.lookahead_time: -1.0
3.3 recoveries节点
当机器人找不到通往目标的有效路径,会发生什么情况?如果机器人卡在中间,不知道该怎么办?
在这种情况下,机器人会使用恢复行为。目前,Nav2 中有三种可用的恢复行为:
spin - 按给定角度执行原地旋转
backup - 按给定距离进行线性平移
wait - 使机器人处于静止状态
这些简单、预定义的动作通常可以通过行为树来实现。
recoveries_server:
  ros__parameters:
    costmap_topic: local_costmap/costmap_raw
    footprint_topic: local_costmap/published_footprint
    cycle_frequency: 10.0
    recovery_plugins: ["spin", "backup", "wait"]
    spin:
      plugin: "nav2_recoveries/Spin"
    backup:
      plugin: "nav2_recoveries/BackUp"
    wait:
      plugin: "nav2_recoveries/Wait"
    global_frame: odom
    robot_base_frame: base_link
    transform_timeout: 0.1
    use_sim_time: true
    simulate_ahead_time: 2.0
    max_rotational_vel: 1.0
    min_rotational_vel: 0.4
    rotational_acc_lim: 3.2
3.4 BT节点
该节点调用路径规划器节点请求路径,然后调用控制器让机器人沿着路径移动,并在出现问题是恢复。整个行为通过BT来组建
bt_navigator:
  ros__parameters:
    use_sim_time: True
    global_frame: map
    robot_base_frame: base_link
    odom_topic: /odom
    bt_loop_duration: 10
    default_server_timeout: 20
    default_nav_to_pose_bt_xml: "/home/user/ros2_ws/src/path_planner_server/config/behavior.xml" #包含用于导航到姿势的行为的文件的完整路径
    plugin_lib_names:
    - nav2_compute_path_to_pose_action_bt_node
    - nav2_compute_path_through_poses_action_bt_node
    - nav2_follow_path_action_bt_node
    - nav2_back_up_action_bt_node
    - nav2_spin_action_bt_node
    - nav2_wait_action_bt_node
    - nav2_clear_costmap_service_bt_node
    - nav2_is_stuck_condition_bt_node
    - nav2_goal_reached_condition_bt_node
    - nav2_goal_updated_condition_bt_node
    - nav2_initial_pose_received_condition_bt_node
    - nav2_reinitialize_global_localization_service_bt_node
    - nav2_rate_controller_bt_node
    - nav2_distance_controller_bt_node
    - nav2_speed_controller_bt_node
    - nav2_truncate_path_action_bt_node
    - nav2_goal_updater_node_bt_node
    - nav2_recovery_node_bt_node
    - nav2_pipeline_sequence_bt_node
    - nav2_round_robin_node_bt_node
    - nav2_transform_available_condition_bt_node
    - nav2_time_expired_condition_bt_node
    - nav2_distance_traveled_condition_bt_node
    - nav2_single_trigger_bt_node
    - nav2_is_battery_low_condition_bt_node
    - nav2_navigate_through_poses_action_bt_node
    - nav2_navigate_to_pose_action_bt_node
    - nav2_remove_passed_goals_action_bt_node
下面是行为树的具体内容:
<!--
  This Behavior Tree replans the global path periodically at 1 Hz, and has
  recovery actions. Obtained from the official Nav2 package
-->
<root main_tree_to_execute="MainTree">
  <BehaviorTree ID="MainTree">
    <RecoveryNode number_of_retries="6" name="NavigateRecovery">
      <PipelineSequence name="NavigateWithReplanning">
        <RateController hz="1.0">
          <RecoveryNode number_of_retries="1" name="ComputePathToPose">
            <ComputePathToPose goal="{goal}" path="{path}" planner_id="GridBased"/>
            <ClearEntireCostmap service_name="global_costmap/clear_entirely_global_costmap"/>
          </RecoveryNode>
        </RateController>
        <RecoveryNode number_of_retries="1" name="FollowPath">
          <FollowPath path="{path}" controller_id="FollowPath"/>
          <ClearEntireCostmap service_name="local_costmap/clear_entirely_local_costmap"/>
        </RecoveryNode>
      </PipelineSequence>
      <SequenceStar name="RecoveryActions">
        <ClearEntireCostmap service_name="local_costmap/clear_entirely_local_costmap"/>
        <ClearEntireCostmap service_name="global_costmap/clear_entirely_global_costmap"/>
        <Spin spin_dist="1.57"/>
        <Wait wait_duration="5"/>
      </SequenceStar>
    </RecoveryNode>
  </BehaviorTree>
</root>
3.5 配置文件
import os
from ament_index_python.packages import get_package_share_directory
from launch import LaunchDescription
from launch_ros.actions import Node

def generate_launch_description():

    controller_yaml = os.path.join(get_package_share_directory('path_planner_server'), 'config', 'controller.yaml')
    bt_navigator_yaml = os.path.join(get_package_share_directory('path_planner_server'), 'config', 'bt_navigator.yaml')
    planner_yaml = os.path.join(get_package_share_directory('path_planner_server'), 'config', 'planner_server.yaml')
    recovery_yaml = os.path.join(get_package_share_directory('path_planner_server'), 'config', 'recovery.yaml')


    return LaunchDescription([
        Node(
            package='nav2_controller',
            executable='controller_server',
            name='controller_server',
            output='screen',
            parameters=[controller_yaml]),

        Node(
            package='nav2_planner',
            executable='planner_server',
            name='planner_server',
            output='screen',
            parameters=[planner_yaml]),

        Node(
            package='nav2_recoveries',
            executable='recoveries_server',
            name='recoveries_server',
            parameters=[recovery_yaml],
            output='screen'),

        Node(
            package='nav2_bt_navigator',
            executable='bt_navigator',
            name='bt_navigator',
            output='screen',
            parameters=[bt_navigator_yaml]),

        Node(
            package='nav2_lifecycle_manager',
            executable='lifecycle_manager',
            name='lifecycle_manager_pathplanner',
            output='screen',
            parameters=[{'autostart': True},
                        {'node_names': ['planner_server',
                                        'controller_server',
                                        'recoveries_server',
                                        'bt_navigator']}])
    ])
配置好启动文件后,可以给定目标位置,指引小车到指定位置。
同样的,可以通过rviz的点击的方式确定。也可以使用命令行的方式:
ros2 action send_goal /navigate_to_pose nav2_msgs/action/NavigateToPose "pose: {header: {frame_id: map}, pose: {position: {x: 1.52, y: 1.92, z: 0.0}, orientation:{x: 0.0, y: 0.0, z: 0, w: 1.0000000}}}"
ros2 topic pub -1 /goal_pose geometry_msgs/PoseStamped "{header: {stamp: {sec: 0}, frame_id: 'map'}, pose: {position: {x: 2.2, y: 0.0, z: 0.0}, orientation: {w: 1.0}}}"
同理,通过编程的方式也是可以的。
import rclpy
from nav2_msgs.action import NavigateToPose
from rclpy.action import ActionClient
from rclpy.node import Node
from geometry_msgs.msg import PointStamped

class NavToPoseActionClient(Node):

    def __init__(self):
        super().__init__('Nav_To_Pose_Action_Client')
        self._action_client = ActionClient(self, NavigateToPose, '/navigate_to_pose')
        self.subscriber_ = self.create_subscription(PointStamped, 'clicked_point', self.callback, 1)
        self.subscriber_  # prevent unused variable warning

    def callback(self, msg):
        self.get_logger().info('Recieved Data:\n X : %f \n Y : %f \n Z : %f' % (msg.point.x, msg.point.y, msg.point.z))
        self.send_goal (msg.point.x, msg.point.y, 0.0)

    def send_goal(self, x ,y, theta):
        self.get_logger().info('sending goal to action server')
        goal_pose = NavigateToPose.Goal()
        goal_pose.pose.header.frame_id = 'map'
        goal_pose.pose.pose.position.x = x
        goal_pose.pose.pose.position.y = y
        goal_pose.pose.pose.position.z = theta

        self.get_logger().info('waiting for action server')
        self._action_client.wait_for_server()
        self.get_logger().info('action server detected')

        self._send_goal_future = self._action_client.send_goal_async(
            goal_pose,
            feedback_callback=self.feedback_callback)
        self.get_logger().info('goal sent')

        self._send_goal_future.add_done_callback(self.goal_response_callback)

    def goal_response_callback(self, future):
        goal_handle = future.result()
        if not goal_handle.accepted:
            self.get_logger().info('Goal rejected :(')
            return
        self.get_logger().info('Goal accepted :)')
        self._get_result_future = goal_handle.get_result_async()

        self._get_result_future.add_done_callback(self.get_result_callback)

    def get_result_callback(self, future):
        result = future.result().result
        self.get_logger().info('Result: {0}' + str(result))
        rclpy.shutdown()

    def feedback_callback(self, feedback_msg):
        feedback = feedback_msg.feedback
        self.get_logger().info('FEEDBACK:' + str(feedback) )

def main(args=None):
    rclpy.init(args=args)

    action_client = NavToPoseActionClient()

    rclpy.spin(action_client)


if __name__ == '__main__':
    main()
4.机器人避障
4.1 代价地图
代价地图是机器人感应到的障碍物在网格地图上的二维表示。
每个网格单元都包含传感器检测到的障碍物信息,单元的代价可以是未知的、空闲的、被占用的或膨胀的。不同的颜色表示与障碍物发生碰撞的可能性有多大,然后,控制器、规划器和恢复器会利用这些信息来安全高效地计算它们的任务
代价地图有两种类型:
全局代价地图(左图)由静态地图中的障碍物生成。它是规划者用来生成长期路径的地图,有助于避开地图上的已知障碍物。
局部代价地图(右图)由机器人在其周围小范围内检测到的新障碍物生成。控制器利用它来生成短期路径并避开动态障碍物。
[外链图片转存失败,源站可能有防盗链机制,建议将图片保存下来直接上传(img-5B6GzaHQ-1692057536275)(/home/lk/.config/Typora/typora-user-images/image-20230812121839712.png)]
4.2 配置全局代价地图
代价地图
要添加全局代价图,需要在planner 配置文件中添加以下一系列参数:
global_costmap:
  global_costmap:
    ros__parameters:
      update_frequency: 1.0
      publish_frequency: 1.0
      global_frame: map
      robot_base_frame: base_link
      use_sim_time: True
      robot_radius: 0.15
      resolution: 0.05
      track_unknown_space: true
      plugins: ["static_layer", "inflation_layer"]
      static_layer:
        plugin: "nav2_costmap_2d::StaticLayer"
        map_subscribe_transient_local: True
      inflation_layer:
        plugin: "nav2_costmap_2d::InflationLayer"
        cost_scaling_factor: 3.0
        inflation_radius: 0.35
      obstacle_layer:
        plugin: "nav2_costmap_2d::ObstacleLayer"
        enabled: True
        observation_sources: scan
        scan:
          topic: /scan
          max_obstacle_height: 2.0
          clearing: True
          marking: True
          data_type: "LaserScan"
          raytrace_max_range: 3.0
          raytrace_min_range: 0.0
          obstacle_max_range: 2.5
          obstacle_min_range: 0.0
      always_send_full_costmap: True
在 RVIZ 中为 /global_costmap/costmap 主题添加costmap显示(选择Color Scheme为map)
global costmap是由不同障碍物层叠加生成的。每一层都会根据该层计算障碍物的方式向global costmap添加一组障碍物。可用的代价图层有:
Static Layer - 将静态地图中存在的任何黑点作为障碍物添加到全局代价地图中
Inflation Layer - 为全局代价地图中的任何障碍物添加膨胀,作为需要保持的安全距离
Inflation Layer - 将二维传感器检测到的任何物体添加到全局代价图中
Voxel Layer - 将点云数据中的三维障碍物添加到全局代价图中
可以指定应用于全局代价图的一个或所有前面的图层。不过,要包含这些层,需要将它们添加到插件列表中,然后为每个层添加配置参数。
plugins: ["static_layer", "obstacle_layer", "inflation_layer"]
需要注意的是,在插件列表中,将 "obstacle_layer "放在 "inflation_layer "之前。否则,"inflation_layer "插件将无法放大新检测到的障碍物。
4.3 配置局部代价地图
要添加局部代价图,需要在planner 配置文件中添加以下一系列参数:
local_costmap:
  local_costmap:
    ros__parameters:
      update_frequency: 5.0
      publish_frequency: 2.0
      global_frame: odom
      robot_base_frame: base_link
      use_sim_time: True
      rolling_window: true
      width: 1
      height: 1
      resolution: 0.05
      robot_radius: 0.15  # 通常使用圆形(或接近圆形)机器人
      plugins: ["voxel_layer", "inflation_layer"]
      inflation_layer:
        plugin: "nav2_costmap_2d::InflationLayer"
        cost_scaling_factor: 3.0
        inflation_radius: 0.35
      voxel_layer:
        plugin: "nav2_costmap_2d::VoxelLayer"
        enabled: True
        publish_voxel_map: True
        origin_z: 0.0
        z_resolution: 0.05
        z_voxels: 16
        max_obstacle_height: 2.0
        mark_threshold: 0
        observation_sources: scan
        scan:
          topic: /scan
          max_obstacle_height: 2.0
          clearing: True
          marking: True
          data_type: "LaserScan"
          raytrace_max_range: 3.0
          raytrace_min_range: 0.0
          obstacle_max_range: 2.5
          obstacle_min_range: 0.0
      static_layer:
        map_subscribe_transient_local: True
      always_send_full_costmap: True
局部代价地图用于在近距离障碍物前做出快速反应。因此,它的尺寸被缩小到几米。代价映射的实际大小由两个附加参数指定:
width,height
这两个参数决定了传感器更新的机器人周围代价地图区域的大小。
5. 多机器人导航
如果是多机器人环境,每个机器人都可能有相同的 /cmd_vel 主题名和相同的 base_footprint 框架名,甚至相同的控制节点名。这在多机器人环境中是不正确的,因为导航算法无法识别与之对话的机器人。
因此,首先要正确配置机器人,并将主题、框架和节点名称分离到命名空间中。
为了使所有机器人都能自主移动,你需要为每个机器人配置和启动一个完整的导航系统。这意味着为每个机器人都需要一个定位系统、一个控制器服务器、一个规划器服务器、一个行为树导航器(bt-navigator)等等。
唯一共享给所有机器人的是 map_server。因为所有机器人将使用相同的地图,所以只会有一个 map_server。
- 从机器人队列中选择一台机器人负责创建地图。
- 创建地图后,使用该地图启动一个单独的 map_server。
- 每个机器人的导航系统都将使用相同的地图,通过向相同的 map_server 请求。
5.1 多机器人定位
tb3_0/amcl:
  ros__parameters:
    use_sim_time: True
    alpha1: 0.2
    alpha2: 0.2
    alpha3: 0.2
    alpha4: 0.2
    alpha5: 0.2
    base_frame_id: "tb3_0/base_footprint"
    beam_skip_distance: 0.5
    beam_skip_error_threshold: 0.9
    beam_skip_threshold: 0.3
    do_beamskip: false
    global_frame_id: "map"
    lambda_short: 0.1
    laser_likelihood_max_dist: 2.0
    laser_max_range: 100.0
    laser_min_range: -1.0
    laser_model_type: "likelihood_field"
    max_beams: 60
    max_particles: 8000
    min_particles: 200
    odom_frame_id: "tb3_0/odom"
    pf_err: 0.05
    pf_z: 0.99
    recovery_alpha_fast: 0.0
    recovery_alpha_slow: 0.0
    resample_interval: 1
    robot_model_type: "differential"
    save_pose_rate: 0.5
    sigma_hit: 0.2
    tf_broadcast: true
    transform_tolerance: 1.0
    update_min_a: 0.2
    update_min_d: 0.25
    z_hit: 0.5
    z_max: 0.05
    z_rand: 0.5
    z_short: 0.05
    scan_topic: "scan"
    map_topic: "/map"
    # ACTIVATE THE set_initial_pose WHEN YOU HAVE A PROPER initial_pose, by uncommenting the code below
    #set_initial_pose: true
    #initial_pose:
    # x: 7.778
    # y: -9.589
    # z: 0.0
    # a: -0.211

tb3_0/amcl_map_client:
  ros__parameters:
    use_sim_time: True

tb3_0/amcl_rclcpp_node:
  ros__parameters:
    use_sim_time: True
import os

from ament_index_python.packages import get_package_share_directory
from launch import LaunchDescription
from launch_ros.actions import Node

def generate_launch_description():

    tb3_0_config = os.path.join(get_package_share_directory('localization_server'), 'config', 'tb3_0_amcl_config.yaml')
    tb3_1_config = os.path.join(get_package_share_directory('localization_server'), 'config', 'tb3_1_amcl_config.yaml')

    map_file = os.path.join(get_package_share_directory('map_server'), 'config', 'turtlebot_area.yaml')

    return LaunchDescription([
        Node(
            package='nav2_map_server',
            executable='map_server',
            name='map_server',
            output='screen',
            parameters=[{'use_sim_time': True},
                        {'topic_name':"map"},
                        {'frame_id':"map"},
                        {'yaml_filename':map_file}]
        ),

        Node(
            namespace='tb3_0',
            package='nav2_amcl',
            executable='amcl',
            name='amcl',
            output='screen',
            parameters=[tb3_0_config]
        ),

        Node(
             namespace='tb3_1',
             package='nav2_amcl',
             executable='amcl',
             name='amcl',
             output='screen',
             parameters=[tb3_1_config]
        ),

        Node(
            package='nav2_lifecycle_manager',
            executable='lifecycle_manager',
            name='lifecycle_manager_localization',
            output='screen',
            parameters=[{'use_sim_time': True},
                        {'autostart': True},
                        {'bond_timeout':0.0},
                        {'node_names': ['map_server', 'tb3_0/amcl', 'tb3_1/amcl']}]
        )
    ])
同理,其他也是两个节点
6. Nav2导航新特性
Nav2 Simple Commander 提供了一套通过 Python3 代码与 Nav2 系统交互的方法。因此,您可以将其视为一个 Python API,让您可以轻松地与导航堆栈交互。
包括goToPose()、goThroughPoses() 和 followWaypoints()。
cd ~/ros2_ws/src
git clone https://bitbucket.org/theconstructcore/nav2_pkgs.git
6.1 Navigate To Pose
NavigateToPose 动作最适用于点对点导航请求或其他可在行为树中表示边界条件姿势的任务,如动态物体跟随。
#! /usr/bin/env python3
# Copyright 2021 Samsung Research America
#
# Licensed under the Apache License, Version 2.0 (the "License");
# you may not use this file except in compliance with the License.
# You may obtain a copy of the License at
#
#     http://www.apache.org/licenses/LICENSE-2.0
#
# Unless required by applicable law or agreed to in writing, software
# distributed under the License is distributed on an "AS IS" BASIS,
# WITHOUT WARRANTIES OR CONDITIONS OF ANY KIND, either express or implied.
# See the License for the specific language governing permissions and
# limitations under the License.

import time
from copy import deepcopy

from geometry_msgs.msg import PoseStamped
from rclpy.duration import Duration
import rclpy

from nav2_simple_commander.robot_navigator import BasicNavigator, TaskResult

# Shelf positions for picking
shelf_positions = {
    "shelf_A": [-3.829, -7.604],
    "shelf_B": [-3.791, -3.287],
    "shelf_C": [-3.791, 1.254],
    "shelf_D": [-3.24, 5.861]}

# Shipping destination for picked products
shipping_destinations = {
    "recycling": [-0.205, 7.403],
    "pallet_jack7": [-0.073, -8.497],
    "conveyer_432": [6.217, 2.153],
    "frieght_bay_3": [-6.349, 9.147]}

'''
Basic item picking demo. In this demonstration, the expectation
is that a person is waiting at the item shelf to put the item on the robot
and at the pallet jack to remove it
(probably with a button for 'got item, robot go do next task').
'''


def main():
    # Recieved virtual request for picking item at Shelf A and bringing to
    # worker at the pallet jack 7 for shipping. This request would
    # contain the shelf ID ("shelf_A") and shipping destination ("pallet_jack7")
    ####################
    request_item_location = 'shelf_C'
    request_destination = 'pallet_jack7'
    ####################

    rclpy.init()

    navigator = BasicNavigator()

    # Set your demo's initial pose
    initial_pose = PoseStamped()
    initial_pose.header.frame_id = 'map'
    initial_pose.header.stamp = navigator.get_clock().now().to_msg()
    initial_pose.pose.position.x = 3.45
    initial_pose.pose.position.y = 2.15
    initial_pose.pose.orientation.z = 1.0
    initial_pose.pose.orientation.w = 0.0
    navigator.setInitialPose(initial_pose)

    # Wait for navigation to activate fully
    navigator.waitUntilNav2Active()

    shelf_item_pose = PoseStamped()
    shelf_item_pose.header.frame_id = 'map'
    shelf_item_pose.header.stamp = navigator.get_clock().now().to_msg()
    shelf_item_pose.pose.position.x = shelf_positions[request_item_location][0]
    shelf_item_pose.pose.position.y = shelf_positions[request_item_location][1]
    shelf_item_pose.pose.orientation.z = 1.0
    shelf_item_pose.pose.orientation.w = 0.0
    print('Received request for item picking at ' + request_item_location + '.')
    navigator.goToPose(shelf_item_pose)

    # Do something during your route
    # (e.x. queue up future tasks or detect person for fine-tuned positioning)
    # Print information for workers on the robot's ETA for the demonstration
    i = 0
    while not navigator.isTaskComplete():
        i = i + 1
        feedback = navigator.getFeedback()
        if feedback and i % 5 == 0:
            print('Estimated time of arrival at ' + request_item_location +
                  ' for worker: ' + '{0:.0f}'.format(
                      Duration.from_msg(feedback.estimated_time_remaining).nanoseconds / 1e9)
                  + ' seconds.')

    result = navigator.getResult()
    if result == TaskResult.SUCCEEDED:
        print('Got product from ' + request_item_location +
              '! Bringing product to shipping destination (' + request_destination + ')...')
        shipping_destination = PoseStamped()
        shipping_destination.header.frame_id = 'map'
        shipping_destination.header.stamp = navigator.get_clock().now().to_msg()
        shipping_destination.pose.position.x = shipping_destinations[request_destination][0]
        shipping_destination.pose.position.y = shipping_destinations[request_destination][1]
        shipping_destination.pose.orientation.z = 1.0
        shipping_destination.pose.orientation.w = 0.0
        navigator.goToPose(shipping_destination)

    elif result == TaskResult.CANCELED:
        print('Task at ' + request_item_location +
              ' was canceled. Returning to staging point...')
        initial_pose.header.stamp = navigator.get_clock().now().to_msg()
        navigator.goToPose(initial_pose)

    elif result == TaskResult.FAILED:
        print('Task at ' + request_item_location + ' failed!')
        exit(-1)

    while not navigator.isTaskComplete():
        pass

    exit(0)


if __name__ == '__main__':
    main()
6.2 Navigate Through Poses
NavigateThroughPoses 动作最适用于姿态受限的导航请求,或其他在行为树中表示一组姿态的任务。该操作不会在每个航点停留,而是以姿势约束的方式穿过这些航点。
#! /usr/bin/env python3
# Copyright 2021 Samsung Research America
#
# Licensed under the Apache License, Version 2.0 (the "License");
# you may not use this file except in compliance with the License.
# You may obtain a copy of the License at
#
#     http://www.apache.org/licenses/LICENSE-2.0
#
# Unless required by applicable law or agreed to in writing, software
# distributed under the License is distributed on an "AS IS" BASIS,
# WITHOUT WARRANTIES OR CONDITIONS OF ANY KIND, either express or implied.
# See the License for the specific language governing permissions and
# limitations under the License.

import time
from copy import deepcopy

from geometry_msgs.msg import PoseStamped
from rclpy.duration import Duration
import rclpy

from nav2_simple_commander.robot_navigator import BasicNavigator, TaskResult

'''
Basic security route patrol demo. In this demonstration, the expectation
is that there are security cameras mounted on the robots recording or being
watched live by security staff.
'''


def main():
    rclpy.init()

    navigator = BasicNavigator()

    # Security route, probably read in from a file for a real application
    # from either a map or drive and repeat.
    security_route = [
        [1.792, 2.144],
        [1.792, -5.44],
        [1.792, -9.427],
        [-3.665, -9.427],
        [-3.665, -4.303],
        [-3.665, 2.330],
        [-3.665, 9.283]]

    # Set your demo's initial pose
    initial_pose = PoseStamped()
    initial_pose.header.frame_id = 'map'
    initial_pose.header.stamp = navigator.get_clock().now().to_msg()
    initial_pose.pose.position.x = 3.45
    initial_pose.pose.position.y = 2.15
    initial_pose.pose.orientation.z = 1.0
    initial_pose.pose.orientation.w = 0.0
    navigator.setInitialPose(initial_pose)

    # Wait for navigation to activate fully
    navigator.waitUntilNav2Active()

    # Do security route until dead
    while rclpy.ok():
        # Send your route
        route_poses = []
        pose = PoseStamped()
        pose.header.frame_id = 'map'
        pose.header.stamp = navigator.get_clock().now().to_msg()
        pose.pose.orientation.w = 1.0
        for pt in security_route:
            pose.pose.position.x = pt[0]
            pose.pose.position.y = pt[1]
            route_poses.append(deepcopy(pose))
        navigator.goThroughPoses(route_poses)

        # Do something during your route (e.x. AI detection on camera images for anomalies)
        # Print ETA for the demonstration
        i = 0
        while not navigator.isTaskComplete():
            i = i + 1
            feedback = navigator.getFeedback()
            if feedback and i % 5 == 0:
                print('Estimated time to complete current route: ' + '{0:.0f}'.format(
                      Duration.from_msg(feedback.estimated_time_remaining).nanoseconds / 1e9)
                      + ' seconds.')

                # Some failure mode, must stop since the robot is clearly stuck
                if Duration.from_msg(feedback.navigation_time) > Duration(seconds=180.0):
                    print('Navigation has exceeded timeout of 180s, canceling the request.')
                    navigator.cancelTask()

        # If at the end of the route, reverse the route to restart
        security_route.reverse()

        result = navigator.getResult()
        if result == TaskResult.SUCCEEDED:
            print('Route complete! Restarting...')
        elif result == TaskResult.CANCELED:
            print('Security route was canceled, exiting.')
            exit(1)
        elif result == TaskResult.FAILED:
            print('Security route failed! Restarting from the other side...')

    exit(0)


if __name__ == '__main__':
    main()
6.3 Waypoint Following
FollowWaypoints 操作最适用于简单的自主任务,您希望在每个航点停留并执行某个行为(例如暂停 2 秒、拍照、等待某人在航点上放置盒子等)。Nav2 航点跟踪服务器包含在每个航点执行任务的 TaskExecutor 插件。
#! /usr/bin/env python3
# Copyright 2021 Samsung Research America
#
# Licensed under the Apache License, Version 2.0 (the "License");
# you may not use this file except in compliance with the License.
# You may obtain a copy of the License at
#
#     http://www.apache.org/licenses/LICENSE-2.0
#
# Unless required by applicable law or agreed to in writing, software
# distributed under the License is distributed on an "AS IS" BASIS,
# WITHOUT WARRANTIES OR CONDITIONS OF ANY KIND, either express or implied.
# See the License for the specific language governing permissions and
# limitations under the License.

import time
from copy import deepcopy

from geometry_msgs.msg import PoseStamped
from rclpy.duration import Duration
import rclpy

from nav2_simple_commander.robot_navigator import BasicNavigator, TaskResult


def main():
    rclpy.init()

    navigator = BasicNavigator()

    # Inspection route, probably read in from a file for a real application
    # from either a map or drive and repeat.
    inspection_route = [
        [3.461, -0.450],
        [3.461, -2.200],
        [3.661, -4.121],
        [3.661, -5.850]]

    # Set your demo's initial pose
    initial_pose = PoseStamped()
    initial_pose.header.frame_id = 'map'
    initial_pose.header.stamp = navigator.get_clock().now().to_msg()
    initial_pose.pose.position.x = 3.45
    initial_pose.pose.position.y = 2.15
    initial_pose.pose.orientation.z = 1.0
    initial_pose.pose.orientation.w = 0.0
    navigator.setInitialPose(initial_pose)

    # Wait for navigation to activate fully
    navigator.waitUntilNav2Active()

    # Send your route
    inspection_points = []
    inspection_pose = PoseStamped()
    inspection_pose.header.frame_id = 'map'
    inspection_pose.header.stamp = navigator.get_clock().now().to_msg()
    inspection_pose.pose.orientation.z = 1.0
    inspection_pose.pose.orientation.w = 0.0
    for pt in inspection_route:
        inspection_pose.pose.position.x = pt[0]
        inspection_pose.pose.position.y = pt[1]
        inspection_points.append(deepcopy(inspection_pose))
    nav_start = navigator.get_clock().now()
    navigator.followWaypoints(inspection_points)

    # Do something during your route (e.x. AI to analyze stock information or upload to the cloud)
    # Print the current waypoint ID for the demonstration
    i = 0
    while not navigator.isTaskComplete():
        i = i + 1
        feedback = navigator.getFeedback()
        if feedback and i % 5 == 0:
            print('Executing current waypoint: ' +
                  str(feedback.current_waypoint + 1) + '/' + str(len(inspection_points)))

    result = navigator.getResult()
    if result == TaskResult.SUCCEEDED:
        print('Inspection of shelves complete! Returning to start...')
    elif result == TaskResult.CANCELED:
        print('Inspection of shelving was canceled. Returning to start...')
        exit(1)
    elif result == TaskResult.FAILED:
        print('Inspection of shelving failed! Returning to start...')

    # go back to start
    initial_pose.header.stamp = navigator.get_clock().now().to_msg()
    navigator.goToPose(initial_pose)
    while not navigator.isTaskComplete():
        pass

    exit(0)


if __name__ == '__main__':
    main()


 2746
2746


 被折叠的 条评论
为什么被折叠?
被折叠的 条评论
为什么被折叠?
 到【灌水乐园】发言


