


 本文详细描述了UnrealEngine中PlayerCameraManager的初始化过程以及相机更新机制,包括相机位置同步、视图目标处理、相机风格切换、镜头效果应用和视点计算等关键步骤。
1.初始化流程
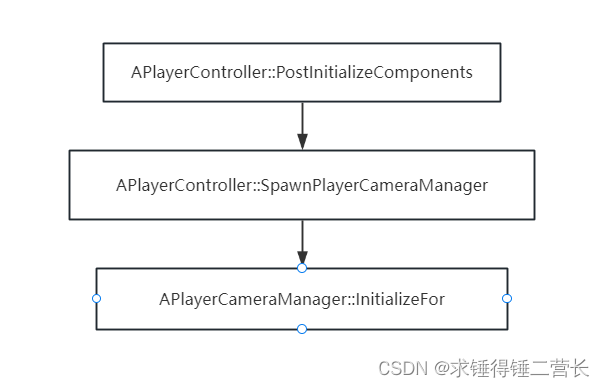
在SpawnPlayerCameraManager中创建CameraManager并进行初始化
void APlayerController::SpawnPlayerCameraManager()
{
	// servers and owning clients get cameras
	// If no archetype specified, spawn an Engine.PlayerCameraManager.  NOTE all games should specify an archetype.
	FActorSpawnParameters SpawnInfo;
	SpawnInfo.Owner = this;
	SpawnInfo.Instigator = GetInstigator();
	SpawnInfo.ObjectFlags |= RF_Transient;	// We never want to save camera managers into a map
	if (PlayerCameraManagerClass != NULL)
	{
		PlayerCameraManager = GetWorld()->SpawnActor<APlayerCameraManager>(PlayerCameraManagerClass, SpawnInfo);
	}
	else
	{
		PlayerCameraManager = GetWorld()->SpawnActor<APlayerCameraManager>(SpawnInfo);
	}

	if (PlayerCameraManager != NULL)
	{
		PlayerCameraManager->InitializeFor(this);
	}
	else
	{
		UE_LOG(LogPlayerController, Log,  TEXT("Couldn't Spawn PlayerCameraManager for Player!!") );
	}
}
InitializeFor为给定的关联PlayerController初始化这个PlayerCameraManager
void APlayerCameraManager::InitializeFor(APlayerController* PC)
{
	FMinimalViewInfo DefaultFOVCache = GetCameraCacheView();
	DefaultFOVCache.FOV = DefaultFOV;
	SetCameraCachePOV(DefaultFOVCache);

	PCOwner = PC;

	SetViewTarget(PC);

	// set the level default scale
	SetDesiredColorScale(GetWorldSettings()->DefaultColorScale, 5.f);

	// Force camera update so it doesn't sit at (0,0,0) for a full tick.
	// This can have side effects with streaming.
	UpdateCamera(0.f);
}
2.相机更新流程

2.1 CameraManager::UpdateCamera
内部执行两个操作:
1. 调用DoupdateCamera()函数
2. 如果CameraManager.buseclientsidecamerupupdates设置为True,客户端将复制相机位置到服务器,其中,会将旋转压缩到4字节
void APlayerCameraManager::UpdateCamera(float DeltaTime)
{
	check(PCOwner != nullptr);

	if ((PCOwner->Player && PCOwner->IsLocalPlayerController()) || !bUseClientSideCameraUpdates || bDebugClientSideCamera)
	{
		DoUpdateCamera(DeltaTime);

		...................

		if (bShouldSendClientSideCameraUpdate && IsNetMode(NM_Client))
		{
            ......................
		}
	}
}
2.2 CameraManager::DoUpdateCamera
实际更新相机的函数
1. 颜色插值变化
// update color scale interpolation
	if (bEnableColorScaleInterp)
	{
		float BlendPct = FMath::Clamp((GetWorld()->TimeSeconds - ColorScaleInterpStartTime) / ColorScaleInterpDuration, 0.f, 1.0f);
		ColorScale = FMath::Lerp(OriginalColorScale, DesiredColorScale, BlendPct);
		// if we've maxed
		if (BlendPct == 1.0f)
		{
			// disable further interpolation
			bEnableColorScaleInterp = false;
		}
	}
2.调用UpdateViewTarget()处理ViewTarget的更新
	// Don't update outgoing viewtarget during an interpolation when bLockOutgoing is set.
	if ((PendingViewTarget.Target == NULL) || !BlendParams.bLockOutgoing)
	{
		// Update current view target
		ViewTarget.CheckViewTarget(PCOwner);
		UpdateViewTarget(ViewTarget, DeltaTime);
	}

	// our camera is now viewing there
	NewPOV = ViewTarget.POV;
3.ViewTarget和PendingViewTarget之间的融合(过渡)逻辑
	// if we have a pending view target, perform transition from one to another.
	if (PendingViewTarget.Target != NULL)
	{
		BlendTimeToGo -= DeltaTime;

		// Update pending view target
		PendingViewTarget.CheckViewTarget(PCOwner);
		UpdateViewTarget(PendingViewTarget, DeltaTime);

		// blend....
		if (BlendTimeToGo > 0)
		{
			float DurationPct = (BlendParams.BlendTime - BlendTimeToGo) / BlendParams.BlendTime;

			float BlendPct = 0.f;
			switch (BlendParams.BlendFunction)
			{
	            .........
            }

		}
		else
		{
			// we're done blending, set new view target
			ViewTarget = PendingViewTarget;

			// clear pending view target
			PendingViewTarget.Target = NULL;

			BlendTimeToGo = 0;

			// our camera is now viewing there
			NewPOV = PendingViewTarget.POV;

			OnBlendComplete().Broadcast();
		}
	}
4.处理CameraFade
	if (bEnableFading)
	{
		if (bAutoAnimateFade)
		{
			FadeTimeRemaining = FMath::Max(FadeTimeRemaining - DeltaTime, 0.0f);
			if (FadeTime > 0.0f)
			{
				FadeAmount = FadeAlpha.X + ((1.f - FadeTimeRemaining / FadeTime) * (FadeAlpha.Y - FadeAlpha.X));
			}

			if ((bHoldFadeWhenFinished == false) && (FadeTimeRemaining <= 0.f))
			{
				// done
				StopCameraFade();
			}
		}

		if (bFadeAudio)
		{
			ApplyAudioFade();
		}
	}
5.缓存相机数据FillCameraCache,用于渲染
	if (AllowPhotographyMode())
	{
		const bool bPhotographyCausedCameraCut = UpdatePhotographyCamera(NewPOV);
		bGameCameraCutThisFrame = bGameCameraCutThisFrame || bPhotographyCausedCameraCut;
	}

	// Cache results
	FillCameraCache(NewPOV);
2.3 APlayerCameraManager::UpdateViewTarget
UpdateViewTarget 根据 ViewTarget 内的 Target 计算对应的 POV 信息(核心逻辑)
1. 如果TargetActor是CameraActor类型的,调用其CameraComponent的GetCameraView()方法
	if (ACameraActor* CamActor = Cast<ACameraActor>(OutVT.Target))
	{
		// Viewing through a camera actor.
		CamActor->GetCameraComponent()->GetCameraView(DeltaTime, OutVT.POV);
	}
2. 否则根据设置的CameraStyle进行相应的处理,如果CameraStyle为默认值则调用UpdateViewTargetInternal()方法
	    static const FName NAME_Fixed = FName(TEXT("Fixed"));
		static const FName NAME_ThirdPerson = FName(TEXT("ThirdPerson"));
		static const FName NAME_FreeCam = FName(TEXT("FreeCam"));
		static const FName NAME_FreeCam_Default = FName(TEXT("FreeCam_Default"));
		static const FName NAME_FirstPerson = FName(TEXT("FirstPerson"));

		if (CameraStyle == NAME_Fixed)
		{
            ...........
		}
		else if (CameraStyle == NAME_ThirdPerson || CameraStyle == NAME_FreeCam || CameraStyle == NAME_FreeCam_Default)
		{
            ......
		}
		else if (CameraStyle == NAME_FirstPerson)
		{
	        .......
		}
		else
		{
			UpdateViewTargetInternal(OutVT, DeltaTime);
		}
	}
3. ApplyCameraModifiers 处理特殊的镜头需求;比如:CameraShake、粒子效果等
	if (!bDoNotApplyModifiers || bAlwaysApplyModifiers)
	{
		// Apply camera modifiers at the end (view shakes for example)
		ApplyCameraModifiers(DeltaTime, OutVT.POV);
	}
4. 更新CameraManager的位置以及任何附加的相机镜头效果
	// Synchronize the actor with the view target results
	SetActorLocationAndRotation(OutVT.POV.Location, OutVT.POV.Rotation, false);

	UpdateCameraLensEffects(OutVT);
2.4 CameraManager::UpdateViewTargetInternal
本质上也是为了调用CameraComponent的GetCameraView()方法
void APlayerCameraManager::UpdateViewTargetInternal(FTViewTarget& OutVT, float DeltaTime)
{
	if (OutVT.Target)
	{
		FVector OutLocation;
		FRotator OutRotation;
		float OutFOV;

		if (BlueprintUpdateCamera(OutVT.Target, OutLocation, OutRotation, OutFOV))
		{
			OutVT.POV.Location = OutLocation;
			OutVT.POV.Rotation = OutRotation;
			OutVT.POV.FOV = OutFOV;
		}
		else
		{
			OutVT.Target->CalcCamera(DeltaTime, OutVT.POV);
		}
	}
}
优先调用蓝图中的实现,若没有,则调用Actor中的CalcCamera()方法
AActor::CalcCamera的实现如下:
void AActor::CalcCamera(float DeltaTime, FMinimalViewInfo& OutResult)
{
	if (bFindCameraComponentWhenViewTarget)
	{
		// Look for the first active camera component and use that for the view
		TInlineComponentArray<UCameraComponent*> Cameras;
		GetComponents(/*out*/ Cameras);

		for (UCameraComponent* CameraComponent : Cameras)
		{
			if (CameraComponent->IsActive())
			{
				CameraComponent->GetCameraView(DeltaTime, OutResult);
				return;
			}
		}
	}

	GetActorEyesViewPoint(OutResult.Location, OutResult.Rotation);
}
会在Actor中寻找CameraComponent,然后调用CameraComponent::GetCameraView()方法
如果没有找到Actor身上的CameraComponent,则调用GetActorEyesViewPoint()计算
void AActor::GetActorEyesViewPoint( FVector& OutLocation, FRotator& OutRotation ) const
{
	OutLocation = GetActorLocation();
	OutRotation = GetActorRotation();
}
2.5 UCameraComponent::GetCameraView
返回相机的视角。设置FMinimalViewInfo里的各项参数
1. 首先执行bUsePawnControlRotation = true的逻辑
	if (bUsePawnControlRotation)
	{
		const APawn* OwningPawn = Cast<APawn>(GetOwner());
		const AController* OwningController = OwningPawn ? OwningPawn->GetController() : nullptr;
		if (OwningController && OwningController->IsLocalPlayerController())
		{
			const FRotator PawnViewRotation = OwningPawn->GetViewRotation();
			if (!PawnViewRotation.Equals(GetComponentRotation()))
			{
				SetWorldRotation(PawnViewRotation);
			}
		}
	}
2. 设置Location和Rotation
	if (bUseAdditiveOffset)
	{
		FTransform OffsetCamToBaseCam = AdditiveOffset;
		FTransform BaseCamToWorld = GetComponentToWorld();
		FTransform OffsetCamToWorld = OffsetCamToBaseCam * BaseCamToWorld;

		DesiredView.Location = OffsetCamToWorld.GetLocation();
		DesiredView.Rotation = OffsetCamToWorld.Rotator();
	}
	else
	{
		DesiredView.Location = GetComponentLocation();
		DesiredView.Rotation = GetComponentRotation();
	}
3. 其余各项FOV、AspectRation等
	DesiredView.FOV = bUseAdditiveOffset ? (FieldOfView + AdditiveFOVOffset) : FieldOfView;
	DesiredView.AspectRatio = AspectRatio;
	DesiredView.bConstrainAspectRatio = bConstrainAspectRatio;
	DesiredView.bUseFieldOfViewForLOD = bUseFieldOfViewForLOD;
	DesiredView.ProjectionMode = ProjectionMode;
	DesiredView.OrthoWidth = OrthoWidth;
	DesiredView.OrthoNearClipPlane = OrthoNearClipPlane;
	DesiredView.OrthoFarClipPlane = OrthoFarClipPlane;

	if (bOverrideAspectRatioAxisConstraint)
	{
		DesiredView.AspectRatioAxisConstraint = AspectRatioAxisConstraint;
	}

	// See if the CameraActor wants to override the PostProcess settings used.
	DesiredView.PostProcessBlendWeight = PostProcessBlendWeight;
	if (PostProcessBlendWeight > 0.0f)
	{
		DesiredView.PostProcessSettings = PostProcessSettings;
	}

	// If this camera component has a motion vector simumlation transform, use that for the current view's previous transform
	DesiredView.PreviousViewTransform = FMotionVectorSimulation::Get().GetPreviousTransform(this);


 232
232


 被折叠的 条评论
为什么被折叠?
被折叠的 条评论
为什么被折叠?
 到【灌水乐园】发言


