一、函数简介
1、laplacian算子
函数原型:Laplacian(src, ddepth, dst=None, ksize=None, scale=None, delta=None, borderType=None)
src:图像矩阵
ddepth:深度类型
2、Sobel算子
函数原型:Sobel(src, ddepth, dx, dy, dst=None, ksize=None, scale=None, delta=None, borderType=None)
src:图像矩阵
ddepth:深度类型
dx:x方向
dy:y方向
3、Canny算子
函数原型:Canny(image, threshold1, threshold2, edges=None, apertureSize=None, L2gradient=None)
image:图像矩阵
threshold1:阈值1
threshold1:阈值2
二、实例演练
1、拉普拉斯边缘检测
代码如下:
#encoding:utf-8

#
#laplacian边缘检测
#

import numpy as np
import cv2

image = cv2.imread("H:\\img\\lena.jpg")
image = cv2.cvtColor(image,cv2.COLOR_BGR2GRAY)#将图像转化为灰度图像
cv2.imshow("Original",image)
cv2.waitKey()

#拉普拉斯边缘检测
lap = cv2.Laplacian(image,cv2.CV_64F)#拉普拉斯边缘检测
lap = np.uint8(np.absolute(lap))##对lap去绝对值
cv2.imshow("Laplacian",lap)
cv2.waitKey()
- 1
- 2
- 3
- 4
- 5
- 6
- 7
- 8
- 9
- 10
- 11
- 12
- 13
- 14
- 15
- 16
- 17
- 18
- 19
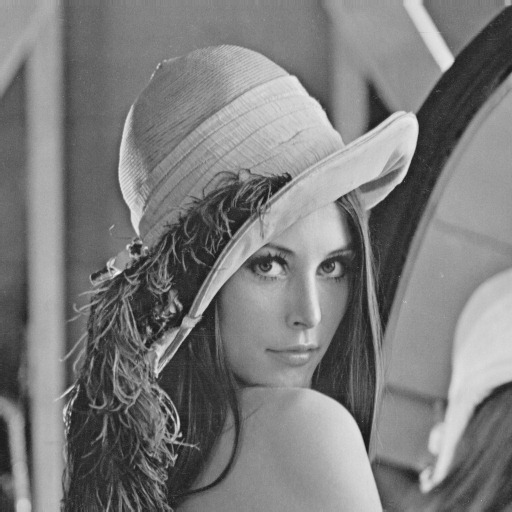
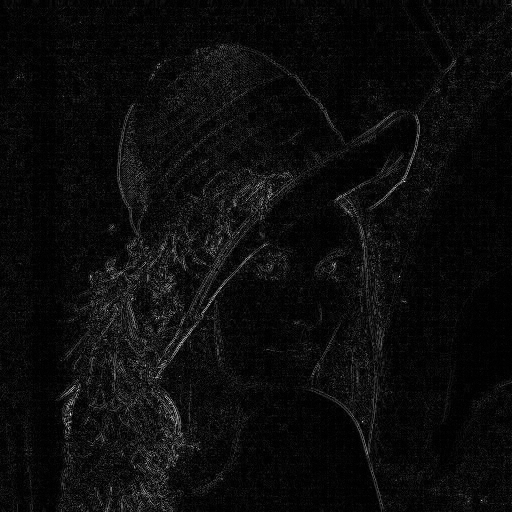
结果如下:
原图像:
laplacian边缘检测结果:
2、Soble边缘检测
代码如下:
#encoding:utf-8

#
#Sobel边缘检测
#

import numpy as np
import cv2

image = cv2.imread("H:\\img\\lena.jpg")
image = cv2.cvtColor(image,cv2.COLOR_BGR2GRAY)#将图像转化为灰度图像
cv2.imshow("Original",image)
cv2.waitKey()

#Sobel边缘检测
sobelX = cv2.Sobel(image,cv2.CV_64F,1,0)#x方向的梯度
sobelY = cv2.Sobel(image,cv2.CV_64F,0,1)#y方向的梯度

sobelX = np.uint8(np.absolute(sobelX))#x方向梯度的绝对值
sobelY = np.uint8(np.absolute(sobelY))#y方向梯度的绝对值

sobelCombined = cv2.bitwise_or(sobelX,sobelY)#
cv2.imshow("Sobel X", sobelX)
cv2.waitKey()
cv2.imshow("Sobel Y", sobelY)
cv2.waitKey()
cv2.imshow("Sobel Combined", sobelCombined)
cv2.waitKey()
- 1
- 2
- 3
- 4
- 5
- 6
- 7
- 8
- 9
- 10
- 11
- 12
- 13
- 14
- 15
- 16
- 17
- 18
- 19
- 20
- 21
- 22
- 23
- 24
- 25
- 26
- 27
- 28
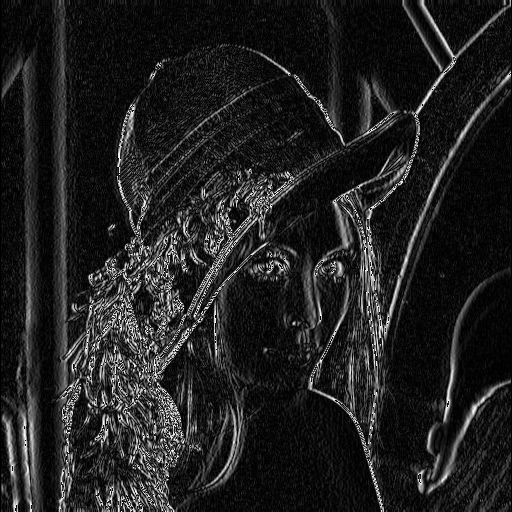
结果如下:
原图像:

X方向边缘检测结果:
Y方向边缘检测结果:

XY方向结合边缘检测结果:
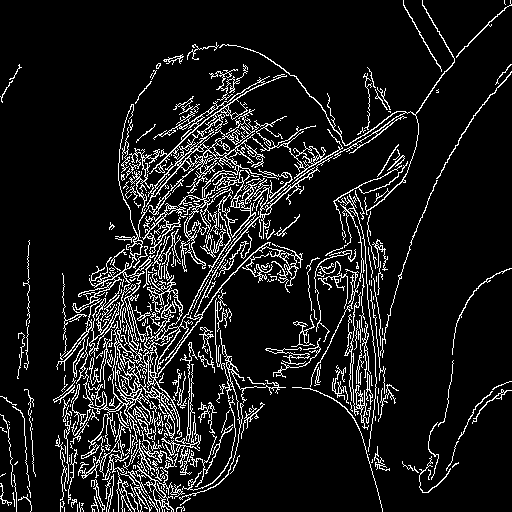
3、Canny边缘检测
代码如下:
#encoding:utf-8

#
#Canny边缘检测
#

import numpy as np
import cv2

image = cv2.imread("H:\\img\\lena.jpg")#读入图像
image = cv2.cvtColor(image,cv2.COLOR_BGR2GRAY)#将图像转化为灰度图像
cv2.imshow("Image",image)#显示图像
cv2.waitKey()

#Canny边缘检测
canny = cv2.Canny(image,30,150)
cv2.imshow("Canny",canny)
cv2.waitKey()
- 1
- 2
- 3
- 4
- 5
- 6
- 7
- 8
- 9
- 10
- 11
- 12
- 13
- 14
- 15
- 16
- 17
- 18
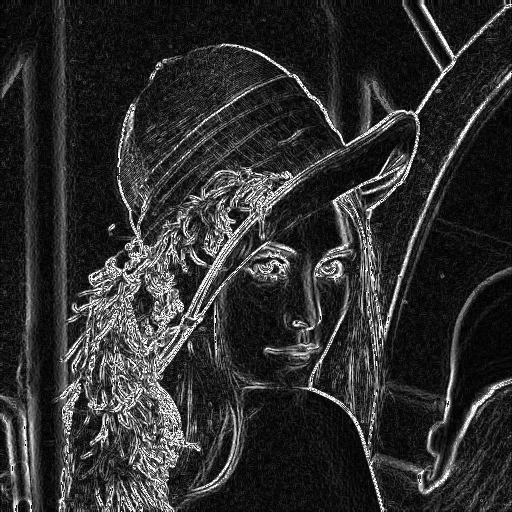
结果如下:
原图像:
Canny边缘检测结果:


 本文介绍了三种常见的边缘检测技术:Laplacian、Sobel 和 Canny 算法,并通过 Python 的 OpenCV 库实现这些算法,展示了如何从图像中提取边缘特征。


 6386
6386

 被折叠的 条评论
为什么被折叠?
被折叠的 条评论
为什么被折叠?
 到【灌水乐园】发言


