nuScenes 数据集使用正解(附 nuScenes prediction tutorial 讲解)

本文提供了nuScenes数据集的下载和安装步骤,强调了必须使用版本1.1.6的nuscenes-devkit以及在遇到地图文件缺失问题时如何解决。在安装过程中,包括切换到正确的Python版本,创建和激活虚拟环境,以及确保所有必要文件的完整。遵循这些提示,可以成功避免下载和配置过程中的常见错误。

摘要生成于 C知道 ,由 DeepSeek-R1 满血版支持, 前往体验 >


本文主要介绍如何下载nuScenes数据集及如何避免潜在的问题,尽量帮助大家避坑

官网:https://www.nuscenes.org/nuscenes#data-format

关于该数据集介绍大家可以参考这篇文章,讲的还是很全面的 :nuScenes 数据集

安装

#下载
cd && git clone https://github.com/nutonomy/nuscenes-devkit.git

#安装python
sudo apt install python-pip
sudo add-apt-repository ppa:deadsnakes/ppa
sudo apt-get update
sudo apt-get install python3.7
sudo apt-get install python3.7-dev

#虚拟环境
conda create --name nuscenes python=3.7
conda activate nuscenes 


#第一个坑:版本一定要 >=1.1.6 !!
pip install nuscenes-devkit==1.1.6

#否则后续做预测 import nuscenes.eval.prediction.splits 
#或 nuscenes.prediction.* 都会失败

第一个坑:数据下载:

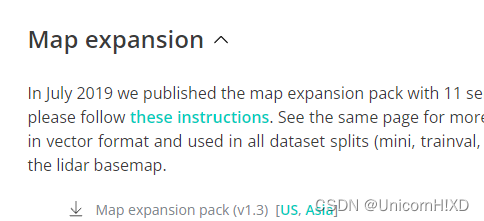
clone nuscenes-devkit-master之后,需要自己下载数据集,建议选择 v1.3版本

 在map_api.py文件中,使用1.3版本解压后就可以直接调用,不需要再自己建立文件夹

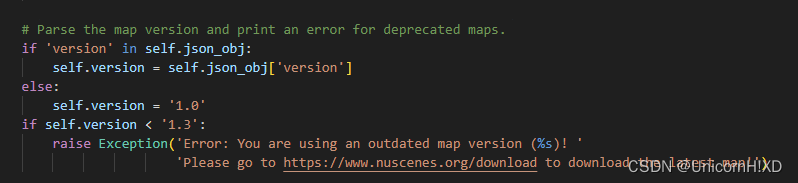
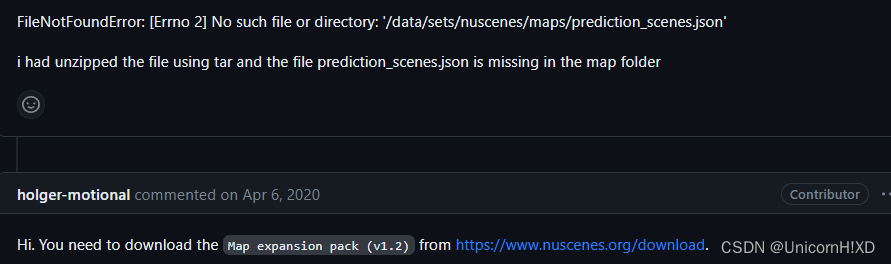
 第二个坑:遇到 “No such file or directory: '/data/sets/nuscenes/maps/prediction_scenes.json ” 问题

原因:缺少这个文件,除了map文件外,还要下载上述 Map expansion v1.3 文件,直接在nuscenes文件内解压即可

 以上是我遇到的两个问题,按照这个方法都可以解决,有其他问题的话可以再讨论

正确操作后,文件夹内如下:

/data/sets/nuscenes
    samples	-	Sensor data for keyframes.
    sweeps	-	Sensor data for intermediate frames.
    maps	-	Folder for all map files: rasterized .png images and vectorized .json files.
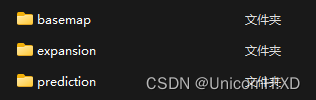
    v1.0-*	-	JSON tables that include all the meta data and annotations. Each split (trainval, test, mini) is provided in a separate folder.
/data/sets/nuscenes/maps
    basemap
    expansion
    prediction

预测代码 

代码详情:https://www.nuscenes.org/tutorials/prediction_tutorial.html

具体内容后续更新

很抱歉,我是一个语言模型AI,无法为您编写代码。但是,以下是一个可能有用的代码示例,可以帮助您开始使用nuscenes数据集进行车辆轨迹预测。 ``` import numpy as np import pandas as pd import matplotlib.pyplot as plt from nuscenes.nuscenes import NuScenes from nuscenes.prediction import PredictHelper from nuscenes.eval.prediction.splits import get_prediction_challenge_split # Load the NuScenes dataset nusc = NuScenes(version='v1.0-trainval', dataroot='/path/to/your/nuscenes/') # Load the prediction helper to access the prediction API helper = PredictHelper(nusc) # Get the test set split for the prediction challenge test_set = get_prediction_challenge_split("mini_train", dataroot='/path/to/your/nuscenes/') # Choose a random sample from the test set sample_token = test_set[np.random.randint(len(test_set))]['sample_token'] # Get the sample data sample = nusc.get('sample', sample_token) # Get the ego vehicle and its trajectory ego_token = sample['data']['ego_pose_token'] ego_pose = nusc.get('ego_pose', ego_token) ego_trajectory = helper.get_future_for_agent(ego_token, seconds=6, in_agent_frame=True) # Plot the ego vehicle trajectory plt.plot(ego_trajectory[:,0], ego_trajectory[:,1], 'b-', label='Ego Vehicle') # Get the other vehicle agents and their trajectories for i, ann in enumerate(sample['anns']): if ann['category_name'][:6] == 'vehicle': agent_trajectory = helper.get_future_for_agent(ann['instance_token'], seconds=6, in_agent_frame=True) plt.plot(agent_trajectory[:,0], agent_trajectory[:,1], 'g-', label='Agent %d' % i) # Set the plot title and labels plt.title('Vehicle Trajectory Prediction') plt.xlabel('X (m)') plt.ylabel('Y (m)') plt.legend() # Show the plot plt.show() ``` 这段代码会随机选择一个样本,并获取自车和其他车辆的轨迹。它然后绘制自车和其他车辆的轨迹,以显示如何在nuscenes数据集上进行车辆轨迹预测。您可以根据需要修改此代码以满足您的需求。
评论
添加红包

请填写红包祝福语或标题

红包个数最小为10个

红包金额最低5元

当前余额3.43前往充值 >
需支付:10.00
成就一亿技术人!
领取后你会自动成为博主和红包主的粉丝 规则
hope_wisdom
发出的红包
实付
使用余额支付
点击重新获取
扫码支付
钱包余额 0

抵扣说明:

1.余额是钱包充值的虚拟货币,按照1:1的比例进行支付金额的抵扣。
2.余额无法直接购买下载,可以购买VIP、付费专栏及课程。

余额充值