


 本文介绍了如何使用CLIP模型的文字提示来引导Diffusion模型生成图像,包括两种引导方式:有分类器引导和无分类器引导。作者展示了如何利用预训练pipeline进行图像生成,并通过文字提示实现更精确的控制。
之前的Diffusion实战老老实实按照最基本的diffusion过程完成的,最近学习了一种新的方法,利用文字提示,来引导Diffusion模型生成想要的图像。
Diffusion实战篇:
【Diffusion实战】训练一个diffusion模型生成S曲线(Pytorch代码详解)
【Diffusion实战】训练一个diffusion模型生成蝴蝶图像(Pytorch代码详解)
Diffusion综述篇:
【Diffusion综述】医学图像分析中的扩散模型(一)
【Diffusion综述】医学图像分析中的扩散模型(二)
0、所需安装与下载
pip install open_clip_torch  # CLip模型
pip install accelerate  # 安装“accelerate”,以便更快、更少占用内存的模型加载
不装accelerate的下场,就是pipeline载不进来,并被强烈安利:

下载预训练pipeline:johnowhitaker/sd-class-wikiart-from-bedrooms,这是从卧室图像到wikiart图像做微调的一个pipeline。
1、引导扩散的思想
引导扩散是想做什么呢,是想让扩散模型朝着我们想要的方向去生成图像,这时候就需要一个指引,如何给定这个指引呢,有两种方式:
(1)有分类器引导:不需要重新训练 diffusion 模型,需要训练加噪图片的分类模型,可以控制生成图片的类别,分类图片有多少类,就能控制这个扩散模型生成多少类。
代表论文:Diffusion Models Beat GANs on Image Synthesis
(2)无分类器引导:需要重新训练 diffusion 模型,不需要训练分类模型,不受限于类别,直接用条件控制。
代表论文:Classifier-Free Diffusion Guidance
我们想采用CLIP的文本编码器,实现基于文字引导图像生成,使用的约束不是类别,而是文字特征与图像特征的相似度。
2、预训练pipeline图像生成
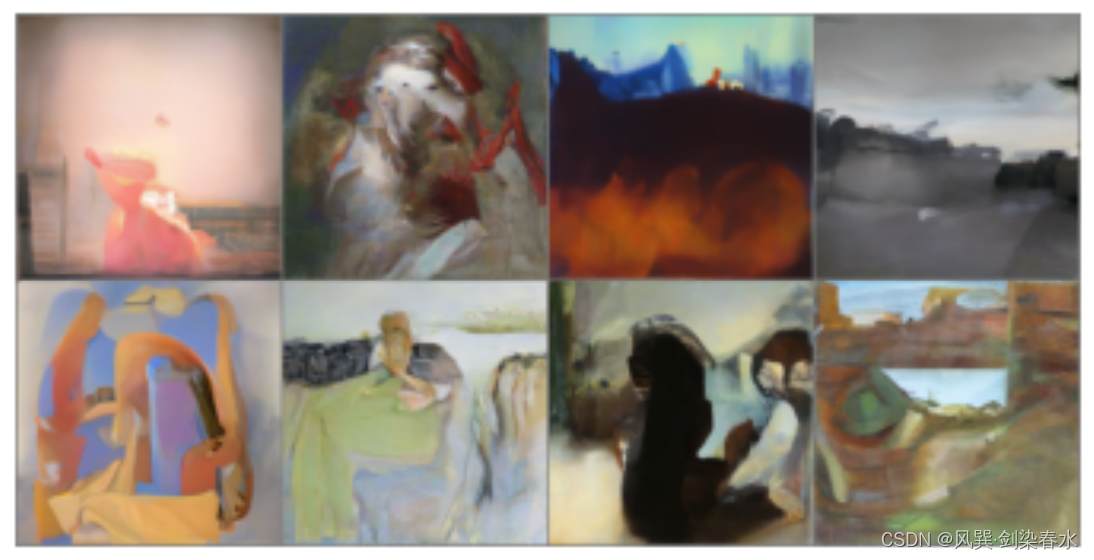
让我们试试预训练好的sd-class-wikiart-from-bedrooms生成的图像是什么样子的吧~
import torch
import torchvision
from tqdm import tqdm
from diffusers import DDPMPipeline, DDIMScheduler
from matplotlib import pyplot as plt

# 加载预训练pipeline
device = torch.device("cuda" if torch.cuda.is_available() else "cpu")
pipeline_name = "E:/Code/kuosan/sd-class-wikiart-from-bedrooms"
image_pipe = DDPMPipeline.from_pretrained(pipeline_name).to(device)

# 使用调度器,用50步采样一些图像
scheduler = DDIMScheduler.from_pretrained(pipeline_name)
scheduler.set_timesteps(num_inference_steps=50)
print(scheduler.timesteps)

# 生成随机噪声
x = torch.randn(8, 3, 256, 256).to(device)

# 采样循环
for i, t in tqdm(enumerate(scheduler.timesteps)):
    # 调整模型输入,为噪声图像加上时间步信息
    model_input = scheduler.scale_model_input(x, t)
    with torch.no_grad():
        noise_pred = image_pipe.unet(model_input, t)["sample"]  # 噪声预测
    # 根据预测的噪声 noise_pred、当前时间步长 t 和当前图像样本 x 来更新图像样本
    x = scheduler.step(noise_pred, t, x).prev_sample

# 可视化
grid = torchvision.utils.make_grid(x, nrow=4)
plt.imshow(grid.permute(1, 2, 0).cpu().clip(-1, 1) * 0.5 + 0.5)
plt.axis('off')
plt.show()
打印的时间步:
tensor([980, 960, 940, 920, 900, 880, 860, 840, 820, 800, 780, 760, 740, 720,
        700, 680, 660, 640, 620, 600, 580, 560, 540, 520, 500, 480, 460, 440,
        420, 400, 380, 360, 340, 320, 300, 280, 260, 240, 220, 200, 180, 160,
        140, 120, 100,  80,  60,  40,  20,   0])
生成的图像如下,艺术风,额…有点抽象,可见微调效果一般:
3、文字引导图像生成
利用CLIP模型,根据生成图像与文本提示的差异, 计算关于输入噪声 x {x} x 的梯度,更新噪声图像 x {x} x,然后根据网络预测的噪声、当前时间步长 t {t} t 和文本引导更新后的噪声 x {x} x 来逐渐反向扩散,最终完成图像生成。
import open_clip
import torch
import torchvision
from torchvision import transforms
import numpy as np
from PIL import Image
from tqdm import tqdm
from matplotlib import pyplot as plt
from diffusers import DDIMScheduler, DDPMPipeline
# 损失函数, 比较图像特征与文字特征
def clip_loss(image, text_features):
# 利用Clip图像编码器获得图像特征
image_features = clip_model.encode_image(tfms(image))
input_normed = torch.nn.functional.normalize(image_features.unsqueeze(1), dim=2)
embed_normed = torch.nn.functional.normalize(text_features.unsqueeze(0), dim=2)
dists = (
input_normed.sub(embed_normed).norm(dim=2).div(2).arcsin().pow(2).mul(2)
) # 使用 Squared Great Circle Distance 计算距离
return dists.mean()
# 模型加载
device = torch.device("cuda" if torch.cuda.is_available() else "cpu")
clip_model, _, preprocess = open_clip.create_model_and_transforms("ViT-B-32", pretrained="openai")
clip_model.to(device)
# 数据增强
tfms = transforms.Compose([transforms.RandomResizedCrop(224),
transforms.RandomAffine(5),
transforms.RandomHorizontalFlip(),
transforms.Normalize(mean=(0.48145466, 0.4578275, 0.40821073),
std=(0.26862954, 0.26130258, 0.27577711)),])
# 加载预训练pipeline
pipeline_path = 'E:/Code/kuosan/sd-class-wikiart-from-bedrooms'
image_pipe = DDPMPipeline.from_pretrained(pipeline_path).to(device)
# 加载调度器
scheduler = DDIMScheduler.from_pretrained(pipeline_path)
scheduler.set_timesteps(num_inference_steps=500)
# 文本提示
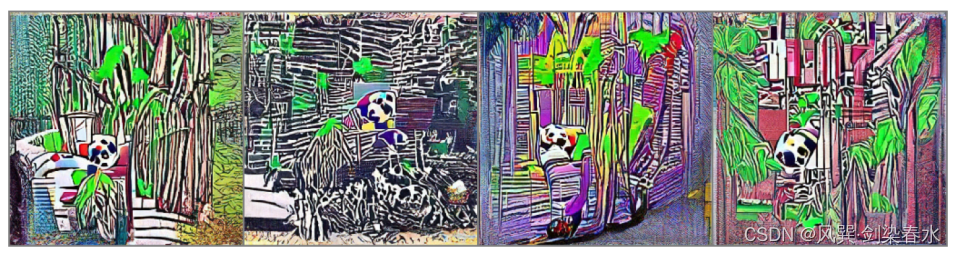
prompt = "A lovely giant panda is eating fresh bamboo" # 可调参数
# 利用Clip的文本编码器获得文本特征
text = open_clip.tokenize([prompt]).to(device)
with torch.no_grad(), torch.cuda.amp.autocast():
text_features = clip_model.encode_text(text)
guidance_scale = 8 # 可调参数
n_cuts = 4 # 可调参数
x = torch.randn(4, 3, 256, 256).to(device) # 随机噪声
for i, t in tqdm(enumerate(scheduler.timesteps)):
model_input = scheduler.scale_model_input(x, t) # 设置模型输入
# 利用预训练pipeline预测噪声
with torch.no_grad():
noise_pred = image_pipe.unet(model_input, t)["sample"]
# -------------------------------------------------------------------------
# 引导过程: 根据生成图像与文本提示的损失, 计算关于输入x的梯度, 更新噪声图像x
cond_grad = 0
for cut in range(n_cuts):
# 设置输入图像的requires_grad属性为True
x = x.detach().requires_grad_()
# 根据预测噪声, 时间步和输出噪声, 获得去噪后的图像
x0 = scheduler.step(noise_pred, t, x).pred_original_sample
# 计算图像特征与文本特征的损失, guidance_scale系数用于控制文本提示对生成过程的影响程度
loss = clip_loss(x0, text_features) * guidance_scale
# 损失函数 loss 关于参数 x 的梯度, 并使用n_cuts进行平均
cond_grad -= torch.autograd.grad(loss, x)[0] / n_cuts
if i % 25 == 0 or i ==499:
print("Step:", i, ", Guidance loss:", loss.item())
# 根据梯度更新x
alpha_bar = scheduler.alphas_cumprod[i]
# cond_grad为累积梯度, alpha_bar.sqrt()作为缩放因子来缩放梯度
x = (x.detach() + cond_grad * alpha_bar.sqrt())
# -------------------------------------------------------------------------
# 根据预测的噪声 noise_pred、当前时间步长 t 和当前图像样本 x 来更新图像样本
x = scheduler.step(noise_pred, t, x).prev_sample
# 可视化
grid = torchvision.utils.make_grid(x.detach(), nrow=4)
im = grid.permute(1, 2, 0).cpu().clip(-1, 1) * 0.5 + 0.5
image_generate = Image.fromarray(np.array(im * 255).astype(np.uint8))
plt.figure(dpi=300)
plt.imshow(image_generate)
plt.axis('off')
plt.show()
生成效果如下,确实有那味儿了,但不多~
参考资料:
1、Classifier-Free Diffusion Guidance | 无需显式分类器指导也能获得很好的生成效果
2、扩散模型从原理到实践. 人民邮电出版社. 李忻玮, 苏步升等.
pipeline确实是方便又好玩!修改可调参数,可获得不一样的体验嗷~


 253
253

 被折叠的 条评论
为什么被折叠?
被折叠的 条评论
为什么被折叠?
 到【灌水乐园】发言


