一:TrailRenderer模拟管道流体
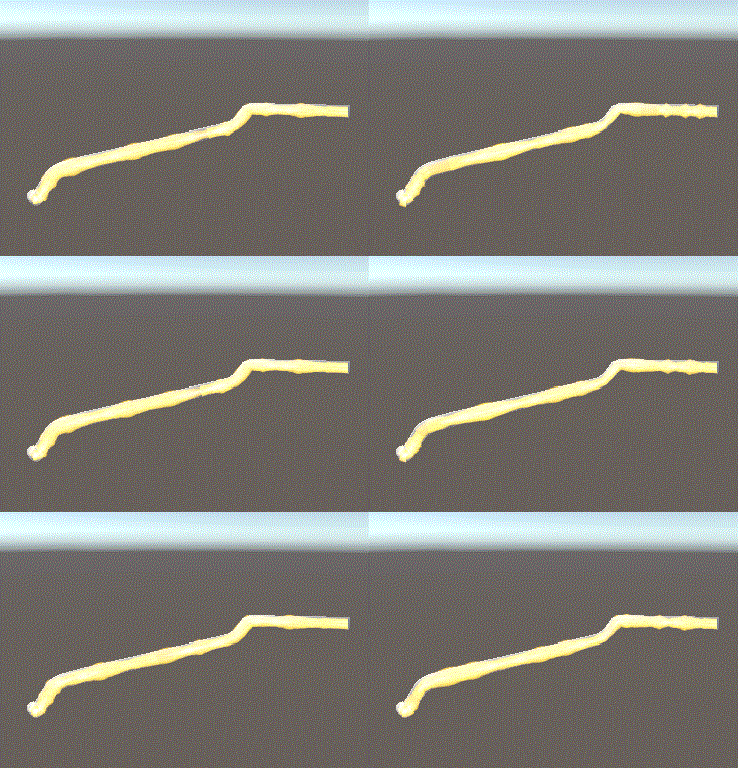
效果如图所示:

首先,先构造流体因子
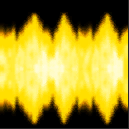
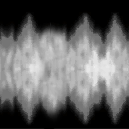
构造流体因子:创建一个空物体,挂载TrailRenderer组件,创建一个材质球,命名为Trail1,将其Shader设为Mobile/Particles/Additive,然后将下面所示的纹理图片赋值给Trail1,作为其的Particle Texture。
纹理图片素材:


然后挂载FlowItem脚本,完整脚本如下所示:
流体因子类:FlowItem.cs
using UnityEngine;

public class FlowItem : MonoBehaviour {

    public float DelayDestroy = 0.5f;

    private bool _isFlowing = false;
    private PipeFlow _pipeFlow;
    private int _flowIndex = 0;
    private int _nextIndex = 1;
    private float _flowPosition = 0f;
    private Coroutine _stopCoroutine;

    private void Reset()
    {
        transform.position = _pipeFlow.FlowPath[0];

        TrailRenderer[] trails = GetComponentsInChildren<TrailRenderer>();
        for (int i = 0; i < trails.Length; i++)
        {
            trails[i].Clear();
        }

        ParticleSystem[] pss = GetComponentsInChildren<ParticleSystem>();
        for (int i = 0; i < pss.Length; i++)
        {
            pss[i].SetParticles(null, 0);
        }
    }

    private void Update()
    {
        if (_isFlowing)
        {
            _flowPosition += _pipeFlow.FlowSpeeds[_flowIndex];
            transform.position = Vector3.Lerp(_pipeFlow.FlowPath[_flowIndex], _pipeFlow.FlowPath[_nextIndex], _flowPosition);

            if (_flowPosition >= 1f)
            {
                if (_nextIndex >= _pipeFlow.FlowPath.Count - 1)
                {
                    _isFlowing = false;

                    _stopCoroutine = StartCoroutine(PipeFlow.DelayExecute(() => {
                        Stop();
                    }, DelayDestroy));
                }
                else
                {
                    _flowIndex += 1;
                    _nextIndex = _flowIndex + 1;
                    _flowPosition = 0f;
                }
            }
        }
    }

    public void Shoot(PipeFlow pipeFlow)
    {
        _pipeFlow = pipeFlow;
        Reset();

        gameObject.SetActive(true);
        _isFlowing = true;
        _flowIndex = 0;
        _nextIndex = 1;
        _flowPosition = 0f;

        if (_stopCoroutine != null)
        {
            StopCoroutine(_stopCoroutine);
            _stopCoroutine = null;
        }
    }

    public void Stop()
    {
        gameObject.SetActive(false);
        _isFlowing = false;

        if (!_pipeFlow.Items.Contains(this))
        {
            _pipeFlow.Items.Add(this);
        }

        if (_stopCoroutine != null)
        {
            StopCoroutine(_stopCoroutine);
            _stopCoroutine = null;
        }
    }
}
最后将其做成预制体即可。
然后可以看下我TrailRenderer的属性设置,FlowItem的Delay Destroy属性为此流体因子延时消亡的时间,最好跟TrailRenderer的Time属性保持一致,这样的话才不会看到整条TrailRenderer突然消失的情况:

每一个流体因子携带一个拖尾渲染器,由PipeFlow根据其属性FlowInterval(间隔发射时间)进行持续发射(如果不是OnlyOnce模式),每一个流体因子从路径起点抵达路径终点的时间为FlowTime。
//PipeFlow.cs
public void Flow(Action endAction);
外部调用Flow方法为开启流体,参数endAction当第一个流体因子抵达管道路径终点时触发,可以为空。
其次,实现管道路径
因为TrailRenderer可以通过设置Corner Vertices(拐角处顶点数量)来自动圆角,所以不用考虑使用任何曲线算法,这样还能保证我们的路径点绝对的贴合管道,毕竟管道模型可能会有你意想不到的弯曲复杂度。
不过我们为了要保证流体在管道的每一个位置都保持相同速度流动,所以必须为每一个路段指定不同的流动速度。
管道流体实例类:PipeFlow.cs
using System;
using System.Collections;
using System.Collections.Generic;
using UnityEngine;

public class PipeFlow : MonoBehaviour {

    public FlowItem ItemTemplate;
    public float FlowTime = 1f;
    public float FlowInterval = 0.5f;
    public bool OnlyOnce = false;

    [HideInInspector]
    public List<Vector3> FlowPath = new List<Vector3>();
    [HideInInspector]
    public List<float> FlowSpeeds = new List<float>();
    [HideInInspector]
    public List<FlowItem> Items = new List<FlowItem>();

    private bool _isInit = false;
    private bool _isFlowing = false;
    private float _flowInterval = 0f;
    private Action _actionTrigger;
    private Coroutine _actionCoroutine;

    private void Awake()
    {
        if (!_isInit)
        {
            Init();
        }
    }

    private void Init()
    {
        float tatol = 0f;
        for (int i = 0; i < FlowPath.Count - 1; i++)
        {
            tatol += Vector3.Distance(FlowPath[i], FlowPath[i + 1]);
        }
        for (int i = 0; i < FlowPath.Count - 1; i++)
        {
            float dis = Vector3.Distance(FlowPath[i], FlowPath[i + 1]);
            float time = dis / tatol * (FlowTime * 50);
            FlowSpeeds.Add(1f / time);
        }

        _isInit = true;
    }

    private void Update()
    {
        if (_isFlowing)
        {
            _flowInterval += Time.deltaTime;
            if (_flowInterval >= FlowInterval)
            {
                _flowInterval = 0f;
                ShootItem();

                if (OnlyOnce)
                {
                    _isFlowing = false;
                }
            }
        }
    }

    private void ShootItem()
    {
        if (Items.Count > 0)
        {
            Items[0].Shoot(this);
            Items.RemoveAt(0);
        }
        else
        {
            GameObject item = Instantiate(ItemTemplate.gameObject);
            item.transform.parent = transform;
            item.GetComponent<FlowItem>().Shoot(this);
        }
    }

    public void Flow(Action endAction)
    {
        if (FlowPath.Count < 2)
        {
            Debug.LogWarning("路径点数量必须大于等于2!");
            return;
        }
        if (!ItemTemplate)
        {
            Debug.LogWarning("ItemTemplate不能为空!");
            return;
        }

        if (!_isInit)
        {
            Init();
        }

        _isFlowing = true;
        _flowInterval = FlowInterval;

        _actionTrigger = endAction;
        if (_actionCoroutine != null)
        {
            StopCoroutine(_actionCoroutine);
            _actionCoroutine = null;
        }
        if (_actionTrigger != null)
        {
            _actionCoroutine = StartCoroutine(DelayExecute(_actionTrigger, FlowTime));
        }
    }

    public void Stop()
    {
        _isFlowing = false;

        if (_actionCoroutine != null)
        {
            StopCoroutine(_actionCoroutine);
            _actionCoroutine = null;
        }

        FlowItem[] fis = transform.GetComponentsInChildren<FlowItem>();
        foreach (FlowItem fi in fis)
        {
            fi.Stop();
        }
    }

    public static IEnumerator DelayExecute(Action action, float delaySeconds)
    {
        yield return new WaitForSeconds(delaySeconds);
        action();
    }
}
该类的编辑器重写:PipeFlowEditor.cs
这个编辑器方法主要是实现在面板上可视化、自定义编辑炉体路径点功能,此类脚本不需要被挂载在某个物体上。
using UnityEngine;
using UnityEditor;
[CustomEditor(typeof(PipeFlow)), CanEditMultipleObjects]
public class PipeFlowEditor : Editor
{
    private PipeFlow _pipeFlow;
    private int _currentIndex = -1;
    private bool _showInEditor = true;

    private void OnEnable()
    {
        _pipeFlow = target as PipeFlow;
    }

    public override void OnInspectorGUI()
    {
        base.OnInspectorGUI();

        EditorGUILayout.BeginVertical("HelpBox");

        EditorGUILayout.BeginHorizontal();
        GUILayout.Label("FlowPath");
        _showInEditor = GUILayout.Toggle(_showInEditor, "Show In Editor");
        EditorGUILayout.EndHorizontal();

        if (_showInEditor)
        {
            EditorGUILayout.BeginHorizontal();
            if (GUILayout.Button("路径倒置", "ButtonLeft"))
            {
                if (EditorUtility.DisplayDialog("提示", "是否将整条路径倒置?", "是的", "我再想想"))
                {
                    if (_pipeFlow.FlowPath.Count > 1)
                    {
                        _pipeFlow.FlowPath.Reverse();
                    }
                }
            }
            if (GUILayout.Button("清空路径点", "ButtonRight"))
            {
                if (EditorUtility.DisplayDialog("提示", "是否清空路径点?", "是的", "我再想想"))
                {
                    _pipeFlow.FlowPath.Clear();
                    _currentIndex = -1;
                }
            }
            EditorGUILayout.EndHorizontal();

            for (int i = 0; i < _pipeFlow.FlowPath.Count; i++)
            {
                EditorGUILayout.BeginHorizontal();
                GUI.backgroundColor = _currentIndex == i ? Color.cyan : Color.white;
                if (GUILayout.Button("path point" + (i + 1), "prebutton"))
                {
                    _currentIndex = i;
                    Tools.current = Tool.None;
                }
                GUI.backgroundColor = Color.white;
                if (GUILayout.Button("", "OL Minus", GUILayout.Width(16)))
                {
                    _pipeFlow.FlowPath.RemoveAt(i);
                    _currentIndex = -1;
                }
                EditorGUILayout.EndHorizontal();
            }

            EditorGUILayout.BeginHorizontal();
            GUILayout.FlexibleSpace();
            if (GUILayout.Button("", "OL Plus", GUILayout.Width(16)))
            {
                if (_currentIndex != -1)
                {
                    _pipeFlow.FlowPath.Add(_pipeFlow.FlowPath[_currentIndex]);
                }
                else
                {
                    _pipeFlow.FlowPath.Add(new Vector3(0, 0, 0));
                }
            }
            EditorGUILayout.EndHorizontal();
        }

        EditorGUILayout.EndVertical();
    }

    private void OnSceneGUI()
    {
        if (_showInEditor)
        {
            Handles.color = Color.cyan;
            if (_pipeFlow.FlowPath.Count > 0)
            {
                Handles.Label(_pipeFlow.FlowPath[0], "[" + _pipeFlow.transform.name + "]起点", "ErrorLabel");
            }
            if (_pipeFlow.FlowPath.Count > 1)
            {
                Handles.Label(_pipeFlow.FlowPath[_pipeFlow.FlowPath.Count - 1], "[" + _pipeFlow.transform.name + "]终点", "ErrorLabel");
            }

            for (int i = 0; i < _pipeFlow.FlowPath.Count; i++)
            {
                //每一个操作手柄添加位移功能
                _pipeFlow.FlowPath[i] = Handles.PositionHandle(_pipeFlow.FlowPath[i], Quaternion.identity);
                //重新为每一个操作手柄添加序号标签(i+1)可以在scene看到从1开始,与监视面板的“path point1”对应
                Handles.Label(_pipeFlow.FlowPath[i] + new Vector3(0, 0.025f, 0), "[" + (i + 1) + "]", "ErrorLabel");

                if (i < _pipeFlow.FlowPath.Count - 1)
                    Handles.DrawLine(_pipeFlow.FlowPath[i], _pipeFlow.FlowPath[i + 1]);
            }

            if (_currentIndex != -1)
            {
                _pipeFlow.FlowPath[_currentIndex] = Handles.PositionHandle(_pipeFlow.FlowPath[_currentIndex], Quaternion.identity);
            }
        }
    }
}
创建好上面两个脚本类之后,然后在unity中创建一个空物体,挂载PipeFlow脚本,然后将上面所创建的流体因子赋值,设置好合适的时间参数,最后,搭建路径点即可。如图所示:

最后,再强调一下外部调用PipeFlow类里Flow()方法为开启流体,参数endAction当第一个流体因子抵达管道路径终点时触发,可以为空;调用PipeFlow里Stop()方法为停止流体。
二:箭头指引效果
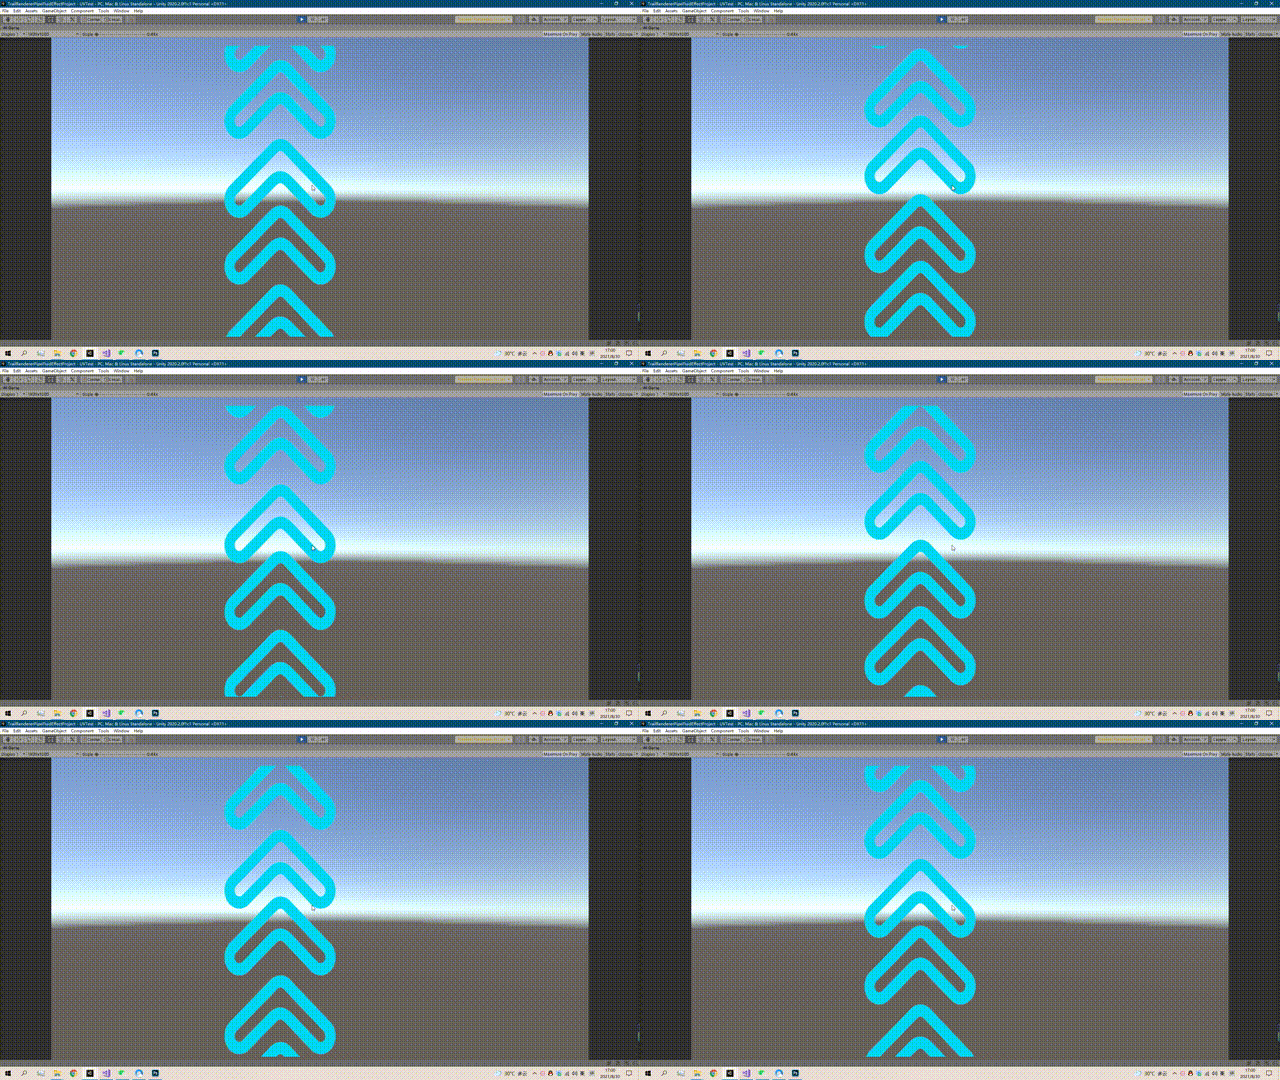
效果图如下:

用到的素材如下:

实现步骤如下:
首先:创建一个Cube,然后将如下脚本挂载在Cube上,脚本如下:
using System.Collections;
using System.Collections.Generic;
using UnityEngine;

public class UVMoves : MonoBehaviour
{

    public float ScrollSpeed = 10;
    public int countX = 1;
    public float countY = 2;

    private float offsetX = 0.0f;
    private float offsetY = 0.0f;
    // private GameObject singleTexSize;
    // Use this for initialization
    void Start()
    {
        float x_1 = 1.0f / countX;
        float y_1 = 1.0f * countY;
       GetComponent<Renderer>().material.mainTextureScale = new Vector2(x_1, y_1);

    }

    // Update is called once per frame
    void Update()
    {
    }

    private void FixedUpdate()
    {
        float frame = (Time.time * ScrollSpeed);
        //offsetX = frame / countX;
        //水平方向运动
        //offsetY = -(frame - frame % countX) / countY / countX;
        //offsetX = frame / countX;
        //垂直方向运动
        offsetY = frame / countY;
        offsetX = -(frame - frame % countY) / countY / countX;
        GetComponent<Renderer>().material.SetTextureOffset("_MainTex", new Vector2(offsetX, -offsetY));
    }

}
然后,创建一个材质球,Shader类型选择为Unlit/Transparent,然后将箭头的图片素材赋值上去,如下图所示:

然后,将该材质赋值给创建的Cube上,即可。
原理:这种方法就是通过代码控制贴图的UV以一定的速度朝着一定的方向运动。
上述两种方法,过程都比较详细,素材资源也都提供了,基本上可以自行实现,如还不能实现的,可下载这个原工程文件:
https://download.csdn.net/download/qq_44718259/21749562?spm=1001.2014.3001.5501


 326
326


 被折叠的 条评论
为什么被折叠?


