


你是否手头有很多图像等着你标注mask!!
这些图像是不是都挺相似的,你不想再标注了!!
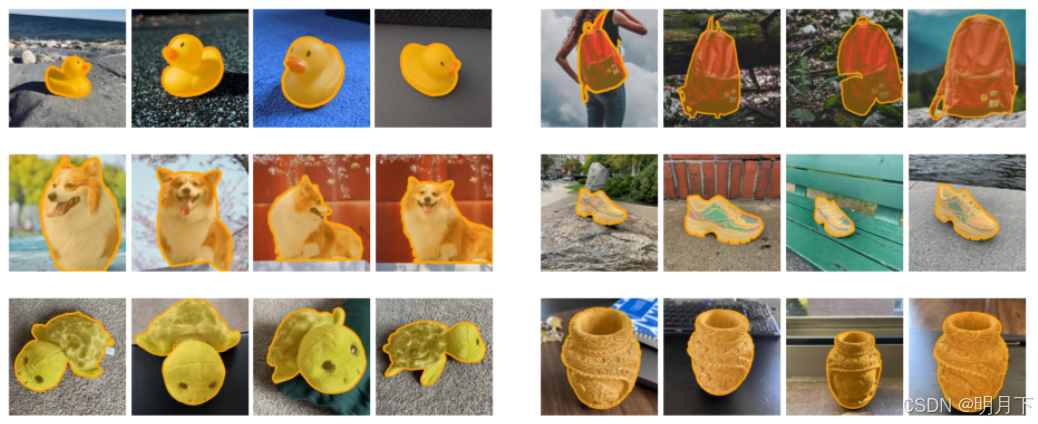
本文能实现的功能——利用SAM2实现小样本跨图分割模式
你只需要:
- 准备几张图像以及对应的mask(还是得标那么几张滴~也可以直接用SAM工具标几张)
- 输入待标注的图像。
- 输出图像的mask图
先简单介绍一下SAM2吧~(不想看的直接下一章看代码)
-
发表时间:2024.7.30
-
官网:https://ai.meta.com/sam2/
-
代码:https://github.com/facebookresearch/segment-anything-2
-
论文:https://export.arxiv.org/abs/2408.00714
-
Demo: https://sam2.metademolab.com
https://huggingface.co/spaces/fffiloni/SAM2-Video-Predictor -
功能:实现(point,bbox,mask)promot,实现图片&视频分割,可进行实例级分割(就是指定想要分割的目标进行分割)和全景级分割(就是将图像中每个东西都分割)
-
与SAM相比:SAM2可以
(1)支持任意长视频实时分割
(2)实现zero-shot泛化
(3)分割和追踪准确性提升,图像分割准确高6倍,速度快3倍
(4)解决遮挡问题。 -
SAM2局限:
(1)SAM2无法跨镜头分割对象,在长遮挡/扩展视频/拥挤场景中丢失跟踪对象。(需要对附加帧的细化点击可以快速恢复正确的预测)。
(2)对非常小/快速移动/多个重复对象中丢失跟踪对象(需要纳入运动建模可以减轻错误)。
(3)有研究指出SAM2 在无需提示(自动模式)即可感知图像中不同物体的能力有所下降。
![[图片]](https://i-blog.csdnimg.cn/direct/ebb93fa4e99d414e86aa9756fbea6774.png)
-
技术细节:
(1)记忆编码器根据当前预测创建记忆,记忆库保留有关视频目标对象过去预测的信息。记忆注意力机制通过条件化当前帧特征,并根据过去帧的特征调整以产生嵌入,然后将其传递到掩码解码器以生成该帧的掩码预测,后续帧不断重复此操作。
(2)视频中还容易出现分割对象被遮挡的情况。为了解决这个新情况,SAM2还增加了一个额外的模型输出“遮挡头”(occlusion head),用来预测对象是否出现在当前帧上。 -
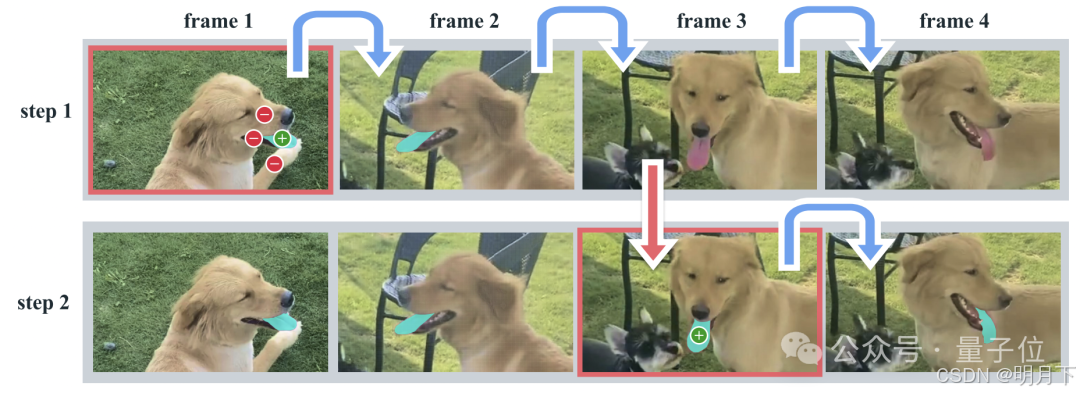
SAM2进行交互式分割的过程:
主要分为两步:选择和细化。
在第一帧中,用户通过点击来选择目标对象,SAM2根据点击自动将分割传播到后续帧,形成时空掩码。
如果SAM2在某些帧中丢失了目标对象,用户可以通过在新一帧中提供额外的提示来进行校正。比如,在第三帧中需要恢复对象,只需在该帧中点击即可。
SAM2原代码使用流程:
- 将视频转为图像帧(就是MP4转jpg格式)
- 并将图像帧重命名为00001.jpg等数字编号
- 模型加载所有图像帧数据
- 对第一帧图像增加prompt,可以是point,bbox,mask。(带有prompt的帧称为cond 帧)
- 开始处理图像帧,当前帧依据cond帧和前6帧的特征&结果为判断依据,输出当前帧的结果。
SAM2进阶应用—实现小样本跨图自动标注分割
数据准备
- 先用labelme标注3-5张图片的mask得到json。作为模板图【一张都不想标的话,可以尝试用SAM标注,先见其他博主的教程吧,我以后补上】
- 数据集目录格式。
- few-shot_path:放模板图和mask
- test_path:放待打标的图像
data_name
  ├── few_shot_path
  │   ├── 1.jpg
  │   ├── 1.json //1.jpg图片的mask标注
  │   ├── 2.jpg
  │   ├── 2.json //1.jpg图片的mask标注
  │   |   ...
  ├── test_path
  │   ├── 5.jpg
  │   ├── 5.json// (可选)如果你想做实验,看SAM2和gt mask之间的精度差异,可以放标注文件。
  │   ├── 6.jpg
  │   ├── 7.jpg
  │   |   ...
代码和环境准备
增加git 缓冲大小
git config --global http.postBuffer 524288000
下载代码
git clone https://gitee.com/zjmjolin/sam2-few-shot-cross-image-segmentation.git && cd sam2
必要环境准备
pip install -e .
安装pycococreatortools
方法1:
pip install git+git://github.com/waspinator/pycococreator.git@0.2.0
有时候会因为网络问题无法成功下载。那就尝试方法2:
方法2:
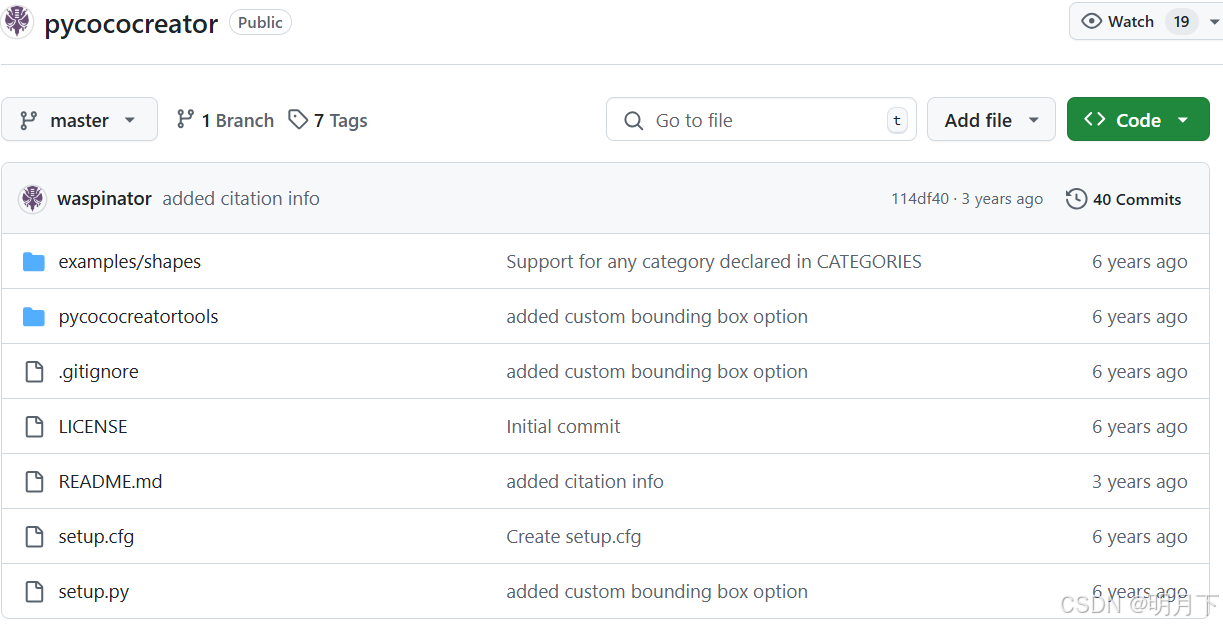
到官网下载源文件,https://github.com/waspinator/pycococreator
上传服务器,解压下载的zip包
pip install cython
cd pycococreator
python3 setup.py build_ext install
python setup.py
安装pycocotools
pip install pycocotools
安装其他库
pip install argparse
pip install opencv-python-headless
pip install opencv_python
pip install matplotlib
pip install requests
pip install shapely
模型准备
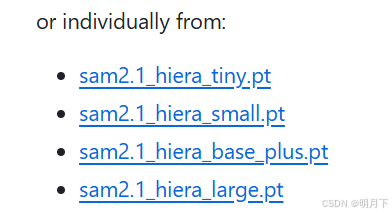
下载SAM2模型,根据需要下载:大的模型效果肯定好一些,但显卡不一定能跑。
https://github.com/facebookresearch/sam2?tab=readme-ov-file#download-checkpoints
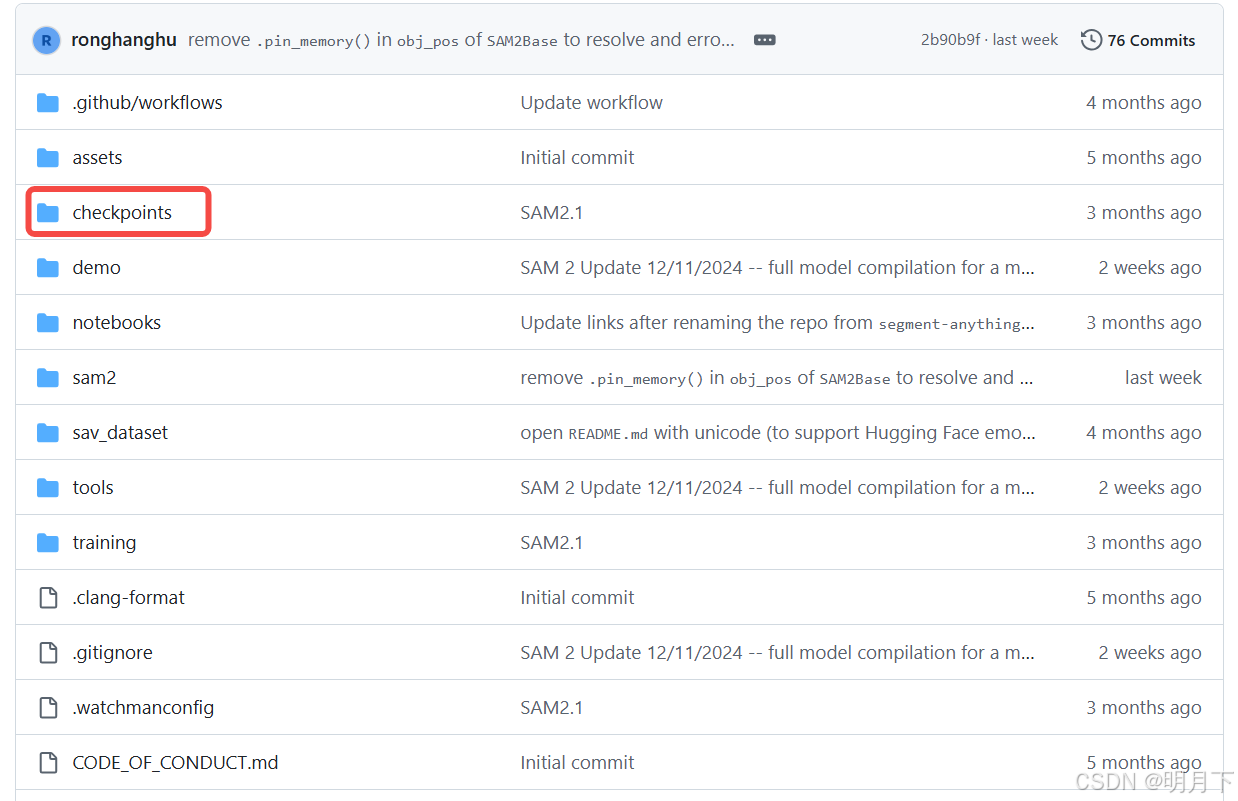
下载好之后,将模型放在checkpoints中
运行代码
python fewshot_with_multimask.py --few_shot_path '模板图和mask的路径' --test_path '待打标的图像' --save_root 'mask和结果图的保存路径'
然后就可以在save_root中看到结果啦!
对SAM2具体修改如下:
【想要了解博主是如何改代码的可以看该章节】
为了实现SAM2 小样本跨图模式,需要对SAM2视频模式进行如下修改:
- 不限制输入图像的名称,
- 将“模型加载所有图像帧数据”修改成“模型首先加载所有few-shot图像”
- 给小样本图像增加prompt。
- 加载待标注图像,存储到inference_state字典中。
- 不再将测试图片的存储在memory bank即inference_state[“output_dict”]。
- 将“模型加载所有图像帧数据”修改成“模型首先加载所有few-shot图像”
# fewshot_with_multimask.py
inference_state = predictor.init_state(video_path=few_shot_path) # 只加载few-shot
# segment-anything-2 > sam2->sam2_video_predictor.py
class SAM2VideoPredictor(SAM2Base):
    def init_state(
            self,
            video_path,
            offload_video_to_cpu=False,
            offload_state_to_cpu=False,
            async_loading_frames=False,
    ):
    ....
    # Warm up the visual backbone and cache the image feature on frame 0
    # 冗余步骤,直接注释掉
    # self._get_image_feature(inference_state, frame_idx=0, batch_size=1)
- 对每一张few-shot图像增加prompt。
# fewshot_with_multimask.py
for ann_frame_idx,mask in enumerate(input_mask):
    predictor.add_new_mask(
        inference_state=inference_state,
        frame_idx=ann_frame_idx,
        obj_id=ann_obj_id,
        mask=mask,
        )
- 加载测试图像,并加载到inference_state[“images”]中,另外修改inference_state[“num_frames”]
# fewshot_with_multimask.py
img, height, width = load_test_img_as_tensor(text_img_path, 1024)
inference_state["images"] = torch.cat((inference_state["images"], img), dim=0)
inference_state["num_frames"] = few_shot_num+1 #few_shot_num+test
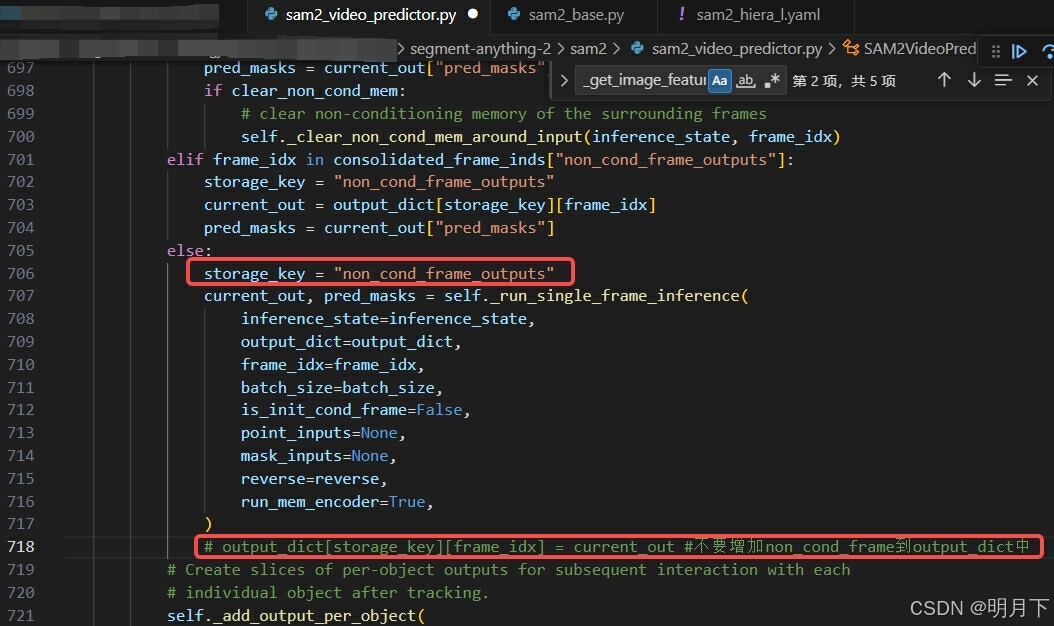
- 测试图像不需要存储在inference_state[“output_dict”][“non_cond_frame_outputs”]
# segment-anything-2 > sam2->sam2_video_predictor.py
class SAM2VideoPredictor(SAM2Base):
    def propagate_in_video(
        self,
        inference_state,
        start_frame_idx=None,
        max_frame_num_to_track=None,
        reverse=False,
    ):
    ...
    else:
        storage_key = "non_cond_frame_outputs"
        current_out, pred_masks = self._run_single_frame_inference(
            inference_state=inference_state,
            output_dict=output_dict,
            frame_idx=frame_idx,
            batch_size=batch_size,
            is_init_cond_frame=False,
            point_inputs=None,
            mask_inputs=None,
            reverse=reverse,
            run_mem_encoder=True,
        )
        # 不要增加non_cond_frame到output_dict中,该行直接注释
        #output_dict[storage_key][frame_idx] = current_out
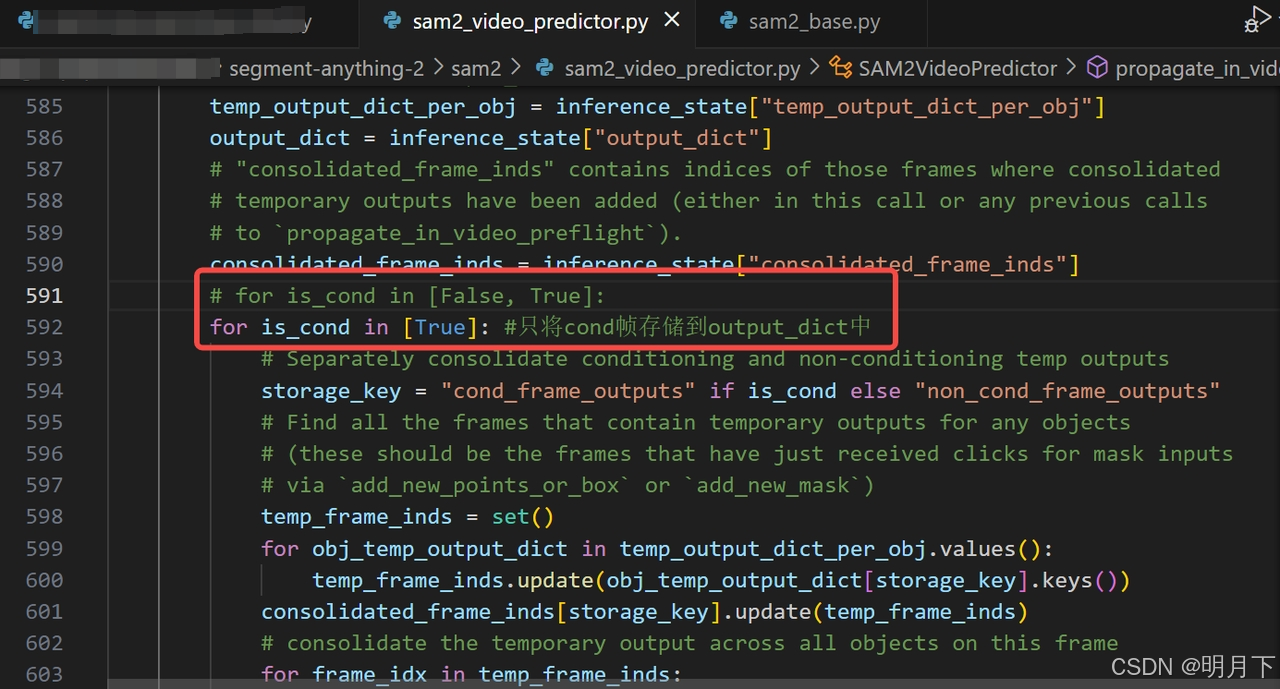
# segment-anything-2 > sam2->sam2_video_predictor.py
def propagate_in_video_preflight(self, inference_state):
    ...
    #
    # for is_cond in [False, True]: # 注释掉,不更新output_dict['output_dict']['non_cond_frame_outputs']
    for is_cond in [True]: #只将更新cond帧存储到output_dict['output_dict']['cond_frame_outputs']中
- 获取测试图像的mask,video_segments中out_frame_idx==few_shot_num时,为测试图像的mask
# fewshot_with_multimask.py
video_segments = {}
for out_frame_idx, out_obj_ids, out_mask_logits in predictor.propagate_in_video(inference_state):
    if out_frame_idx!=few_shot_num:continue
    video_segments[out_frame_idx] = {
        out_obj_id: (out_mask_logits[i] > 0.0).cpu().numpy()
        for i, out_obj_id in enumerate(out_obj_ids)
    }
- 删除测试图像在inference_state[“images”]中的信息
# fewshot_with_multimask.py
inference_state["images"]=inference_state["images"][:-1]
# 必须删除inference_state['cached_features']中的测试数据,否则全部错
if few_shot_num in inference_state["cached_features"]:
    del inference_state["cached_features"][few_shot_num]
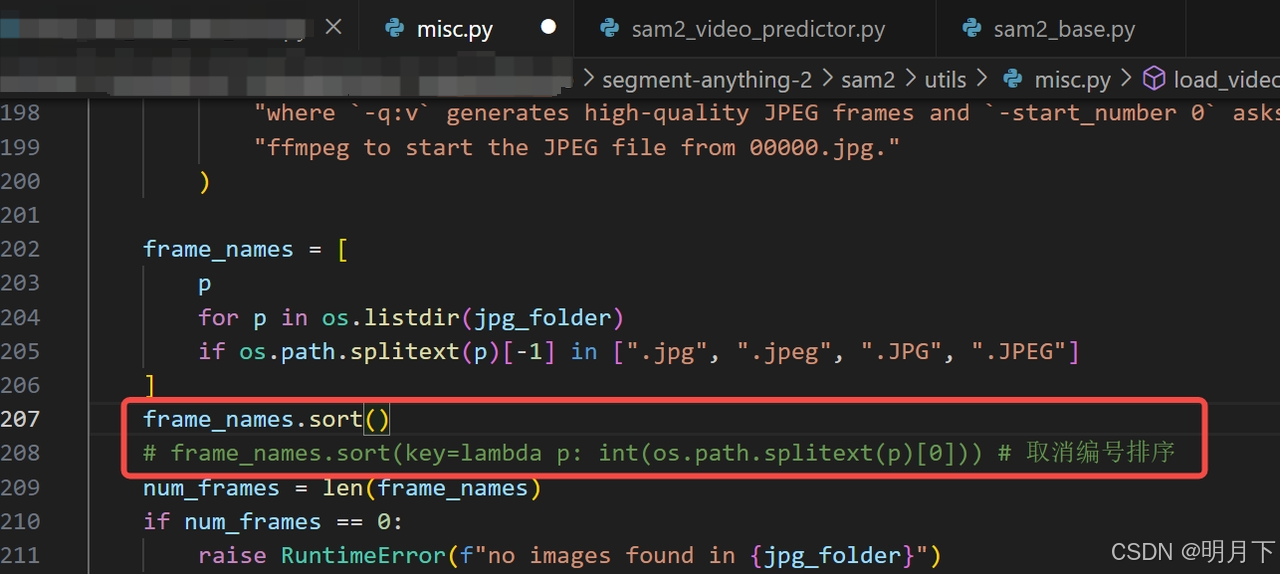
- 不限制few-shot输入图像的名称
问题与思考:
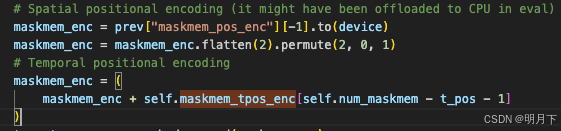
- num_maskmem:无法修改,和模型绑定。只能人为控制。但不妨碍输入>7的few-shot
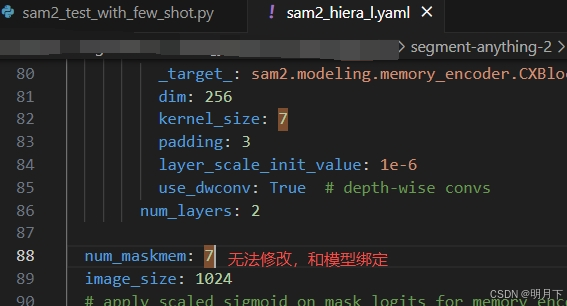

 # 尝试将num_maskmem修改成5,直接报错
  File "/mnt/volumes/cvg-data-lx/zhangjieming/paperwithcode/segment-anything-2/sam2/build_sam.py", line 122, in _load_checkpoint
    missing_keys, unexpected_keys = model.load_state_dict(sd)
                                    ^^^^^^^^^^^^^^^^^^^^^^^^^
  File "/root/anaconda3/envs/sam2/lib/python3.11/site-packages/torch/nn/modules/module.py", line 2215, in load_state_dict
    raise RuntimeError('Error(s) in loading state_dict for {}:\n\t{}'.format(
RuntimeError: Error(s) in loading state_dict for SAM2VideoPredictor:
        size mismatch for maskmem_tpos_enc: copying a param with shape torch.Size([7, 1, 1, 64]) from checkpoint, the shape in current model is torch.Size([5, 1, 1, 64]).
- inference_state字典中重要参数
# 最近几帧的feature,以便快速交互
inference_state["cached_features"] = {}

# 存储每一帧模型的跟踪结果和状态
inference_state["output_dict"] = {
"cond_frame_outputs": {},  # dict containing {frame_idx: <out>}
"non_cond_frame_outputs": {},  # dict containing {frame_idx: <out>}
}

#每个对象跟踪结果的Slice,与“output_dict”共享相同的内存
inference_state["output_dict_per_obj"] = {}

#当用户与帧交互以添加点击或掩码时,用于保存新输出的临时存储(在传播开始之前,它被合并到“output_dict”中)
inference_state["temp_output_dict_per_obj"] = {}

#  已经从点击或掩码输入中保存合并输出的帧 (我们在跟踪期间直接使用它们的合并输出)
inference_state["consolidated_frame_inds"] = {
"cond_frame_outputs": set(),  # set containing frame indices
"non_cond_frame_outputs": set(),  # set containing frame indices
}

# 每个跟踪帧的元数据(例如被跟踪的方向)
inference_state["tracking_has_started"] = False
inference_state["frames_already_tracked"] = {}
想要微调SAM2见以下博客:
https://avoid.overfit.cn/post/9598b9b4ccc64a8e86275f1e7712e0dd
https://github.com/sagieppel/fine-tune-train_segment_anything_2_in_60_lines_of_code/


 6638
6638

 被折叠的 条评论
为什么被折叠?
被折叠的 条评论
为什么被折叠?
 到【灌水乐园】发言


