


笔者经过尝试raspbian、Ubuntu-desktop、Ubuntu-server、Ubuntu-core等系统的体验,最终选择了对内存要求不是太高,有图形界面的Ubuntu-mate 22.04LTS系统,跟raspbian很类似,没有多余的软件,内存占用1G左右,能作为基本的Linux主机使用。
一、下载Ubuntu系统镜像
Ubuntu官方链接:https://ubuntu.com/download/raspberry-pi
Ubuntu-mate官方链接:Choose an architecture | Download (ubuntu-mate.org)
根据树莓派的硬件和需求选择相应系统镜像。
二、烧录系统镜像
准备TF卡,使用相关工具下载烧录,相关教程很多,这里不再赘述。
三、插卡开机
如果有HDMI接口的屏幕、鼠标,将简单许多,开机根据提示选择语言,时区,创建账户等,即完成开机初始化。
没有屏幕的只能使用SSH远程操控,相关教程也很多,笔者有外接屏幕并未尝试过。
四、最重要的安装必要的软件
1、换源。
原本的软件源远在国外,软件下载更新巨慢,第一步自然的换成国内源。听说中科大的源比较全面,经过体验速度也不错。
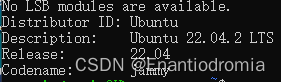
查看系统版本:
lsb_release -a根据系统发行版版本,选择相应的源
如:
编辑源代码段:
sudo nano /etc/apt/sources.list头部标‘#’注释原代码段,添加jammy的软件源
# 中科大源

deb https://mirrors.ustc.edu.cn/ubuntu-ports-ports/ jammy main restricted universe multiverse
deb-src https://mirrors.ustc.edu.cn/ubuntu-ports/ jammy main restricted universe multiverse
deb https://mirrors.ustc.edu.cn/ubuntu-ports/ jammy-updates main restricted universe multiverse
deb-src https://mirrors.ustc.edu.cn/ubuntu-ports/ jammy-updates main restricted universe multiverse
deb https://mirrors.ustc.edu.cn/ubuntu-ports/ jammy-backports main restricted universe multiverse
deb-src https://mirrors.ustc.edu.cn/ubuntu-ports/ jammy-backports main restricted universe multiverse
deb https://mirrors.ustc.edu.cn/ubuntu-ports/ jammy-security main restricted universe multiverse
deb-src https://mirrors.ustc.edu.cn/ubuntu-ports/ jammy-security main restricted universe multiverse
deb https://mirrors.ustc.edu.cn/ubuntu-ports/ jammy-proposed main restricted universe multiverse
deb-src https://mirrors.ustc.edu.cn/ubuntu-ports/ jammy-proposed main restricted universe multiverse
完成后ctrl+o保存,ctrl+x退出,在终端输入以下指令更新软件:
sudo apt update 			// 更新apt资源列表
sudo apt upgrade            // 更新软件
2.开启SSH服务。
通常来说有时还是需要用PC电脑操控的。
sudo apt update 			        //更新apt资源
sudo apt install openssh-server		//安装ssh
sudo service ssh start			    //启动ssh,这里就可以通过ssh连接了
sudo systemctl enable ssh 		    //将ssh服务设置为用户登录时启动。
sudo ufw allow ssh			        //开启SSH服务器的防火墙
PC端在Ubuntu系统中就可以使用:
ssh 用户名@树莓派IP地址
来登陆,Windows系统可查询网络教程,来连接。。。
3.安装samba,开启文件共享。
官方教程:Install and Configure Samba | Ubuntu
以下是从文档中复制来的:
To install Samba, we run:
sudo apt update
sudo apt install samba
We can check if the installation was successful by running:
whereis sambaNow that Samba is installed, we need to create a directory for it to share:
mkdir /home/<username>/sambashare/ // <username>换成自己的树莓派用户名,可自定义The command above creates a new folder sambashare in our home directory which we will share later.
The configuration file for Samba is located at /etc/samba/smb.conf. To add the new directory as a share, we edit the file by running:
sudo vim /etc/samba/smb.confAt the bottom of the file, add the following lines:
[sambashare]
    comment = Samba on Ubuntu
    path = /home/username/sambashare
    read only = no
    browsable = yes
Now that we have our new share configured, save it and restart Samba for it to take effect:
sudo service smbd restartUpdate the firewall rules to allow Samba traffic:
sudo ufw allow sambaSince Samba doesn’t use the system account password, we need to set up a Samba password for our user account:
sudo smbpasswd -a username // username换成自己的树莓派用户名 On Windows, open up File Manager and edit the file path to:
\\ip-address\sambashare // ip-address 替换为树莓派ip地址4.安装中文输入法。
笔者为此困扰了很久,翻遍了很多教程,最终才得以解决。
如果安装了fcitx框架,却没有中文输入法,则可按以下步骤:
打开终端,输入以下命令以卸载 fcitx4 相关软件包:
sudo apt-get remove fcitx*输入以下命令以更新系统软件包:
sudo apt-get update输入以下命令以安装 fcitx5 相关软件包:
sudo apt-get install fcitx5输入以下命令安装 fcitx5 中文输入法(也可安装谷歌拼音,参考网上教程):
sudo apt-get install fcitx5-pinyin5.安装树莓派gpio库
这里给出bcm2835库的安装,适用于C/C++开发使用
官方链接:http://www.airspayce.com/mikem/bcm2835/
相关教程也可参考以上链接文档,相关安装命令如下:
# download the latest version of the library, say bcm2835-1.xx.tar.gz, then:
tar zxvf bcm2835-1.xx.tar.gz
cd bcm2835-1.xx
./configure
make
sudo make check
sudo make install
五、总结
之后还应该安装文本编辑器,网上都推荐Vim,但作为Linux小白,实在难以配置出好看又好用的Vim界面,最终还是安装了一个VScode,不用配置既有良好的编辑环境,虽然内存占用确实较高,但还是省心的。目前树莓派只能作为Linux小电脑使用,学习一下Linux终端命令行,和设备驱动,真要做嵌入式还得将树莓派做下位机,安装Ubuntu-core系统比较合适。
千淘万漉虽辛苦,吹尽狂沙始到金。


 1294
1294

 被折叠的 条评论
为什么被折叠?
被折叠的 条评论
为什么被折叠?
 到【灌水乐园】发言


