


0. 环境搭建
环境:Ubuntu 22.04.1 LTS 64-bits
本文使用git install方法安装v4.210版本
安装前请确保安装build-essential和其它必要的GCC环境
# Git install
git clone https://github.com/verilator/verilator
unset VERILATOR_ROOT  # For bash
cd verilator
git pull         # Make sure git repository is up-to-date
git tag          # See what versions exist
git checkout v4.210  # Switch to specified release version
autoconf         # Create ./configure script
./configure      # Configure and create Makefile
make -j `nproc`  # Build Verilator itself (if error, try just 'make')
sudo make install
verilator --version
# wavefrom check tool
apt-get install gtkwave
1.初次测试
Verilator是一个非常快速的仿真工具,它使用C/C++编写Testbench并运行Verilog模型。尝试运行来自Verilator中的Example来确保Verilator的正常运行。
进入 %Verilator%/examples/make_hello_c 位置
提取其中的top.v和sim_main.cpp
// DESCRIPTION: Verilator: Verilog example module
//
// This file ONLY is placed under the Creative Commons Public Domain, for
// any use, without warranty, 2017 by Wilson Snyder.
// SPDX-License-Identifier: CC0-1.0

// See also the EXAMPLE section in the verilator manpage/document.
module top;
  initial begin
     $display("Hello World!");
     $finish;
   end
endmodule
// DESCRIPTION: Verilator: Verilog example module
//
// This file ONLY is placed under the Creative Commons Public Domain, for
// any use, without warranty, 2017 by Wilson Snyder.
// SPDX-License-Identifier: CC0-1.0
//======================================================================

// Include common routines
#include <verilated.h>

// Include model header, generated from Verilating "top.v"
#include "Vtop.h"

int main(int argc, char** argv, char** env) {
    // See a similar example walkthrough in the verilator manpage.

    // This is intended to be a minimal example.  Before copying this to start a
    // real project, it is better to start with a more complete example,
    // e.g. examples/c_tracing.

    // Prevent unused variable warnings
    if (false && argc && argv && env) {}

    // Construct the Verilated model, from Vtop.h generated from Verilating "top.v"
    Vtop* top = new Vtop;

    // Simulate until $finish
    while (!Verilated::gotFinish()) {

        // Evaluate model
        top->eval();
    }

    // Final model cleanup
    top->final();

    // Destroy model
    delete top;

    // Return good completion status
    return 0;
}
另外新建一个文件夹用于存放我们的verilator文件,这个目录下打开终端
编译运行
verilator -Wall --cc --exe --build sim_main.cpp top.v
-Wall:提示警告信息
–cc:获得Cpp输出结果
–build:自动编译
接下来进入文件夹运行Vtop即可
./obj_dir/Vout
看到HelloWorld成功输出。
Testbench分析
sim_main.cpp是我们应该去编写的Testbench文件,文件的的头文件需要包含Vtop.h,
若verilog模型以$finish作结,可以include <verilated.h> 以Verilated::getFinish()的结果作为判定条件,
top->eval();用于更新电路状态,如果有输入输出需要变更,可以访问top的输入输出变量。
2.双控开关逻辑电路仿真
尝试一下开关逻辑电路仿真,新建文件夹/double_switch
创建顶层文件,并仿照编写测试文件
module top(
  a
  ,b
  ,f
);
  input a;
  input b;
  output f;

  assign f = a^b;

endmodule
#include <verilated.h>
#include "Vtop.h"
int main (int argc,char** argv ,char** env){
if(false && argc && argv && env){}
Vtop *top = new Vtop;
int cnt = 0;
while(cnt <= 10){//条件设定为次数测试
int a = rand() & 1;//随机实验
int b = rand() & 1;
top->a = a;//赋值变化
top->b = b;
top ->eval();//更新电路
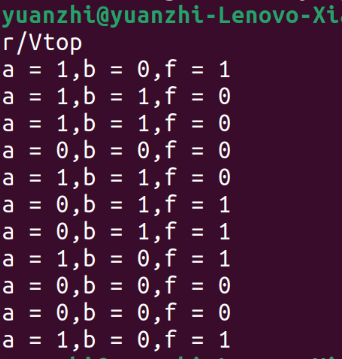
printf("a = %d,b = %d,f = %d\n",a,b,top->f);
cnt = cnt + 1;
//尝试校验结果
assert ((top->f == (a^b)));
};
top->final();
delete top;
return 0;
}
编译并测试:
3.生成波形文件并显示
波形文件是verilog输出的一种重要形式,尝试以下使用Verilator产生波形*.vcd文件,并使用GTKwave工具显示并观察。
创建一个数控振荡器,并尝试将20MHz的时钟转换为1MHz的震荡波形
`timescale 1ns/1ps


module CLK_NCO(
    clk
    ,rst
    ,i_pinc
    ,o_clk
    ,o_ce
);
    input                       clk;
    input                       rst;
    input               [31:0]  i_pinc;

    output  reg                 o_clk;
    output  reg                 o_ce;
    reg                 [31:0]  acc_pinc;
    reg                         msb;
    always @(posedge clk) begin
        if(rst)begin
            acc_pinc <= 32'd0;
            msb <= 0;
        end
        else begin
            acc_pinc <= acc_pinc +i_pinc;
            o_clk <= acc_pinc[31];
            msb <= acc_pinc[31];
            o_ce <= acc_pinc[31] && (!msb);
        end

    end

endmodule
创建仿真文件
#include <stdio.h>
#include <stdlib.h>
#include <assert.h>

#include "VCLK_NCO.h"
#include "verilated_vcd_c.h" //生成波形时调用
#include "verilated.h" //common routine

#define MAX_SIM_TIME 20000
uint64_t main_time = 0;

int main(int argc,char** argv,char** env){
    Verilated::commandArgs(argc,argv);
    //打开波形仿真
    Verilated::traceEverOn(true);
    VerilatedVcdC *tfp = new VerilatedVcdC();
    //新建仿真对象
    VCLK_NCO *top = new VCLK_NCO;
    //准备生成波形文件
    top->trace(tfp,5);
    tfp->open("wave.vcd");
    top->rst = 1;

    while (main_time < MAX_SIM_TIME )
    {
        /* code */
        top->clk ^= 1;
        top->i_pinc = 0x05555555;
        if(main_time == 100){
            top->rst = 0;
        }

        top->eval();
        tfp->dump(main_time);
        main_time++;
    }
    tfp->close();
    delete top;
    exit(EXIT_SUCCESS);

}
相比于不启用波形的仿真方法,只是多启用了波形生成的功能。运行以下命令以编译并生成VCD文件。
//编译警告 -Wall 开启波形追踪 -trace 生成可执行文件 -exe
verilator -Wall -trace -cc CLK_NCO.v -exe sim_main.cpp
//MAKE工程
make -C obj_dir -f VCLK_NCO.mk VCLK_NCO
//执行文件,进行仿真并生成vcd文件
make -C obj_dir -f VCLK_NCO.mk VCLK_NCO
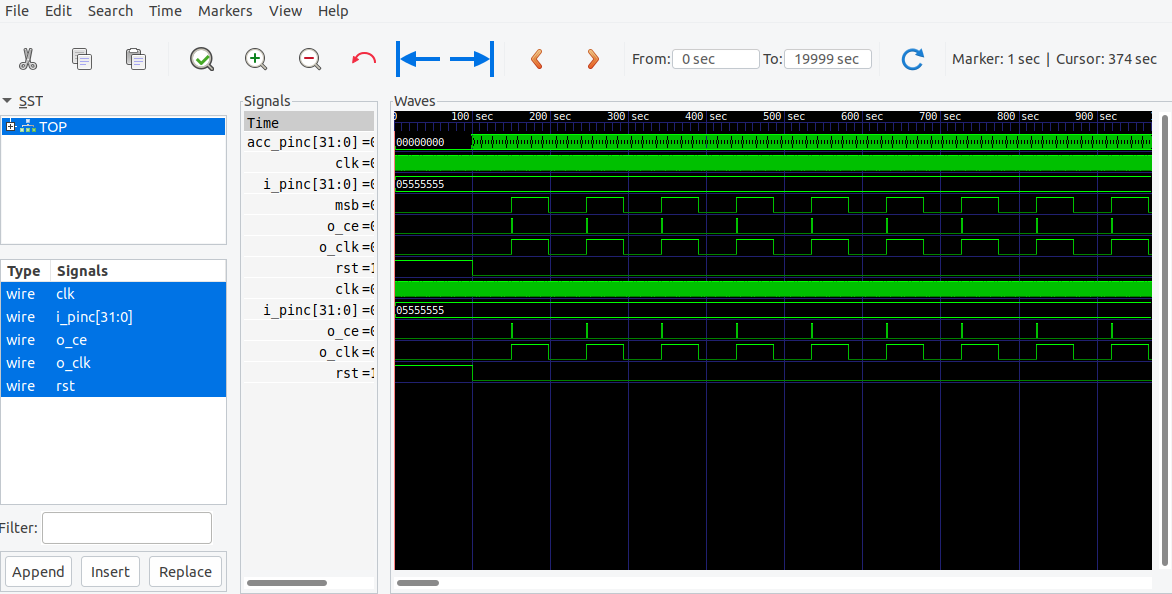
//使用gtkwave打开
gtkwave wave.vcd


 1509
1509


 被折叠的 条评论
为什么被折叠?
被折叠的 条评论
为什么被折叠?
 到【灌水乐园】发言


