glsl着色器
When I just started work with the 3D graphics I was surprised about shaders. This is a very powerful tool to manipulate a 3D object. But for me a long time ago that looked very complicated and hard to start. I got a lot of questions and no simple answers. After some time and with more experience with ThreeJS I returned to them and now I have the simple jump in the tutorial.
当我刚开始使用3D图形时,我对着色器感到惊讶。 这是操纵3D对象的非常强大的工具。 但是对我而言,很久以前,这看起来非常复杂且难以启动。 我有很多问题,没有简单的答案。 在一段时间之后,在对ThreeJS有了更多的经验之后,我回到了他们那里,现在我可以轻松地学习本教程了。
Let’s take an example and go through the steps to create such a thing. My favourite example is the planet texture for the small game about futuristic space wars. Many planets and space shapes of different types, colours and form exist in our universe. Just imagine the cost of painted textures for such a small game. Of course, our imagine start-up will look for another way of implementation. And the shaders are the best choice here. You might have a question “Why?”, so I cannot hide the answer from you anymore and let’s deep dive!
让我们以一个示例为例,并逐步执行创建此类操作的步骤。 我最喜欢的示例是有关未来派太空战争的小型游戏的行星纹理。 我们的宇宙中存在许多不同类型,颜色和形式的行星和空间形状。 试想一下,对于这么小的游戏而言,绘制纹理的成本是多少。 当然,我们想象中的初创公司将寻找另一种实现方式。 着色器是这里的最佳选择。 您可能会问“为什么?” ,所以我无法再对您隐藏答案了,让我们深入探讨!
Shaders are written by the GLSL — OpenGL high-level shading language and they are executed on the GPU. We have two types of shaders — vertex and fragment. Vertex shaders work with vertexes of an object and define their position, size and etc. In the same time, fragment shaders work with colours, brightness and etc.
着色器由GLSL(OpenGL高级着色语言)编写,它们在GPU上执行。 我们有两种类型的着色器-顶点和片段。 顶点着色器使用对象的顶点并定义其位置,大小等。同时,片段着色器使用颜色,亮度等。
I use the ThreeJS library for this example. At first, we should declare the geometry and material of the sphere.
在此示例中,我使用ThreeJS库。 首先,我们应该声明球体的几何形状和材料。
const geometry = new THREE.SphereGeometry(planetSize, 65, 65);
const material = new THREE.ShaderMaterial({
    uniforms,
    vertexShader,
    fragmentShader
});
const sphere = new THREE.Mesh(geometry, material);scene.add(sphere);
The first of all we declared SphereGeometry. The geometry is created by sweeping and calculating vertexes around the Y-axis (horizontal sweep) and the Z-axis (vertical sweep). ShaderMaterial is material rendered with custom shaders. We applied our custom shaders into vertexShader and fragmentShader properties. WebGLRenderer will render them properly. As a result, we defined the sphere as a new ThreeJS Mesh.
首先,我们声明SphereGeometry 。 通过围绕Y轴(水平扫掠)和Z轴(垂直扫掠)扫掠并计算顶点来创建几何。 ShaderMaterial是使用自定义着色器渲染的材质。 我们将自定义着色器应用于vertexShader和fragmentShader属性。 WebGLRenderer将正确呈现它们。 结果,我们将球体定义为新的ThreeJS Mesh。
Vertex shader code is working with positions and displacement of the vertexes on the sphere. Also, we should handle with UV mapping, it is the 3D modelling process of projecting a 2D image onto a 3D model’s surface. The simplest vertex shader looks like:
顶点着色器代码可处理球体上顶点的位置和位移。 此外,我们应该处理UV映射,这是将2D图像投影到3D模型表面上的3D建模过程。 最简单的顶点着色器如下所示:
void main() {
 gl_Position = projectionMatrix * modelViewMatrix * vec4(position, 1.0);
}
And with simplest fragment shader:
并使用最简单的片段着色器:
void main() {
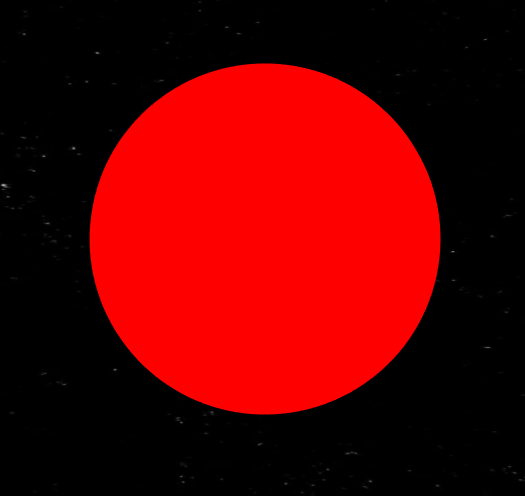
 gl_FragColor = vec4(0.9, 0.0, 0.0, 1.0);
}
We have a good result! The simple sphere with slow rotation. However, this too simple, what about UV? How to see it? Well, let’s update the shaders. In the vertex shader, we should add the declaration of variable what will save a UV value. In the same time, this variable will be available from fragment shader and we can change the colour of lines displaying the sphere UV with basic checks and gl_FragColor.
我们取得了很好的成绩! 旋转缓慢的简单球体。 但是,这太简单了,紫外线呢? 怎么看? 好,让我们更新着色器。 在顶点着色器中,我们应添加变量的声明,以保存UV值。 同时,片段着色器将提供此变量,我们可以使用基本检查和gl_FragColor更改显示球形UV的线的颜色。
varying vec2 vUv;void main() {
 vUv = uv;
 gl_Position = projectionMatrix * modelViewMatrix * vec4(position, 1.0);
}
And fragment shader:
和片段着色器:
varying vec2 vUv;
void main() {
  if ((fract(vUv.x * 10.0) < 0.02)|| (fract(vUv.y * 10.0) < 0.02)) {
    gl_FragColor = vec4(vec3(0.0), 1.0);
  } else {
    gl_FragColor = vec4(1.0);
  }
}
As we can see, the connection exists between shaders and vUv variable sends from the vertex shader to fragment shader. Also, we may send the data from JS code through the uniforms property in ShaderMaterial declaration.
如我们所见,着色器之间存在连接,并且vUv变量从顶点着色器发送到片段着色器。 同样,我们可以通过ShaderMaterial声明中的uniforms属性发送来自JS代码的数据。
At the last point of this article, I want to add the code snippets from the first image of the ice planet. Here you can find the same logic as before but including some additions.
在本文的最后,我想从冰行星的第一个图像中添加代码片段。 在这里,您可以找到与以前相同的逻辑,但其中包括一些补充。
varying vec3 vUv;
varying vec4 color;
float noise(vec3 x, vec3 y) {
  vec3 p = floor(x);
  vec3 f = fract(x);
  float n = p.x + p.y*157. + 113.*p.z;
  f = f*f*(3.-2.*f);  vec4 v1 = fract(753.*sin(n + vec4(0., 1., 157., 158.)));
  vec4 v2 = fract(753.*sin(n + vec4(113., 114., 270., 271.)));
  vec4 v3 = mix(v1, v2, f.z);
  vec2 v4 = mix(v3.xy, v3.zw, f.y);  return mix(v4.x, v4.y, f.x);
}
void main() {
  vUv = vec3(uv, 1.0);
  color = vec4(49.,49.0,49.0,1.0)/255.;
  float b = 5.0 * noise(0.3 * position, vec3( 2.0 ));
  float displacement = -10. * 0.2 + b;
  vec3 newPositionD = position + normal * displacement;
 gl_Position = projectionMatrix * modelViewMatrix * vec4(newPosition, 1.0);
   vUv = (vec4(newPosition, 1.0) * modelViewMatrix).xyz;
}
Fragment shader takes the output from the vertex shader and computes colour and other attributes of each “fragment”: a unit of rendering work affecting mainly a single output pixel, associated colours, the depth value of a pixel, etc. After these operations, the fragment is sent to Framebuffer for display on the screen.
片段着色器从顶点着色器获取输出,并计算每个“片段”的颜色和其他属性:渲染工作的一个单元,主要影响单个输出像素,关联的颜色,像素的深度值等。这些操作之后,片段发送到帧缓冲区以在屏幕上显示。
varying vec3 vUv;
uniform float radius;
varying vec4 color;
const mat3 m = mat3(0.00, 0.80, 0.60, -0.80, 0.36, -0.48, -0.60, -0.48, 0.64);
float noise(vec3 x, vec3 y) {
  vec3 p = floor(x);
  vec3 f = fract(x);
  float n = p.x + p.y*157. + 113.*p.z;
  f = f*f*(3.-2.*f);  vec4 v1 = fract(753.*sin(n + vec4(0., 1., 157., 158.)));
  vec4 v2 = fract(753.*sin(n + vec4(113., 114., 270., 271.)));
  vec4 v3 = mix(v1, v2, f.z);
  vec2 v4 = mix(v3.xy, v3.zw, f.y);  return mix(v4.x, v4.y, f.x);
}
void main() {
  vec4 fragColor = vec4(0.9, 0.0, 0.0, 1.0);
  vec3 fragCoord = vec3(vUv.x, vUv.y, vUv.z) / radius;
  vec3 src = vec3(fragCoord.x, fragCoord.y, fragCoord.z) * 1.;
  vec3 colorGradient = mix(vec3(26., 38., 83.)/255., vec3(111., 163., 181.)/255., vec3(196., 255., 148.)/255.);
  float f = 0.0;
  vec3 q = 8.0*src;
  f = 0.4 + 0.5000*noise(q); q = m*q*2.01;
  f += 0.2500*noise(q); q = m*q*2.02;
  f += 0.1250*noise(q); q = m*q*2.03;
  f += 0.0625*noise(q); q = m*q*2.01;  fragColor = vec4(colorGradient + f, 1.0);
  gl_FragColor = fragColor;
}
Enjoy shaders and have fun!😉
享受着色器并享受乐趣!😉
翻译自: https://medium.com/swlh/shaders-first-steps-to-glsl-fef521fdf158
glsl着色器


 本文介绍了GLSL着色器的基本概念,包括顶点着色器和片段着色器的工作原理,以及如何使用ThreeJS库创建和应用自定义着色器。通过一个创建行星纹理的示例,详细解释了如何在3D游戏中使用着色器优化纹理渲染,减少成本。


 2348
2348

 被折叠的 条评论
为什么被折叠?


