


 博客介绍了如何使用OpenMV摄像头和Arduino通过I2C进行通信,实现颜色检测(寻找绿色区域)并将检测结果(坐标误差)发送给Arduino,以控制伺服电机。在OpenMV端,利用图像处理找到绿色区域并计算偏差,然后通过I2C将数据发送给Arduino,Arduino接收并解析数据,用于伺服调整。整个过程中,博客提供了详细的代码示例和注意事项,确保了通讯的稳定性和数据的准确性。
本来是想openmv和arduino模拟串口通讯的,但是模拟串口定时器被舵机库占用了,所以来捣鼓一下openmv的IIC通讯,然后有空在捣鼓一下arduino的定时器
官方案例:
OpenMV IDE运行下面的程序:
# Arduino 作为I2C主设备, OpenMV作为I2C从设备。
#
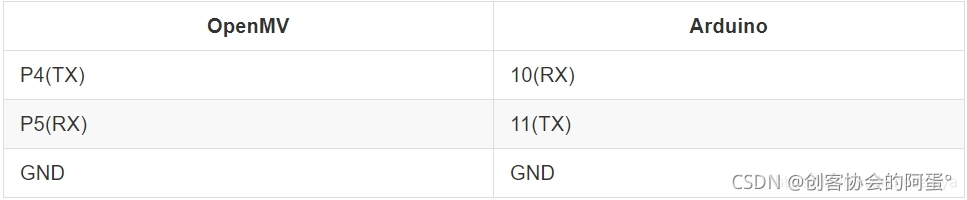
# 请把OpenMV和Arduino按照下面连线:
#
# OpenMV Cam Master I2C Data (P5) - Arduino Uno Data (A4)
# OpenMV Cam Master I2C Clock (P4) - Arduino Uno Clock (A5)
# OpenMV Cam Ground - Arduino Ground
import pyb, ustruct
text = "Hello World!\n"
data = ustruct.pack("<%ds" % len(text), text)
# 使用 "ustruct" 来生成需要发送的数据包
# "<" 把数据以小端序放进struct中
# "%ds" 把字符串放进数据流,比如:"13s" 对应的 "Hello World!\n" (13 chars).
# 详见 https://docs.python.org/3/library/struct.html
# READ ME!!!
#
# 请理解,当您的OpenMV摄像头不是I2C主设备,所以不管是使用中断回调,
# 还是下方的轮循,都可能会错过响应发送数据给主机。当这种情况发生时,
# Arduino会获得NAK,并且不得不从OpenMV再次读数据。请注意,
# OpenMV和Arduino都不擅长解决I2C的错误。在OpenMV和Arduino中,
# 你可以通过释放I2C外设,再重新初始化外设,来恢复功能。
# OpenMV上的硬件I2C总线都是2
bus = pyb.I2C(2, pyb.I2C.SLAVE, addr=0x12)
bus.deinit() # 完全关闭设备
bus = pyb.I2C(2, pyb.I2C.SLAVE, addr=0x12)
print("Waiting for Arduino...")
# 请注意,为了正常同步工作,OpenMV Cam必须 在Arduino轮询数据之前运行此脚本。
# 否则,I2C字节帧会变得乱七八糟。所以,保持Arduino在reset状态,
# 直到OpenMV显示“Waiting for Arduino...”。
while(True):
try:
bus.send(ustruct.pack("<h", len(data)), timeout=10000) # 首先发送长度 (16-bits).
try:
bus.send(data, timeout=10000) # 然后发送数据
print("Sent Data!") # 没有遇到错误时,会显示
except OSError as err:
pass # 不用担心遇到错误,会跳过
# 请注意,有3个可能的错误。 超时错误(timeout error),
# 通用错误(general purpose error)或繁忙错误
#(busy error)。 “err.arg[0]”的错误代码分别
# 为116,5,16。
except OSError as err:
pass # 不用担心遇到错误,会跳过
# 请注意,有3个可能的错误。 超时错误(timeout error),
# 通用错误(general purpose error)或繁忙错误
#(busy error)。 “err.arg[0]”的错误代码分别
# 为116,5,16。
Arduino运行以下程序:
// Arduino Code

include <Wire.h>
#define BAUD_RATE 19200
#define CHAR_BUF 128

void setup() {
  Serial.begin(BAUD_RATE);
  Wire.begin();
  delay(1000); // 给OpenMV一个启动的时间
}

void loop() {
  int32_t temp = 0;
  char buff[CHAR_BUF] = {0};

  Wire.requestFrom(0x12, 2);
  if (Wire.available() == 2) { // got length?

    temp = Wire.read() | (Wire.read() << 8);
    delay(1); // Give some setup time...

    Wire.requestFrom(0x12, temp);
    if (Wire.available() == temp) { // got full message?

      temp = 0;
      while (Wire.available()) buff[temp++] = Wire.read();

    } else {
      while (Wire.available()) Wire.read(); // Toss garbage bytes.
    }
  } else {
    while (Wire.available()) Wire.read(); // Toss garbage bytes.
  }

  Serial.print(buff);
  delay(1); // Don't loop to quickly.
}
不回卡死,并且还会自动滤除不对称的信息,非常值得借鉴参考的IIC通讯案例。
我的应用:
import sensor, image, time
from pid import PID
from pyb import Servo
import pyb, ustruct
#text = "A"+"X"+str(X_error)+"Y"+str(Y_error)+"B"+"\r\n"
text = "Hello World!\n"
data = ustruct.pack("<%ds" % len(text), text)
bus = pyb.I2C(2, pyb.I2C.SLAVE, addr=0x12)
bus.deinit() # 完全关闭设备
bus = pyb.I2C(2, pyb.I2C.SLAVE, addr=0x12)
print("Waiting for Arduino...")
green_threshold = (35, 60, 76, 15, 5, 70)
sensor.reset() # Initialize the camera sensor.
sensor.set_vflip(True)#翻转
sensor.set_pixformat(sensor.RGB565) # use RGB565. 128*160
sensor.set_framesize(sensor.QQVGA) # use QQVGA for speed.
sensor.skip_frames(10) # Let new settings take affect.
sensor.set_auto_whitebal(False) # turn this off.
clock = time.clock() # Tracks FPS.
def find_max(blobs):
max_size=0
for blob in blobs:
if blob[2]*blob[3] > max_size:
max_blob=blob
max_size = blob[2]*blob[3]
return max_blob
while(True):
clock.tick() # Track elapsed milliseconds between snapshots().
img = sensor.snapshot() # Take a picture and return the image.
blobs = img.find_blobs([green_threshold])
if blobs:
max_blob = find_max(blobs)
img.draw_rectangle(max_blob.rect()) # rect
img.draw_cross(max_blob.cx(), max_blob.cy()) # cx, cy
#print("X:",max_blob.cx(),"Y:",max_blob.cy())
X_error = max_blob.cx()-img.width()/2 #底的误差为最大色块所在的X轴-宽(宽固定=160 /2=80)我理解为取XY中心点
Y_error = -(max_blob.cy()-img.height()/2)
X_error = int(X_error)
Y_error = int(Y_error)
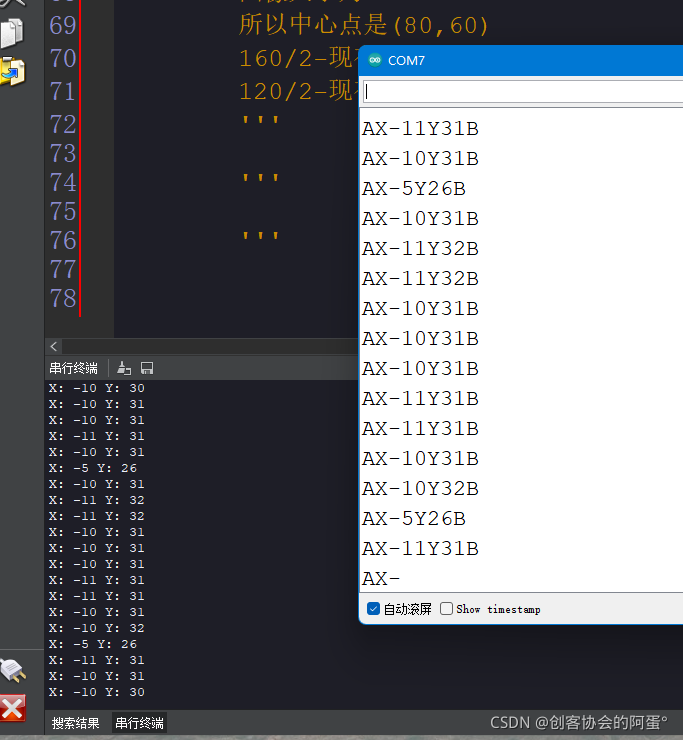
print("X:",X_error,"Y:",Y_error)
text = "A"+"X"+str(X_error)+"Y"+str(Y_error)+"B"+"\r\n"
data = ustruct.pack("<%ds" % len(text), text)
try:
bus.send(ustruct.pack("<h", len(data)), timeout=10000) # 首先发送长度 (16-bits).
try:
bus.send(data, timeout=10000) # 然后发送数据
#print("Sent Data!") # 没有遇到错误时,会显示
except OSError as err:
pass
except OSError as err:
pass
效果:
程序代码


 1330
1330

 被折叠的 条评论
为什么被折叠?
被折叠的 条评论
为什么被折叠?
 到【灌水乐园】发言


