


Using Cameras
In this session you will learn the basics of the Unity camera system. You will learn about perspective and orthographic cameras as well as how to layer multiple cameras to achieve interesting effects. Unity tutor: Mike Geig
Camera is just a Component. 有三个随从 Component: GUILayer, Flare Layer, Audio Listener.
Screen Space(左下角 (0, 0),右上角(1280, 1024)), Viewport Space(左下角(0, 0),右上角(1, 1)).
可以使用 Field of View 中的 Perspective 制造特殊的效果。
Camera Properties
| Property: | Function: |
|---|---|
| Clear | Flags Determines which parts of the screen will be cleared. This is handy when using multiple Cameras to draw different game elements. |
| Depth | The camera’s position in the draw order. Cameras with a larger value will be drawn on top of cameras with a smaller value. |
| Culling Mask | Includes or omits layers of objects to be rendered by the Camera. Assigns layers to your objects in the Inspector. |
| Target Texture | Reference to a Render Texture that will contain the output of the Camera view. Setting this reference will disable this Camera’s capability to render to the screen. |
Split Screen
Picture in Picture
Buffer Clearing to show multiple objects on the screen at the same time.
GUI layer
Rendered textures – super awesome.
This will place the camera’s view onto a Texture that can then be applied to another object. This makes it easy to create sports arena video monitors, surveillance cameras, reflections etc.

参考链接:
- https://docs.unity3d.com/Manual/class-Camera.html
- https://docs.unity3d.com/Manual/CamerasOverview.html
Using Lights
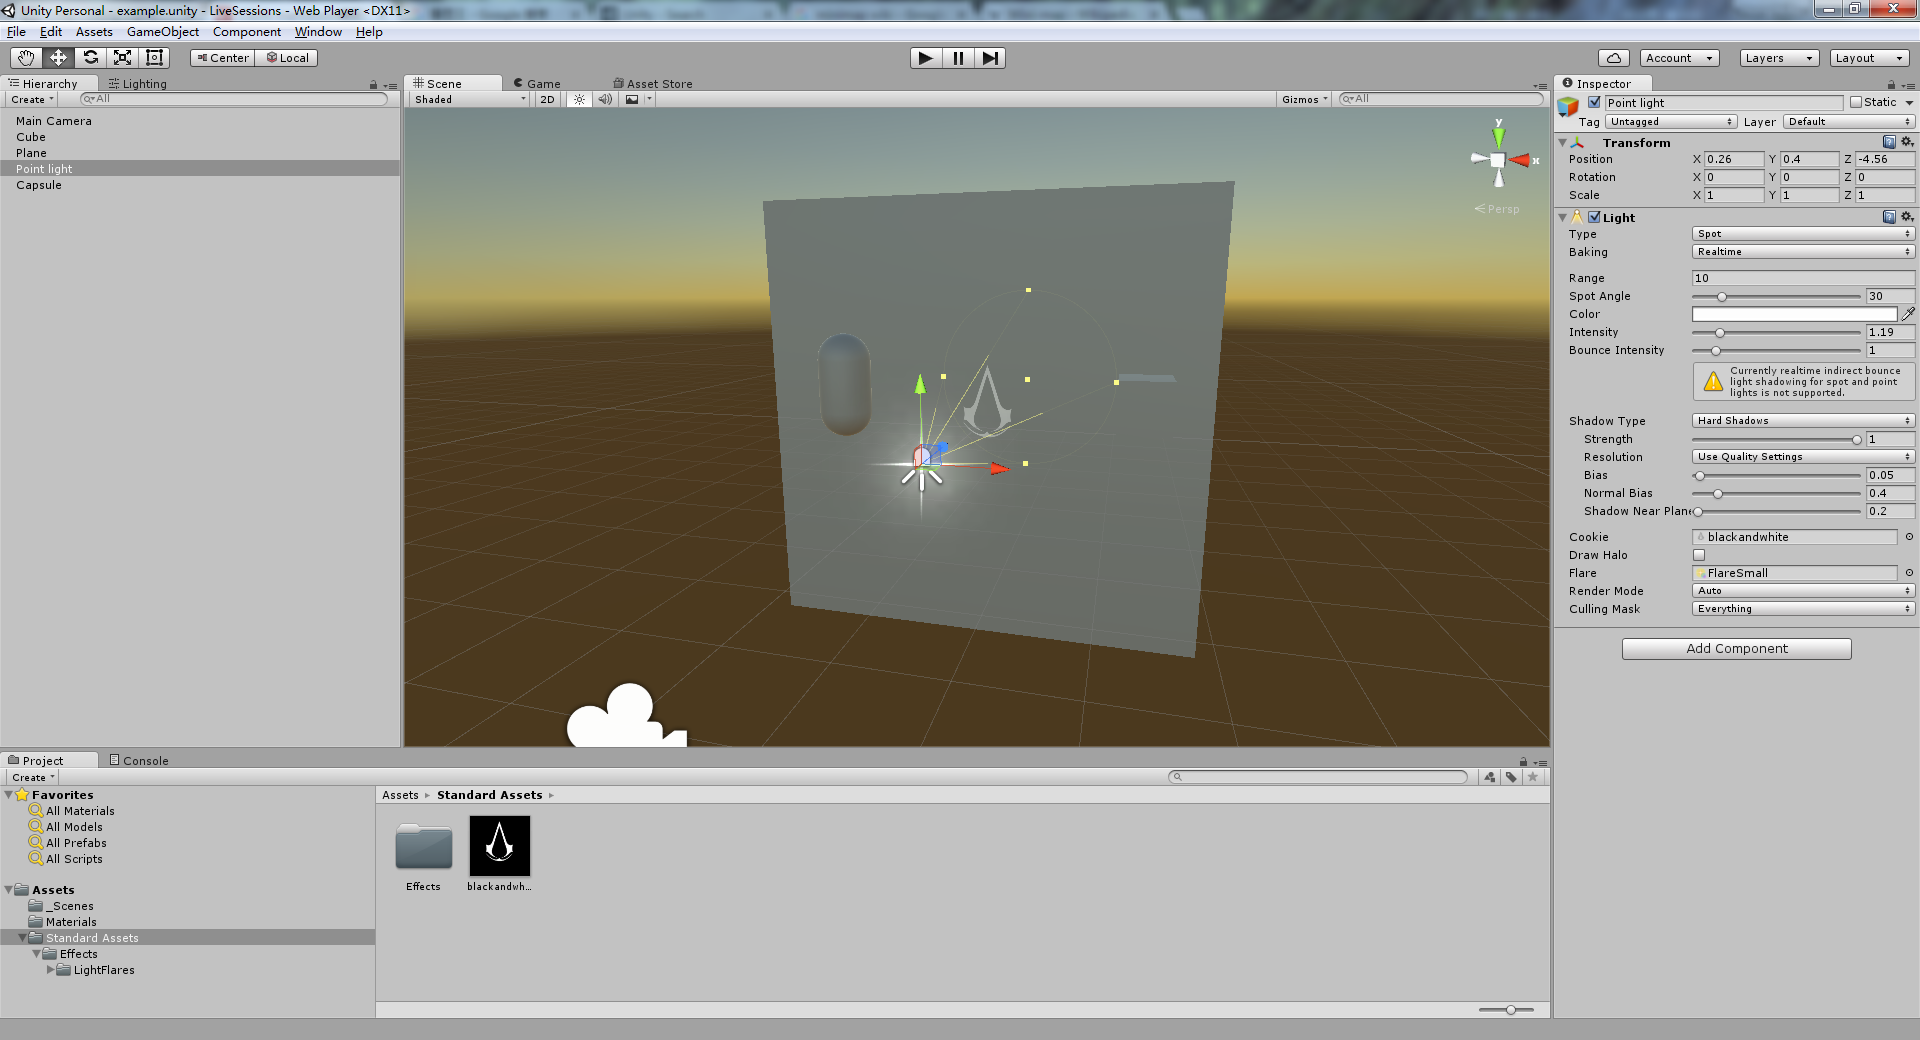
使用一张黑白图片作一个灯光的 Cookie。
在给 Point Light 一个 Cookie 的时候,对图片的配置如下:
(比较重要的几项)
Texture Type : Advanced
Mapping: 6 Frames Layout
Alpha from Grayscale: Yes
Generate Mip Maps: Yes
Border Mip Maps: Yes
Wrap Mode: Clamp

在给 Spot Light 一个 Cookie 的时候,对图片的配置如下:
改变一个配置:Mapping: None
在给 Directional Light 一个 Cookie 的时候,对图片的配置如下:
再改变一个配置:Wrap Mode: Repeat
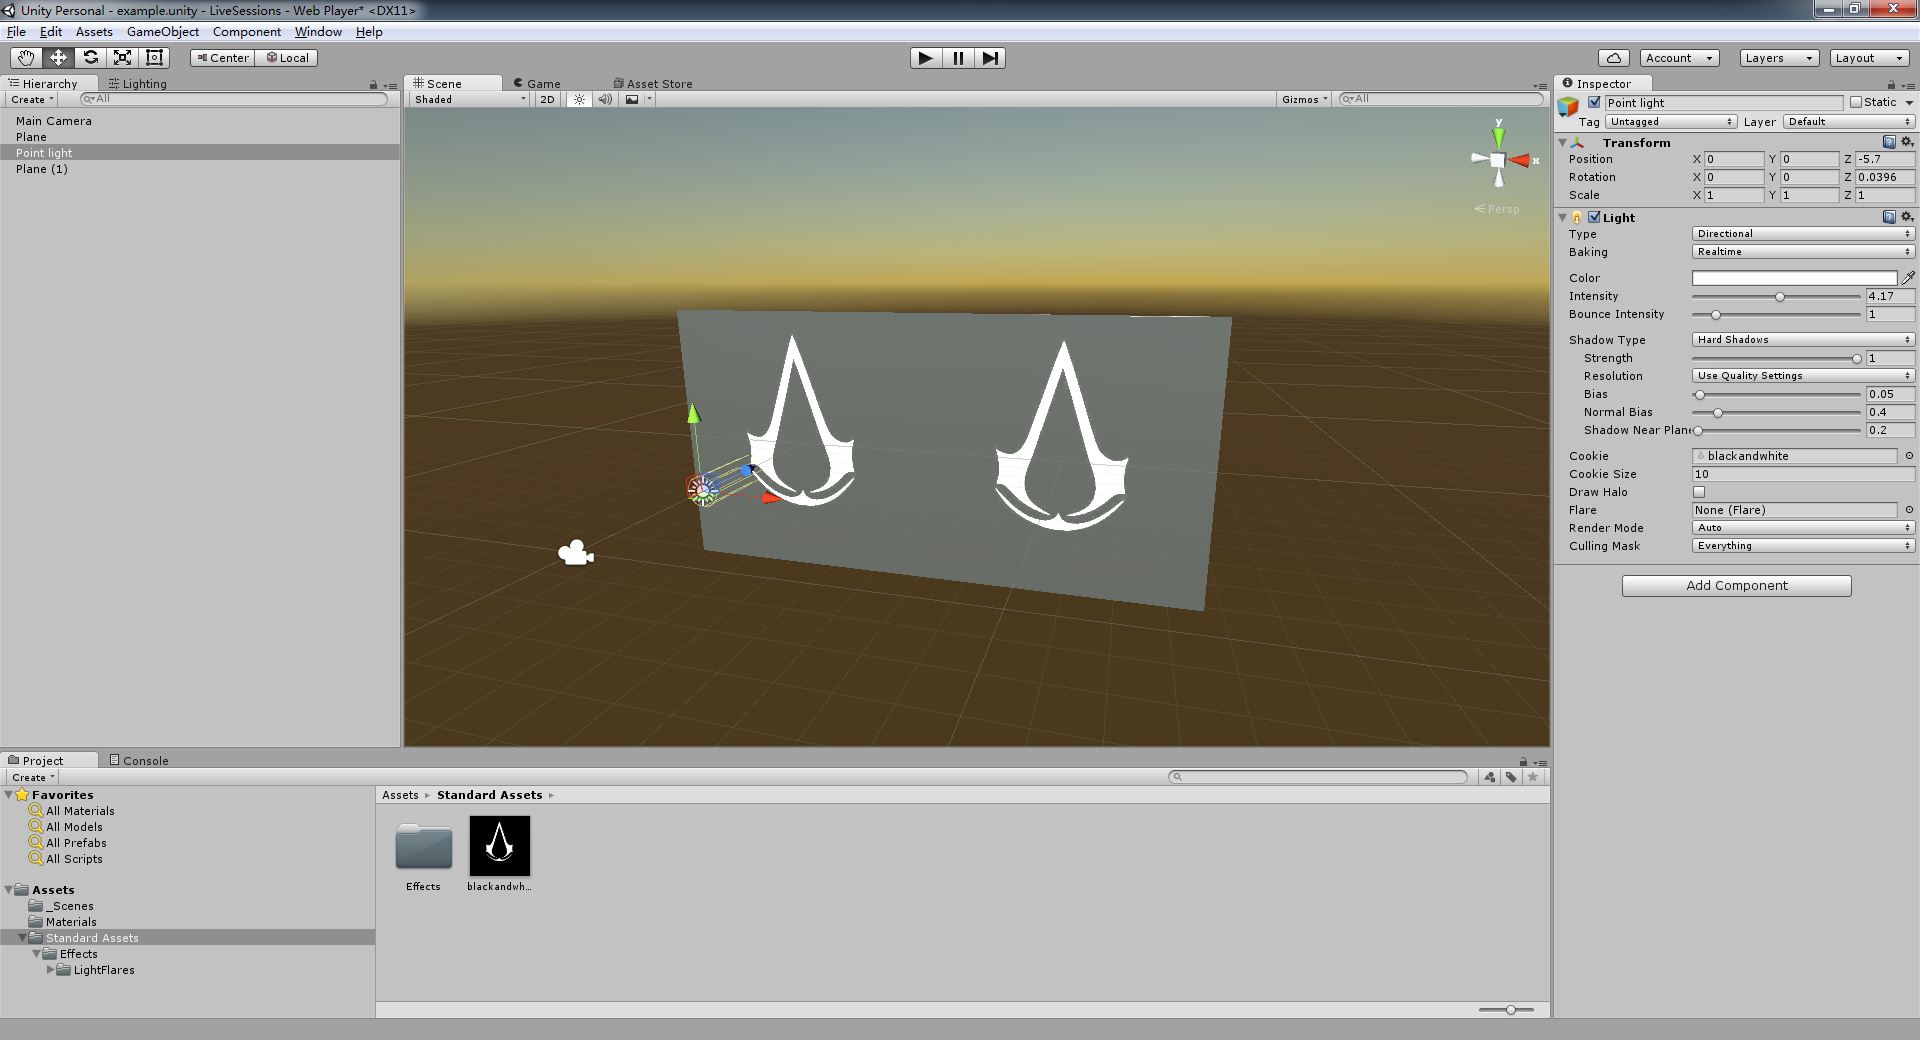
Directional Light 可以直接改变 Cookie 的大小,而另外两种 Light 则只能间接改变之。
Light Mapping
Unity has a fully integrated lightmapper – Beast by Illuminate Labs. This means that Beast will bake lightmaps for your scene based on how your scene is set up within Unity, taking into account meshes, materials, textures and lights. It also means that lightmapping is an integral part of the rendering engine - once your lightmaps are created you don’t need to do anything else, they will be automatically picked up by the objects.
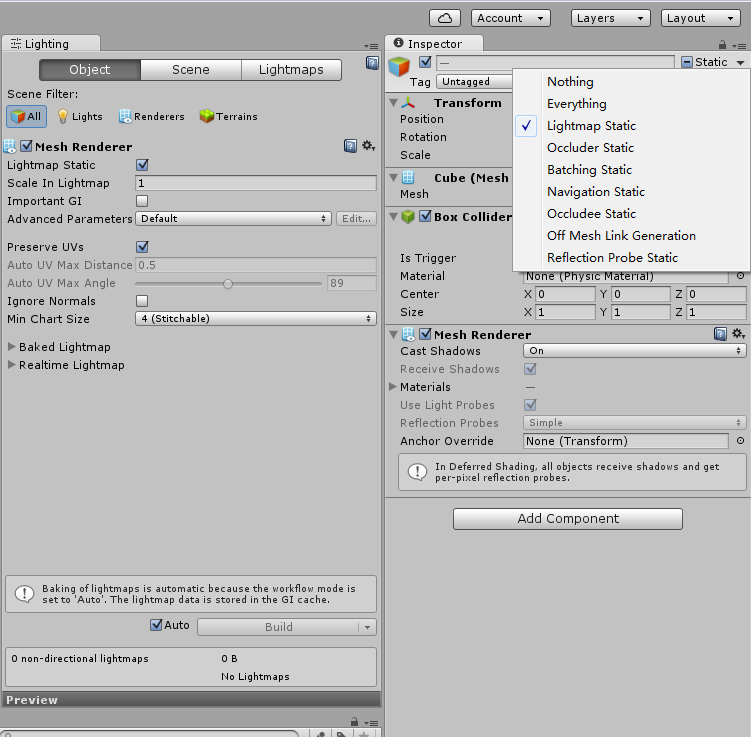
Step 1, make sure the objects that are not going to move anymore are set static for lightmapping(bake).
有两种方式,方式1,打开 Window/Lighting/Object,然后选择你想要设置的 GameObject ,可以按住 ctrl 来完成多选,然后勾选 Lightmap Static。
方式2,选择多个 GameObject 后,在Inspector/Static 下拉菜单中选择 Lightmap Static。
Game Dev Tip: How to bake Lightmap in Unity 5 !
What is Light-map!?
Light-map is nothing but a texture with lighting information baked directly from the scene to help reduce draw calls and increase performance of one’s game. It usually has shadow, Global Illumination and Ambient occlusion baked onto it to give an amazing depth to the environment without hindering the FPS. Real-time lightning is only set to moving or intractable objects which reflects dynamic shadows. This is a rather standard procedure in games pipeline and has been in use since a long time.
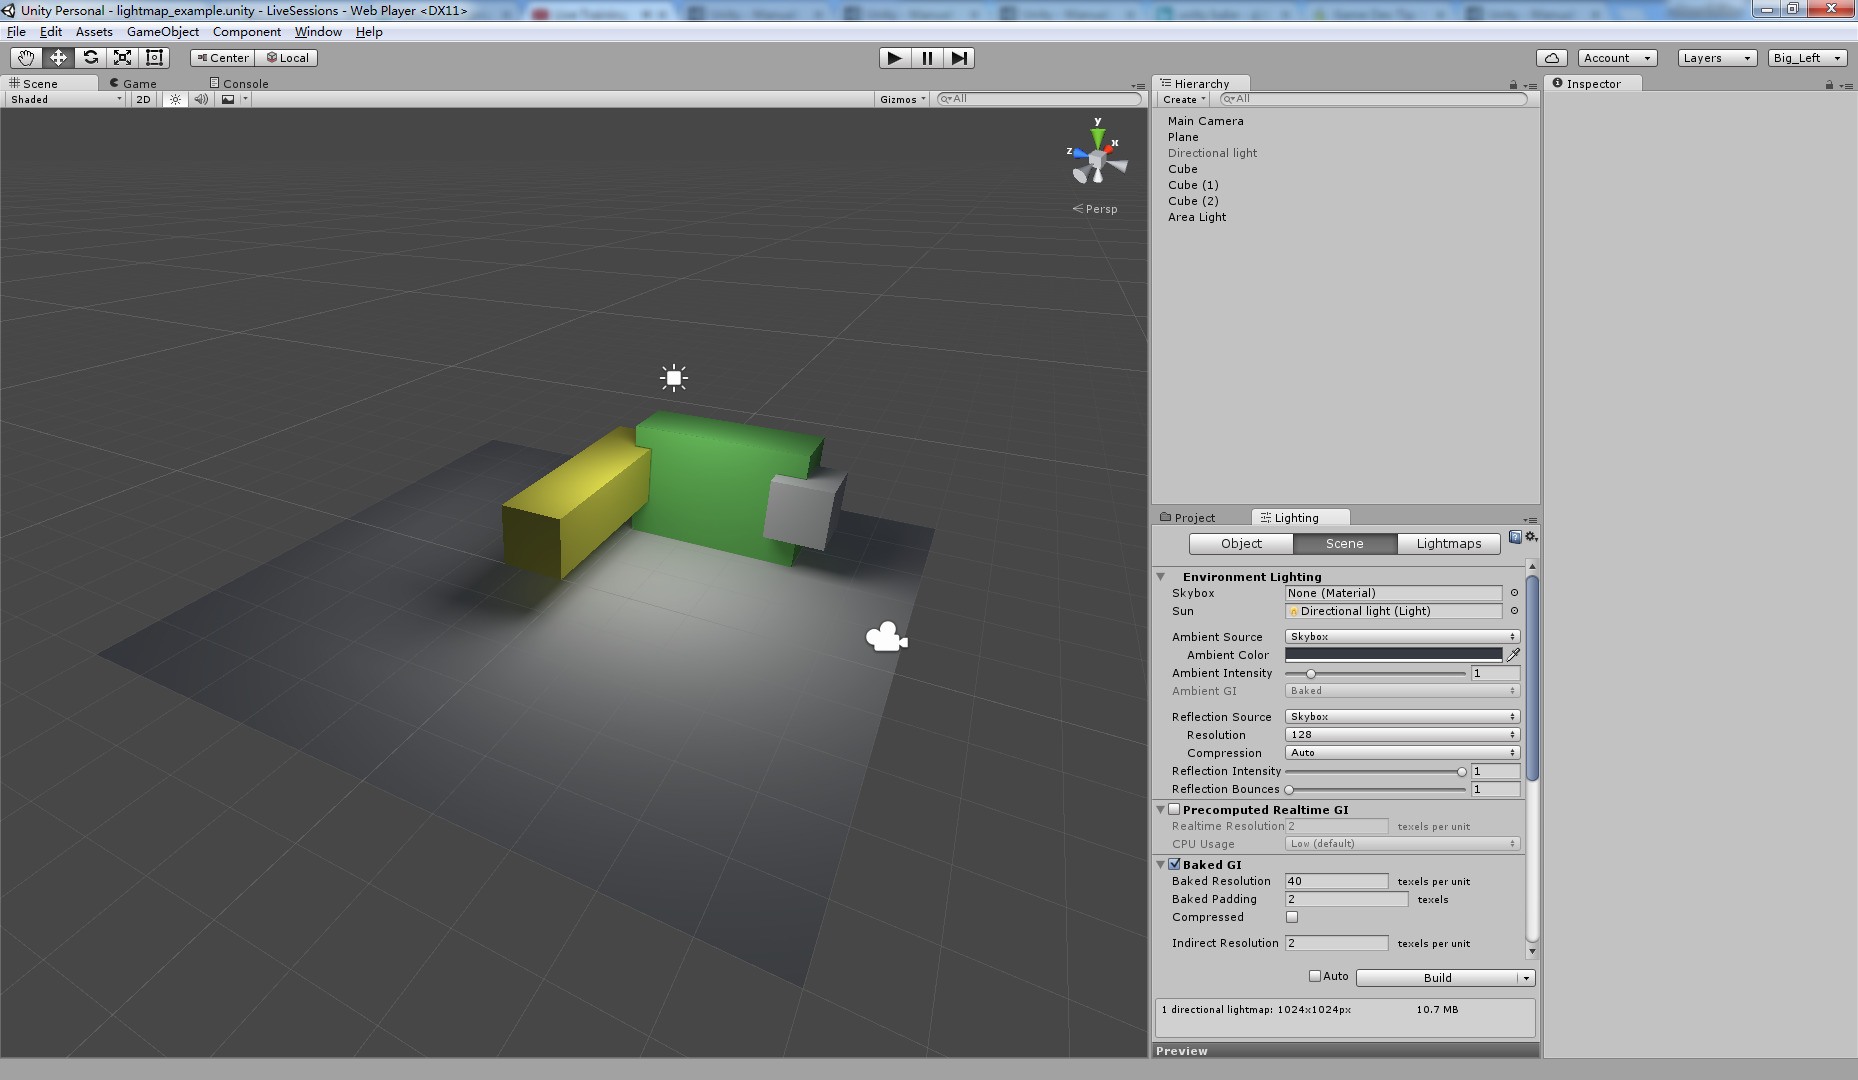
To open up the Lighmap setting tab, you need to go to Windows > Lighting > Scenes.
To get more info about each property of the setting tab, please refer to this documentation link.
The last thing, the area light, when we add an area light gameobject to the scene, it didn’t seems to do anything except if I were to bake a lightmap.
Fun with Lasers
In this session you will be learning how to use ray casting and line renders to make laser guns. Only basic assets will be used so that you can follow along at home. This is an intermediate level lesson, so be sure to be familiar with the concepts of scripting in Unity in order to understand the content. Come join us as we shoot some stuff! Tutor: Mike Geig
using UnityEngine;
using System.Collections;

public class LaserScript : MonoBehaviour
{
    // Turning the laser on and off, and shooting the laser.

    LineRenderer line;


    // Use this for initialization
    void Start ()
    {
        line = GetComponent<LineRenderer> ();
        line.enabled = false;
        Cursor.lockState = CursorLockMode.Locked;
    }

    // Update is called once per frame
    void Update ()
    {
        if (Input.GetButtonDown ("Fire1"))
        {
            StopCoroutine ("FireLaser");
            StartCoroutine ("FireLaser");
        }
    }

    IEnumerator FireLaser()
    {
        line.enabled = true;

        while (Input.GetButton ("Fire1"))
        {
            Ray ray = new Ray (transform.position, transform.forward);  // use Ray(射线) to set up line
            RaycastHit hit;

            line.SetPosition (0, ray.origin);                           // laser 起始位置
            if (Physics.Raycast(ray, out hit, 100))                     // 如果 ray 在 100 单位内 接触到其他物体,则终点在接触点
            {
                line.SetPosition(1, hit.point);
            }
            else                                                        // 如果 ray 在 100 单位内 没有接触到其他物体,则为固定长度
            {
                line.SetPosition(1, ray.GetPoint(100));
            }
            //line.SetPosition(1, ray.GetPoint(100));

            yield return null;
        }

        line.enabled = false;
    }

}
LineRenderer
The line renderer is used to draw free-floating lines in 3D space.
Ray
Physics.Raycast
Casts a ray, from point origin, in direction direction, of length maxDistance, against all colliders in the scene.
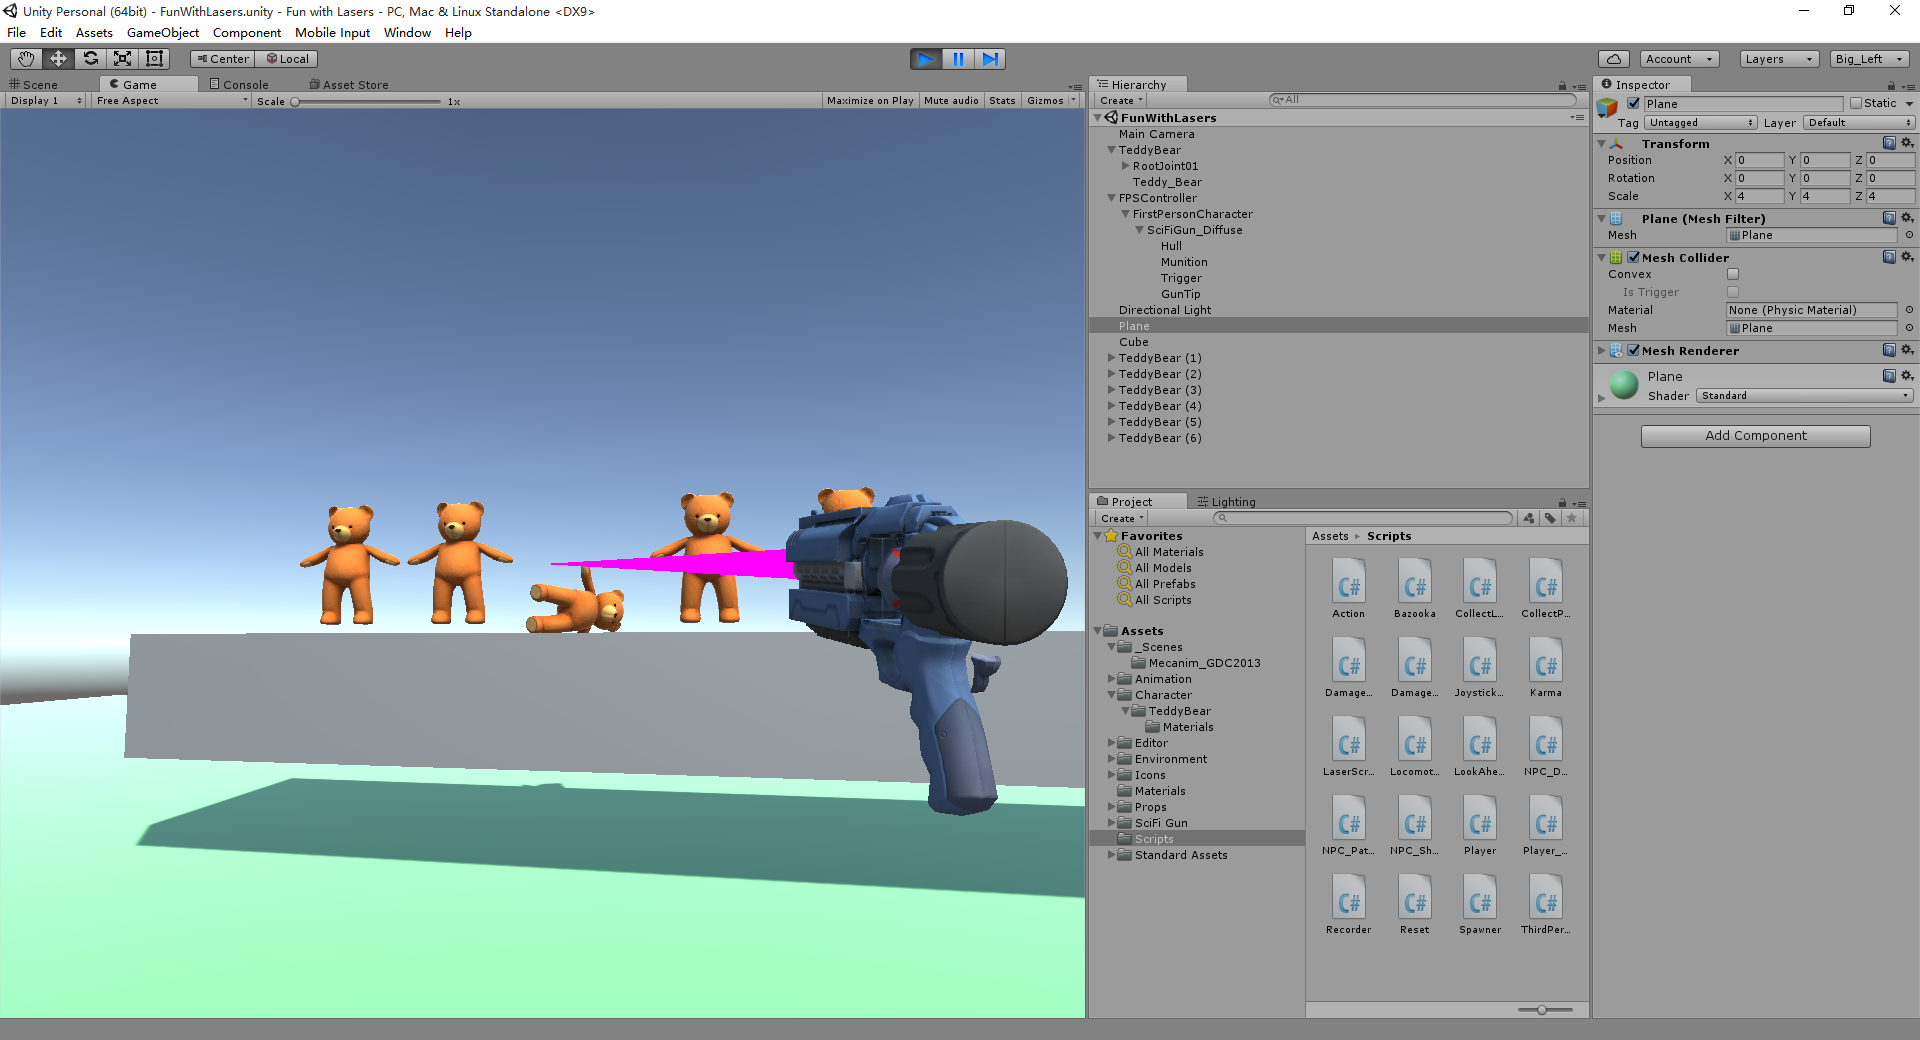
下面,增加了小熊,当laser射到小熊的时候,会在hit.point 给一个力,让小熊运动,注意,小熊必须要有 Rigidbody component,然后添加一个 collider ,这样当 laser 射到小熊的 collider 的时候,给的力才能有作用。只添加了三行代码
    IEnumerator FireLaser()
    {
        line.enabled = true;

        while (Input.GetButton ("Fire1"))
        {
            Ray ray = new Ray (transform.position, transform.forward);  // use Ray(射线) to set up line
            RaycastHit hit;

            line.SetPosition (0, ray.origin);                           // laser 起始位置
            if (Physics.Raycast(ray, out hit, 100))                     // 如果 ray 在 100 单位内 接触到其他物体,则终点在接触点
            {
                line.SetPosition(1, hit.point);
                if (hit.rigidbody != null)      // 如果 hit 到 带有 rigidbody component 的 collider,则在 hit.point 处加一个沿着 ray 方向的 力
                {
                    hit.rigidbody.AddForceAtPosition (transform.forward * 5, hit.point);    // 这个方向就是 ray 的方向
                }
            }
            else                                                        // 如果 ray 在 100 单位内 没有接触到其他物体,则为固定长度
            {
                line.SetPosition(1, ray.GetPoint(100));
            }
            //line.SetPosition(1, ray.GetPoint(100));

            yield return null;
        }

        line.enabled = false;
    }
运行效果如下图:
添加一个 Flare 到 一个 Point Light ,让 Laser Gun 更帅。
下面是效果图,
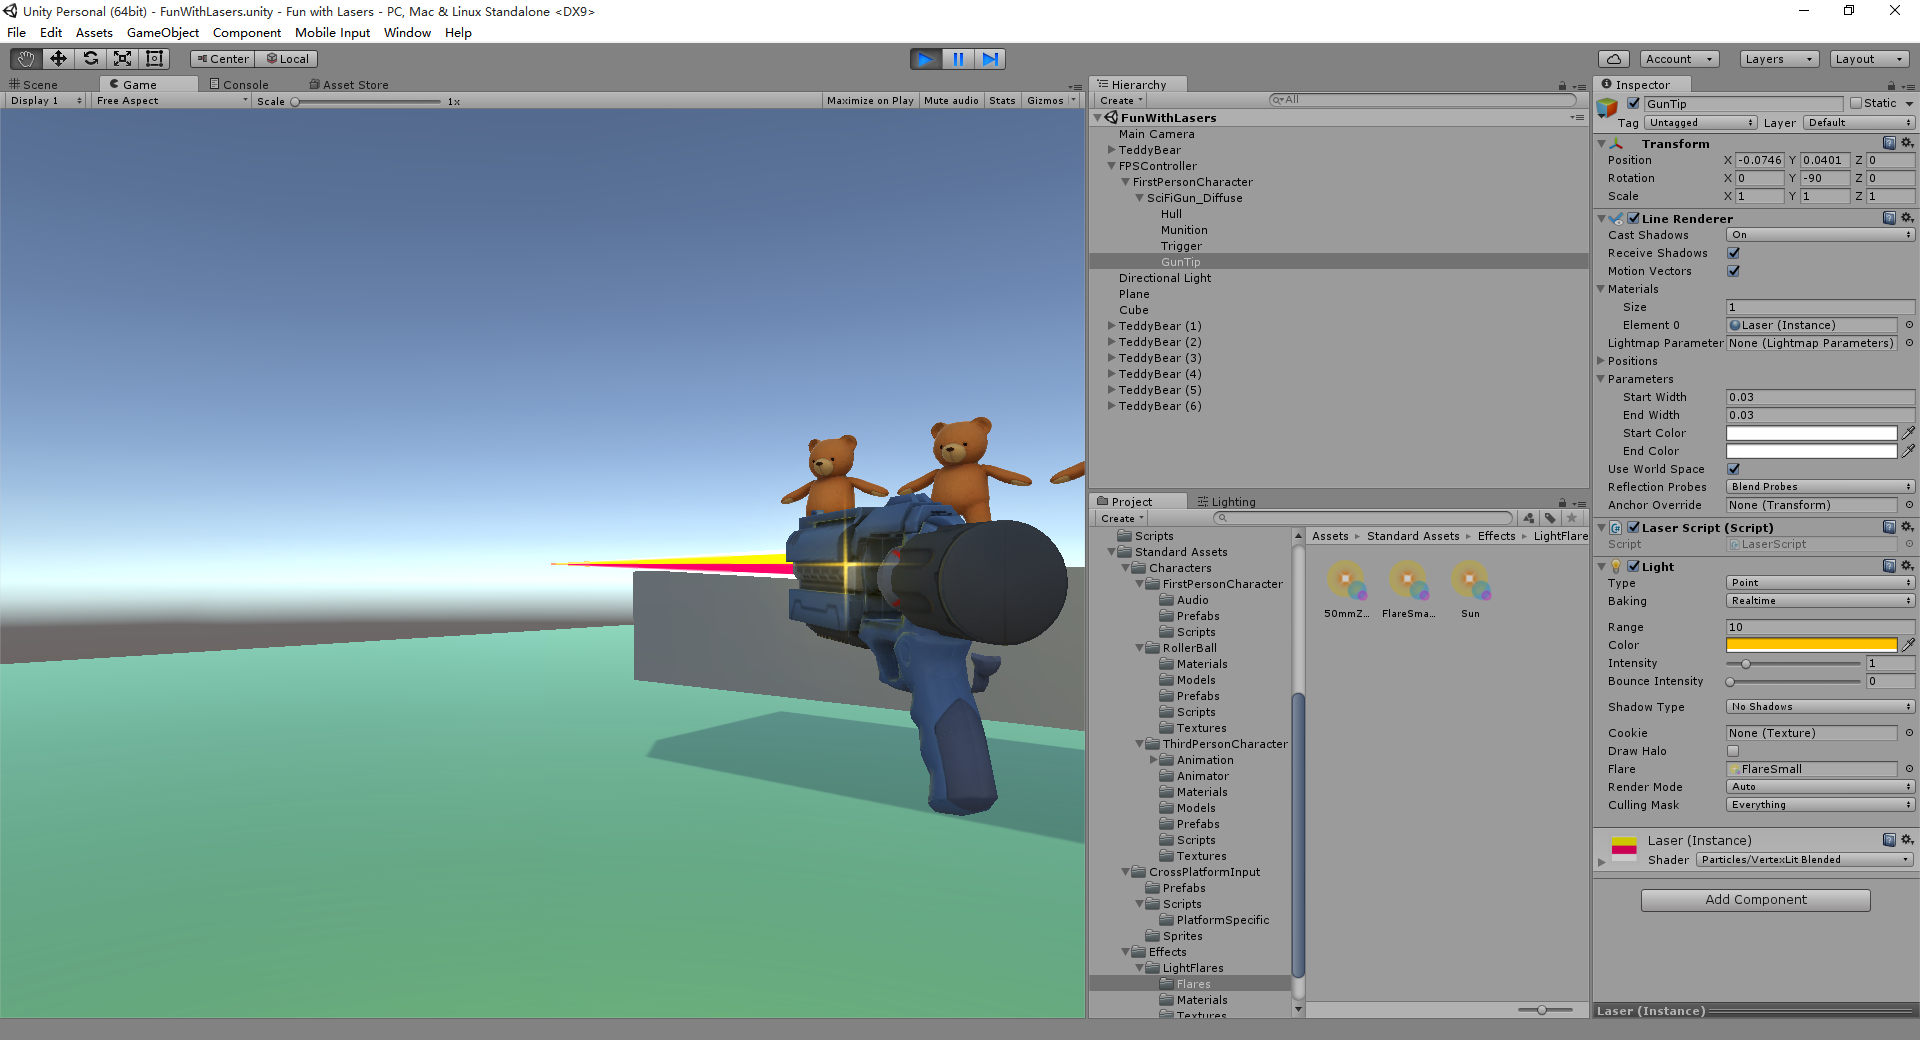
全部代码:
using UnityEngine;
using System.Collections;

public class LaserScript : MonoBehaviour
{
    // Turning the laser on and off, and shooting the laser.

    LineRenderer line;
    Light light;

    // Use this for initialization
    void Start ()
    {
        line = gameObject.GetComponent<LineRenderer> ();
        line.enabled = false;
        light = gameObject.GetComponent<Light> ();          // 当 fire 的时候,添加 flare 效果,通过 Light component
        light.enabled = false;

        Cursor.lockState = CursorLockMode.Locked;
    }

    // Update is called once per frame
    void Update ()
    {
        if (Input.GetButtonDown ("Fire1"))
        {
            StopCoroutine ("FireLaser");
            StartCoroutine ("FireLaser");
        }
    }

    IEnumerator FireLaser()
    {
        line.enabled = true;
        light.enabled = true;
        while (Input.GetButton ("Fire1"))
        {
            line.material.mainTextureOffset = new Vector2 (0, Time.time);       // 设置 The texture offset of the main texture,此处为 y 轴方向的 offset
            Ray ray = new Ray (transform.position, transform.forward);  // use Ray(射线) to set up line
            RaycastHit hit;

            line.SetPosition (0, ray.origin);                           // laser 起始位置
            if (Physics.Raycast(ray, out hit, 100))                     // 如果 ray 在 100 单位内 接触到其他物体,则终点在接触点
            {
                line.SetPosition(1, hit.point);
                if (hit.rigidbody != null)      // 如果 hit 到 带有 rigidbody component 的 collider,则在 hit.point 处加一个沿着 ray 方向的 力
                {
                    hit.rigidbody.AddForceAtPosition (transform.forward * 5, hit.point);    // 这个方向就是 ray 的方向
                }
            }
            else                                                        // 如果 ray 在 100 单位内 没有接触到其他物体,则为固定长度
            {
                line.SetPosition(1, ray.GetPoint(100));
            }
            //line.SetPosition(1, ray.GetPoint(100));

            yield return null;
        }

        line.enabled = false;
        light.enabled = false;
    }

}
Tips: the Ray allows us to make our Line Renderer interact with the world in a very efficient way and can doing all those calculatioins.


 3140
3140

 被折叠的 条评论
为什么被折叠?
被折叠的 条评论
为什么被折叠?
 到【灌水乐园】发言


