Unity API学习——协程、鼠标相关事件函数、Mathf以及Input类

协程

  1. 执行方法:同步执行(不会阻挡当前方法的执行);运行过程中自身可以暂停
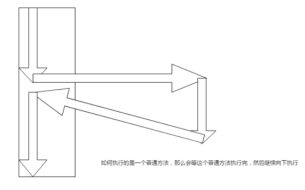
在这里插入图片描述普通执行在这里插入图片描述协程执行

  1. Coroutines规则
    返回值是IEnumerator;
    返回参数的时候使用yield return null/0;
    协程方法的调用StartCoroutine(method())

  2. StopAllCoroutines:停止所有协程
    StopCoroutine:停止一个指定的协程
    注:开启协程和关闭协程相对应,如果开启协程使用方法名,则关闭协程的时候使用方法名(字符串);如果开启的时候使用方法的调用,则关闭的时候也需使用

测试代码
using System.Collections;
using System.Collections.Generic;
using UnityEngine;

public class API08Coroutine : MonoBehaviour {
   

    public GameObject cube;

	void Start () {
   
        //print("haha");
        ChangeColor();
        //StartCoroutine(ChangeColor());
        协程方法开启后,会继续运行下面的代码,不会等协程方法运行结束才继续执行
        //print("hahaha");
	}

    private IEnumerator ie;

	void Update () {
   
        if (Input.GetKeyDown(KeyCode.Space))
        {
   
            //ie = Fade();
            //StartCoroutine(ie);
            StartCoroutine("Fade");
        }//判断某个键的按下,协程开启
        if(Input.GetKeyDown(KeyCode.S))
        {
   
            //StopCoroutine(ie);
            StopCoroutine("Fade");
        }//按下某个键,协程暂停
	}

    //IEnumerator Fade()
    //{
   
    //    for(float i=0;i<=1;i+=0.1f)//i代表颜色
    //    {
   
    //        cube.GetComponent<MeshRenderer>().material.color = new Color(i, i, i, i);
    //        yield return new WaitForSeconds(0.1f);
    //    }
    //}

    IEnumerator Fade()
    {
   
        for (; ; )
        {
   
            Color color = cube.GetComponent<
  • 0
    点赞
  • 3
    收藏
    觉得还不错? 一键收藏
  • 0
    评论
要实现Unity中视角跟随鼠标,可以按照以下步骤进行: 1. 在Unity中创建一个摄像机,并将其放置在场景中。 2. 创建一个空物体,将其命名为“Player”,并将其放置在场景中。 3. 将摄像机作为“Player”的子对象,并将其位置设置为相对于“Player”对象的偏移量(例如,将其放置在“Player”对象的后方一定距离的位置)。 4. 编写脚本来控制摄像机的旋转。在脚本中,使用Input.GetAxis函数获取鼠标移动的偏移量,并将其应用于摄像机的旋转中。 以下是一个示例脚本: ``` public class CameraController : MonoBehaviour { public Transform player; public float sensitivity = 5.0f; public float smoothing = 2.0f; private Vector2 smoothedVelocity; private Vector2 currentLookingPos; void Start() { Cursor.lockState = CursorLockMode.Locked; } void Update() { Vector2 inputValues = new Vector2(Input.GetAxisRaw("Mouse X"), Input.GetAxisRaw("Mouse Y")); inputValues = Vector2.Scale(inputValues, new Vector2(sensitivity * smoothing, sensitivity * smoothing)); smoothedVelocity.x = Mathf.Lerp(smoothedVelocity.x, inputValues.x, 1f / smoothing); smoothedVelocity.y = Mathf.Lerp(smoothedVelocity.y, inputValues.y, 1f / smoothing); currentLookingPos += smoothedVelocity; transform.localRotation = Quaternion.AngleAxis(-currentLookingPos.y, Vector3.right); player.localRotation = Quaternion.AngleAxis(currentLookingPos.x, player.up); } } ``` 在这个脚本中,我们首先定义了一个“Player”对象,以及一些控制摄像机旋转的参数。在Start函数中,我们锁定了鼠标,这样它就不会离开游戏窗口。在Update函数中,我们使用Input.GetAxis函数获取鼠标移动的偏移量,并将其平滑处理,然后将其应用于摄像机的旋转中。最后,我们使用Quaternion.AngleAxis函数来将旋转转换为四元数,并将其应用于摄像机和“Player”对象中。 如果一切正常,你现在应该能够在Unity中看到摄像机跟随鼠标移动了。

“相关推荐”对你有帮助么?

  • 非常没帮助
  • 没帮助
  • 一般
  • 有帮助
  • 非常有帮助
提交
评论
添加红包

请填写红包祝福语或标题

红包个数最小为10个

红包金额最低5元

当前余额3.43前往充值 >
需支付:10.00
成就一亿技术人!
领取后你会自动成为博主和红包主的粉丝 规则
hope_wisdom
发出的红包
实付
使用余额支付
点击重新获取
扫码支付
钱包余额 0

抵扣说明:

1.余额是钱包充值的虚拟货币,按照1:1的比例进行支付金额的抵扣。
2.余额无法直接购买下载,可以购买VIP、付费专栏及课程。

余额充值