


 本文介绍了Unity中顶点和片段着色器的基础知识,包括Shader的创建、材质和着色器的链接,以及简单的非光照着色器和单色着色器的实现。此外,还探讨了法线可视化、三向贴图和光照计算,以及阴影投射的实现。通过示例代码和步骤,帮助读者理解Shader在Unity中的应用。
Vertex and fragment shader examples 顶点与片断着色器示例
本文档主要是对Unity官方手册的个人理解与总结(其实以翻译记录为主:>)
仅作为个人学习使用,不得作为商业用途,欢迎转载,并请注明出处。
文章中涉及到的操作都是基于Unity2018.2版本
参考链接:https://docs.unity3d.com/Manual/SL-VertexFragmentShaderExamples.html
This page contains vertex and fragment program examples. For a basic introduction to shaders, see the shader tutorials: Part 1 and Part 2. For an easy way of writing regular material shaders, see Surface Shaders。
此页面包含顶点和片段程序示例。有关着色器的基本介绍,请参阅着色器教程番外篇1,2。要编写常规材质着色器的简单方法,请参阅Surface Shaders。
You can download the examples shown below as a zipped Unity project.
Setting up the scene
If you are not familiar with Unity’s Scene View, Hierarchy View, Project View and Inspector, now would be a good time to read the first few sections from the manual, starting with Unity Basics.
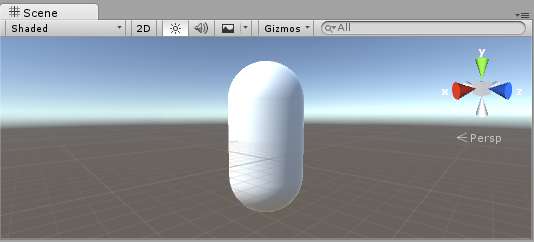
The first step is to create some objects which you will use to test your shaders. Select Game Object > 3D Object > Capsule in the main menu. Then position the camera so it shows the capsule. Double-click the Capsule in the Hierarchy to focus the scene view on it, then select the Main Camera object and click Game object > Align with View from the main menu.
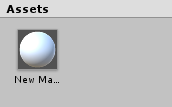
Create a new Material by selecting Create > Material from the menu in the Project View. A new material called New Material will appear in the Project View.
Creating a shader
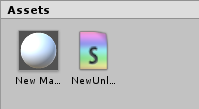
Now create a new Shader asset in a similar way. Select Create > Shader > Unlit Shader from the menu in the Project View. This creates a basic shader that just displays a texture without any lighting.
Other entries in the Create > Shader menu create barebone shaders or other types, for example a basic surface shader.
Linking the mesh, material and shader
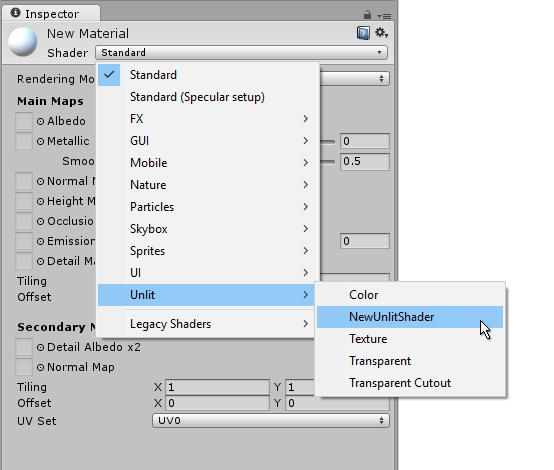
Make the material use the shader via the material’s inspector, or just drag the shader asset over the material asset in the Project View. The material inspector will display a white sphere when it uses this shader.
Now drag the material onto your mesh object in either the Scene or the Hierarchy views. Alternatively, select the object, and in the inspector make it use the material in the Mesh Renderer component’s Materials slot.

With these things set up, you can now begin looking at the shader code, and you will see the results of your changes to the shader on the capsule in the Scene View.
Main parts of the shader
To begin examining the code of the shader, double-click the shader asset in the Project View. The shader code will open in your script editor (MonoDevelop or Visual Studio).
The shader starts off with this code:
Shader "Unlit/NewUnlitShader"
{
    Properties
    {
        _MainTex ("Texture", 2D) = "white" {}
    }
    SubShader
    {
        Tags { "RenderType"="Opaque" }
        LOD 100

        Pass
        {
            CGPROGRAM
            #pragma vertex vert
            #pragma fragment frag
            // make fog work
            #pragma multi_compile_fog

            #include "UnityCG.cginc"

            struct appdata
            {
                float4 vertex : POSITION;
                float2 uv : TEXCOORD0;
            };

            struct v2f
            {
                float2 uv : TEXCOORD0;
                UNITY_FOG_COORDS(1)
                float4 vertex : SV_POSITION;
            };

            sampler2D _MainTex;
            float4 _MainTex_ST;

            v2f vert (appdata v)
            {
                v2f o;
                o.vertex = UnityObjectToClipPos(v.vertex);
                o.uv = TRANSFORM_TEX(v.uv, _MainTex);
                UNITY_TRANSFER_FOG(o,o.vertex);
                return o;
            }

            fixed4 frag (v2f i) : SV_Target
            {
                // sample the texture
                fixed4 col = tex2D(_MainTex, i.uv);
                // apply fog
                UNITY_APPLY_FOG(i.fogCoord, col);
                return col;
            }
            ENDCG
        }
    }
}
This initial shader does not look very simple! But don’t worry, we will go over each part step-by-step.
Let’s see the main parts of our simple shader.
Shader
The Shader command contains a string with the name of the shader. You can use forward slash characters “/” to place your shader in sub-menus when selecting your shader in the Material inspector.
Shader命令包含一个带有着色器名称的字符串。在材质检查器中选择着色器时,可以使用斜杠字符“/”将着色器放在子菜单中。
Properties
The Properties block contains shader variables (textures, colors etc.) that will be saved as part of the Material, and displayed in the material inspector. In our unlit shader template, there is a single texture property declared.
属性块包含着色器变量(纹理、颜色等),这些变量将作为材质的一部分保存,并显示在材质检查器中。在我们的非光照着色模板中,有一个纹理属性被声明。
SubShader
A Shader can contain one or more SubShaders, which are primarily used to implement shaders for different GPU capabilities. In this tutorial we’re not much concerned with that, so all our shaders will contain just one SubShader.
一个着色器可以包含一个或多个子着色器,这些子着色器主要用于实现不同GPU性能的着色器。在本教程中,我们不太关心这个,所以所有的着色器将只包含一个SubShader。
Pass
Each SubShader is composed of a number of passes, and each Pass represents an execution of the vertex and fragment code for the same object rendered with the material of the shader. Many simple shaders use just one pass, but shaders that interact with lighting might need more (see Lighting Pipeline for details). Commands inside Pass typically setup fixed function state, for example blending modes.
每个子着色器由一些通道组成,每个通道表示对同一个对象的顶点和片段代码的执行,该对象使用着色器的材质参数渲染。许多简单的着色器只有一个通道,但是与光照交互的着色器可能需要更多(详见光照管线)。通道内部命令通常设置固定管线状态,例如混合模式。
__CGPROGRAM__ .. ENDCG
These keywords surround portions of HLSL code within the vertex and fragment shaders. Typically this is where most of the interesting code is. See vertex and fragment shaders for details.
这些关键字围绕着顶点和片段着色器中的部分HLSL代码。通常,这是最有意思的代码所在之处。有关详细信息,请参阅顶点和片断着色器。
Simple unlit shader
The unlit shader template does a few more things than would be absolutely needed to display an object with a texture. For example, it supports Fog, and texture tiling/offset fields in the material. Let’s simplify the shader to bare minimum, and add more comments:
非光照着色器模板所做的事情要比显示具有纹理的对象所做的事情多得多。例如,它支持材质中的雾和纹理贴图/偏移字段。让我们简化着色器到最低限度,并添加更多的评论:
Shader "Unlit/SimpleUnlitTexturedShader"
{
    Properties
    {
        // we have removed support for texture tiling/offset,
        // so make them not be displayed in material inspector
        [NoScaleOffset] _MainTex ("Texture", 2D) = "white" {}
    }
    SubShader
    {
        Pass
        {
            CGPROGRAM
            // use "vert" function as the vertex shader
            #pragma vertex vert
            // use "frag" function as the pixel (fragment) shader
            #pragma fragment frag

            // vertex shader inputs
            struct appdata
            {
                float4 vertex : POSITION; // vertex position
                float2 uv : TEXCOORD0; // texture coordinate
            };

            // vertex shader outputs ("vertex to fragment")
            struct v2f
            {
                float2 uv : TEXCOORD0; // texture coordinate
                float4 vertex : SV_POSITION; // clip space position
            };

            // vertex shader
            v2f vert (appdata v)
            {
                v2f o;
                // transform position to clip space
                // (multiply with model*view*projection matrix)
                o.vertex = mul(UNITY_MATRIX_MVP, v.vertex);
                // just pass the texture coordinate
                o.uv = v.uv;
                return o;
            }

            // texture we will sample
            sampler2D _MainTex;

            // pixel shader; returns low precision ("fixed4" type)
            // color ("SV_Target" semantic)
            fixed4 frag (v2f i) : SV_Target
            {
                // sample texture and return it
                fixed4 col = tex2D(_MainTex, i.uv);
                return col;
            }
            ENDCG
        }
    }
}
The Vertex Shader is a program that runs on each vertex of the 3D model. Quite often it does not do anything particularly interesting. Here we just transform vertex position from object space into so called “clip space”, which is what’s used by the GPU to rasterize the object on screen. We also pass the input texture coordinate unmodified - we’ll need it to sample the texture in the fragment shader.
顶点着色器是在3D模型的每个顶点上运行的程序。通常它不会做任何特别有趣的事情。这里我们只是将顶点位置从对象空间转换为所谓的“剪辑空间”,这是GPU用来在屏幕上光栅化对象的。我们还传递了未修改的输入纹理坐标——我们需要它在片段着色器中采样纹理。
The Fragment Shader is a program that runs on each and every pixel that object occupies on-screen, and is usually used to calculate and output the color of each pixel. Usually there are millions of pixels on the screen, and the fragment shaders are executed for all of them! Optimizing fragment shaders is quite an important part of overall game performance work.
片断着色器是一个程序,它运行在物体在屏幕上占据的每个像素上,通常用于计算和输出每个像素的颜色。通常在屏幕上有数百万像素,而片段着色器是为它们执行的!优化片断着色器是整个游戏性能工作的重要部分。
Some variable or function definitions are followed by a Semantic Signifier - for example : POSITION or : SV_Target. These semantics signifiers communicate the “meaning” of these variables to the GPU. See the shader semantics page for details.
一些变量或函数定义后面跟着一个语义符号——例如:POSITION或:SV_Target。这些语义符号将这些变量的“意义”传递给GPU。有关详细信息&#
 最低0.47元/天 解锁文章


 1681
1681

 被折叠的 条评论
为什么被折叠?
被折叠的 条评论
为什么被折叠?
 到【灌水乐园】发言


