


本博客主要介绍verdi的基础操作,主要想要介绍对Verdi的一些概述,为之后的复杂操作打下基础。本系列的verdi ,由于本人不涉及IC验证,所以不会对每一个功能进行详细赘述。
本篇博客是根据verdi ug介绍nwave tutorial部分,是自己的verdi ug的理解以及实际操作。
作者:ciscomonkey 未经允许不得转载抄袭!
Verdi的文件
novas.rc文件:
The novas.rc resource file stores the information to set window size, window
position, signal height, spacing, default signal colors, menus, buttons, toolbars,
and library information.
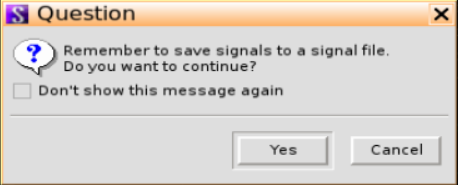
在第一次调用verdi后,然后退出软件后,就会在当前的工作目录下面自动生成一个novas.rc的文件。因此在退出的时候会得到如下图的提示。提醒你将nwave中的波形保存为一个signal.rc文件
这个文件官方不建议更改,相当于tool -》preference
novas.conf 文件
The novas.conf configuration file stores the information about frame layout information (dock/undock, maximize/restore, and display/hide).
signal.rc 文件
The signal.rc configuration file stores the current nWave information to restore window layout, opened files, view range, cursor/marker position, loaded signals, and signal attributes. The syntax of signal.rc file is described below along with an example of its use.
Session (.ses) File
The session.ses resource file stores the current Verdi information to restore window layout, current scopes, current design, viewing options, and bookmarks. The syntax of the session file is described below along with an example of its use.
启动verdi的方法
在启动命令的时候引用 [ source file ].f 文件
verdi -f < source_file_name >
如果是mixed language,则并不推荐这种方式启动。
Replay a File 使用TCL来执行
在启动verdi的时候,使用下面的command来执行启动。
verdi -play < command_file_name >
command_file_name是TCL文件。
user interface基本介绍
如下图所示,我现在启动verdi通过 -f 来启动。


理解session
session代表当前的进程快照,也就是说你当前呈现出什么样子,下次打开就是什么样子。
如下图所示,我当前的快照界面是这样,现在我进行保存为my1.ses
保存为my1.ses

可以发现,在我们的保存路径下面多了下面四个文件,如果我还打开了原理图nschema的话可能还会多一个。

如下图所示,restore session,可以完全恢复为原来的界面。

恢复后的界面如下图所示:

如何在启动的时候就吃这个session文件。
verdi -ssr my.session

此时,打开的就是mysession的界面

Symbol library
指定verdi的Symbol library可以在nnovas.rc文件中指定,或者说
preferences -> Schematics ->Symbol Lib
关于rc文件,与DC一样,优先级最高的是当前工作目录下面的,最低的根目录下面的。


 4356
4356


 被折叠的 条评论
为什么被折叠?
被折叠的 条评论
为什么被折叠?
 到【灌水乐园】发言


