


C++回调函数理解
0.引言
看了一些介绍感觉太官方了,我的简单理解就是从模式设计思想出发,回调函数的目的就是为了将变化的模块抽离出来,延迟实现;固定的模块抽象出来设计好,“写死”。

1.回调函数的实现方式
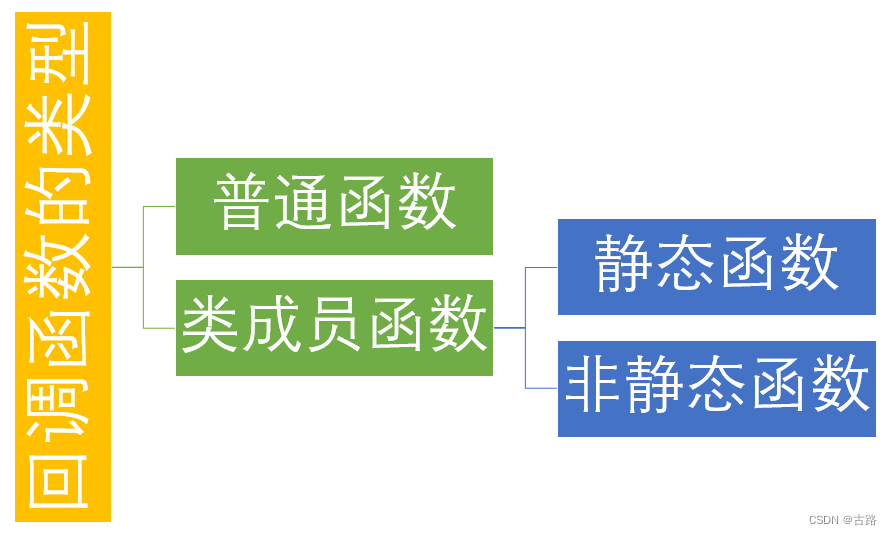
2.普通函数以函数指针的形式进行实现
#include <iostream>

// ===========不变的模块,写死================
// 回调函数类型
typedef void (*CallbackFunction)(int);
// 带回调函数参数的函数
void PerformOperation(int value, CallbackFunction callback) {
    std::cout << "Performing operation with value: " << value << std::endl;
    // 执行某些操作...

    // 调用回调函数
    callback(value * 2);
}


// =========变化的模块,放到客户端进行实现========
// 回调函数的实现
void Callback(int result) {
    std::cout << "Callback received result: " << result << std::endl;
    // 执行回调操作...
}

int main() {
    int value = 5;

    // 调用带回调函数参数的函数
    PerformOperation(value, Callback);

    return 0;
}
3.类成员函数以静态函数进行实现
#include <iostream>

// ===========不变的模块,写死================
// 定义回调函数类型
typedef void (*CallbackFunction)(int);
// 带回调函数参数的函数
void PerformOperation(int value, CallbackFunction callback) {
    std::cout << "Performing operation with value: " << value << std::endl;
    // 执行某些操作...

    // 调用回调函数
    callback(value * 2);
}


// =========变化的模块,放到客户端进行实现========
// 回调类
class CallbackClass {
public:
	// 类的静态成员函数,当做全局函数使用
    static void Callback(int result) {
        std::cout << "Callback received result: " << result << std::endl;
        // 执行回调操作...
    }
};

int main() {
    int value = 5;
    // 创建回调类的对象
    CallbackClass callbackObj;
    // 将静态成员函数作为回调函数
    CallbackFunction callback = CallbackClass::Callback;
    // 调用带回调函数参数的函数
    PerformOperation(value, callback);
    return 0;
}
可以看出,以上两种方式没有什么本质的区别。
但这种实现有一个很明显的缺点:static 函数不能访问非static 成员变量或函数,会严重限制回调函数可以实现的功能。
4.类成员函数以非静态函数进行实现
- 实现1
#include <iostream>
// ===========不变的模块,写死================
// 定义回调函数类型
typedef void (*CallbackFunction)(int);
// 带回调函数参数的函数
void PerformOperation(int value, CallbackFunction callback) {
    std::cout << "Performing operation with value: " << value << std::endl;
    // 执行某些操作...

    // 调用回调函数
    callback(value * 2);
}

// =========变化的模块,放到客户端进行实现========
// 回调类
class CallbackClass {
public:
    void Callback(int result) {
        std::cout << "Callback received result: " << result << std::endl;
        // 执行回调操作...
    }
};

int main() {
    int value = 5;

    // 创建回调类的对象
    CallbackClass callbackObj;
    // 将非静态成员函数作为回调函数
    CallbackFunction callback = [&](int result) {
        callbackObj.Callback(result);
    };
    // 调用带回调函数参数的函数
    PerformOperation(value, callback);

    return 0;
}
- 实现2
#include <iostream>
// =========变化的模块,放到客户端进行实现========
class ProgramA {
 public:
  void FunA1() { printf("I'am ProgramA.FunA1() and be called..\n"); }

  void FunA2() { printf("I'am ProgramA.FunA2() and be called..\n"); }
};
// ===========不变的模块,写死================
class ProgramB {
 public:
  void FunB1(void (ProgramA::*callback)(), void *context) {
    printf("I'am ProgramB.FunB1() and be called..\n");
    ((ProgramA *)context->*callback)();
  }
};

int main(int argc, char **argv) {
  ProgramA PA;
  PA.FunA1();

  ProgramB PB;
  PB.FunB1(&ProgramA::FunA2, &PA);  // 此处都要加&
}
这种实现方式有很明显的缺点,不变的模块需要提前知道客户端的类型,显示不是很合理。
- 实现3
这里还有一种方法可以避免这样的问题,可以把非static的回调函数 包装为另一个static函数,这种方式也是一种应用比较广的方法。
#include <iostream>

// =========变化的模块,放到客户端进行实现========
class ProgramA {
 public:
  void FunA1() { printf("I'am ProgramA.FunA1() and be called..\n"); }

  void FunA2() { printf("I'am ProgramA.FunA2() and be called..\n"); }

  static void FunA2Wrapper(void *context) {
    printf("I'am ProgramA.FunA2Wrapper() and be called..\n");
    ((ProgramA *)context)->FunA2();  // 此处调用的FunA2()是context的函数, 不是this->FunA2()
  }
};

// ===========不变的模块,写死================
class ProgramB {
 public:
  void FunB2(void (*callback)(void *), void *context) {
    printf("I'am ProgramB.FunB2() and be called..\n");
    callback(context);
  }
};

int main(int argc, char **argv) {
  ProgramA PA;
  PA.FunA1();

  ProgramB PB;
  PB.FunB2(ProgramA::FunA2Wrapper, &PA);
}
上面借助wrapper函数实现回调,虽然很灵活,但是还是不够优秀,比如:
- 1)多了一个不是太有实际用处的wrapper函数。
- 2)wrapper中还要对传入的指针进行强制转换。
- 3)FunB2调用时,不但要指定wrapper函数的地址,还要传入PA的地址。
5.std::funtion和std::bind的使用
#include <iostream>

#include <functional> // fucntion/bind
// =========变化的模块,放到客户端进行实现========
class ProgramA {
 public:
  void FunA1() { printf("I'am ProgramA.FunA1() and be called..\n"); }

  void FunA2() { printf("I'am ProgramA.FunA2() and be called..\n"); }

  static void FunA3() { printf("I'am ProgramA.FunA3() and be called..\n"); }
};

// ===========不变的模块,写死================
class ProgramB {
  typedef std::function<void ()> CallbackFun;
 public:
   void FunB1(CallbackFun callback) {
    printf("I'am ProgramB.FunB2() and be called..\n");
    callback();
  }
};

void normFun() { printf("I'am normFun() and be called..\n"); }

int main(int argc, char **argv) {
  ProgramA PA;
  PA.FunA1();

  printf("\n");
  ProgramB PB;
  PB.FunB1(normFun);
  printf("\n");
  PB.FunB1(ProgramA::FunA3);
  printf("\n");
  PB.FunB1(std::bind(&ProgramA::FunA2, &PA));
}
std::funtion支持直接传入函数地址,或者通过std::bind指定。
简而言之,std::funtion是定义函数类型(输入、输出),std::bind是绑定特定的函数(具体的要调用的函数)。
6.c++回调的实现
#include <functional>
#include <iostream>
// ===========不变的模块,写死================
class MyTest{
public:
    MyTest() = default;
    void doCalc(){
        //干其他事,完了
        // 执行回调
        if(myCallBack!= nullptr){
            myCallBack(1,2);
        }
    }

    using callback_t = std::function<void(const int &a, const int &b)>;

    // 注册回调
    void setCallBackHandler(const callback_t &cb){
        myCallBack = cb;
    }

private:
    // 定义回调
    callback_t myCallBack;
};

// =========变化的模块,放到客户端进行实现========
// 回调函数
void handleCallBack(const int &a,const int &b){
    std::cout << "this is from callback handleCallBack"<<std::endl;
}

int main(){

    MyTest t;

    // 回调函数
    auto f= [](const int &a,const int &b){
        std::cout << "this is from callback f"<<std::endl;
    };
    // 注册回调
    // 写法一
    t.setCallBackHandler(f);

    // 写法二
    t.setCallBackHandler([&f](auto &&a, auto &&b) {
        f(std::forward<decltype(a)>(a), std::forward<decltype(b)>(b));
    });

    // 写法三
    t.setCallBackHandler([](auto &&a, auto &&b) {
        handleCallBack(std::forward<decltype(a)>(a), std::forward<decltype(b)>(b));
    });

    t.doCalc();
}
7.应用实例
- 摘抄自高博的代码。
(1)写死的模块
- io_utils.h
#include <fstream>
#include <functional>
#include <utility>

class TxtIO {
   public:
    TxtIO(const std::string &file_path) : fin(file_path) {}

    /// 定义回调函数
    using IMUProcessFuncType = std::function<void(const IMU &)>;
    using OdomProcessFuncType = std::function<void(const Odom &)>;
    using GNSSProcessFuncType = std::function<void(const GNSS &)>;

    TxtIO &SetIMUProcessFunc(IMUProcessFuncType imu_proc) {
        imu_proc_ = std::move(imu_proc);
        return *this;
    }

    TxtIO &SetOdomProcessFunc(OdomProcessFuncType odom_proc) {
        odom_proc_ = std::move(odom_proc);
        return *this;
    }

    TxtIO &SetGNSSProcessFunc(GNSSProcessFuncType gnss_proc) {
        gnss_proc_ = std::move(gnss_proc);
        return *this;
    }

    // 遍历文件内容,调用回调函数
    void Go();

   private:
    std::ifstream fin;
    IMUProcessFuncType imu_proc_;
    OdomProcessFuncType odom_proc_;
    GNSSProcessFuncType gnss_proc_;
};
- io_utils.cc
#include "io_utils.h"
#include <glog/logging.h>

void TxtIO::Go() {
    if (!fin) {
        LOG(ERROR) << "未能找到文件";
        return;
    }

    while (!fin.eof()) {
        std::string line;
        std::getline(fin, line);
        if (line.empty()) {
            continue;
        }

        if (line[0] == '#') {
            // 以#开头的是注释
            continue;
        }

        // load data from line
        std::stringstream ss;
        ss << line;
        std::string data_type;
        ss >> data_type;

        if (data_type == "IMU" && imu_proc_) {
            double time, gx, gy, gz, ax, ay, az;
            ss >> time >> gx >> gy >> gz >> ax >> ay >> az;
            // imu_proc_(IMU(time, Vec3d(gx, gy, gz) * math::kDEG2RAD, Vec3d(ax, ay, az)));
            imu_proc_(IMU(time, Vec3d(gx, gy, gz), Vec3d(ax, ay, az)));
        } else if (data_type == "ODOM" && odom_proc_) {
            double time, wl, wr;
            ss >> time >> wl >> wr;
            odom_proc_(Odom(time, wl, wr));
        } else if (data_type == "GNSS" && gnss_proc_) {
            double time, lat, lon, alt, heading;
            bool heading_valid;
            ss >> time >> lat >> lon >> alt >> heading >> heading_valid;
            gnss_proc_(GNSS(time, 4, Vec3d(lat, lon, alt), heading, heading_valid));
        }
    }

    LOG(INFO) << "done.";
}
把读取文件的操作抽象出来写死,具体怎么处理留给回调函数(客户端)进行实现。
(2)变化的模块
    /// 记录结果
    auto save_result = [](std::ofstream& fout, double timestamp, const Sophus::SO3d& R, const Vec3d& v,
                          const Vec3d& p) {
        auto save_vec3 = [](std::ofstream& fout, const Vec3d& v) { fout << v[0] << " " << v[1] << " " << v[2] << " "; };
        auto save_quat = [](std::ofstream& fout, const Quatd& q) {
            fout << q.w() << " " << q.x() << " " << q.y() << " " << q.z() << " ";
        };

        fout << std::setprecision(18) << timestamp << " " << std::setprecision(9);
        save_vec3(fout, p);
        save_quat(fout, R.unit_quaternion());
        save_vec3(fout, v);
        fout << std::endl;
    };

    std::ofstream fout("./data/ch3/state.txt");
    io.SetIMUProcessFunc([&imu_integ, &save_result, &fout, &ui](const sad::IMU& imu) {
          imu_integ.AddIMU(imu);
          save_result(fout, imu.timestamp_, imu_integ.GetR(), imu_integ.GetV(), imu_integ.GetP());
          if (ui) {
              ui->UpdateNavState(imu_integ.GetNavState());
              usleep(1e2);
          }
      }).Go();
可以,还是很实用。


 5318
5318


 被折叠的 条评论
为什么被折叠?
被折叠的 条评论
为什么被折叠?
 到【灌水乐园】发言


