


基于查找表的快速Gamma校正
在图像预处理中经常通过Gamma校正实现像素修正,常见的Gamma校正是按照公式
对每个像素进行校正,这样做对一张图片还好,当你有大量图片需要做相同处理的时
候计算量就会变得很大,这个时候可以通过建立查找表,然后根据查找表映射实现快
速的Gamma校正。Gamma校正的数学公式如下:

gamma的取值范围为0.05~5之间。
其中P(x,y)表示每个像素值,对每个像素进行Gamma校正之后就得到了处理后的图像。整
个处理流程如下:
1. 读取输入图像的像素数据
2. 根据公式建立查找表(LUT)映射
3. 根据每个像素值映射到查找表中Gamma校正后的像素值
4. 输出处理之后的图像像素数据
彩色图像需要对各个通道实现上述处理,灰度图像只要单通道处理即可。
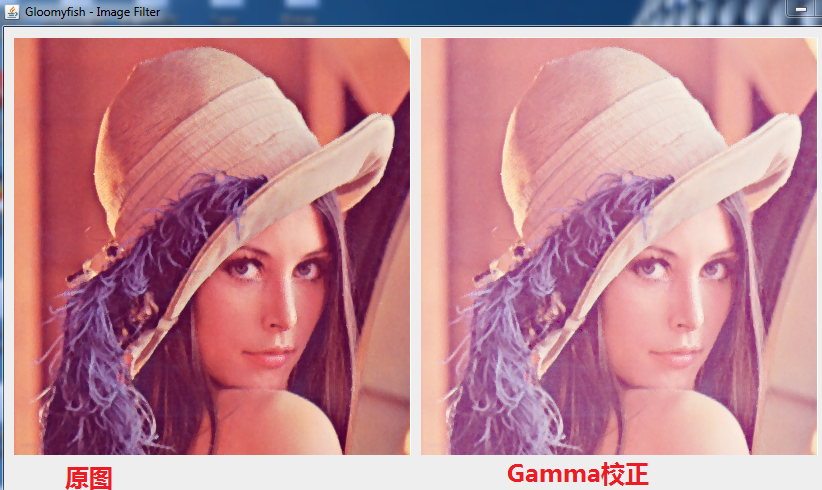
Gamma校正的效果如下:
源代码如下:
package com.gloomyfish.filter.study;

import java.awt.image.BufferedImage;

public class GammaFilter extends AbstractBufferedImageOp {
	private int[] lut;
	private double gamma;

	public GammaFilter() {
		this.lut = new int[256];
		this.gamma = 0.5;
	}

	@Override
	public BufferedImage filter(BufferedImage src, BufferedImage dst) {
		int width = src.getWidth();
		int height = src.getHeight();

		if (dst == null)
			dst = createCompatibleDestImage(src, null);

		// Gamma correction
		int[] inPixels = new int[width * height];
		int[] outPixels = new int[width * height];
		getRGB(src, 0, 0, width, height, inPixels);
		setupGammaLut();
		int index = 0;
		for (int row = 0; row < height; row++) {
			int ta = 0, tr = 0, tg = 0, tb = 0;
			for (int col = 0; col < width; col++) {
				index = row * width + col;
				ta = (inPixels[index] >> 24) & 0xff;
				tr = (inPixels[index] >> 16) & 0xff;
				tg = (inPixels[index] >> 8) & 0xff;
				tb = inPixels[index] & 0xff;
				outPixels[index] = (ta << 24) | (lut[tr] << 16) | (lut[tg] << 8) | lut[tb];
			}
		}

		// 返回结果
		setRGB(dst, 0, 0, width, height, outPixels);
		return dst;
	}

	private void setupGammaLut() {
		for (int i = 0; i < 256; i++) {
			lut[i] = (int) (Math.exp(Math.log(i / 255.0) * gamma) * 255.0);
		}

	}
}


 828
828

 被折叠的 条评论
为什么被折叠?
被折叠的 条评论
为什么被折叠?
 到【灌水乐园】发言


