


目录
前言
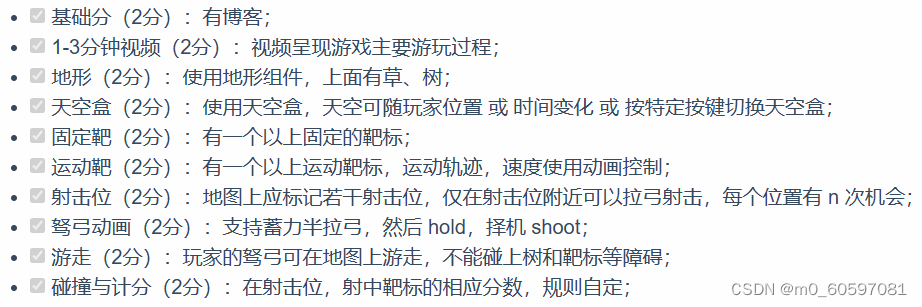
3D游戏制作的大作业,先放要求:
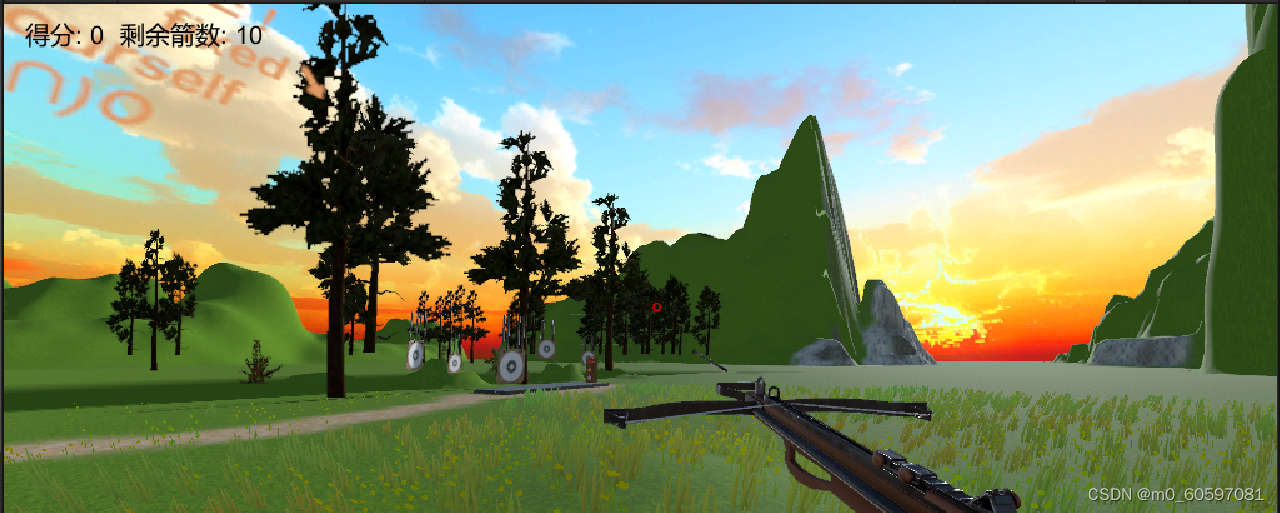
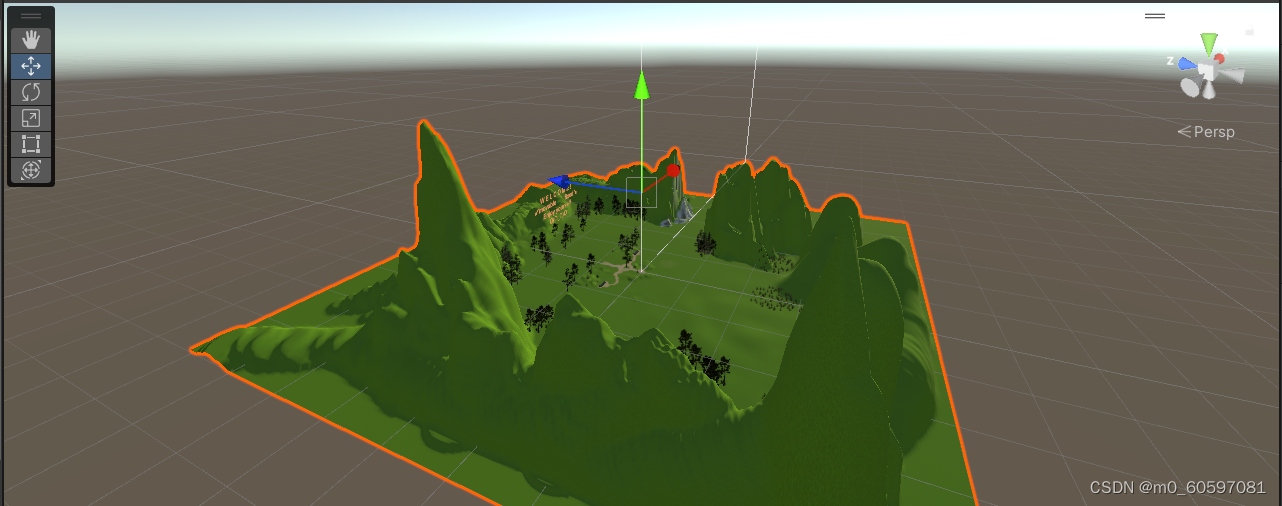
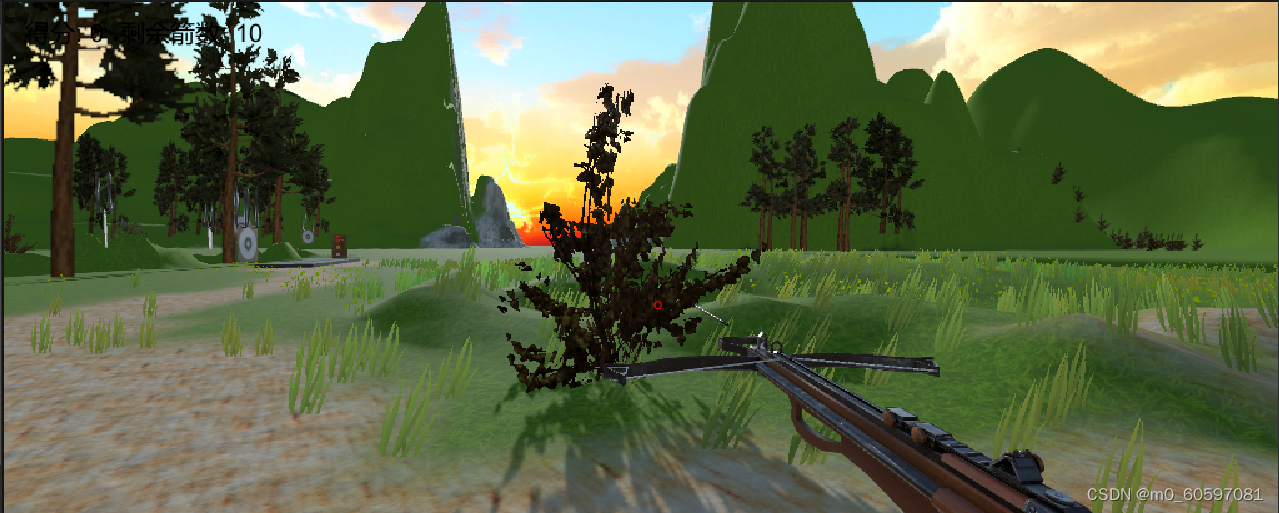
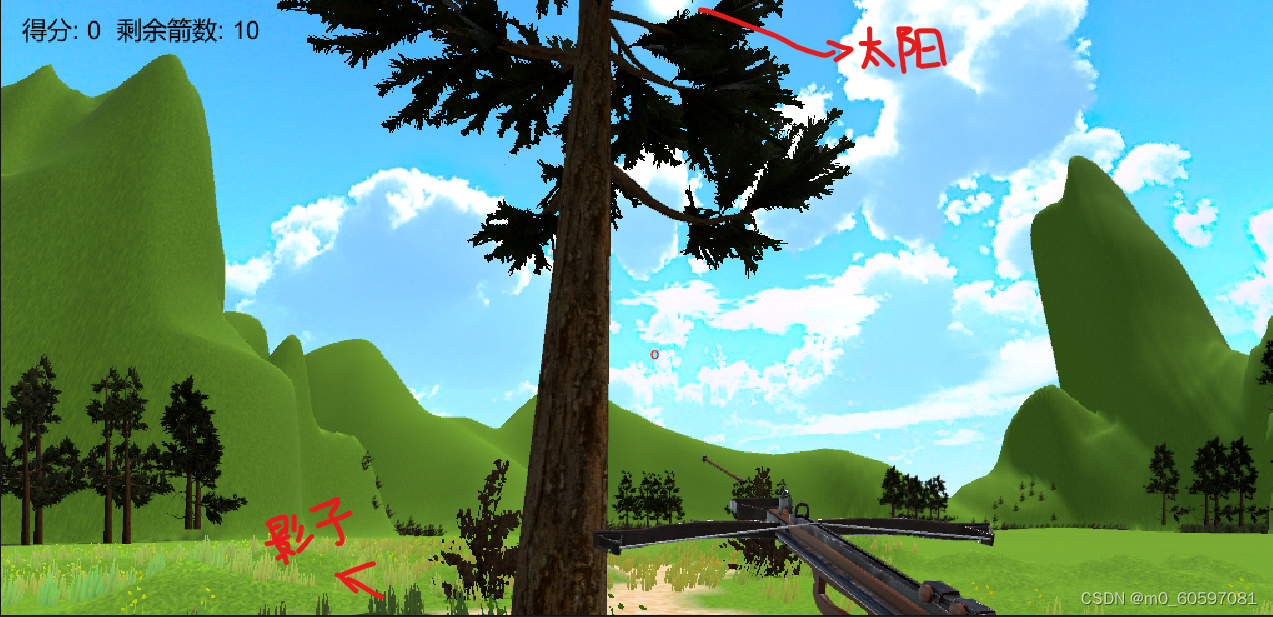
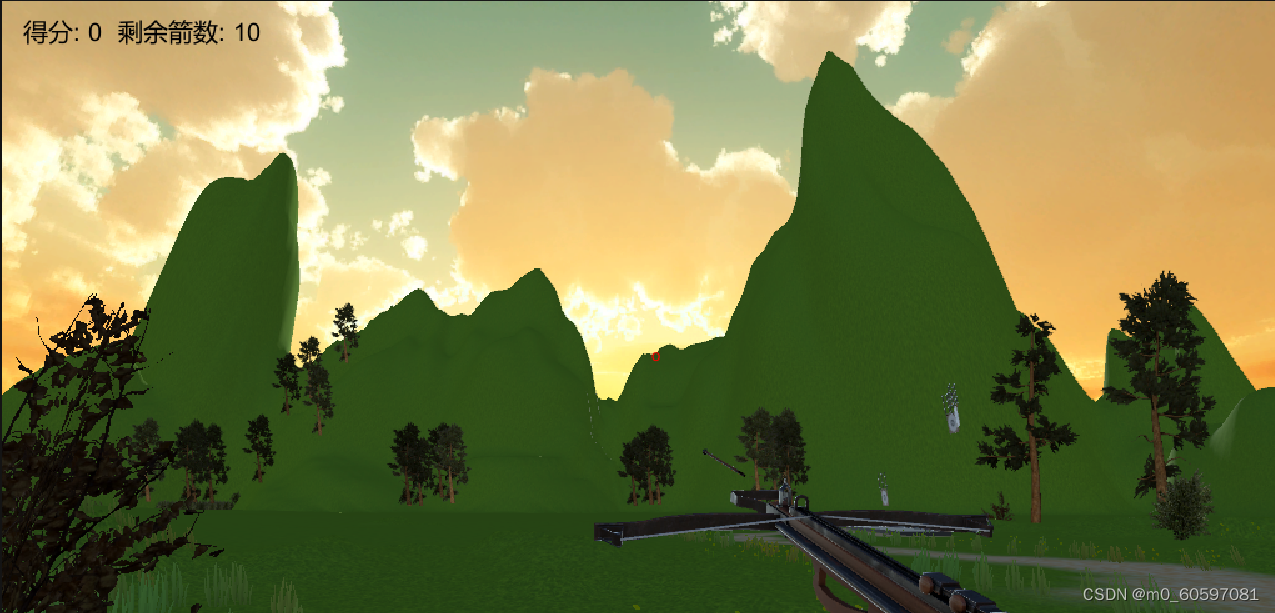
游戏成果截图:
下面将按功能讲解具体实现
具体实现
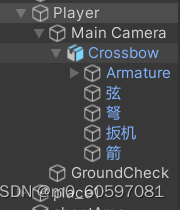
游戏的整体框架沿用之前的架构,用工厂单实例来产生箭射出。整体结构如下:
工欲善其事,必先利其器。首先要导入资源包,包括天空盒资源、树草资源、靶子资源和十字弩资源。这些都是免费资源~
1. 人物游走
游戏需要让玩家在地图中以第一人称视角在地图上游走,包括前后左右移动、跳跃和移动视角。首先要创建玩家对象,这里创建的是一个胶囊体capsule,去除掉原来的胶囊碰撞体,添加Character Controller作为新的碰撞体。
为了实现第一人称的效果,把相机调整到人物的上半部分,并挂载到人物上作为人物的子对象。射击用的十字弩也调整到合适位置并,挂载到相机下作为相机的子对象,这样摄像机移动时弓也能同步移动。为了检测玩家到地面的距离(防止一直跳上天的bug),还要添加一个检测对象在人物底部。这样对玩家对象的创建就结束了。
(个人想法)胶囊体什么都没有感觉有点突兀,所以直接在mesh render中去掉材料了,按一个减号就行,这样就能让人物变得透明同时还有碰撞体积。

用代码来控制人的移动、跳跃和相机视角的转动,下面两个代码分别挂载到人物和相机上。这两段代码是在网上搜的,但是现在找不到来源了……
using System.Collections;
using System.Collections.Generic;
using UnityEngine;

public class PlayerController : MonoBehaviour
{
    //获得player的CharacterController组件
    private CharacterController cc;

    public float moveSpeed = 80.0f;//移动速度

    public float jumpSpeed = 50.0f;//跳跃速度

    //定义获得按键值的两个变量
    private float horizontalMove, verticalMove;

    //定义三维变量dir控制方向
    private Vector3 dir;

    //重力
    private float gravity = 9.8f;

    private Vector3 velocity;//用来控制Y轴速度

    //我们只需要检测player是否在地上就可以了,这里我们可以使用Physics中的CheckSphere方法,如果定义的球体和物体发生碰撞,返回真
    //为了使用这个方法,我们需要定义几个变量
    public Transform groundCheck;//检测点的中心位置
    public float checkRedius;//检测点的半径
    public LayerMask groundLayer;//需要检测的图层
    //布尔值来存储CheckSphere的返回值
    public bool isGround;


    private void Start()
    {
        //获取player的CharacterController组件
        cc = GetComponent<CharacterController>();
        //锁定鼠标后再解锁,鼠标将自动回到屏幕中心
        Cursor.lockState = CursorLockMode.Locked;
        // Cursor.lockState = CursorLockMode.None;
        //隐藏鼠标
        Cursor.visible = false;
    }
    private void Update()
    {
        isGround = Physics.CheckSphere(groundCheck.position,checkRedius,groundLayer);
        if(isGround && velocity.y < 0)
        {
            velocity.y = -2f;
        }

        horizontalMove = Input.GetAxis("Horizontal") *2 * moveSpeed;
        verticalMove = Input.GetAxis("Vertical") * 2 * moveSpeed;

        dir = transform.forward * verticalMove + transform.right * horizontalMove;
        cc.Move(dir * Time.deltaTime);


        //在一瞬间有一个向上的速度,在过程中也会随着重力慢慢下降,如果想要让它只跳跃一次的话,加上isGround就行了
        if(Input.GetKeyDown(KeyCode.Space) && isGround)
        {
            velocity.y = jumpSpeed*1.4f;
        }

        velocity.y -= gravity * Time.deltaTime;
        //再用CharacterController的Move方法来移动y轴
        cc.Move(velocity * Time.deltaTime);
    }
}
控制相机跟随:
using System.Collections;
using System.Collections.Generic;
using UnityEngine;


public class CameraController : MonoBehaviour
{
    //我们通过控制Player的旋转方法,来控制相机视角的左右移动,所以我们需要一个Player的Tranform
    public Transform player;


    //定义两个float变量,来获取鼠标移动的值
    private float mouseX, mouseY;
    //我们可以给鼠标增加一个灵敏度
    public float mouseSensitivity = 800f;

    //mouseY中的GetAxis方法会返回-1到1之间的浮点数,在鼠标移动的时候,数值会随着方向的变化而变化,在鼠标不动时,数值会回弹到0,所以我们就会遇到鼠标上下移动时回弹的问题
    public float xRotation;

    private void Update()
    {
        //在Update方法中,我们使用输入系统中的GetAxis方法来获取鼠标移动的值,乘以鼠标灵敏度再乘以Time.deltatime,鼠标移动的值就这样得到了
        //Input.GetAxis:它会在鼠标移动相应对应轴的过程中返回 -1 到 1 的值
        mouseX = Input.GetAxis("Mouse X") * mouseSensitivity * Time.deltaTime;
        mouseY = Input.GetAxis("Mouse Y") * mouseSensitivity * Time.deltaTime;

        xRotation -= mouseY;

        //使用数学函数Clamp限制
        xRotation = Mathf.Clamp(xRotation,-50f,60f);

        //Vector3.up是向上的一个三维变量,和一个0,1,0的三维变量是一样的
        //我们需要控制player的y轴旋转才能让它左右旋转
        player.Rotate(Vector3.up * mouseX);
        //接下来我们要选转相机了,我们使用tranform.localRotation方法,让相机上下旋转,使用localRotation就可以不被父对象旋转影响,造成一些奇怪的问题
        //因为localRotation是属性,我们还要给他赋值
        transform.localRotation = Quaternion.Euler(xRotation, 0, 0);
    }
}
2. 地形
自行创建地形terrain,用自带的工具自行发挥创作。为了让上面的groundcheck能检测到东西,需要给地形的Layer设置成Ground,这个是需要自己创建并添加的。
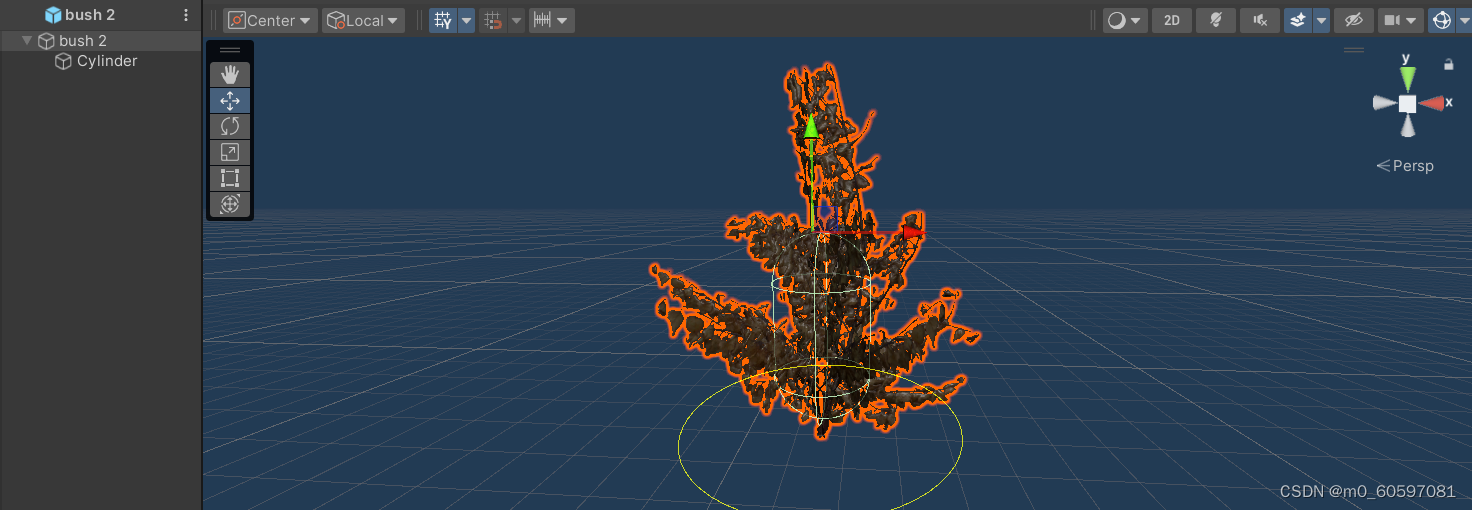
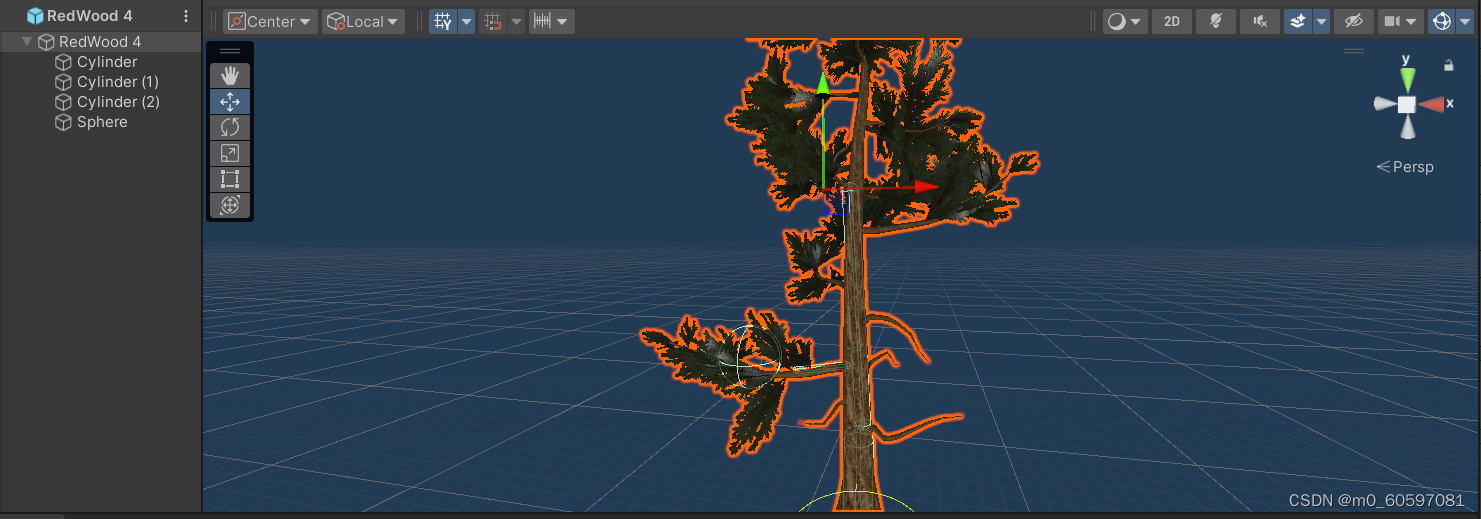
种的树和草用的都是导入资源包里的预制。初始的预制是没有碰撞体积的,要想有碰撞体积,我采取的方法是编辑预制,根据树的形状手动加碰撞体,然后用让人物变透明的一样的方法让拟合的物体变透明。
3. 天空盒变换
天空盒资源用的是导入的资源包Fantasy Skybox FREE。作业要求是天空盒变化就好,但为了视觉效果更真实,让光照也跟着天空盒一起变化,光照的方向尽可能和贴图中太阳的方向一样。为了让场景的视觉效果更好,还调整了一系列参数,参考的教程是这个:
Unity中调整光照特效的7个技巧_unity怎么让场景变亮-CSDN博客
下面是控制天空盒变化的代码,里面的一些数字是根据场景手动调整的。
using System.Collections;
using System.Collections.Generic;
using UnityEngine;

public class ChangeSkyBox : MonoBehaviour
{
    public Material[] mats;
    private int index=0;
    // 获取Directional Light组件
    private Light directionalLight;
    public Gradient lightColorGradient;
    public AnimationCurve lightIntensityCurve;

    // Start is called before the first frame update
    void Start()
    {
        mats = Resources.LoadAll<Material>("Materials/skyboxs");
        RenderSettings.skybox = mats[0];
        index ++;
        directionalLight = GameObject.Find("Directional Light").GetComponent<Light>();
    }

    // Update is called once per frame
    void Update()
    {
        if(Input.GetKeyDown(KeyCode.LeftShift)){
            ChangeBox();
        }
        ChangeLight();
    }
    public void ChangeBox()
    {
        RenderSettings.skybox = mats[index];
        index++;
        index %= mats.Length;
    }
    public void ChangeLight(){
        float currentTime = index*6f;
        // 计算当前的光强度
        float intensity = lightIntensityCurve.Evaluate(currentTime);
        // 计算当前的光颜色
        Color color = lightColorGradient.Evaluate(currentTime / 24f);
        // 设置光源的方向(模拟太阳的移动)
        float rotationAngle = (currentTime - 5f) * 15f; // 每小时15度
        directionalLight.transform.rotation = Quaternion.Euler(rotationAngle, -85f, 0f);

        // 设置光源的强度和颜色
        // directionalLight.intensity = intensity;
        directionalLight.color = color;
    }
}
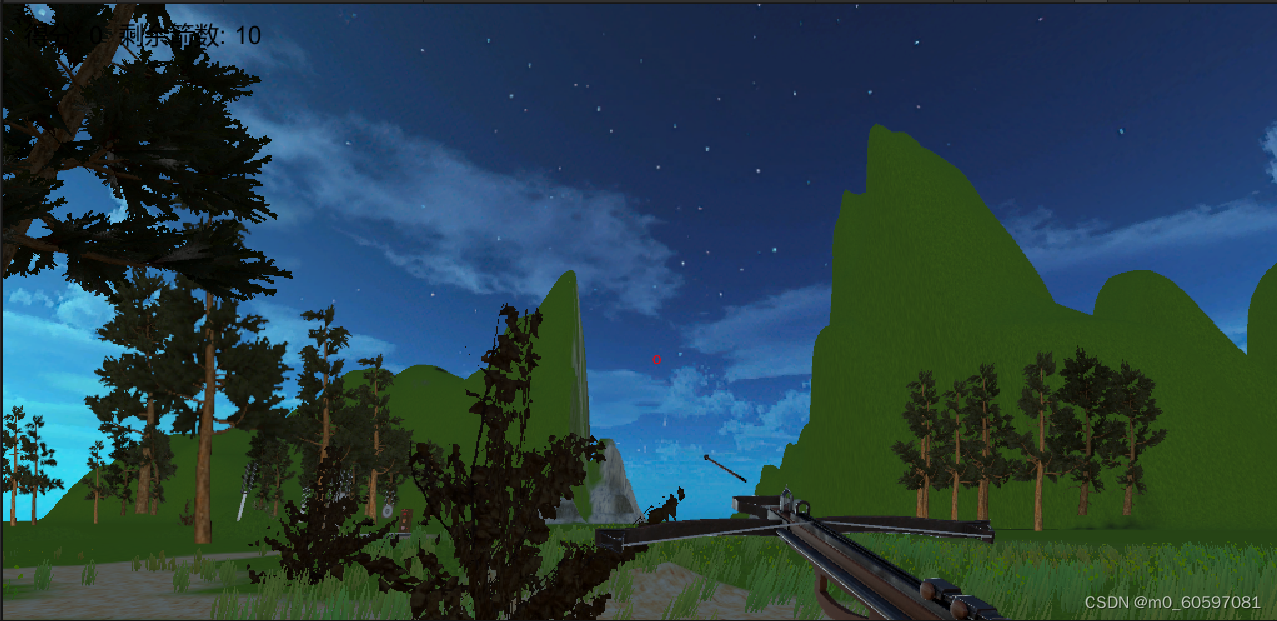
下面分别是早晨(6:00),中午(12:00),傍晚(18:00)和夜晚(24:00)的效果:
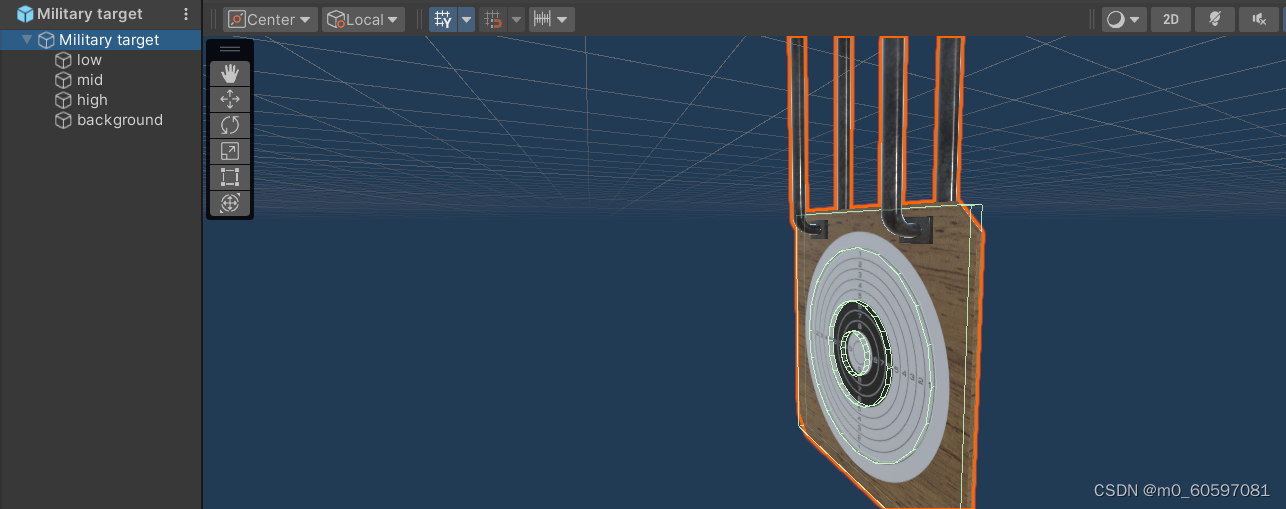
4. 靶子制作&&碰撞与计分
靶子的资源用的是Military target(这个模型不知道为什么很小,放大50倍感觉才正常点)。要求射中不同区域得不同的分数,所以需要修改一下。这里把靶子分成3个有效击中区域,给每个区域制作一个用来检测碰撞的射击环(其实是个圆盘)。环的大小和厚度都是手动调整的,调成透明的方法也和前面一样。
手动添加的碰撞体积用的都是mesh colider,其中除了background,都勾选上isTrigger选项,这样代码才能通过OnTriggerEnter函数检测到碰撞(勾选这个选项后实际上没有碰撞效果,箭会穿过去,但是后面有background兜着,所以不会穿过去)。
计分就由挂载到环上的代码来实现,当发生碰撞后,就把箭停下,然后设成靶子的子对象,并且使用运动学控制,这样就能实现箭插在靶子上的效果。碰撞发生后,用专门的计分器ScoreController计分。
using System.Collections;
using System.Collections.Generic;
using UnityEngine;

public class RingController : MonoBehaviour
{
    //当前环的分值
    public int RingScore ;
    public ISceneController scene;
    public ScoreRecorder sc_recorder;
    // Start is called before the first frame update
    void Start()
    {
        scene = Director.getInstance().currentSceneController as FirstController;
        sc_recorder = Singleton<ScoreRecorder>.Instance;
    }

    // Update is called once per frame
    void Update()
    {

    }
    //碰撞检测,如果箭击中该环,就响应。

    void OnTriggerEnter(Collider collision){
        Debug.Log("trigger");
        Transform arrow = collision.gameObject.transform;
        Debug.Log(arrow);
        if (arrow == null)
        {
            return;
        }
        if (arrow.tag == "arrow")
        {
            //将箭的速度设为0
            arrow.GetComponent<Rigidbody>().velocity = new Vector3(0, 0, 0);
            // Debug.Log("击中"+RingScore);
            //使用运动学运动控制
            arrow.GetComponent<Rigidbody>().isKinematic = true;
            arrow.transform.parent = this.transform.parent;         // 将箭和靶子绑定
            //计分
            sc_recorder.Record(RingScore);

        }
    }
}
using System.Collections;
using System.Collections.Generic;
using System.Runtime.CompilerServices;
using UnityEngine;
public class ScoreRecorder : MonoBehaviour
{
int score;
public FirstController firstController;
public UserGUI userGUI;
// Start is called before the first frame update
void Start()
{
firstController = (FirstController)Director.getInstance().currentSceneController;
firstController.scoreController = this;
userGUI = this.gameObject.GetComponent<UserGUI>();
}
public void Record(int ringscore) {
score += ringscore;
userGUI.score = score;
}
}
固定靶
把靶子加载到固定位置即可。我在这里受平时玩的一个fps游戏启发,设计了一个可交互的固定靶,可以自行调整一个固定靶的位置。
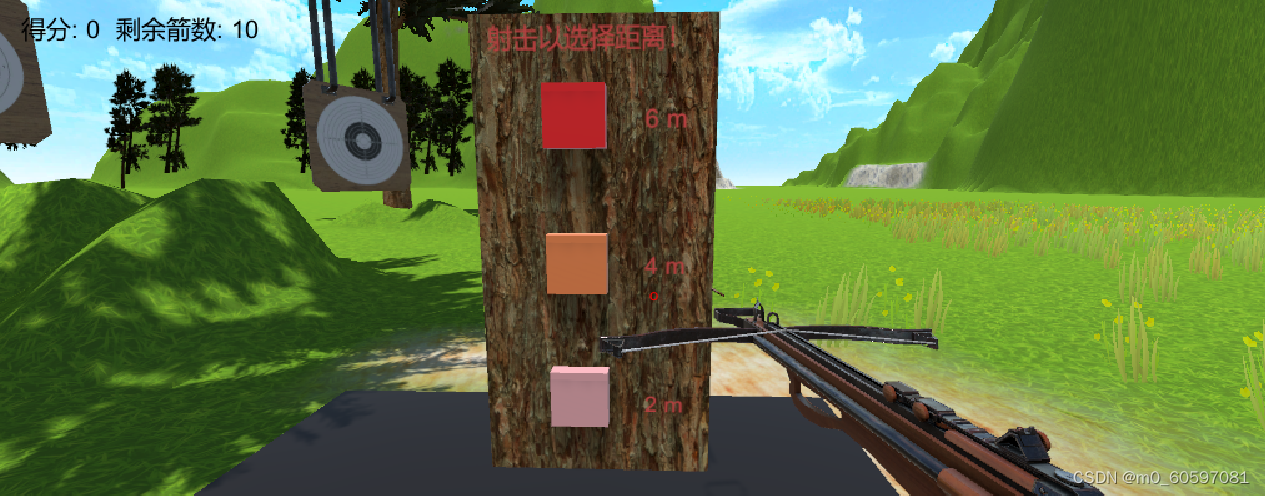
实现逻辑很简单,获取游戏对象,改变位置即可。为了方便(其实好像也不方便),这里在每个块上面都挂了代码,这里展示4m的:
using System.Collections;
using System.Collections.Generic;
using UnityEngine;

public class Interact : MonoBehaviour
{
    GameObject target;  //需要移动的游戏对象
    Vector3 origin_position;
    Transform origin_transform;
    // Start is called before the first frame update
    void Start()
    {
        origin_position = new Vector3(75f,8f,55f);
        target = GameObject.Find("move-fixed");
        // Debug.Log(origin_transform.position);
    }

    // Update is called once per frame
    void Update()
    {

    }

    void OnTriggerEnter(Collider collision)
    {
        // 获取被碰撞的物体
        GameObject collidedObject = collision.gameObject;
        if(collidedObject.tag == "arrow"){
            // Debug.Log(origin_transform.position);
            target.transform.position = origin_position + new Vector3(0,0,8f);
        }
    }
}
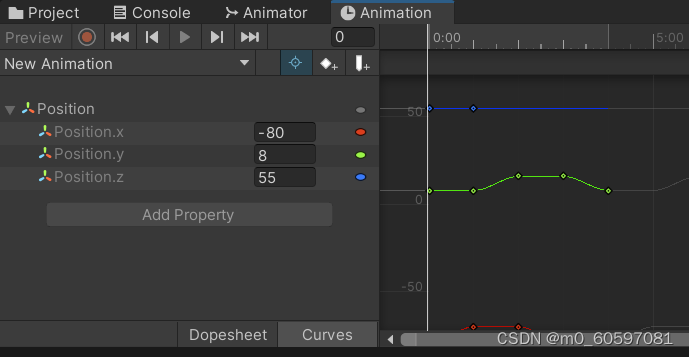
运动靶
给游戏对象自行制作相应的动画animation,上课都说过,这里不再介绍。
5. 射击位的实现
射击位也是通过碰撞实现。把射击区域设计成偏平的立方体,刚好能检测到碰撞的那种,这样看起来就像是地毯了。挂载代码到射击区域上,玩家进入区域时才通知firstcontroller可以射击。
using System.Collections;
using System.Collections.Generic;
using UnityEngine;

public class ShootArea : MonoBehaviour
{
    //是否可以射箭
    private bool canShoot;
    public FirstController firstController;

    void Start(){
        firstController = (FirstController)Director.getInstance().currentSceneController;
    }

    public void OnTriggerEnter(Collider collider)
    {
        if (collider.gameObject.tag == "Player")
        {
            canShoot = true;
            firstController.AreaCallBack(canShoot);
        }
    }


    private void OnTriggerExit(Collider collider)
    {
        if (collider.gameObject.tag == "Player")
        {
            canShoot = false;
            firstController.AreaCallBack(canShoot);
        }
    }
}
6. 弓弩变化
根据导入资源的动作自行制作一个状态机,和上课讲的状态机一样,其中empty-pull和hold都是混合树,通过这两个混合树来实现蓄力拉弓的动作。

射箭的逻辑由ShootControl控制,左键点击射箭,左键长按蓄力,长按时点击右键hold,hold后再次点击左键射出。通过一系列if else判断来检测鼠标状态,其中长按的检测用到了简单的协程;通过设置参数来控制动画,参数设置用setTrigger函数和setFloat实现。
还要从firstController中获取是否能射箭和剩余箭数量的信息,只有在设计区域并且有箭时才可以射箭。
using System.Collections;
using System.Collections.Generic;
using UnityEngine;

public class ShootControl : MonoBehaviour
{
    public Animator animator;
    public FirstController firstController;
    public float power = 0.4f;
    private bool isHolding = false;
    private bool isMouseDown;
    private bool isMouseLongPressed;

    private float longPressDuration = 0.2f; // 定义长按的持续时间

    void Start(){
        animator = GetComponent<Animator>();
        firstController = (FirstController)Director.getInstance().currentSceneController;
    }

    private void Update()
    {
        // 长按左键不断增加力量
        if (isMouseLongPressed && !isHolding)
        {
            power = Mathf.Min(power + Time.deltaTime, 1f);
        }
        // Debug.Log(power);
        animator.SetFloat("power", power);
        if(firstController.GetArea() && firstController.arrowNum>0){
            ClickCheck();
        }

    }

    public void ClickCheck(){
        // 按下左键
        if (Input.GetMouseButtonDown(0))
        {
            // Debug.Log("单击左键");
            if(!isHolding){
                isMouseDown = true;
                isMouseLongPressed = false;

                // 开始协程检测长按
                StartCoroutine(CheckLongPress());
                // 触发start
                animator.SetFloat("power", power);
                animator.SetTrigger("start");
            }
            else{
                ShootAnimator();
            }
        }
        else if(isMouseLongPressed && Input.GetMouseButtonDown(1)){//right key down
            // Debug.Log("右键按下");
            isHolding = true;
            // 停止协程
            StopCoroutine(CheckLongPress());
            isMouseLongPressed = false;

            animator.SetFloat("hold power", power);
            animator.SetTrigger("hold");
        }
        // 松开左键
        else if (isMouseDown && Input.GetMouseButtonUp(0))
        {
            isMouseDown = false;
            if(!isHolding){
                // Debug.Log("松开左键");
                isMouseLongPressed = false;

                // 停止协程
                StopCoroutine(CheckLongPress());
                //触发hold
                animator.SetFloat("hold power", power);
                // Debug.Log("hold power:"+power+".");
                animator.SetTrigger("hold");
                // 触发shoot
                ShootAnimator();
            }
        }
    }

    private IEnumerator CheckLongPress()
    {
        yield return new WaitForSeconds(longPressDuration);
        // 如果鼠标处于按下状态,则表示长按
        if (isMouseDown)
        {
            // Debug.Log("长按左键");
            isMouseLongPressed = true;
        }

    }

    private void ShootAnimator(){
        animator.SetTrigger("shoot");
        firstController.ShootCallback(true, power);
        isHolding = false;
        power = 0.4f;
    }
}
7. 其他部分
以上就是得分点的实现代码,但是只有这些是不完整的,还有其他比较重要的代码。比如射箭的动作控制:
using System.Collections;
using System.Collections.Generic;
using UnityEngine;

public class CCActionManager : SSActionManager, IActionCallback
{
    public FirstController sceneController;
    public FlyAction action;
    public ArrowFactory factory;

    public GameObject arrow;
    public GameObject crossbow;
    public float forceRate=0.33f;

    // Start is called before the first frame update
    protected new void Start()
    {
        sceneController = (FirstController)Director.getInstance().currentSceneController;
        sceneController.actionManager = this;
        factory = Singleton<ArrowFactory>.Instance;
        crossbow = GameObject.Find("Crossbow");
    }

    public void SSActionEvent(SSAction source,
        SSActionEventType events = SSActionEventType.Completed,
        int intParam = 0,
        string strParam = null,
        Object objectParam = null) {
            factory.FreeArrow(source.transform.gameObject);
    }

    public void ShootArrow(float power){
        Quaternion bowRotation = crossbow.transform.rotation;

		arrow = factory.GetArrow();
		Vector3 shootDirection = bowRotation * Vector3.up;
        // Debug.Log(shootDirection);
		arrow.GetComponent<Rigidbody>().AddForce(shootDirection * power * forceRate, ForceMode.Impulse);
        arrow.transform.parent = null;
        action = FlyAction.GetSSAction();
        this.RunAction(arrow, action, this);
    }
}
还有一个就是前面经常提到的firstController,它是代码的主体控制器,要把它挂载到玩家对象上来实现一系列功能的。
using System.Collections;
using System.Collections.Generic;
using UnityEngine;

public class FirstController : MonoBehaviour, ISceneController, IUserAction
{
    public CCActionManager actionManager;
    public ArrowFactory factory;
    public UserGUI userGUI;
    public GameObject bow;
    public ScoreRecorder scoreController;
    float shotpower =0.4f;
    bool shot = false;
    public int arrowNum = 10;
    bool inArea = false;

    void Awake() {
        Director director = Director.getInstance();
        bow = GameObject.Find("Crossbow");

        director.currentSceneController = this;
        director.currentSceneController.LoadSource();

        gameObject.AddComponent<UserGUI>();
        gameObject.AddComponent<CCActionManager>();
        gameObject.AddComponent<ScoreRecorder>();
        gameObject.AddComponent<ArrowFactory>();

        factory = Singleton<ArrowFactory>.Instance;
        userGUI = gameObject.GetComponent<UserGUI>();
    }
    // Start is called before the first frame update
    void Start()
    {

    }

    // Update is called once per frame
    void Update()
    {
        if(inArea && arrowNum>0 ){
            Shoot(shotpower);
        }
        userGUI.arrowNum = arrowNum;
    }

    public void LoadSource(){

    }

    public void Shoot(float shootpower){
        if(shot){
            actionManager.ShootArrow(shootpower);
            shot = false;
            arrowNum --;
        }
    }
    public void gameOver(){

    }

    public void ShootCallback(bool isShot, float power)
    {
        shotpower = power;
        shot = isShot;
    }

    public void AreaCallBack(bool inArea){
        this.inArea = inArea;
        if(inArea)
            arrowNum = 10;
    }

    public bool GetArea(){
        return inArea;
    }
}
总结
上面就是游戏的主体功能的实现了。紧赶慢赶,前前后后用了一周的课余时间才做完的。可以看出游戏比较简陋,代码比较繁琐,而且不能动态地去加载所有的代码和资源;而且准心的实现也很简陋,只是在屏幕上简单的画了一个点等等,还有许多改进的地方。
作业的完成参考了许多别人的博客,这里感谢所有愿意写博客分享技术的大佬们~
游戏的效果演示:
Unity游戏制作——射箭游戏
后面应该会整理一下上传到GitHub


 942
942

 被折叠的 条评论
为什么被折叠?
被折叠的 条评论
为什么被折叠?
 到【灌水乐园】发言


