


ROS2系列文章目录
ROS2中nav_msgs/msg/Path 数据含义及使用
ROS2中std_msgs/msg/Header 数据含义及使用
ROS2中launch编写及参数含义(launch.xml、python)
提示:阅读并实践本文档后,将掌握并理解ros1中nodelet用法,掌握并理解ros2中component用法
文章目录
ROS中nodelet与component的作用
Nodelet/component旨在提供一种方法,在一台机器上、在一个进程中运行多个算法,在进程内传递消息时不会产生拷贝成本。ros1与ros2中的节点发布与订阅话题数据,本质是将数据打包后通过TCP或者UDP将数据发送、接收、解包后进行数据处理。当存在大量数据如点云、图像等会导致消息传送滞后,因此在同一台机器中,使用nodelet/component会很好的避免数据传输问题,使用该方法只需要发送一个指向该数据的指针,而不是通过TCP/UDP发送数据本身,消息传输会更快。
ROS2中Component官方资料:http://docs.ros.org/en/humble/Tutorials/Intermediate/Writing-a-Composable-Node.html
提示:以下是本篇文章正文内容,下面案例可供参考
本教程的主要目标为:生成一个自定义的组件信息test_component::Test1,功能包为test_component,该组件的主要功能为发布话题“/talker”,发送的数据类型为std_msg/msg/string。
一、创建功能包并添加依赖
创建test_component功能包,添加依赖rclcpp、std_msgs、rcl_components等,实现如下:
ros2 pkg create test_component --build-type ament_cmake --dependencies rclcpp std_msgs rclcpp_components

二、新建组件函数文件及修改CMakeLists.txt
1.新建component实现函数
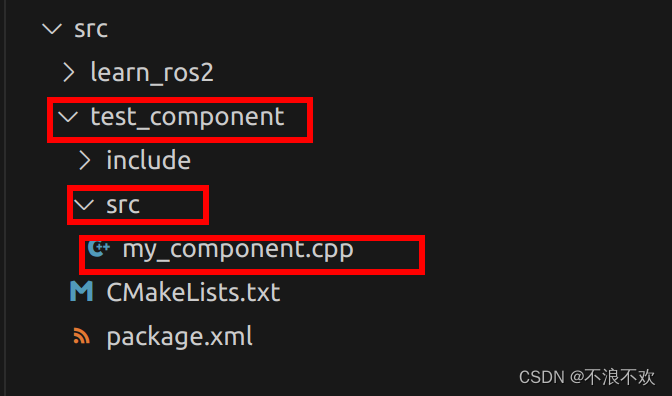
在test_component/src目录下新建C++实现源文件,文件名为:my_component.cpp
2.修改CMakeLists.txt添加组件信息
2.1 使用cmake添加依赖生成库文件
在cmake中包含实现功能必要的头文件:
include_directories(${rclcpp_INCLUDE_DIRS} ${std_msgs_INCLUDE_DIRS} ${rclcpp_components_INCLUDE_DIRS})
使用add_library添加要生成的库,具体使用方法如下:
 add_library(<name> [STATIC | SHARED | MODULE]
             [EXCLUDE_FROM_ALL]
             [<source>...])
将src/my_component.cpp文件添加生产Test1库
add_library(Test1 src/my_component.cpp )
给Test1库链接ros2相关的lib
ament_target_dependencies(Test1 rclcpp std_msgs rcl_components)
添加声明新构建的组件: test_component::Test1
rclcpp_components_register_node(Test1 "test_component::Test1")
声明添加一个新的的组件test_component::Test1到ros2系统中去
rclcpp_components_register_nodes(Test1 "test_component::Test1")
最后,将生成的库安装在指定的目录
install(TARGETS Test1
        ARCHIVE DESTINATION lib
        LIBRARY DESTINATION lib
        RUNTIME DESTINATION bin
)
上述操作对应的CMakeLists.txt文件如下:
cmake_minimum_required(VERSION 3.8)
project(test_component)

if(CMAKE_COMPILER_IS_GNUCXX OR CMAKE_CXX_COMPILER_ID MATCHES "Clang")
  add_compile_options(-Wall -Wextra -Wpedantic)
endif()

# find dependencies
find_package(ament_cmake REQUIRED)
find_package(rclcpp REQUIRED)
find_package(std_msgs REQUIRED)
find_package(rclcpp_components REQUIRED)

if(BUILD_TESTING)
  find_package(ament_lint_auto REQUIRED)
  # the following line skips the linter which checks for copyrights
  # comment the line when a copyright and license is added to all source files
  set(ament_cmake_copyright_FOUND TRUE)
  # the following line skips cpplint (only works in a git repo)
  # comment the line when this package is in a git repo and when
  # a copyright and license is added to all source files
  set(ament_cmake_cpplint_FOUND TRUE)
  ament_lint_auto_find_test_dependencies()
endif()
include_directories(${rclcpp_INCLUDE_DIRS} ${std_msgs_INCLUDE_DIRS} ${rclcpp_components_INCLUDE_DIRS})
add_library(Test1 SHARED src/my_component.cpp )
ament_target_dependencies(Test1 rclcpp std_msgs rclcpp_components)
rclcpp_components_register_nodes(Test1 "test_component::Test1")
install(TARGETS Test1
        ARCHIVE DESTINATION lib
        LIBRARY DESTINATION lib
        RUNTIME DESTINATION bin
)
ament_package()
2.2 构建组件实现
初始化节点, 从Node继承的类开始,并定义了Test1构造函数,确保类的构造函数采用NodeOptions参数。
  explicit Test1(const rclcpp::NodeOptions & options):Node("test_node",options){
        // 创建话题发布者
        pub_ptr = this->create_publisher<std_msgs::msg::String>("/talker",10);
        // 创建定时器,定时1s后进入回调函数
        time_ptr = this->create_wall_timer(std::chrono::seconds(1),std::bind(&Test1::time_callback,this));
    }
使用RSO2中的pluginlib类似的宏调用声明
#include <rclcpp_components/register_node_macro.hpp>
// 给ROS系统调用提供宏定义接口
RCLCPP_COMPONENTS_REGISTER_NODE(test_component::Test1);
生成一个自定义的组件信息test_component::Test1的实现文件test_component.cpp如下:
#include <rclcpp/rclcpp.hpp>
#include <std_msgs/msg/string.hpp>
#include <chrono>
#include <string>
#include <rclcpp_components/register_node_macro.hpp>

namespace test_component{
    //继承rclcpp中的node节点,注意构建组件的构造函数有区别
    class Test1:public rclcpp::Node
    {

    public:
    // 构造函数中加入rclcpp::NodeOptions,并初始化
    explicit Test1(const rclcpp::NodeOptions & options):Node("test_node",options){
        // 创建话题发布者
        pub_ptr = this->create_publisher<std_msgs::msg::String>("/talker",10);
        // 创建定时器,定时1s后进入回调函数
        time_ptr = this->create_wall_timer(std::chrono::seconds(1),std::bind(&Test1::time_callback,this));
    }
    private:
    // 定时器指针
    rclcpp::TimerBase::ConstSharedPtr time_ptr;
    // 发布者话题指针
    rclcpp::Publisher<std_msgs::msg::String>::SharedPtr pub_ptr;
    // 话题发布数据
    std_msgs::msg::String data;
    // 定时器回调函数
    void time_callback(){
        static unsigned int i = 0;
        i++;
        data.data = std::to_string(i);
        pub_ptr->publish(data);
        RCLCPP_INFO(this->get_logger(),"进入定时器回调:%d",i);
    }
    };
};
// 给ROS系统调用提供宏定义接口
RCLCPP_COMPONENTS_REGISTER_NODE(test_component::Test1);
3. 使用指令查看是否加载成功自定义组件
3.1查询插件是否生成
使用ROS2推荐的colcon编译工具编译上述功能包后,执行一下指令:
source install/setup.bash
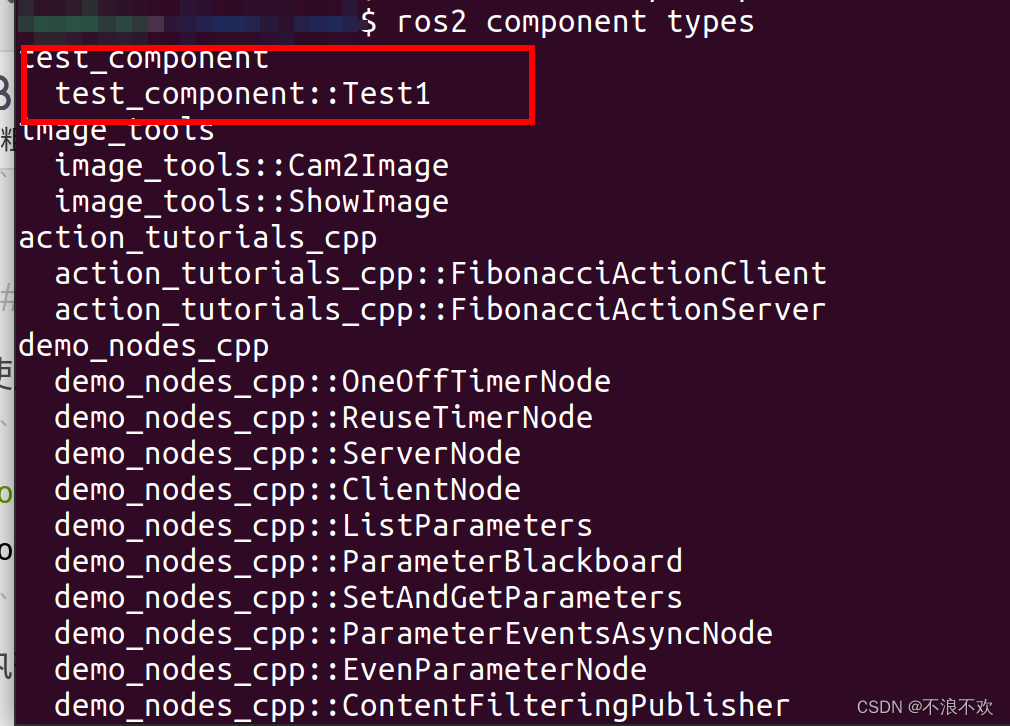
ros2 component types
执行后输出结果中可以查看到是否已经加载自定义的组件信息
3.2 加载运行自定义插件
执行组件容器运行指令
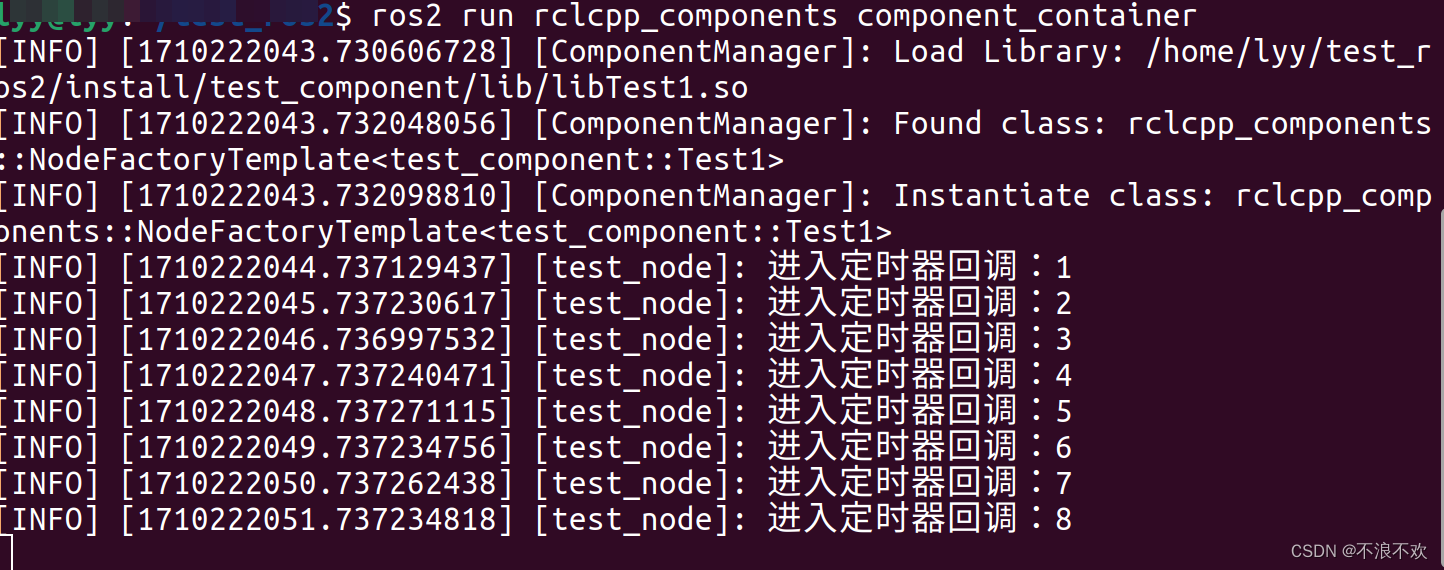
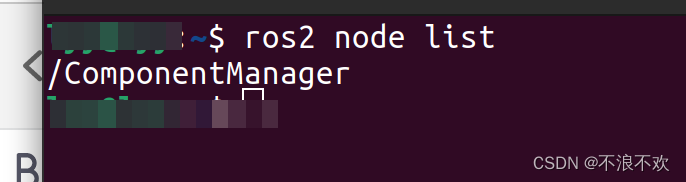
ros2 run rclcpp_components component_container
执行完成后,可以通过查询ROS2中的节点指令确认是否启动成功
使用指令加载命令对生产的自定义插件加载
#ros2 component load /组件管理器名称  功能包  注册的组件名称
ros2 component load /ComponentManager test_component test_component::Test1
执行上述指令后,在组件管理终端即可看到打印输出的日志信息
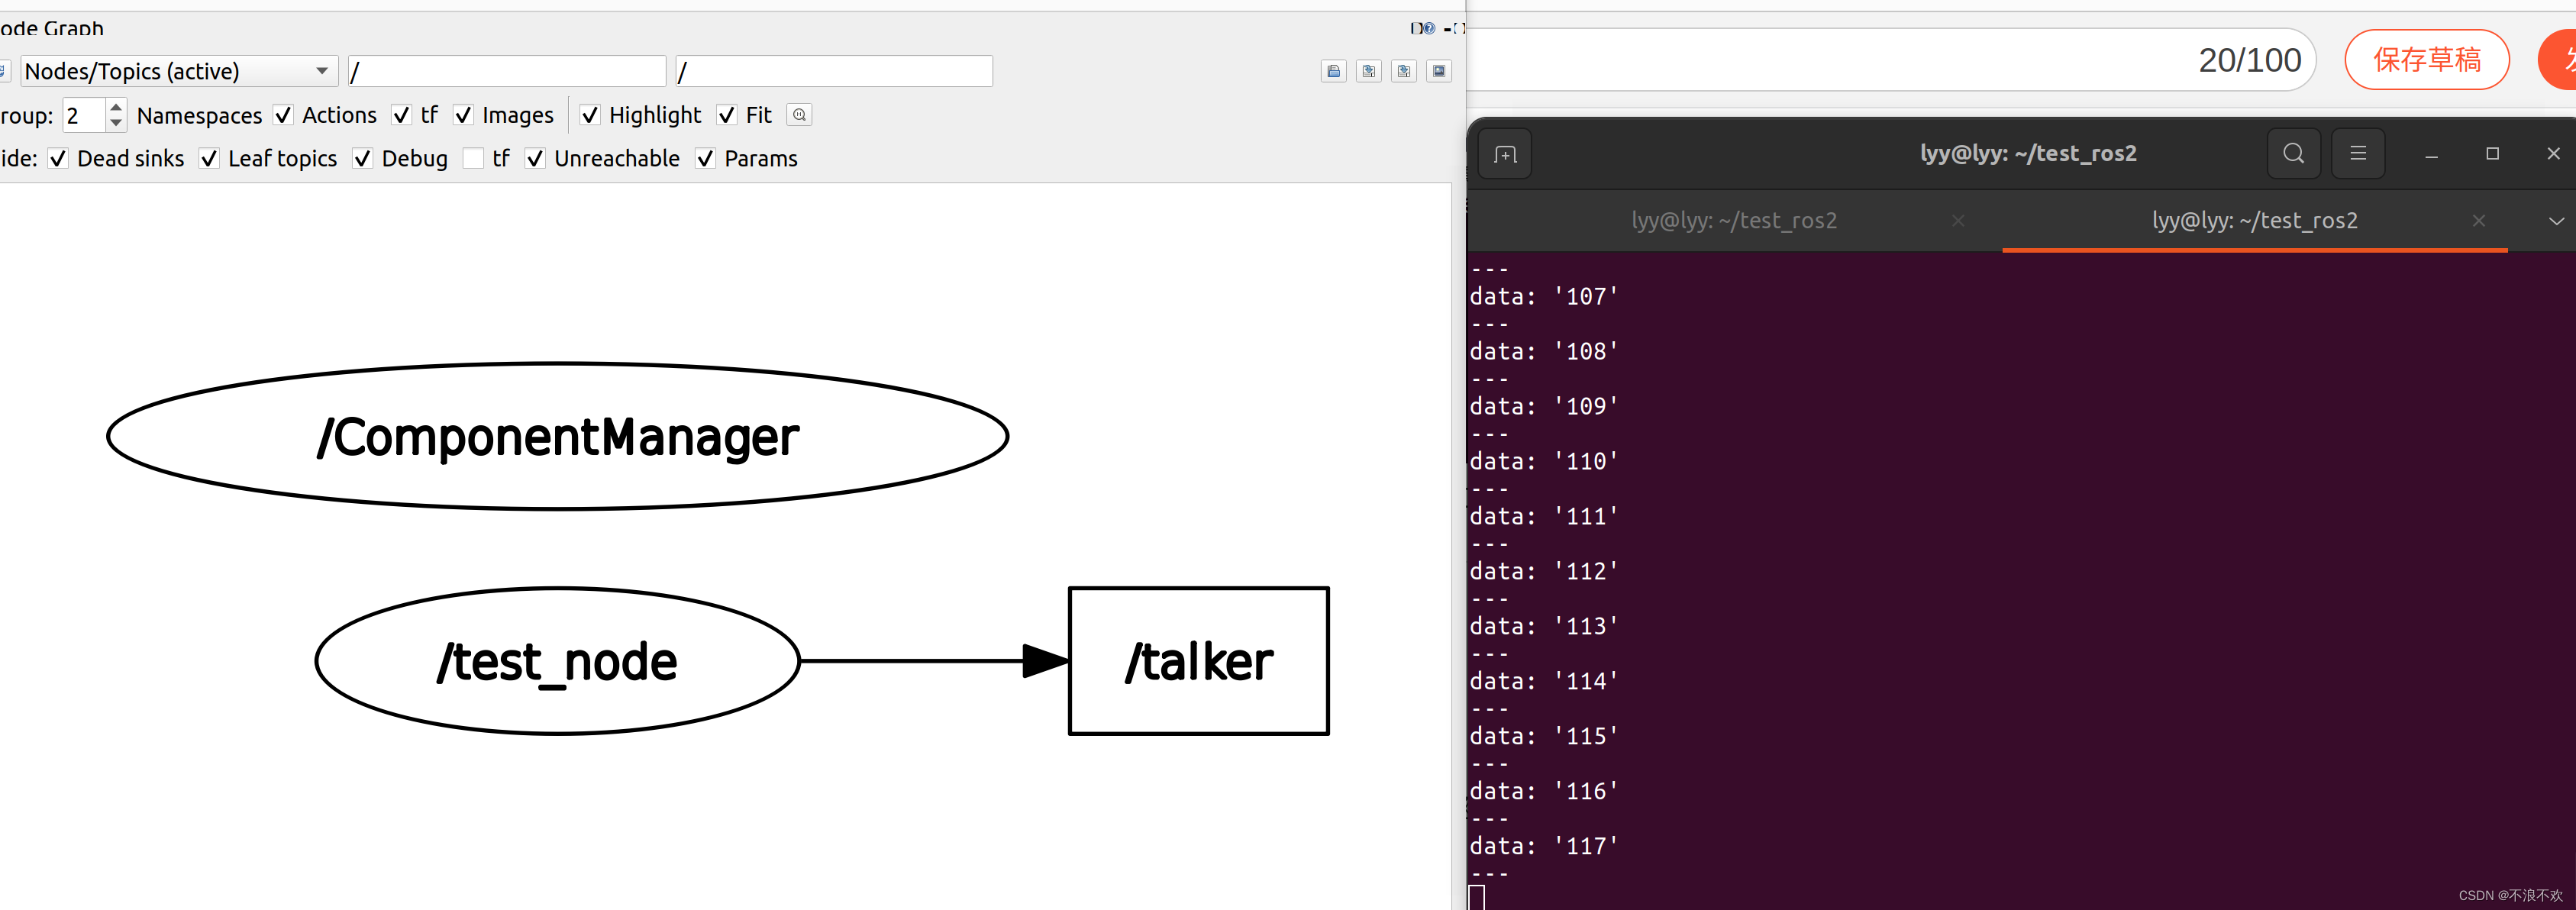
 使用节点管理工具以及话题打印工具查看是否正常显示节点以及话题内容
总结
本教程主要实现一个自定义的组件信息test_component::Test1,功能包为test_component,组件管理器启动加载该组件后,能够正常发布话题“/talker”,据类型为std_msg/msg/string。


 1317
1317


 被折叠的 条评论
为什么被折叠?
被折叠的 条评论
为什么被折叠?
 到【灌水乐园】发言


