


视觉SLAM十四讲笔记-9-3
9.3 实践:Ceres BA
BAL 数据集提供了若干个场景,每一个场景里的相机和路标点信息由一个文本文件给定。在本例中,使用 problem-16-22106-pre.txt文件作为例子。数据格式参考官网:link
Data Format
Each problem is provided as a bzip2 compressed text file in the following format.


<num_cameras> <num_points> <num_observations>
<camera_index_1> <point_index_1> <x_1> <y_1>
...
<camera_index_num_observations> <point_index_num_observations> <x_num_observations> <y_num_observations>
<camera_1>
...
<camera_num_cameras>
<point_1>
...
<point_num_points>
首先,通过定义的 common.h 中定义的 BALProblem 类读入该文件的内容,然后分别用 Ceres 和 g2o 进行求解。
需要注意的是, BAL 数据集有其自身的特殊之处:
- BAL 的相机内参模型由焦距 f f f 和畸变参数 k 1 , k 2 k_1,k_2 k1,k2 给出。 f f f 类似于我们提到的 f x f_x fx 和 f y f_y fy 。由于照片像素基本上是正方形,所以在很多实际场合中 f x f_x fx] 非常接近于 f y f_y fy ,用同一个值也未尝不可。此外,这个模型没有 c x c_x cx 和 c y c_y cy,因为存储的数据已经去掉了这两个值。
- 因为BAL数据在投射时假设投影平面在相机光心之后,所以按照之前用的模型计算,需要在投影之后乘以系数 -1。不过,大部分数据集仍使用光心前面的投影平面,在使用数据集之前应该仔细阅读格式说明。
用 BALProblem 类读取数据之后,可以调用 Noemalize 函数对原始数据进行归一化,或者通过 Perturb 函数给数据加上噪声。归一化是指将所有路标点的中心置为零,然后做一个合适尺度的缩放。这会使得优化过程中数值更加稳定,防止在极端情况下处理很大或者有很大偏移的 BA 问题。
mkdir BundleAdjustmentCeres
cd BundleAdjustmentCeres/
code .

在 bundle_adjustment_ceres.cpp 文件中,实现了 Ceres 求解 BA 的过程。用 Ceres 的关键是定义出投影误差模型,该模型在 SnavelyReprojectionError.h 中给出。
//launch.json
{
    // Use IntelliSense to learn about possible attributes.
    // Hover to view descriptions of existing attributes.
    // For more information, visit: https://go.microsoft.com/fwlink/?linkid=830387
    "version": "0.2.0",
    "configurations": [
        {
            "name": "g++ - 生成和调试活动文件",
            "type": "cppdbg",
            "request":"launch",
            "program":"${workspaceFolder}/build/bundle_adjustment_ceres",
            "args": [],
            "stopAtEntry": false,
            "cwd": "${workspaceFolder}",
            "environment": [],
            "externalConsole": false,
            "MIMode": "gdb",
            "setupCommands": [
                {
                    "description": "为 gdb 启动整齐打印",
                    "text": "-enable-pretty-printing",
                    "ignoreFailures": true
                }
            ],
            "preLaunchTask": "Build",
            "miDebuggerPath": "/usr/bin/gdb"
        }
    ]
}
//tasks.json
{
	"version": "2.0.0",
	"options":{
		"cwd": "${workspaceFolder}/build"   //指明在哪个文件夹下做下面这些指令
	},
	"tasks": [
		{
			"type": "shell",
			"label": "cmake",   //label就是这个task的名字,这个task的名字叫cmake
			"command": "cmake", //command就是要执行什么命令,这个task要执行的任务是cmake
			"args":[
				".."
			]
		},
		{
			"label": "make",  //这个task的名字叫make
			"group": {
				"kind": "build",
				"isDefault": true
			},
			"command": "make",  //这个task要执行的任务是make
			"args": [

			]
		},
		{
			"label": "Build",
			"dependsOrder": "sequence", //按列出的顺序执行任务依赖项
			"dependsOn":[				//这个label依赖于上面两个label
				"cmake",
				"make"
			]
		}
	]
}
#CMakeLists.txt
cmake_minimum_required(VERSION 3.0)

project(BUNDLEADJUSTMENTCERES)

#在g++编译时,添加编译参数,比如-Wall可以输出一些警告信息
set(CMAKE_CXX_FLAGS "${CMAKE_CXX_FLAGS} -Wall -std=c++14")

LIST(APPEND CMAKE_MODULE_PATH ${PROJECT_SOURCE_DIR}/cmake)

#一定要加上这句话,加上这个生成的可执行文件才是可以Debug的,不然不加或者是Release的话生成的可执行文件是无法进行调试的
set(CMAKE_BUILD_TYPE Debug)

# Eigen
include_directories("/usr/include/eigen3")

#添加头文件
include_directories(include)

#此工程要调用opencv库,因此需要添加opancv头文件和链接库
#寻找OpenCV库
find_package(OpenCV REQUIRED)
#添加头文件
include_directories(${OpenCV_INCLUDE_DIRS})

find_package(CSparse REQUIRED)
include_directories(${CSPARSE_INCLUDE_DIR})

#find Ceres
find_package(Ceres REQUIRED)
include_directories(${CERES_INCLUDE_DIRS})

add_library(bal_common src/common.cpp)
add_executable(bundle_adjustment_ceres bundle_adjustment_ceres.cpp)

#链接OpenCV库
target_link_libraries(bundle_adjustment_ceres ${OpenCV_LIBS} ${CERES_LIBRARIES} bal_common)
//SnavelyReprojectionError.h
/*
该文件给出了投影误差模型
*/
#ifndef SnavelyReprojection_H
#define SnavelyReprojection_H

#include <iostream>
#include "ceres/ceres.h"
#include "rotation.h"

class SnavelyReprojectionError {
public:
    SnavelyReprojectionError(double observation_x, double observation_y) : observed_x(observation_x),
                                                                           observed_y(observation_y) {}

    //括号运算符,实现了Ceres计算投影误差的接口
    template<typename T>
    bool operator()(const T *const camera,
                    const T *const point,
                    T *residuals) const {
        // camera[0,1,2] are the angle-axis rotation
        T predictions[2];
        // 带畸变系数的相机投影过程得到路标点在图像上的像素坐标估计值
        CamProjectionWithDistortion(camera, point, predictions);
        // 观测值与估计值的误差
        residuals[0] = predictions[0] - T(observed_x);
        residuals[1] = predictions[1] - T(observed_y);

        return true;
    }

    // 每个相机用9维的参数来描述,camera : 9 dims array
    // camera : 9 dims array
    // [0-2] : angle-axis rotation 三维的旋转角
    // [3-5] : translateion 三维的平移向量
    // [6-8] : camera parameter, [6] focal length 一维的焦距, [7-8] second and forth order radial distortion 两维的畸变系数
    // point : 3D location.
    // predictions : 2D predictions with center of the image plane.
    template<typename T>
    static inline bool CamProjectionWithDistortion(const T *camera, const T *point, T *predictions) {
        // Rodrigues' formula 罗德里格斯公式
        T p[3];
        AngleAxisRotatePoint(camera, point, p);
        // camera[3,4,5] are the translation
        // 取出9维相机参数Camera中的平移部分,第3~5
        p[0] += camera[3];
        p[1] += camera[4];
        p[2] += camera[5];

        // Compute the center fo distortion计算用于畸变的中心点坐标
        T xp = -p[0] / p[2];
        T yp = -p[1] / p[2];

        // Apply second and fourth order radial distortion两维的畸变系数
        const T &l1 = camera[7];
        const T &l2 = camera[8];

        T r2 = xp * xp + yp * yp;
         // 应用二阶和四阶径向畸变系数
        T distortion = T(1.0) + r2 * (l1 + l2 * r2);
        // 获取相机焦距
        const T &focal = camera[6];
        // 计算畸变后的像素坐标
        predictions[0] = focal * distortion * xp;
        predictions[1] = focal * distortion * yp;

        return true;
    }
    // 静态函数Create作为外部调用接口,直接返回一个可自动求导的Ceres代价函数

    static ceres::CostFunction *Create(const double observed_x, const double observed_y) {
        return (new ceres::AutoDiffCostFunction<SnavelyReprojectionError, 2, 9, 3>(
            // 重投影误差代价函数的计算模型
            new SnavelyReprojectionError(observed_x, observed_y)));
    }

private:
    double observed_x;
    double observed_y;
};

#endif // SnavelyReprojection.h
在类的括号中实现了 Ceres 计算误差的接口,估计数据通过 CamProjectionWithDistortion 函数中得到。注意在 Ceres 中,必须以 double 数组形式存储优化变量。该类的静态函数 Create 作为外部调用接口,直接返回一个可自动求导的 Ceres 代价函数。
只需要调用 Create 函数,把代价函数放入 ceres::Problem 中即可。
然后,在 bundle_adjustment_ceres.cpp 中实现了 BA 搭建和求解的部分:
//bundle_adjustment_ceres.cpp
#include <iostream>
#include <ceres/ceres.h>
#include "common.h"
#include "SnavelyReprojectionError.h"
using namespace std;

void SolveBA(BALProblem &bal_problem);

int main(int argc, char **argv)
{
    string file = "./problem-16-22106-pre.txt";
    BALProblem bal_problem(file);
    //数据归一化
    bal_problem.Normalize();
    //给数据添加噪声
    bal_problem.Perturb(0.1, 0.5, 0.5);
    bal_problem.WriteToPLYFile("initial.ply");
    SolveBA(bal_problem);
    bal_problem.WriteToPLYFile("final.ply");

    return 0;
}

void SolveBA(BALProblem &bal_problem) {
    const int point_block_size = bal_problem.point_block_size();
    const int camera_block_size = bal_problem.camera_block_size();
    double *points = bal_problem.mutable_points(); //获得待优化系数3d点 points指向3d点的首地址
    double *cameras = bal_problem.mutable_cameras();//获得待优化系数相机 cameras指向相机的首地址

    // Observations is 2 * num_observations long array observations
    // [u_1, u_2, ... u_n], where each u_i is two dimensional, the x
    // and y position of the observation.
    const double *observations = bal_problem.observations();
    //定义问题
    ceres::Problem problem;

    for (int i = 0; i < bal_problem.num_observations(); ++i) {
        ceres::CostFunction *cost_function;

        // Each Residual block takes a point and a camera as input
        // and outputs a 2 dimensional Residual
        //代价函数,使用静态函数Create返回的可自动求导的代价函数
        cost_function = SnavelyReprojectionError::Create(observations[2 * i + 0], observations[2 * i + 1]);

        // If enabled use Huber's loss function.
        ceres::LossFunction *loss_function = new ceres::HuberLoss(1.0);//核函数

        // Each observation corresponds to a pair of a camera and a point
        // which are identified by camera_index()[i] and point_index()[i]
        // respectively.
        //bal_Problem.point_index()这返回的是一个地址指向索引号的首地址
        double *camera = cameras + camera_block_size * bal_problem.camera_index()[i];
        double *point = points + point_block_size * bal_problem.point_index()[i];
        //向问题中添加误差项
        problem.AddResidualBlock(cost_function, loss_function, camera, point);
    }

    // show some information here ...
    std::cout << "bal problem file loaded..." << std::endl;
    std::cout << "bal problem have " << bal_problem.num_cameras() << " cameras and "
              << bal_problem.num_points() << " points. " << std::endl;
    std::cout << "Forming " << bal_problem.num_observations() << " observations. " << std::endl;

    std::cout << "Solving ceres BA ... " << endl;
    ceres::Solver::Options options; // 设定ceres求解的配置选项
    options.linear_solver_type = ceres::LinearSolverType::SPARSE_SCHUR; // 设置舒尔消元/边缘化,便于加速求解
    options.minimizer_progress_to_stdout = true;
    ceres::Solver::Summary summary; // 优化信息
    ceres::Solve(options, &problem, &summary); // 开始执行优化
    std::cout << summary.FullReport() << "\n";
}
在 ceres::Solver::Options 中,可以设定求解的方法。使用 SPARSE_SCHUR 会让 Ceres 实际求解的过程和前面描述的一样,即先对路标部分进行 Schur 边缘化,以加速的方式求解此问题。不过,在 Ceres 中不能控制哪部分变量被边缘化,这是由 Ceres 求解器自动寻找并计算。
BA 优化的求解输出如下:

用 Meshlab 打开两个点云:

9.4 实践:g2o求解BA
g2o 求解 BA 问题时,使用图模型来描述问题的结构,所以需要用节点来表示相机和路标,然后用边表示它们之间的观测。仍然使用自定义的点和边,只需要覆盖一些关键函数即可。针对相机和路标,定义如下结构体,并使用 override 关键字对基类虚函数进行覆盖:
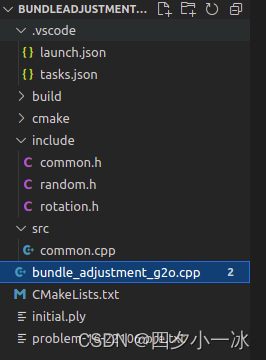
mkdir BundleAdjustmentG2o
cd BundleAdjustmentG2o
code .
//launch.json
{
    // Use IntelliSense to learn about possible attributes.
    // Hover to view descriptions of existing attributes.
    // For more information, visit: https://go.microsoft.com/fwlink/?linkid=830387
    "version": "0.2.0",
    "configurations": [
        {
            "name": "g++ - 生成和调试活动文件",
            "type": "cppdbg",
            "request":"launch",
            "program":"${workspaceFolder}/build/bundle_adjustment_g2o",
            "args": [],
            "stopAtEntry": false,
            "cwd": "${workspaceFolder}",
            "environment": [],
            "externalConsole": false,
            "MIMode": "gdb",
            "setupCommands": [
                {
                    "description": "为 gdb 启动整齐打印",
                    "text": "-enable-pretty-printing",
                    "ignoreFailures": true
                }
            ],
            "preLaunchTask": "Build",
            "miDebuggerPath": "/usr/bin/gdb"
        }
    ]
}
//tasks.json
{
	"version": "2.0.0",
	"options":{
		"cwd": "${workspaceFolder}/build"   //指明在哪个文件夹下做下面这些指令
	},
	"tasks": [
		{
			"type": "shell",
			"label": "cmake",   //label就是这个task的名字,这个task的名字叫cmake
			"command": "cmake", //command就是要执行什么命令,这个task要执行的任务是cmake
			"args":[
				".."
			]
		},
		{
			"label": "make",  //这个task的名字叫make
			"group": {
				"kind": "build",
				"isDefault": true
			},
			"command": "make",  //这个task要执行的任务是make
			"args": [

			]
		},
		{
			"label": "Build",
			"dependsOrder": "sequence", //按列出的顺序执行任务依赖项
			"dependsOn":[				//这个label依赖于上面两个label
				"cmake",
				"make"
			]
		}
	]
}
#CMakeLists.txt
cmake_minimum_required(VERSION 3.0)

project(BUNDLEADJUSTMENTG2O)

#在g++编译时,添加编译参数,比如-Wall可以输出一些警告信息
set(CMAKE_CXX_FLAGS "${CMAKE_CXX_FLAGS} -Wall -std=c++14")

LIST(APPEND CMAKE_MODULE_PATH ${PROJECT_SOURCE_DIR}/cmake)

#一定要加上这句话,加上这个生成的可执行文件才是可以Debug的,不然不加或者是Release的话生成的可执行文件是无法进行调试的
set(CMAKE_BUILD_TYPE Debug)

find_package(Sophus REQUIRED)
include_directories( ${Sophus_INCLUDE_DIRS} )

# Eigen
include_directories("/usr/include/eigen3")

#添加头文件
include_directories(include)


find_package(OpenCV REQUIRED)
include_directories(${OpenCV_INCLUDE_DIRS})

find_package(CSparse REQUIRED)
include_directories(${CSPARSE_INCLUDE_DIR})

find_package (glog 0.6.0 REQUIRED)

#find g2o
find_package(G2O REQUIRED)
include_directories(${G2O_INCLUDE_DIRS})

SET(G2O_LIBS g2o_csparse_extension g2o_stuff g2o_core cxsparse)

add_library(bal_common src/common.cpp)
add_executable(bundle_adjustment_g2o bundle_adjustment_g2o.cpp)

#链接OpenCV库
target_link_libraries(bundle_adjustment_g2o  Sophus::Sophus ${OpenCV_LIBS} ${G2O_LIBS} bal_common glog::glog)
#include <g2o/core/base_vertex.h>
#include <g2o/core/base_binary_edge.h>
#include <g2o/core/block_solver.h>
#include <g2o/core/optimization_algorithm_levenberg.h>
#include <g2o/solvers/csparse/linear_solver_csparse.h>
#include <g2o/core/robust_kernel_impl.h>
#include <iostream>

#include "common.h"
#include "sophus/se3.hpp"

using namespace Sophus;
using namespace Eigen;
using namespace std;

/// 姿态和内参的结构
struct PoseAndIntrinsics {
    PoseAndIntrinsics() {}

    /// set from given data address
    // 构造函数:从给定的数据地址中解析出9维数据
    explicit PoseAndIntrinsics(double *data_addr) {
        rotation = SO3d::exp(Vector3d(data_addr[0], data_addr[1], data_addr[2])); // so3类型旋转位姿
        translation = Vector3d(data_addr[3], data_addr[4], data_addr[5]); // 平移向量
        focal = data_addr[6]; // 焦距
        k1 = data_addr[7]; // 畸变系数1
        k2 = data_addr[8]; // 畸变系数2
    }

    /// 将估计值放入内存
    void set_to(double *data_addr) {
        auto r = rotation.log();
        for (int i = 0; i < 3; ++i) data_addr[i] = r[i];
        for (int i = 0; i < 3; ++i) data_addr[i + 3] = translation[i];
        data_addr[6] = focal;
        data_addr[7] = k1;
        data_addr[8] = k2;
    }

    SO3d rotation;
    Vector3d translation = Vector3d::Zero();
    double focal = 0;
    double k1 = 0, k2 = 0;
};

/// 位姿加相机内参的顶点,9维,前三维为so3,接下去为t, f, k1, k2
// 定义位姿加相机内参的顶点,9维,前三维为so3旋转位姿,接下去为平移向量t, 焦距f, 畸变系数k1, 畸变系数k2
class VertexPoseAndIntrinsics : public g2o::BaseVertex<9, PoseAndIntrinsics> {
public:
    EIGEN_MAKE_ALIGNED_OPERATOR_NEW;

    VertexPoseAndIntrinsics() {}
    // 位姿顶点的重置函数:将估计值置零
    virtual void setToOriginImpl() override {
        _estimate = PoseAndIntrinsics();
    }
    // 位姿顶点的更新函数:计算9维参数的增量 x_{k+1} = x_{k} + \Delta x
    virtual void oplusImpl(const double *update) override {
        // 旋转:【左乘李代数形式扰动更新量】
        _estimate.rotation = SO3d::exp(Vector3d(update[0], update[1], update[2])) * _estimate.rotation;
        // 平移:与更新量直接相加
        _estimate.translation += Vector3d(update[3], update[4], update[5]);
        // 焦距:与更新量直接相加
        _estimate.focal += update[6];
        // 畸变系数1:与更新量直接相加
        _estimate.k1 += update[7];
        // 畸变系数2:与更新量直接相加
        _estimate.k2 += update[8];
    }

    /// 根据估计值投影一个点
    Vector2d project(const Vector3d &point) {
        // 对空间中的路标点进行旋转平移,从世界坐标系转换到相机坐标系
        Vector3d pc = _estimate.rotation * point + _estimate.translation;
        // 相机坐标系投影到归一化平面上
        //【因为BAL数据集的数据在投影使,假设了投影平面在相机光心之后,需要在投影之后乘以系数-1】
        pc = -pc / pc[2];
        // 计算二范数
        double r2 = pc.squaredNorm();
        // 计算畸变系数
        double distortion = 1.0 + r2 * (_estimate.k1 + _estimate.k2 * r2);
        // 获取畸变后的真实图像像素坐标
        return Vector2d(_estimate.focal * distortion * pc[0],
                        _estimate.focal * distortion * pc[1]);
    }

    virtual bool read(istream &in) {}

    virtual bool write(ostream &out) const {}
};

//定义路标顶点类型
class VertexPoint : public g2o::BaseVertex<3, Vector3d> {
public:
    EIGEN_MAKE_ALIGNED_OPERATOR_NEW;

    VertexPoint() {}
    // 路标点顶点的估计值置零
    virtual void setToOriginImpl() override {
        _estimate = Vector3d(0, 0, 0);
    }
    // 计算更新后的路标点 x_{k+1} = x_{k} + \Delta x,路标点位置直接与更新量相加
    virtual void oplusImpl(const double *update) override {
        _estimate += Vector3d(update[0], update[1], update[2]);
    }

    virtual bool read(istream &in) {}

    virtual bool write(ostream &out) const {}
};
// 定义重投影误差边的类型:派生自二元基边
class EdgeProjection :
    public g2o::BaseBinaryEdge<2, Vector2d, VertexPoseAndIntrinsics, VertexPoint> {
public:
    EIGEN_MAKE_ALIGNED_OPERATOR_NEW;
    // 计算重投影误差
    virtual void computeError() override {
        // 取出误差边所连接的两个顶点:位姿顶点和路标顶点
        auto v0 = (VertexPoseAndIntrinsics *) _vertices[0];
        auto v1 = (VertexPoint *) _vertices[1];
        // 计算路标顶点v1在当前相机v0上的投影估计值
        auto proj = v0->project(v1->estimate());
        // 估计值与观测值作差
        _error = proj - _measurement;
    }

    // use numeric derivatives
    virtual bool read(istream &in) {}

    virtual bool write(ostream &out) const {}

};

void SolveBA(BALProblem &bal_problem);

int main(int argc, char **argv) {

    // if (argc != 2) {
    //     cout << "usage: bundle_adjustment_g2o bal_data.txt" << endl;
    //     return 1;
    // }
    string file = "./problem-16-22106-pre.txt";

    BALProblem bal_problem(file);
    bal_problem.Normalize();
    bal_problem.Perturb(0.1, 0.5, 0.5);
    bal_problem.WriteToPLYFile("initial.ply");
    SolveBA(bal_problem);
    bal_problem.WriteToPLYFile("final.ply");

    return 0;
}

void SolveBA(BALProblem &bal_problem) {
    const int point_block_size = bal_problem.point_block_size();
    const int camera_block_size = bal_problem.camera_block_size();
    double *points = bal_problem.mutable_points();
    double *cameras = bal_problem.mutable_cameras();

    // pose dimension 9, landmark is 3
    // 9x3 的块求解器:相机位姿 9 维(旋转3维,平移3维,焦距1维,畸变系数2维), 路标点 3 维
    typedef g2o::BlockSolver<g2o::BlockSolverTraits<9, 3>> BlockSolverType;
    // 线性求解器
    typedef g2o::LinearSolverCSparse<BlockSolverType::PoseMatrixType> LinearSolverType;
    // use LM
    // 选择【列文伯格-马夸尔特LM算法】进行最小二乘梯度下降的优化迭代
    auto solver = new g2o::OptimizationAlgorithmLevenberg(
        g2o::make_unique<BlockSolverType>(g2o::make_unique<LinearSolverType>()));
    // 稀疏优化器
    g2o::SparseOptimizer optimizer;
    // 为稀疏优化器设置 LM 优化算法
    optimizer.setAlgorithm(solver);
    // 打开调试输出
    optimizer.setVerbose(true);

    /// build g2o problem
    // 构建 g2o 图优化模型
    const double *observations = bal_problem.observations();
    // vertex 相机位姿顶点集合
    vector<VertexPoseAndIntrinsics *> vertex_pose_intrinsics;
    // 路标顶点集合
    vector<VertexPoint *> vertex_points;
    // 将相机顶点加入到优化器中
    for (int i = 0; i < bal_problem.num_cameras(); ++i) {
        // 相机位姿顶点
        VertexPoseAndIntrinsics *v = new VertexPoseAndIntrinsics();
        // 获取当前第 i 个相机位姿 9 维
        double *camera = cameras + camera_block_size * i;
        // 给该相机位姿顶点设置编号ID
        v->setId(i);
        // 设置相机位姿顶点的估计值
        v->setEstimate(PoseAndIntrinsics(camera));
        // 往图模型稀疏优化器中添加该位姿顶点
        optimizer.addVertex(v);
        vertex_pose_intrinsics.push_back(v);
    }
    // 将路标顶点加入到优化器中
    for (int i = 0; i < bal_problem.num_points(); ++i) {
        // 路标点顶点
        VertexPoint *v = new VertexPoint();
        // 获取当前第 i 个路标点位置 3 维
        double *point = points + point_block_size * i;
        // 设置路标顶点的编号ID,排在在所有相机的序号之后
        v->setId(i + bal_problem.num_cameras());
        // 给该路标顶点设置估计值
        v->setEstimate(Vector3d(point[0], point[1], point[2]));
        // g2o在BA中需要手动设置待Marg的顶点,// 【将路标顶点边缘化,Schur舒尔消元】
        v->setMarginalized(true);
        // 往图模型稀疏优化器中添加该路标顶点
        optimizer.addVertex(v);
        vertex_points.push_back(v);
    }

    // edge
    // 将观测的重投影误差边加入到优化器中
    for (int i = 0; i < bal_problem.num_observations(); ++i) {
        // 重投影误差边
        EdgeProjection *edge = new EdgeProjection;
        // 设置误差边所连接的0号顶点:相机位姿顶点
        edge->setVertex(0, vertex_pose_intrinsics[bal_problem.camera_index()[i]]);
        // 设置误差边所连接的1号顶点:路标顶点
        edge->setVertex(1, vertex_points[bal_problem.point_index()[i]]);
        // 设置误差边的观测值
        edge->setMeasurement(Vector2d(observations[2 * i + 0], observations[2 * i + 1]));
        // 设置信息矩阵为 2x2 的单位阵
        edge->setInformation(Matrix2d::Identity());
        // 鲁棒核函数设置为Huber核,用于保证每条误差边不会太大而掩盖了其它的误差边,可以使优化结果更加稳健。
        edge->setRobustKernel(new g2o::RobustKernelHuber());
        // 往图模型稀疏优化器中添加重投影误差边
        optimizer.addEdge(edge);
    }
    // 优化器初始化
    optimizer.initializeOptimization();
    // 执行40次优化迭代
    optimizer.optimize(40);

    // set to bal problem
    // 将优化后的相机位姿存入内存中
    for (int i = 0; i < bal_problem.num_cameras(); ++i) {
        // 第i个相机
        double *camera = cameras + camera_block_size * i;
        auto vertex = vertex_pose_intrinsics[i];
        // 用优化后的相机位姿顶点进行更新
        auto estimate = vertex->estimate();
        // 写入内存
        estimate.set_to(camera);
    }
    for (int i = 0; i < bal_problem.num_points(); ++i) {
        // 第i个路标点
        double *point = points + point_block_size * i;
        // 用优化后的路标顶点进行更新
        auto vertex = vertex_points[i];
        for (int k = 0; k < 3; ++k) point[k] = vertex->estimate()[k];
    }
}
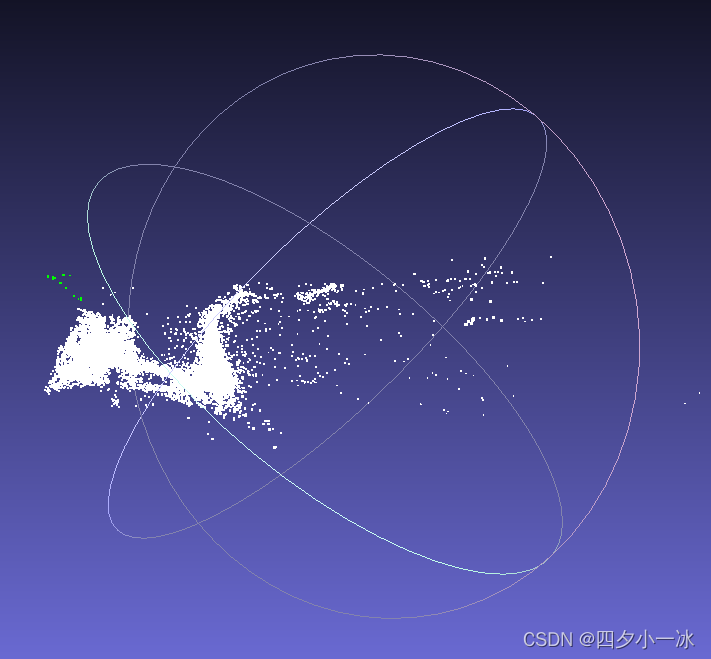
运行结果如下:

用 Meshlab 打开两个点云:


g2o 和 Ceres 的一大不同之处在于,在使用系数优化时, g2o 必须手动设置哪些顶点为边缘顶点,否则就会报运行错误。其余地方和 Ceres 实验大同小异。
在只有观测方程的情况下,构建最小二乘问题,对位姿和路标同时做调整,即所谓的 BA。


 1618
1618


 被折叠的 条评论
为什么被折叠?
被折叠的 条评论
为什么被折叠?
 到【灌水乐园】发言


