


1、代码下载:https://github.com/niessner/BundleFusion
2、依赖库MLib:https://github.com/niessner/mLib
依赖库mLib external libraries:http://kaldir.vc.in.tum.de/mLib/mLibExternal.zip
3、最终的目录结构如下:
BundleFusion-master/
  external/
    mLib/ # this is the submodule you replaced
      data/
      src/
      [...]
  FriedLiver/
    [...]
    FriedLiver.sln
    [...]
mLibExternal/ # you downloaded this from Dropbox
  include
  libsWindows
[...]4、推荐使用NotePad++打开“FriedLiver.vcxproj”,或是使用VSCODE打开工程对其属性进行修改,一共有两处需要修改(当然前提是你的电脑已经安装好了CUDA8.0,参考:https://blog.csdn.net/ffcjjhv/article/details/89221992)


5、安装DirectX SDK:https://www.microsoft.com/en-us/download/details.aspx?id=6812
直接安装即可,如果出现错误,通过控制面板卸载以下两项
![]()
如果还不行,参考博客:https://blog.csdn.net/ffcjjhv/article/details/89221992
6、打开工程,先不急编译,需要修改一些内容
首先:打开GlobalAppState.h文档,将相机模块全部注释掉:

然后,将前面安装的DirectX SDK库添加到工程:包括头文件和库文件以及可执行文件

添加好了后,确认工程为Release x64版本,确认所有的三方库路径正确,确认自己的GPU运算能力,

可以通过下面网址查找自己的显卡运算能力:https://developer.nvidia.com/cuda-gpus#collapseOne,注意运算能力一定要对应,否则可能出错。
添加对应的CUDA工具:

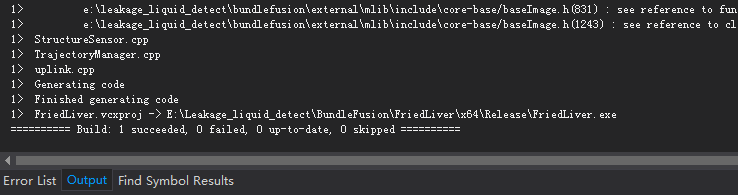
完成以上确认后,开始编译,如果没有意外,则编译通过:
7、由于我是win7系统,用不了KineceV2,所以使用xtion试试,参考:
kinectv1:https://blog.csdn.net/ffcjjhv/article/details/89221992
kinectv2:https://blog.csdn.net/weixin_36788761/article/details/100702469
xtion:https://blog.csdn.net/renye_lpl/article/details/80599408
首先安装OpenNI2:https://structure.io/openni 直接下载对应的版本安装即可,同样地,需要将一下三项配置到工程当中:

取消GlobalAppState.h文件中OpenNI的注释
//#define KINECT
//#define KINECT_ONE
#define OPEN_NI
//#define BINARY_DUMP_READER
//#define INTEL_SENSOR
//#define REAL_SENSE
//#define STRUCTURE_SENSOR
然后找到PrimeSenseSensor.h文件,在其中添加一个函数getSensorName():
	//! Processes the Kinect color data
	bool processColor()
	{
		return true;
	}

	//! Returns the sensor name
	std::string getSensorName() const {
		return "Xtion";
	}
找到DepthSensing.cpp,对其中进行修改,修改完成购编译。
# 将986行
bool bGotDepth = g_CudaImageManager->process()
# 替换为
bool bGotDepth;
while (!(bGotDepth = g_CudaImageManager->process()));
8、当然我们需要测试一下openni2能否打开xtion,测试代码如下:
#include <opencv2/core/core.hpp>
#include <opencv2/imgproc/imgproc.hpp>
#include <opencv2/highgui/highgui.hpp>
#include <opencv2/opencv.hpp>
#include <iostream>

#include "OpenNI.h"

using namespace openni;
using namespace cv;
using namespace std;


int main()
{
	Status rc = STATUS_OK; // OpenNI函数执行结果

	// 初始化OpenNI
	rc = OpenNI::initialize();

	// 获取设备信息
	Array<DeviceInfo> aDeviceList;
	OpenNI::enumerateDevices(&aDeviceList);

	// output information
	//vector<CDevice>  vDevices;
	cout << "电脑上连接着 " << aDeviceList.getSize() << " 个体感设备." << endl;

	for (int i = 0; i < aDeviceList.getSize(); ++i)
	{
		cout << "设备 " << i << endl;
		const DeviceInfo& rDevInfo = aDeviceList[i];
		cout << "设备名: " << rDevInfo.getName() << endl;
		cout << "设备Id: " << rDevInfo.getUsbProductId() << endl;
		cout << "供应商名: " << rDevInfo.getVendor() << endl;
		cout << "供应商Id: " << rDevInfo.getUsbVendorId() << endl;
		cout << "设备URI: " << rDevInfo.getUri() << endl;

	}

	//OpenNI2图
	VideoFrameRef oniDepthImg, oniColorImg;

	//OpenCV图
	Mat cvDepthImg, cvBGRImg;

	//打开Kinect或Xtion设备
	Device device;
	const char * deviceURL = openni::ANY_DEVICE;  //设备名
	rc = device.open(deviceURL);

	//创建并打开深度数据流
	VideoStream oniDepthStream; //深度数据流
	rc = oniDepthStream.create(device, SENSOR_DEPTH); //创建深度数据流
	if (STATUS_OK == rc)
	{
		//设置深度视频模式
		VideoMode modeDepth;
		modeDepth.setResolution(640, 480/*640,480*/); //分辨率
		modeDepth.setFps(30); //帧率
		modeDepth.setPixelFormat(PIXEL_FORMAT_DEPTH_1_MM); //深度像素格式
		oniDepthStream.setVideoMode(modeDepth);

		oniDepthStream.start(); // 打开深度数据流
		if (STATUS_OK != rc)
		{
			cerr << "无法打开深度数据流:" << OpenNI::getExtendedError() << endl;
			oniDepthStream.destroy();
		}
	}
	else
	{
		cerr << "无法创建深度数据流:" << OpenNI::getExtendedError() << endl;
	}

	//创建并打开彩色数据流
	VideoStream oniColorStream;  //RGB数据流
	rc = oniColorStream.create(device, SENSOR_COLOR);
	if (STATUS_OK == rc)
	{
		//设置彩色视频模式
		VideoMode modeColor;
		//不知道为什么,彩色图的分辨率无论如何设置始终都是320*240
		modeColor.setResolution(320, 240/*1280,1040*/);//分辨率
		modeColor.setFps(30);//帧率
		modeColor.setPixelFormat(PIXEL_FORMAT_RGB888);

		//设置深度图和彩色图的配准模式
		if (device.isImageRegistrationModeSupported(IMAGE_REGISTRATION_DEPTH_TO_COLOR))
		{
			device.setImageRegistrationMode(IMAGE_REGISTRATION_DEPTH_TO_COLOR); //深度到彩色图配准
		}

		rc = oniColorStream.start(); //打开彩色数据流
		if (STATUS_OK != rc)
		{
			cerr << "无法打开彩色数据流:" << OpenNI::getExtendedError() << endl;
			oniColorStream.destroy();
		}
	}
	else
	{
		cerr << "无法创建彩色数据流:" << OpenNI::getExtendedError() << endl;
	}

	if (!oniDepthStream.isValid() || !oniColorStream.isValid())
	{
		cerr << "彩色或深度数据流不合法" << endl;
		OpenNI::shutdown();
		return 1;
	}

	namedWindow("depth");
	namedWindow("RGB");

	while (true)
	{
		//读取一帧深度图
		if (STATUS_OK == oniDepthStream.readFrame(&oniDepthImg))
		{
			Mat cvRawImg16U(oniDepthImg.getHeight(), oniDepthImg.getWidth(), CV_16UC1, (void*)oniDepthImg.getData());
			cvRawImg16U.convertTo(cvDepthImg, CV_8U, 255.0 / (oniDepthStream.getMaxPixelValue()));
			flip(cvDepthImg, cvDepthImg, 1);//水平翻转
			imshow("depth", cvDepthImg);
		}

		//读取一帧彩色图
		if (STATUS_OK == oniColorStream.readFrame(&oniColorImg))
		{
			Mat cvRGBImg(oniColorImg.getHeight(), oniColorImg.getWidth(), CV_8UC3, (void*)oniColorImg.getData());
			cvtColor(cvRGBImg, cvBGRImg, CV_RGB2BGR);
			flip(cvBGRImg, cvBGRImg, 1);//水平翻转
			imshow("RGB", cvBGRImg);
		}
		waitKey(30);//没有waitKey不显示图像
	}

	destroyWindow("depth");
	destroyWindow("RGB");

	oniDepthStream.destroy();
	oniColorStream.destroy();
	device.close();
	OpenNI::shutdown();

	return 0;
}
9、修改配置文档,将配置文档和一些dll文件直接放到工程目录下:

修改zParametersDefault.txt文档中的配置:
// 0=Kinect; 1=PrimeSense; 2=KinectOne; 3=BinaryDumpReader; 4=NetworkSensor; 5=IntelSensor; 6=RealSense; 7=StructureSensor; 8=SensorDataReader (for offline processing)
s_sensorIdx = 1;

...

s_hashNumBuckets = 800000;				//smaller voxels require more space
s_hashNumSDFBlocks = 100000;//100000;	//smaller voxels require more space
然后就可以运行了
10、运行结果:

至此,该算法配置完成!


 497
497


 被折叠的 条评论
为什么被折叠?
被折叠的 条评论
为什么被折叠?
 到【灌水乐园】发言


