


 本文详细描述了智慧工地系统中的各种UI界面制作,如主UI、车辆情况UI、数据中心UI等,涉及滚动文字、图片、视频播放、进度条和滑动条等功能。同时介绍了如何通过代码实现小车和吊机的移动控制,以及角色视角跟随的UI显示和漫游功能的制作过程。
智慧工地系统
制作主UI
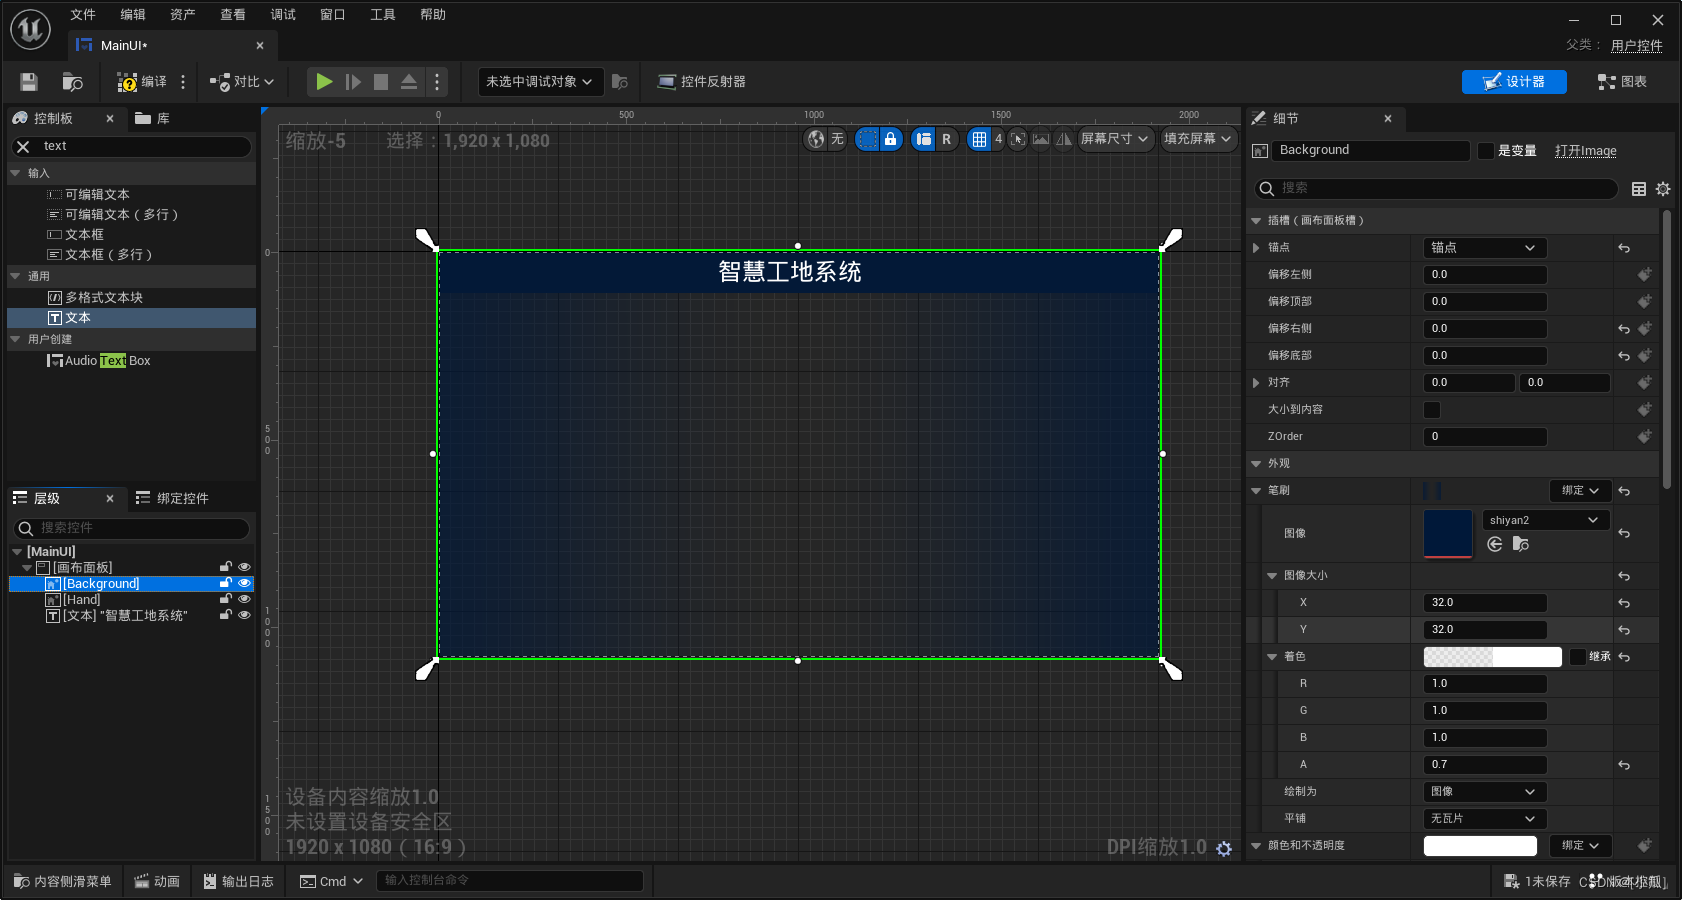


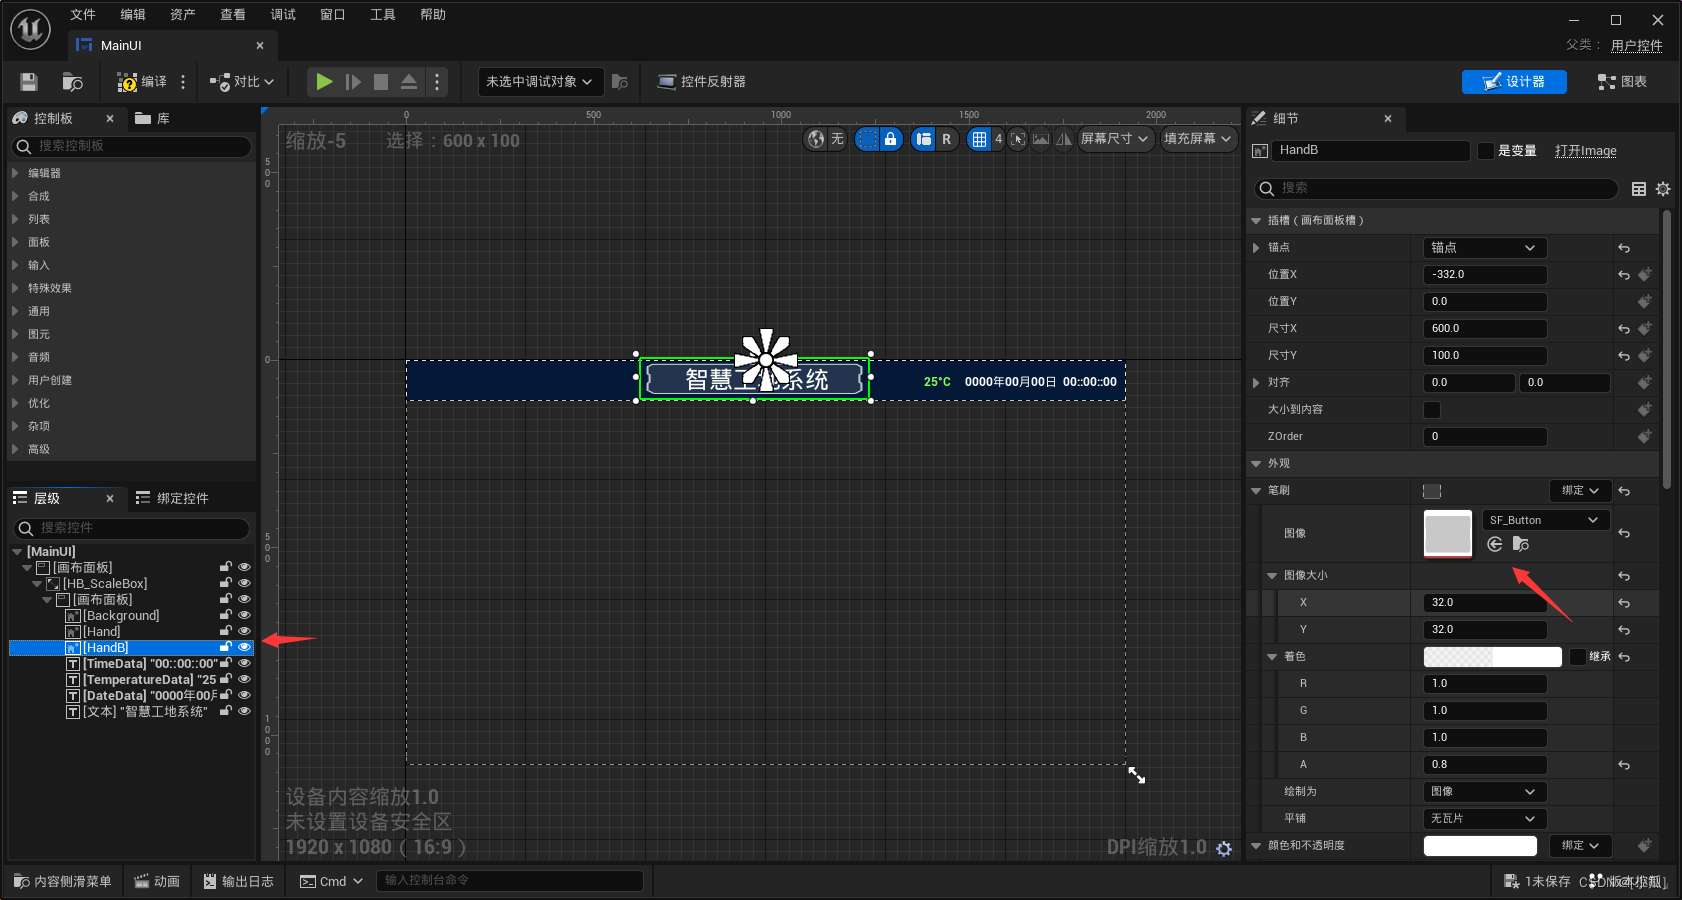
日期时间UI制作
- 添加一个缩放框进行布局用来约束最上面的组件


车辆情况UI制作

工地UI制作

巡查UI制作

能源UI制作

底部按钮UI制作

摄像头UI制作

职工考勤UI制作

监控与咨询UI制作


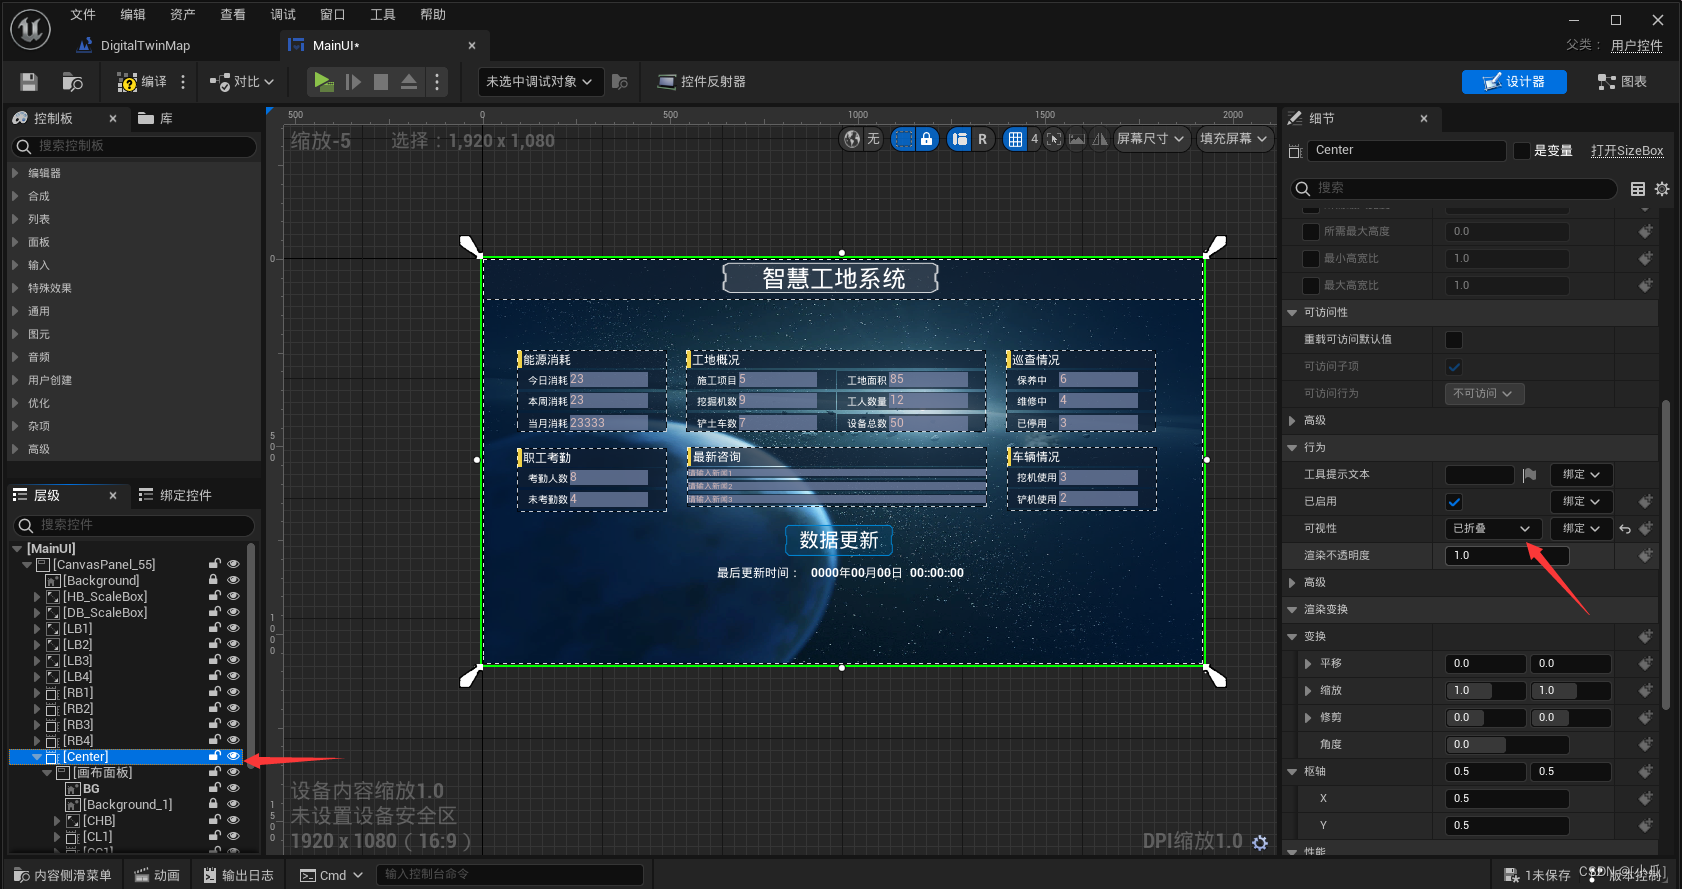
数据中心UI制作


更新当前时间
-
首先将数据中心设置为已折叠
-
然后创建UI与显示鼠标

-
在主UI蓝图中设置调用设置时间节点设置时间
-
Now:返回本地时间与日期
-
As Time与As Data:将传入的时间和日期转换为一个文本,格式为使用不变量时区的日期

-
运行结果

数据中心隐藏与显示
- 当我们点击数据更新时要打开数据中心页面,我们可以设置逻辑当我们点击数据更新按钮时,显示数据中心页面,再次点击隐藏数据中心页面,可以设置一个bool变量默认为true,为真时设置数据中心页面为可视,bool变量为假,为假时设置数据中心页面为已折叠,bool变量为真
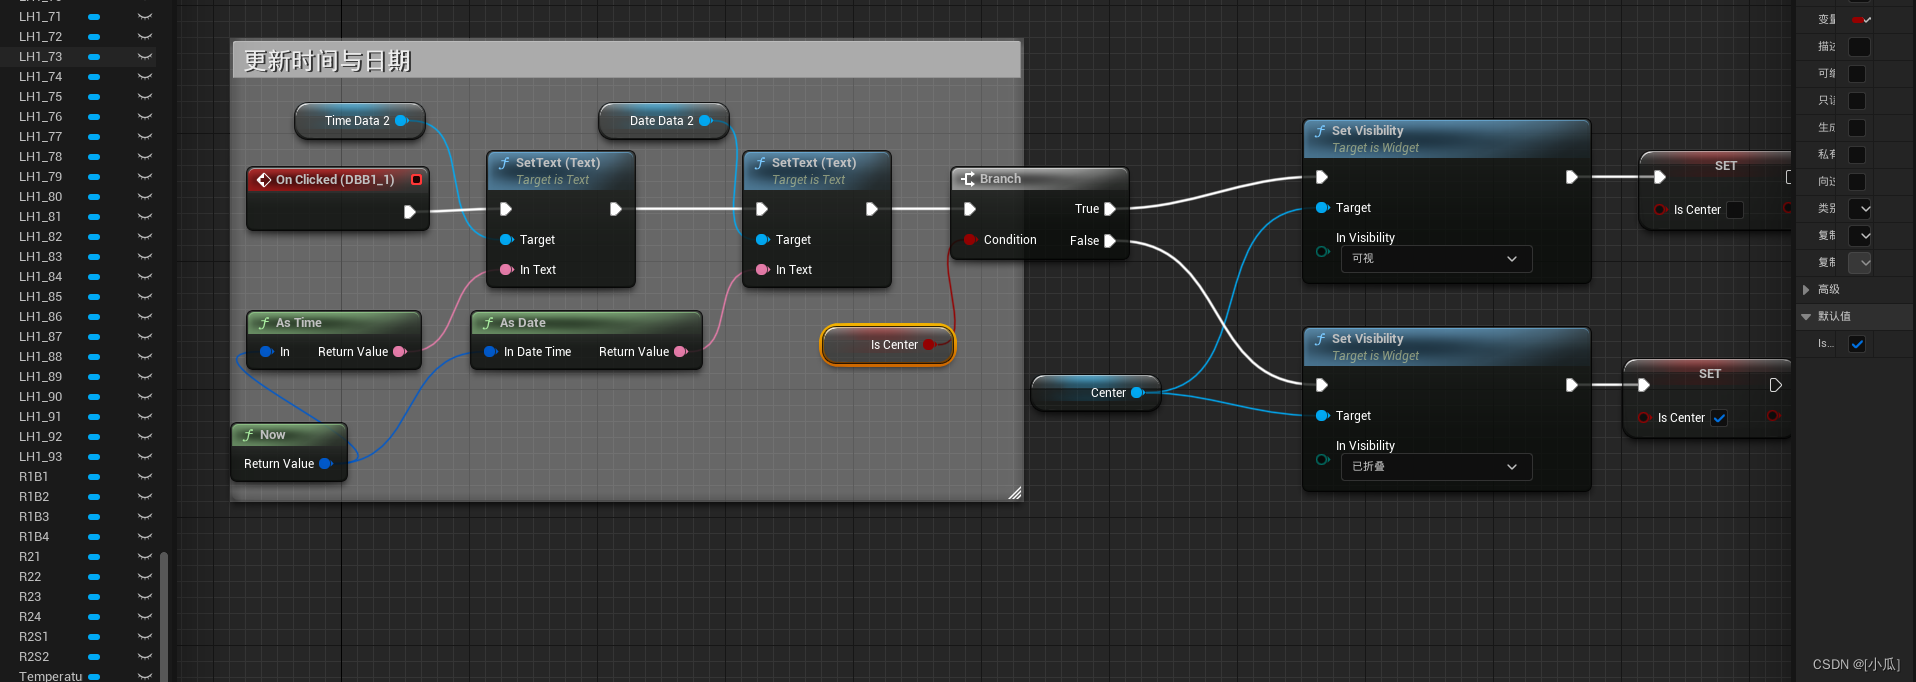
- 当点击智慧中心时,隐藏左边和右边的UI,也是差不多的逻辑,我们添加一个canvas包含左右两边的UI,就可以只需要隐藏这个canvas达到效果


滚动文字制作
- 制作工程介绍的UI

- 然后设置文字滚动,在Tick里面使用设置滚动偏移节点来控制,这个节点需要一个float变量来控制偏移速率,
新建一个float变量用来控制偏移速度,新建一个bool来跳出偏移的结束与开始,当bool为假的时候我们开始偏移float变量加加,偏移大于一个值就将bool设置为真,也就是把这个数值返回给bool也算是偷个懒,因为这个值必定为真,这个值也是一个开始回滚的阀值,bool为真后就进行向上回滚也就是那个阀值减减,一直减到那个阀值为0了给bool变量就会是0了,bool变量就会为假,又开始回滚向下了

- 然后隐藏这个UI,只有点击工程介绍的时候才会出现这个UI界面

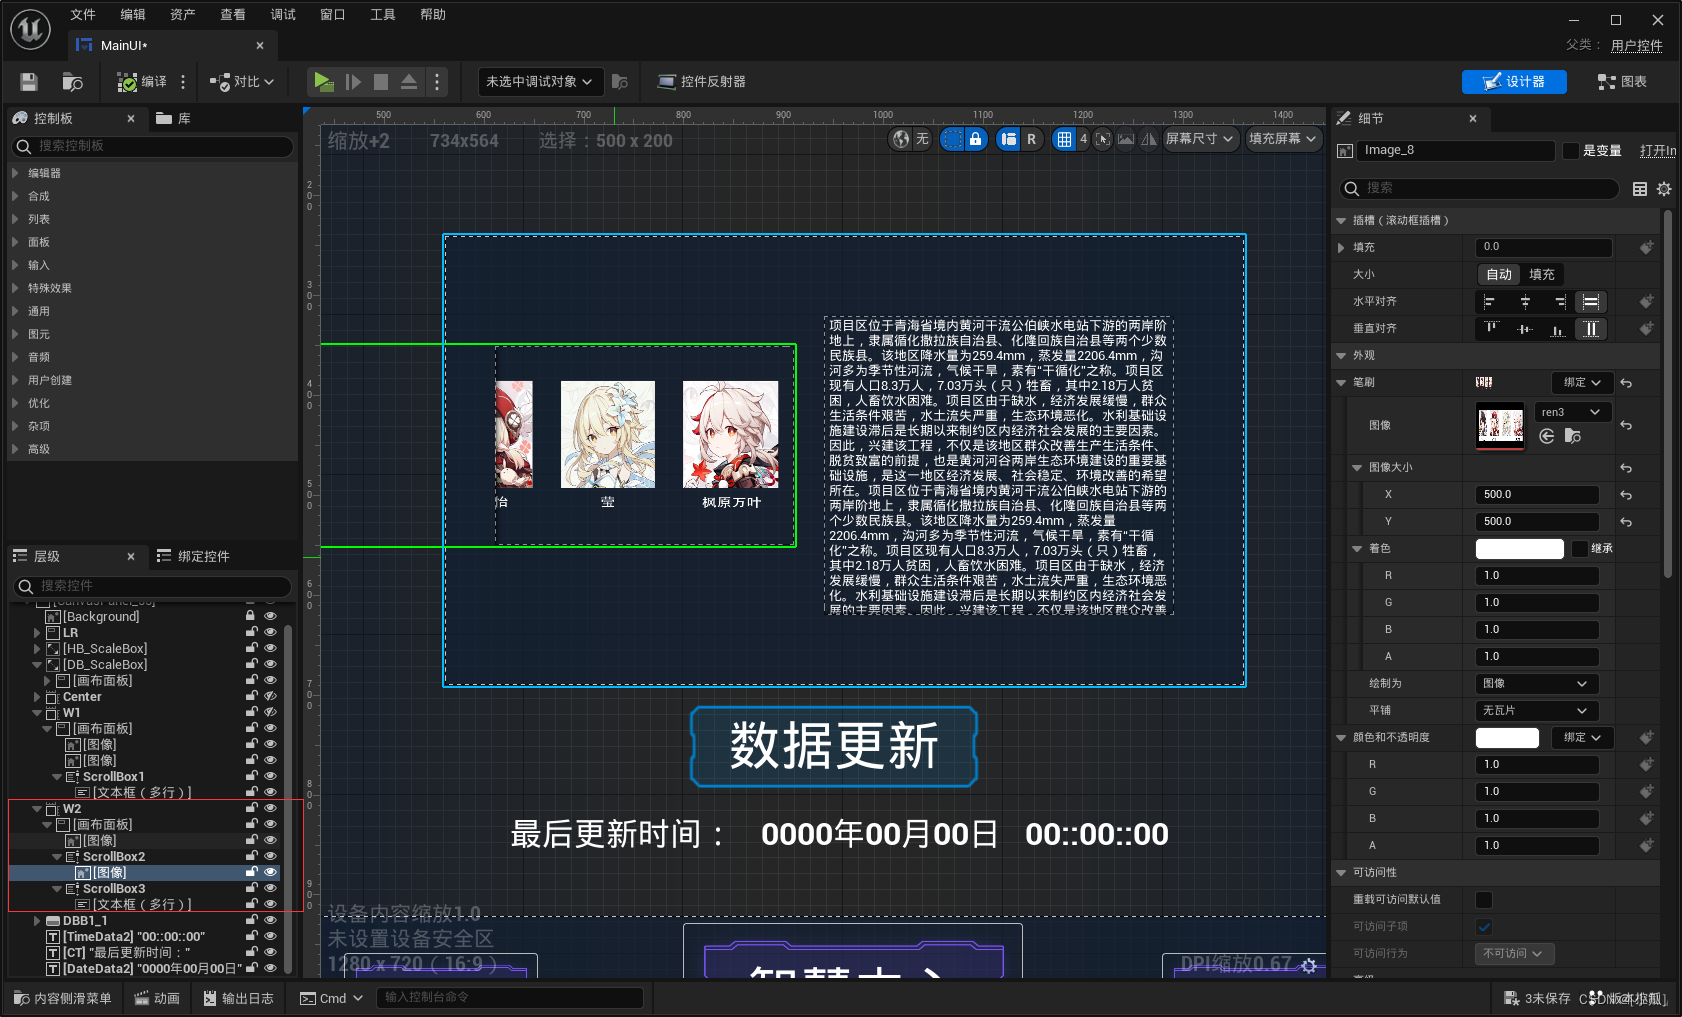
滚动图片制作
-
制作公司介绍的UI
-
然后隐藏这个UI,只有点击公司介绍的时候才会出现这个UI界面,点击这个公司介绍时不能打开着其他UI界面

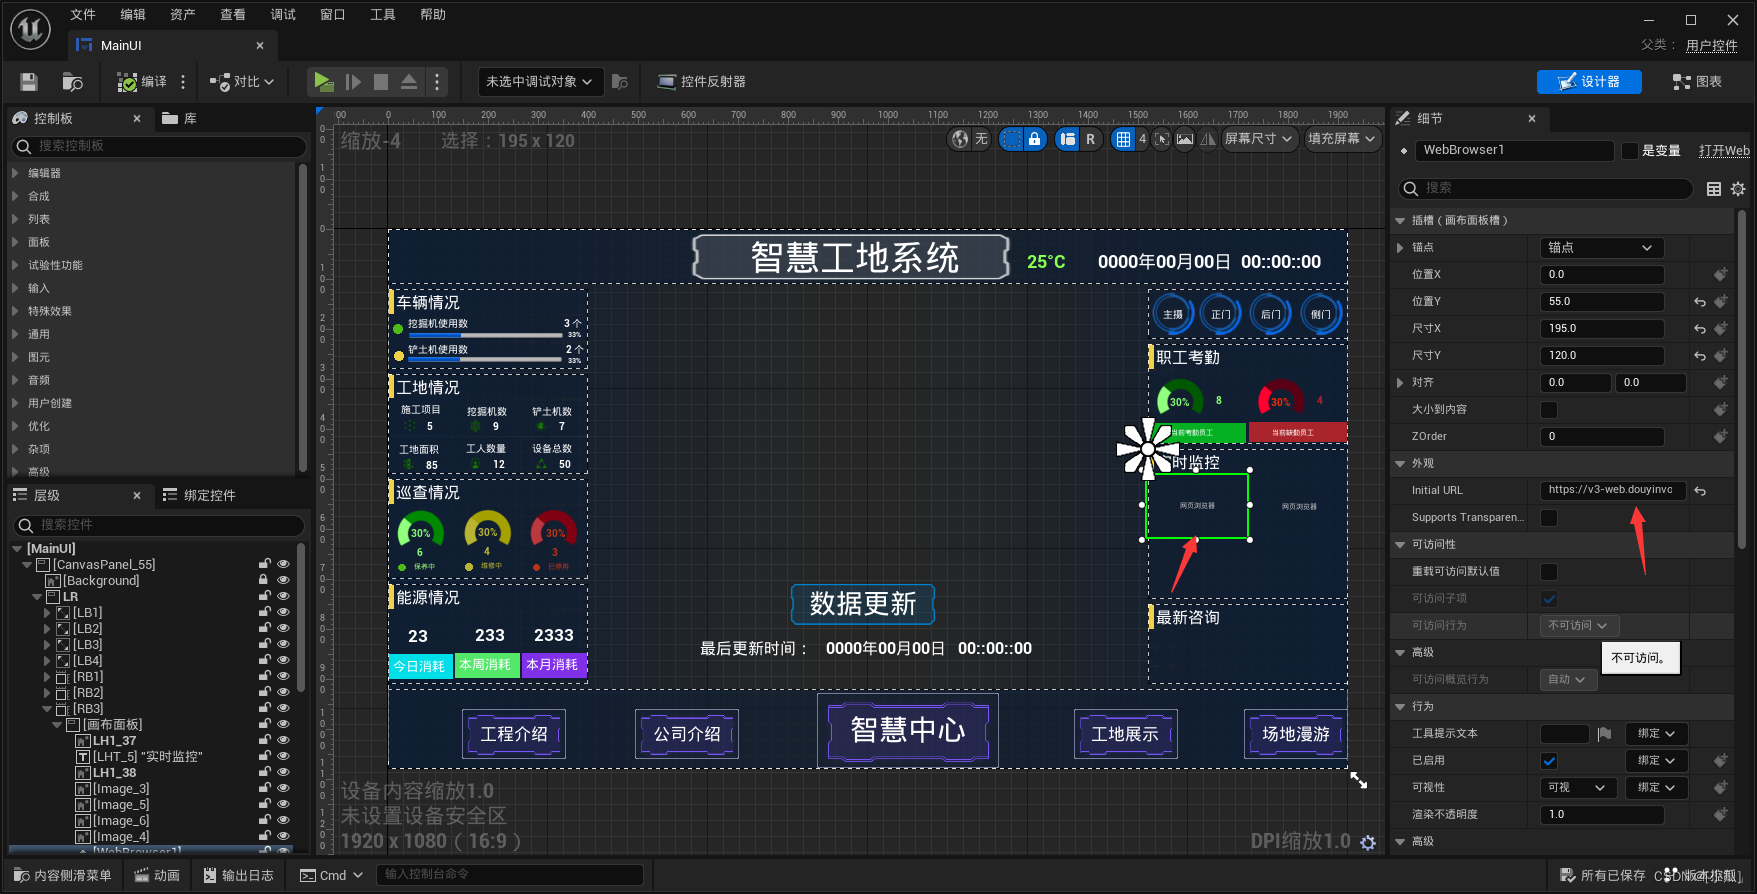
实时监控视频播放
- 首先要添加Web Browser这个插件

- 当然这个Web Browser版本有点老需要更新一下,才能使用目前市面上的主流视频,将这个文件复制到虚幻目录下替换一下Engine目录即可


- 添加外部浏览器组件

滚动新闻制作
- 和滚动图片是一样的,还可以直接在蓝图中复用


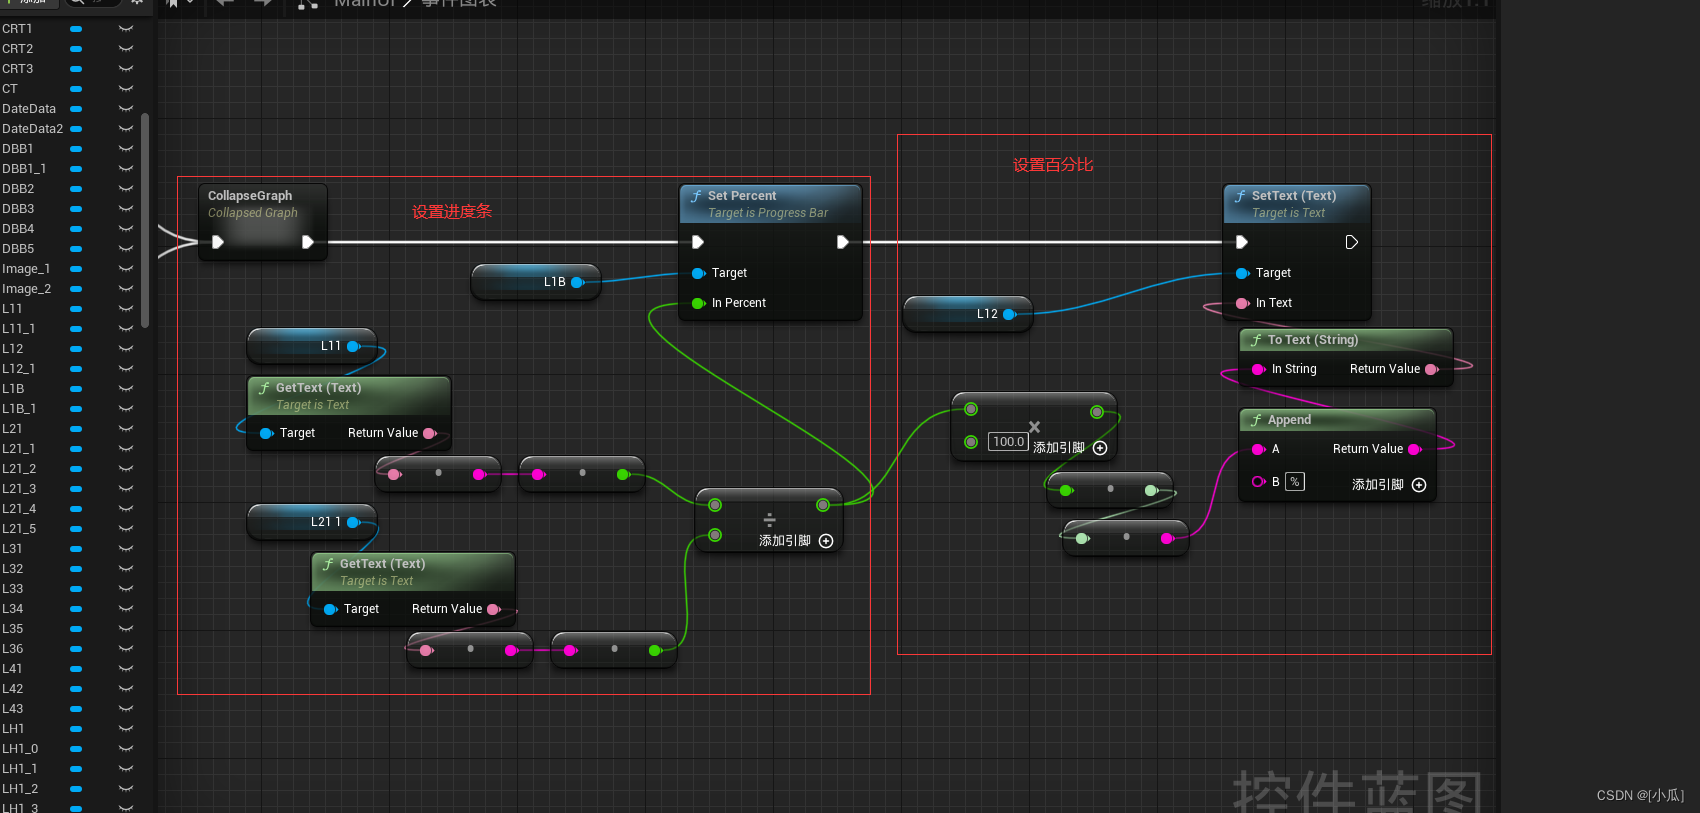
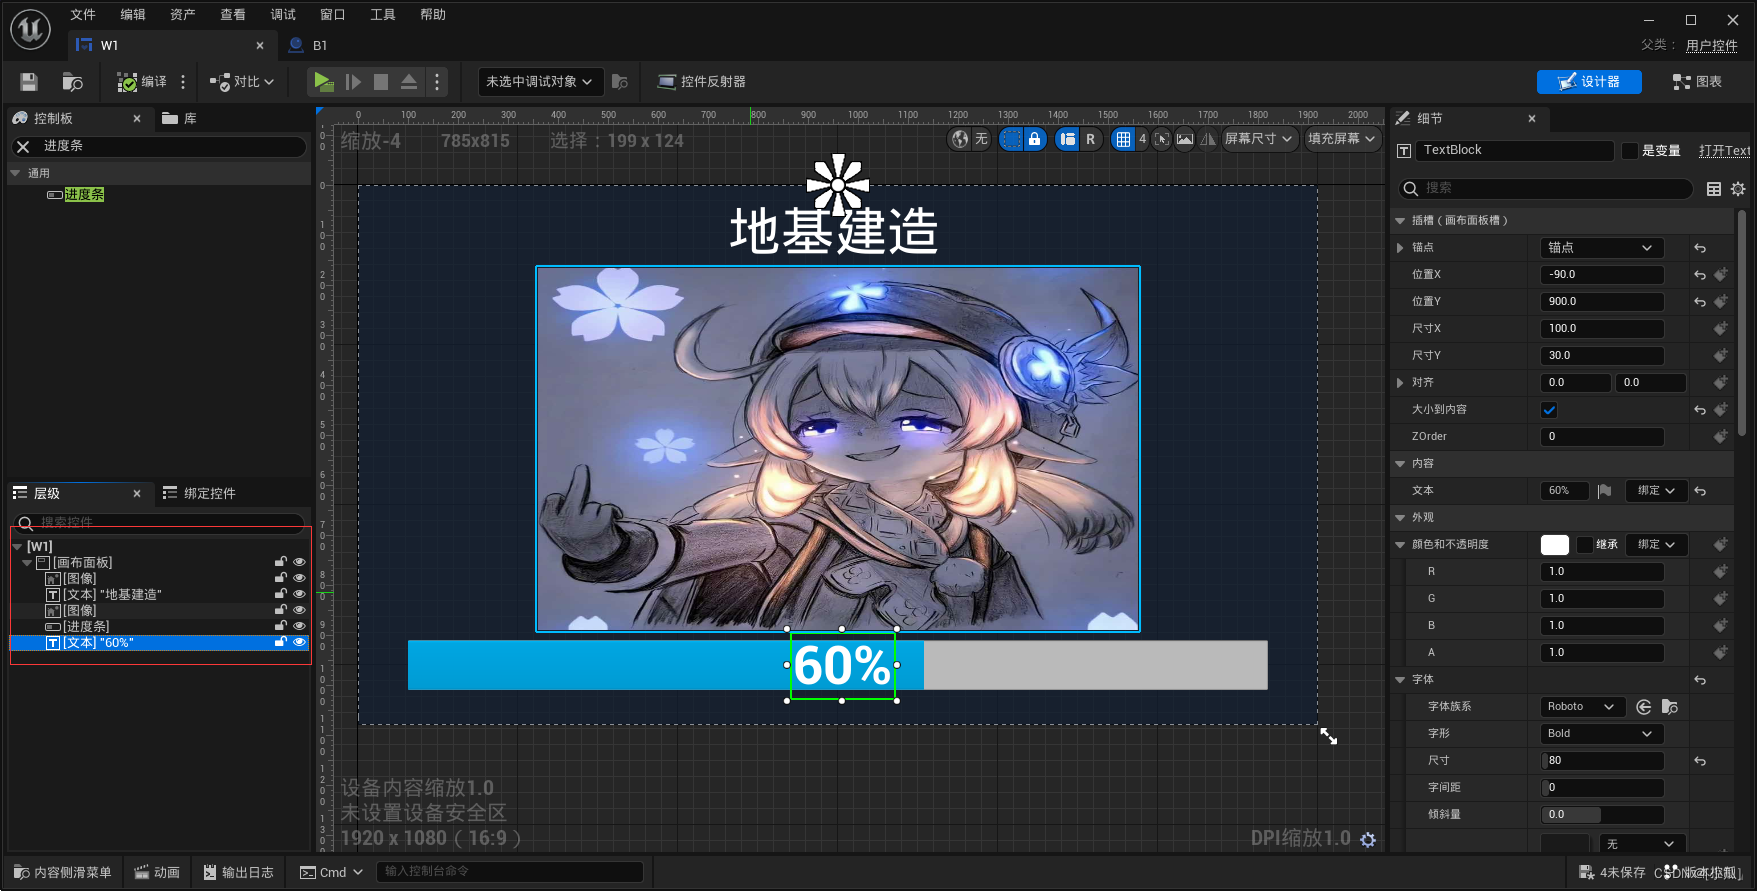
进度条制作
- 进度条的数据等于当前使用的数据/总数据
滑动条制作
- 和进度条差不多只不过设置节点函数是滑动条的,用当前情况/设备总数就是滑动条数据

数据与数据中心的联系
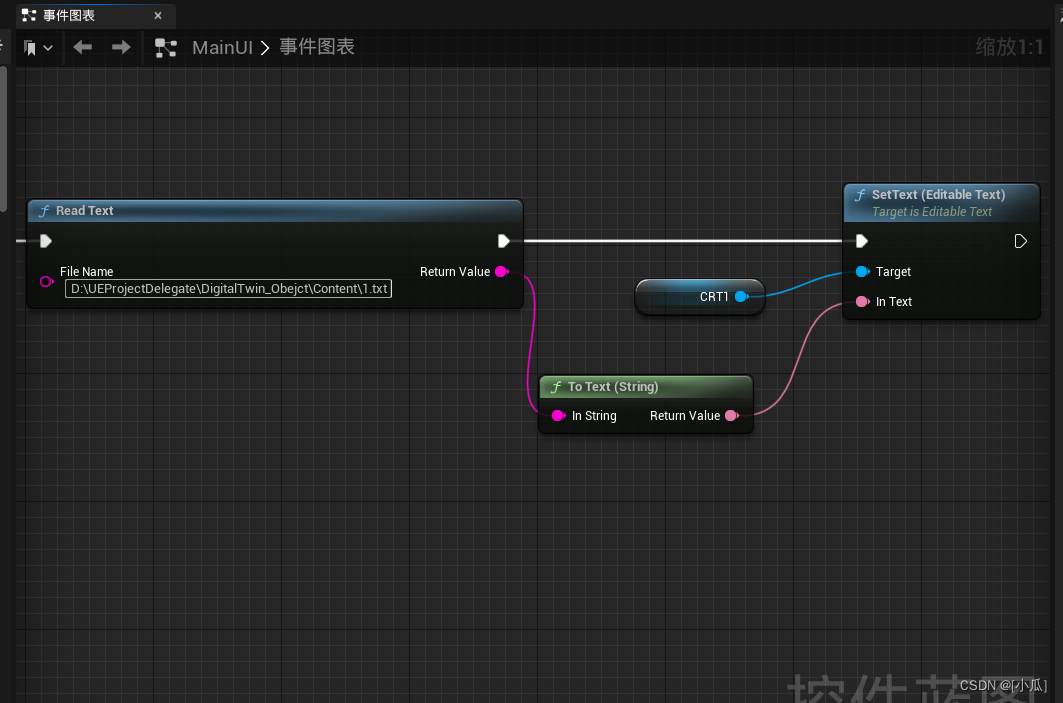
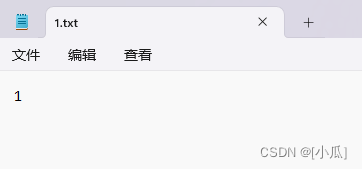
- 因为只是个示例,我们通过读取本地txt读写数据进行与数据中心UI界面联系
- 创建一个蓝图函数库类,创建一个写入函数与读入函数
#include <RunTime\Core\Public\Misc\FileHelper.h>:这是虚幻自带的会提供一些文件的函数,这个是添加在.h文件中,.cpp文件中也加这个头文件.cpp中还要添加头文件#include <Runtime\Core\Public\HAL\FileManagerGeneric.h>:提供一些基础的文件操作#include <Runtime\Core\Public\HAL\PlatformFilemanager.h>:用于管理不同平台的文件夹一些操作#include "Containers/UnrealString.h":处理虚幻的字符串的一些操作
MyBlueprintFunctionLibrary.h
// Fill out your copyright notice in the Description page of Project Settings.

#pragma once

#include "CoreMinimal.h"
#include "Kismet/BlueprintFunctionLibrary.h"
#include <RunTime\Core\Public\Misc\FileHelper.h>
#include "MyBlueprintFunctionLibrary.generated.h"

/**
 *
 */
UCLASS()
class DIGITALTWIN_OBEJCT_API UMyBlueprintFunctionLibrary : public UBlueprintFunctionLibrary
{
	GENERATED_BODY()
public:
	//读取Text文件
	UFUNCTION(BlueprintCallable)
	static FString ReadText(FString FileName);

	//写入Text文件
	UFUNCTION(BlueprintCallable)
	static bool WriteText(FString Content, FString Path);
};
MyBlueprintFunctionLibrary.cpp
- LoadFileToString:读取文件文本
- SaveStringToFile:写入文本到文件
// Fill out your copyright notice in the Description page of Project Settings.


#include "MyBlueprintFunctionLibrary.h"
#include <RunTime\Core\Public\Misc\FileHelper.h>
#include <Runtime\Core\Public\HAL\FileManagerGeneric.h>
#include <Runtime\Core\Public\HAL\PlatformFilemanager.h>
#include "Containers/UnrealString.h"
FString UMyBlueprintFunctionLibrary::ReadText(FString FileName)
{
	FString ResultString;
	//读取文本文件
	FFileHelper::LoadFileToString(ResultString, *(FileName));
	return ResultString;
}

bool UMyBlueprintFunctionLibrary::WriteText(FString Content, FString Path)
{
	bool Result;
	//写入内容
	Result = FFileHelper::SaveStringToFile(Content, *(Path));
	return Result;
}

- 运行结果


- 全部逻辑


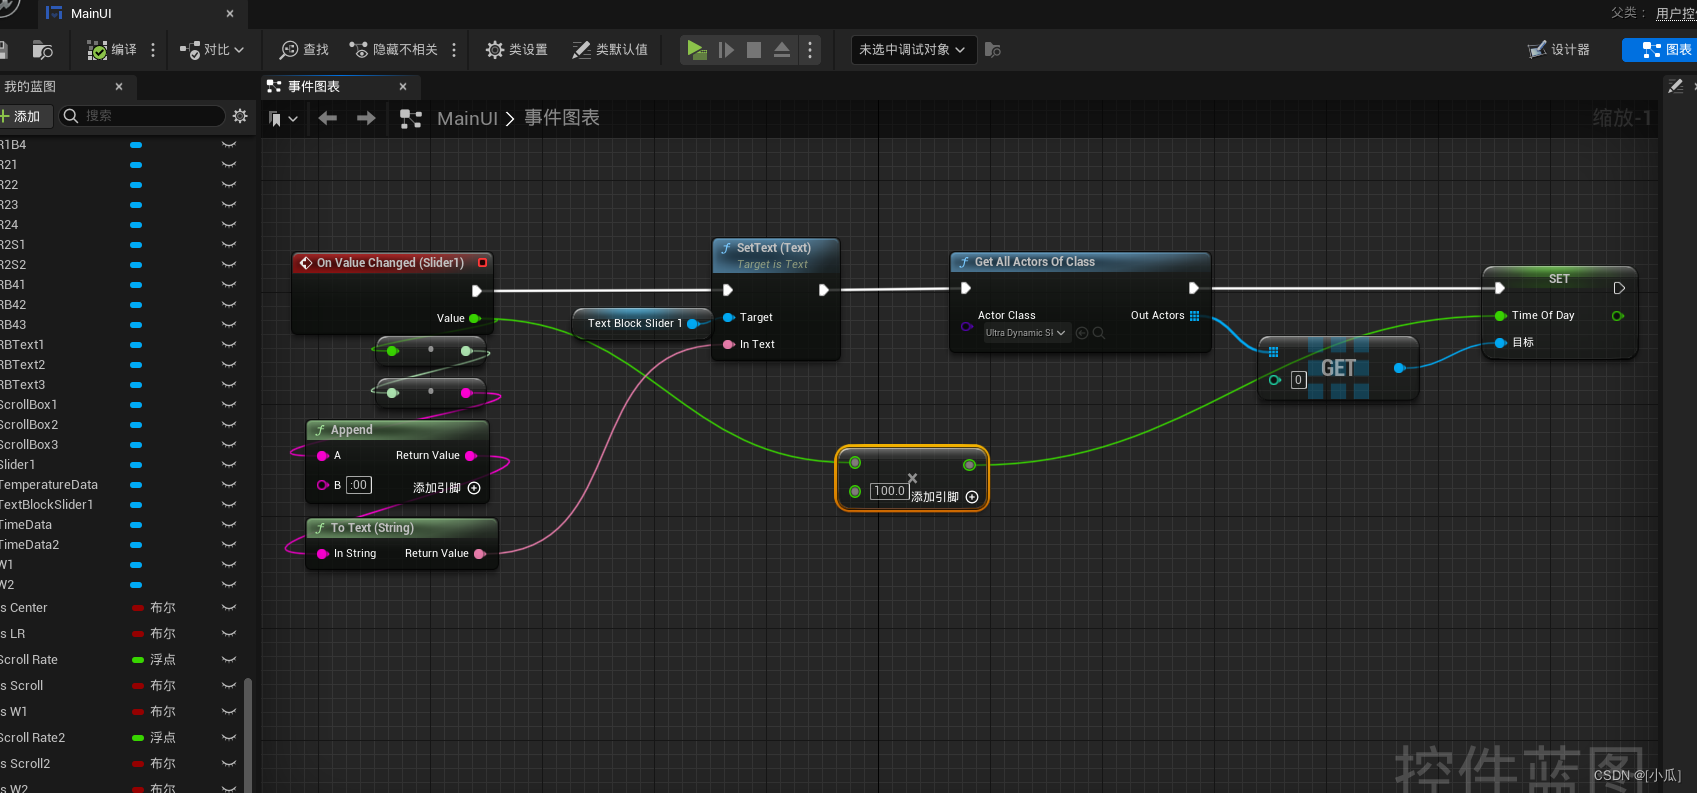
滑动条控制时间
- 下载UltraDynamicSky这个插件,注意对应版本,添加插件里面的天气与天空蓝图替换UE自动生成的

- 新建一个滑条用来控制天空日出日落,开启滑条以鼠标使用步控制无小数的情况

- 逻辑获取到那个控件的蓝图,设置它里面的Time Of Day,以达到控制时间的目的
控制天气制作
-
制作UI

-
逻辑

使小车与吊机动起来
小车
- 导入场景,然后新建一个Actor类来写移动逻辑新建一个静态网格,然后建立两个三维向量的变量一个表示起点,一个表示终点,终点要添加
meta = MakeEditWidger = true属性,添加一个速度变量,因为要使用定时器,添加延迟时间,时间句柄以及bool变量是否开启插值计算和一个表示距离的变量
	UPROPERTY(VisibleAnywhere, Category = "Properties")
	class UStaticMeshComponent* MyMesh;

	UPROPERTY(VisibleAnywhere, BlueprintReadWrite, Category = "Car")
	FVector StartPoint{};

	UPROPERTY(EditAnywhere, BlueprintReadWrite, Category = "Car", meta = (MakeEditWidget = "true"))
	FVector EndPoint {};

	UPROPERTY(EditAnywhere, BlueprintReadWrite, Category = "Car")
	float Speed {};

	UPROPERTY(EditAnywhere, Category = "Car")
	float DelayTime;

	FTimerHandle InterpTimerHandle;
	bool bInterping;
	float Distance;
-
注意
meta = MakeEditWidger = true属性是与Actor自身的相对位置,也就是说在场景中小车所在这个位置与属性所在那个位置是相对Actor来言的,并不是世界位置

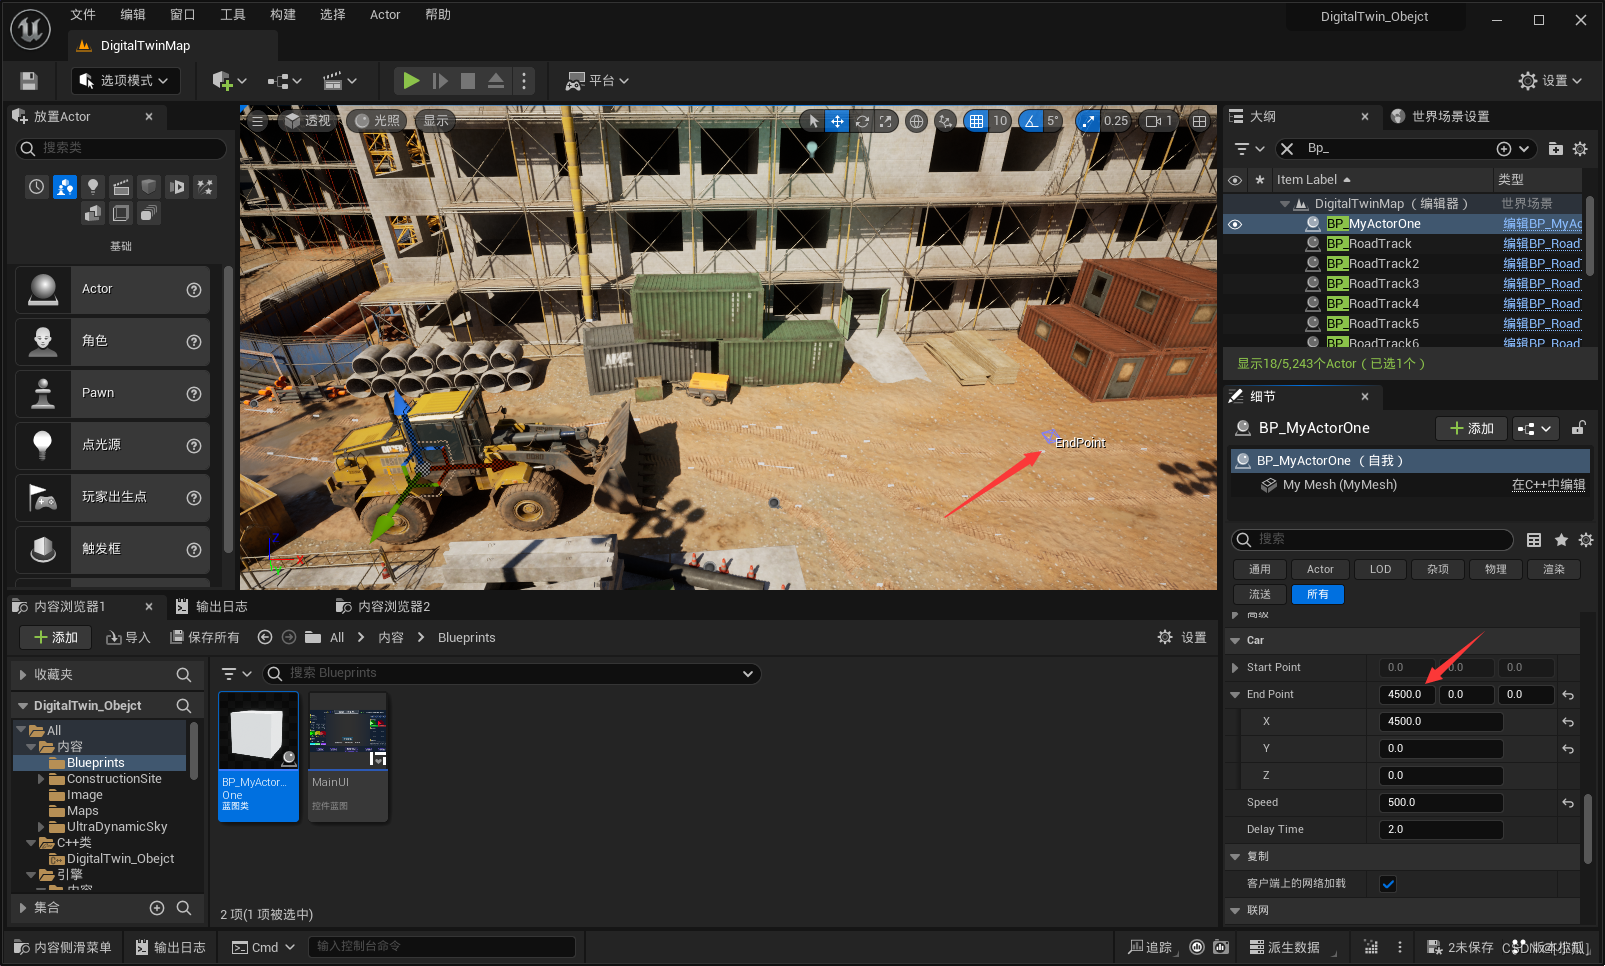
-
实际上属性的位置在这里,也就是属性位置加上原本Actor位置,不要被表明的属性那个标位所误导

-
使小车来回移动逻辑:初始化速度与来回时间与是否插值一开始为真,然后获取Actor起点与终点世界位置
	Speed = 2.f;
	DelayTime = 2.0f;
	bInterping = true;

// Called when the game starts or when spawned
void AMyActorOne::BeginPlay()
{
	Super::BeginPlay();

	//获取Actor的世界位置
	StartPoint = GetActorLocation();
	Distance = EndPoint.Size();
	EndPoint += StartPoint;
}
- 在Tick中开始抒写逻辑获取当前Actor位置,进行向终点插值,设置移动到的新位置,然后新建一个新距离点,这个距离点实时更新当前位置距离开始位置的距离,判断终点距离减去当前这个距离小于一个很小的距离的时候,说明已经到达终点,是否插值变量为假,开启定时器,进行延迟插值,定时器里面的判断函数就是将是否插值变量为真,为什么这样因为已经到终点了是否插值已经为假取消插值了,定时器延迟秒到了后再次开启插值,最后交换终点与起点位置即可。
// Called every frame
void AMyActorOne::Tick(float DeltaTime)
{
	Super::Tick(DeltaTime);
	FVector CurrentLocation = GetActorLocation();
	FVector NewLocation = FMath::VInterpConstantTo(CurrentLocation, EndPoint, DeltaTime, Speed);
	SetActorLocation(NewLocation);//移动到新位置

	float NewDistance = (GetActorLocation() - StartPoint).Size();

	if (Distance - NewDistance <= 0.5f)
	{
		bInterping = !bInterping;

		//Lambda表达式
		auto InterpState = [this]()
		{
			bInterping = !bInterping;
		};

		//开启定时器
		GetWorldTimerManager().SetTimer(InterpTimerHandle, FTimerDelegate::CreateLambda(InterpState), DelayTime, false);

		//交换起点与终点
		FVector temp = StartPoint;
		StartPoint = EndPoint;
		EndPoint = temp;
	}
}
- 将这个小车附加到我们写好的这个Actor上即可
MyActorOne.h
// Fill out your copyright notice in the Description page of Project Settings.

#pragma once

#include "CoreMinimal.h"
#include "GameFramework/Actor.h"
#include "MyActorOne.generated.h"

UCLASS()
class DIGITALTWIN_OBEJCT_API AMyActorOne : public AActor
{
	GENERATED_BODY()

public:
	// Sets default values for this actor's properties
	AMyActorOne();

	UPROPERTY(VisibleAnywhere, Category = "Properties")
	class UStaticMeshComponent* MyMesh;

	UPROPERTY(VisibleAnywhere, BlueprintReadWrite, Category = "Car")
	FVector StartPoint{};

	UPROPERTY(EditAnywhere, BlueprintReadWrite, Category = "Car", meta = (MakeEditWidget = "true"))
	FVector EndPoint {};

	UPROPERTY(EditAnywhere, BlueprintReadWrite, Category = "Car")
	float Speed {};

	UPROPERTY(EditAnywhere, Category = "Car")
	float DelayTime;

	FTimerHandle InterpTimerHandle;
	bool bInterping;
	float Distance;

protected:
	// Called when the game starts or when spawned
	virtual void BeginPlay() override;

public:
	// Called every frame
	virtual void Tick(float DeltaTime) override;

};
MyActorOne.cpp
// Fill out your copyright notice in the Description page of Project Settings.


#include "MyActorOne.h"
#include "UObject/ConstructorHelpers.h"
#include "Components/StaticMeshComponent.h"
#include "TimerManager.h"
// Sets default values
AMyActorOne::AMyActorOne()
{
 	// Set this actor to call Tick() every frame.  You can turn this off to improve performance if you don't need it.
	PrimaryActorTick.bCanEverTick = true;
	MyMesh = CreateDefaultSubobject<UStaticMeshComponent>(TEXT("MyMesh"));
	RootComponent = MyMesh;

	ConstructorHelpers::FObjectFinder<UStaticMesh> StaticMeshAsset(TEXT("/Script/Engine.StaticMesh'/Engine/EngineMeshes/Cube.Cube'"));
	ConstructorHelpers::FObjectFinder<UMaterialInterface> MaterialAsset(TEXT("/Script/Engine.Material'/Engine/BasicShapes/BasicShapeMaterial.BasicShapeMaterial'"));
	if (StaticMeshAsset.Succeeded() && MaterialAsset.Succeeded())
	{
		MyMesh->SetStaticMesh(StaticMeshAsset.Object);
		MyMesh->SetMaterial(0, MaterialAsset.Object);
	}

	Speed = 2.f;
	DelayTime = 2.0f;
	bInterping = true;
}

// Called when the game starts or when spawned
void AMyActorOne::BeginPlay()
{
	Super::BeginPlay();

	//获取Actor的世界位置
	StartPoint = GetActorLocation();
	Distance = EndPoint.Size();
	EndPoint += StartPoint;

}

// Called every frame
void AMyActorOne::Tick(float DeltaTime)
{
	Super::Tick(DeltaTime);
	FVector CurrentLocation = GetActorLocation();
	FVector NewLocation = FMath::VInterpConstantTo(CurrentLocation, EndPoint, DeltaTime, Speed);
	SetActorLocation(NewLocation);//移动到新位置

	float NewDistance = (GetActorLocation() - StartPoint).Size();

	if (Distance - NewDistance <= 0.5f)
	{
		bInterping = !bInterping;

		//Lambda表达式
		auto InterpState = [this]()
		{
			bInterping = !bInterping;
		};

		//开启定时器
		GetWorldTimerManager().SetTimer(InterpTimerHandle, FTimerDelegate::CreateLambda(InterpState), DelayTime, false);

		//交换起点与终点
		FVector temp = StartPoint;
		StartPoint = EndPoint;
		EndPoint = temp;
	}
}
吊机
- 新建一个Actor编写逻辑使吊机进行转向
- 新将要移动材质添加到一个组
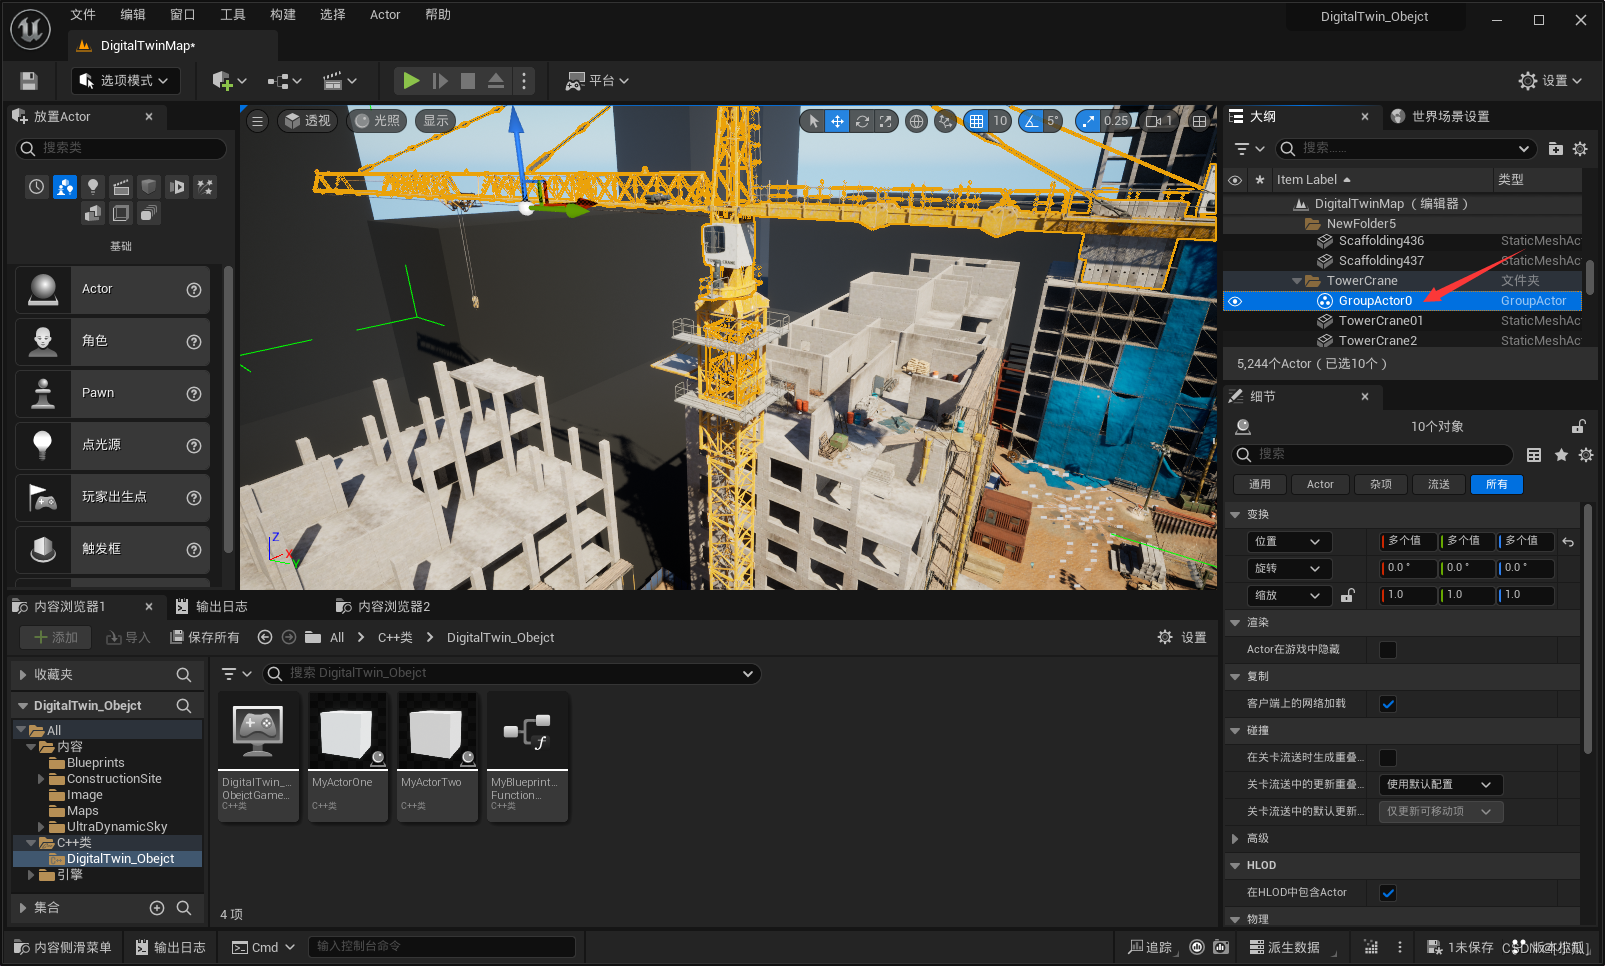
- 然后将组的控制移动到吊机中间,鼠标中建进行移动
- 逻辑:使用一个标识位进行判断转向,当Actor的Yaw大于九十时与小于九十时就行Yaw的减与加即可
	UPROPERTY(EditAnywhere, Category = "Car")
	float RotationRate;

	int a;//标识位
// Called every frame
void AMyActorTwo::Tick(float DeltaTime)
{
	Super::Tick(DeltaTime);

	FRotator CurrentRotation = GetActorRotation();
	if (CurrentRotation.Yaw > 90.f)
	{
		a = 1;
	}
	else if (CurrentRotation.Yaw < -90.f)
	{
		a = 2;
	}
	if (a == 1)
	{
		CurrentRotation = FRotator(CurrentRotation.Pitch, CurrentRotation.Yaw - RotationRate * DeltaTime, CurrentRotation.Roll);
		SetActorRotation(CurrentRotation);
	}
	if (a == 2)
	{
		CurrentRotation = FRotator(CurrentRotation.Pitch, CurrentRotation.Yaw + RotationRate * DeltaTime, CurrentRotation.Roll);
		SetActorRotation(CurrentRotation);
	}
}
MyActorTwo.h
// Fill out your copyright notice in the Description page of Project Settings.

#pragma once

#include "CoreMinimal.h"
#include "GameFramework/Actor.h"
#include "MyActorTwo.generated.h"

UCLASS()
class DIGITALTWIN_OBEJCT_API AMyActorTwo : public AActor
{
	GENERATED_BODY()

public:
	// Sets default values for this actor's properties
	AMyActorTwo();
	UPROPERTY(VisibleAnywhere, Category = "Properties")
	class UStaticMeshComponent* MyMesh;

	UPROPERTY(EditAnywhere, Category = "Car")
	float RotationRate;

	int a;//标识位
protected:
	// Called when the game starts or when spawned
	virtual void BeginPlay() override;

public:
	// Called every frame
	virtual void Tick(float DeltaTime) override;

};
MyActorTwo.cpp
// Fill out your copyright notice in the Description page of Project Settings.


#include "MyActorTwo.h"
#include "UObject/ConstructorHelpers.h"
#include "Components/StaticMeshComponent.h"
// Sets default values
AMyActorTwo::AMyActorTwo()
{
 	// Set this actor to call Tick() every frame.  You can turn this off to improve performance if you don't need it.
	PrimaryActorTick.bCanEverTick = true;
	MyMesh = CreateDefaultSubobject<UStaticMeshComponent>(TEXT("MyMesh"));
	RootComponent = MyMesh;

	ConstructorHelpers::FObjectFinder<UStaticMesh> StaticMeshAsset(TEXT("/Script/Engine.StaticMesh'/Engine/EngineMeshes/Cube.Cube'"));
	ConstructorHelpers::FObjectFinder<UMaterialInterface> MaterialAsset(TEXT("/Script/Engine.Material'/Engine/BasicShapes/BasicShapeMaterial.BasicShapeMaterial'"));
	if (StaticMeshAsset.Succeeded() && MaterialAsset.Succeeded())
	{
		MyMesh->SetStaticMesh(StaticMeshAsset.Object);
		MyMesh->SetMaterial(0, MaterialAsset.Object);
	}

	RotationRate = 10.f;
}

// Called when the game starts or when spawned
void AMyActorTwo::BeginPlay()
{
	Super::BeginPlay();

}

// Called every frame
void AMyActorTwo::Tick(float DeltaTime)
{
	Super::Tick(DeltaTime);

	FRotator CurrentRotation = GetActorRotation();
	if (CurrentRotation.Yaw > 90.f)
	{
		a = 1;
	}
	else if (CurrentRotation.Yaw < -90.f)
	{
		a = 2;
	}
	if (a == 1)
	{
		CurrentRotation = FRotator(CurrentRotation.Pitch, CurrentRotation.Yaw - RotationRate * DeltaTime, CurrentRotation.Roll);
		SetActorRotation(CurrentRotation);
	}
	if (a == 2)
	{
		CurrentRotation = FRotator(CurrentRotation.Pitch, CurrentRotation.Yaw + RotationRate * DeltaTime, CurrentRotation.Roll);
		SetActorRotation(CurrentRotation);
	}
}
展示工地制作
- 新建一个UI控件,制作要显示的UI
- 新建一个Actor蓝图添加Widget组件,显示我们设计的UI界面

- 编写逻辑,让这个控件随着我们角色视角移动,将这个蓝图添加到场景中即可

- 设置到按钮的隐藏逻辑

场地漫游的制作
- 创建一个玩家出生地

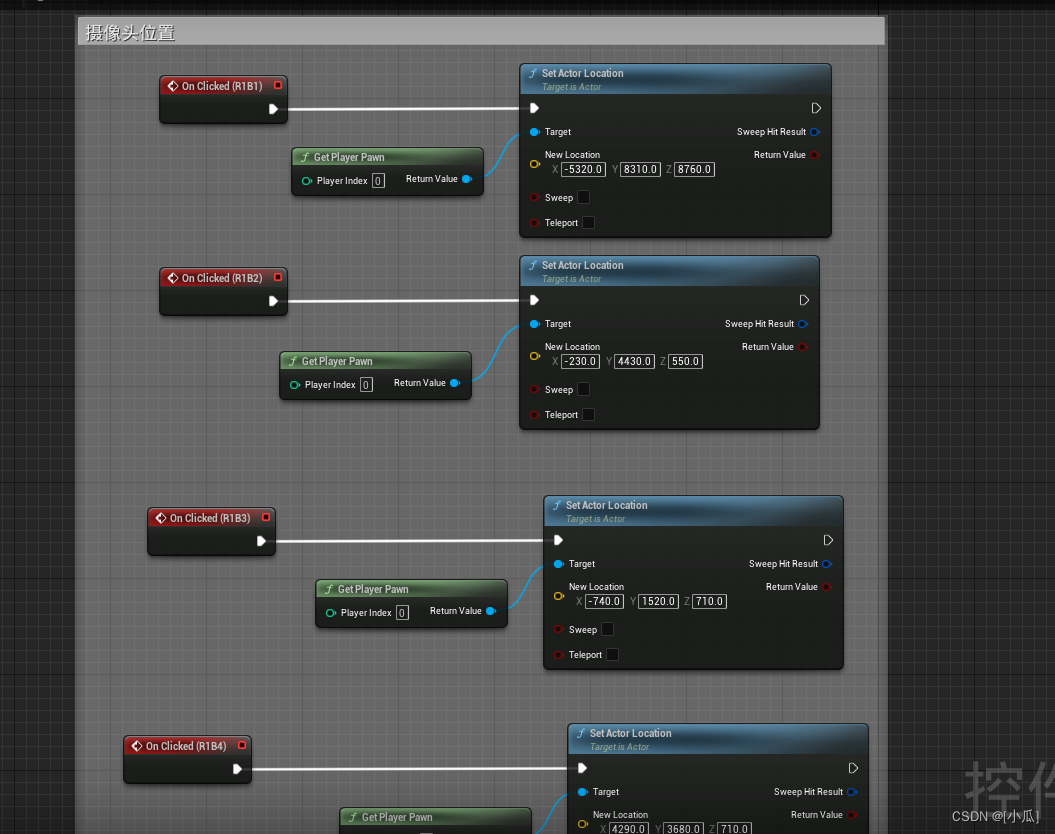
- 编写逻辑,场景漫游与那四个摄像头位置

- 此项目学习来自siki学院人人都能学会的UE5初级数字孪生项目https://www.sikiedu.com/my/course/1517


 3271
3271

 被折叠的 条评论
为什么被折叠?
被折叠的 条评论
为什么被折叠?
 到【灌水乐园】发言


