


想弄一个中心不拉伸的Image
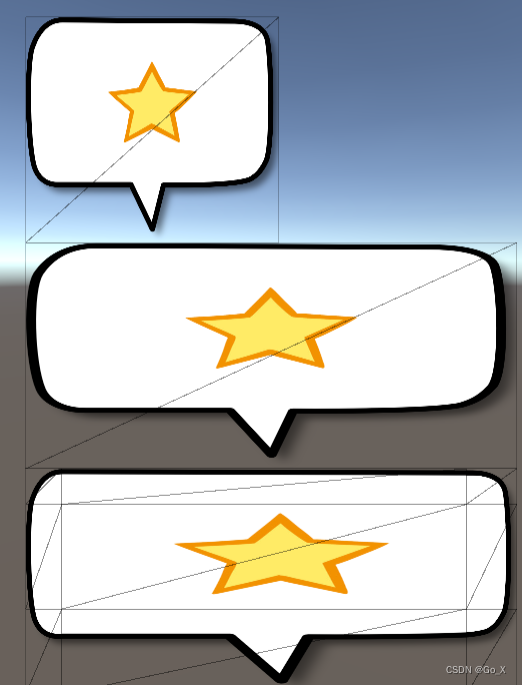
上面的image是NativeSize的图片,中间的是只修改RectTransform尺寸,下面的是修改Image Type到Sliced之后的样子。切换scene到Shaded Wireframe模式,可以看到Sliced模式的图片是由9个四边形拼成的,就是.9图。如果想要一个中间星星不拉伸的图片,应该横竖都分成5片,只拉伸第二和第四区域。
目前是继承Image,也用unity的Sprite Editor来规定可以开始拉伸的区域,然后自定义一个Vector4的centerArea来规定中心固定的区域。
重写OnPopulateMesh方法,如果type == Type.Sliced,画网格。
在Image里,为了生成9-sliced Image,用了长度为4的Vector2的数组来存储顶点位置和uv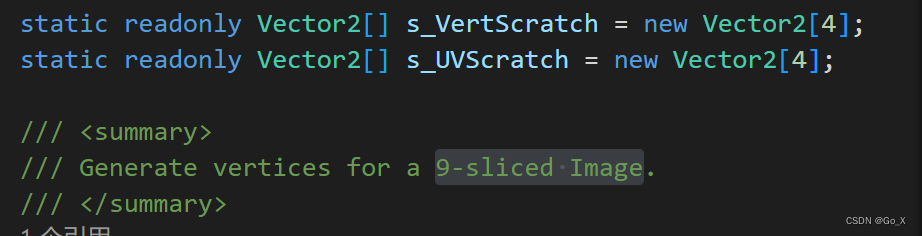
所以到这里应该用长度为6的数组记录这两个信息
   static readonly Vector2[] s_VertScratch = new Vector2[6];
   static readonly Vector2[] s_UVScratch = new Vector2[6];
然后计算图片顶点的位置
  //起点终点
        s_VertScratch[0] = new Vector2(padding.x, padding.y);
        s_VertScratch[5] = new Vector2(rect.width - padding.z, rect.height - padding.w);
        //中心位置
        Vector2 centerPos = (s_VertScratch[5] - s_VertScratch[0]) / 2f;


        //.9开始拉伸位置
        s_VertScratch[1].x = adjustedBorders.x;
        s_VertScratch[1].y = adjustedBorders.y;

        s_VertScratch[4].x = rect.width - adjustedBorders.z;
        s_VertScratch[4].y = rect.height - adjustedBorders.w;

        //中心区域 不变位置
        s_VertScratch[2].x = centerPos.x - sprite.texture.width * (0.5f - centerArea.x);
        s_VertScratch[2].y = centerPos.y - sprite.texture.height * (0.5f - centerArea.y);

        s_VertScratch[3].x = centerPos.x + sprite.texture.width * (centerArea.z - 0.5f);
        s_VertScratch[3].y = centerPos.y + sprite.texture.height * (centerArea.w - 0.5f);
这里暂时用图片中心位置±图片尺寸*uv差值来计算中心位置。
然后uv位置比较简单,直接就是定义的centerArea的值。
  s_UVScratch[0] = new Vector2(outer.x, outer.y);
        s_UVScratch[1] = new Vector2(inner.x, inner.y);
        s_UVScratch[4] = new Vector2(inner.z, inner.w);
        s_UVScratch[5] = new Vector2(outer.z, outer.w);
        s_UVScratch[2] = new Vector2(centerArea.x, centerArea.y);
        s_UVScratch[3] = new Vector2(centerArea.z, centerArea.w);
最后按照顺序添加顶点信息
        for (int x = 0; x < s_UVScratch.Length - 1; ++x)
        {
            int x2 = x + 1;
            for (int y = 0; y < s_UVScratch.Length - 1; ++y)
            {
                if (!fillCenter && x == 2 && y == 2)
                    continue;
                int y2 = y + 1;
                AddQuad(toFill,
                    new Vector2(s_VertScratch[x].x, s_VertScratch[y].y),
                    new Vector2(s_VertScratch[x2].x, s_VertScratch[y2].y),
                    color,
                    new Vector2(s_UVScratch[x].x, s_UVScratch[y].y),
                    new Vector2(s_UVScratch[x2].x, s_UVScratch[y2].y));
            }
        }
注意:这个目前需要规定centerArea的时候,x,y,z,w在中心两侧,并且centerArea的区域在inner里(Sprite Editor里规定的区域)
    //中心区域 应该比编辑器的区域小
        if (centerArea.x < inner.x ||
            centerArea.y < inner.y ||
            centerArea.z > inner.z ||
            centerArea.w > inner.w)
        {
            Debug.LogWarning("centerArea is out of inner");
        }
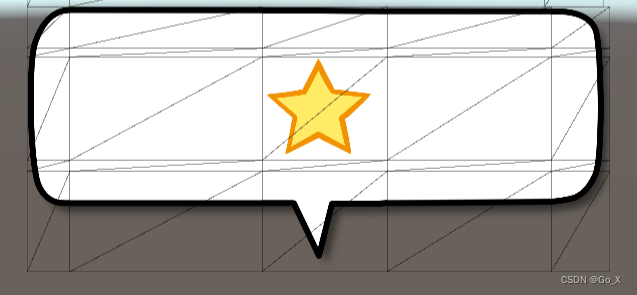
最后效果如下

文件地址
https://gitee.com/go_x/unity-project/blob/master/Assets/CenterFixedImage/CenterFixedImage.cs


 4120
4120

 被折叠的 条评论
为什么被折叠?
被折叠的 条评论
为什么被折叠?
 到【灌水乐园】发言


