


A.1 Initialization
1) Start Groundwater Vistas. The following screen will appear
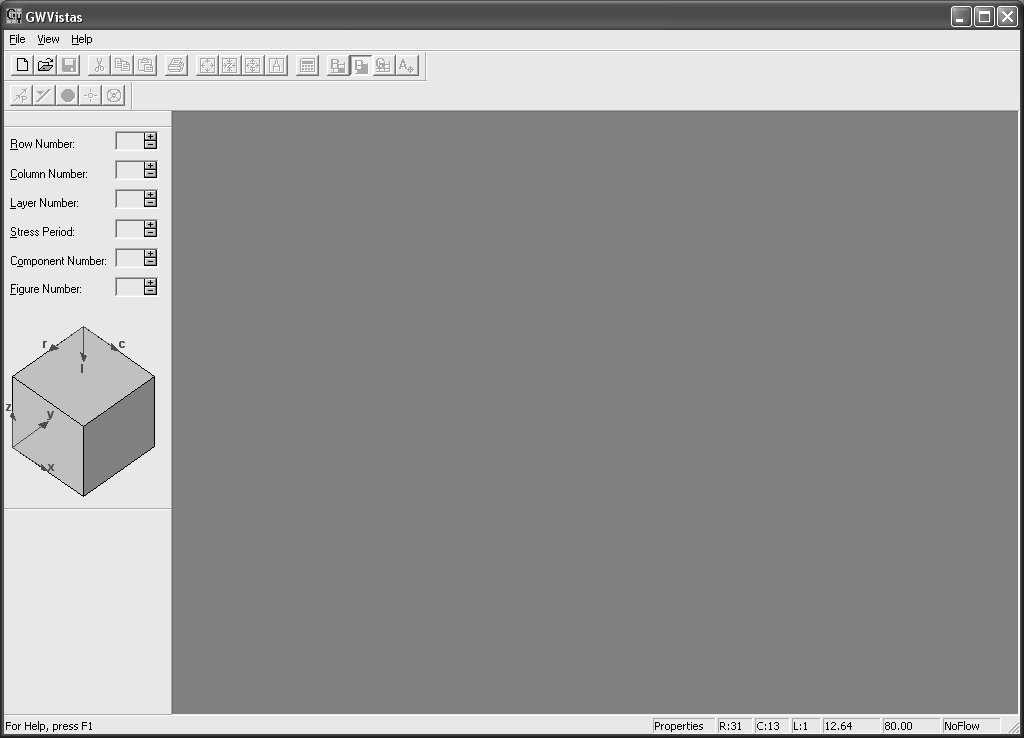
Figure A.1 Groundwater Vistas start-up dialog.
2) Click on “File” menu and click on “New.” This opens a new simulation file.
3) The new simulation file automatically opens an “Initialize Model Grid” dialog.
4) The “Initialize Model Grid” dialog is made up of three sections. (1) Horizontal Grid Information, (2) Vertical Model Grid, and (3) Default Parameter Values.
A.1.1 Horizontal Grid Information
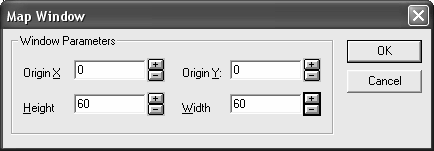
1) Enter a value of 60 for number of rows.
2) Enter a value of 60 for number of columns.
3) Enter a value of 1 ft for Uniform X Spacing.
4) Enter a value of 1 ft for Uniform Y Spacing.
A.1.2 Vertical Model Grid
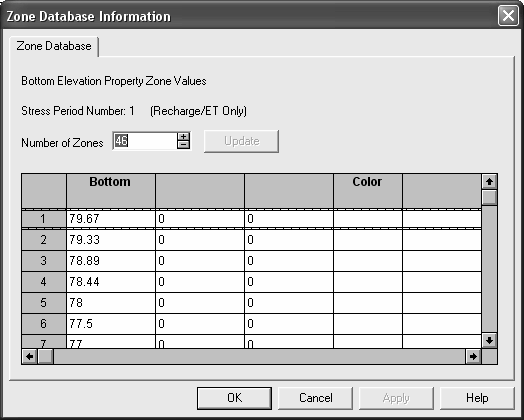
1) Enter a value of 46 for number of layers.
2) Enter a value of 0 ft for Bottom Elevation.
3) Enter a value of 80 ft for Top Elevation.
4) Select the check box next to “Layers are Flat.”
A.1.3 Default Parameters Values
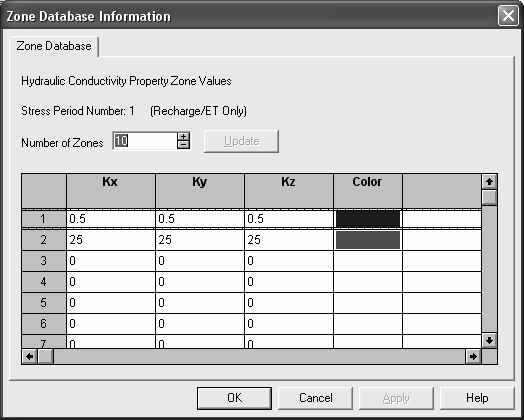
The data regarding the hydraulic conductivity was used from the phase 1 study of the
septic tank drainfield.
Enter a value of 0.5 ft/d for Kx, Ky and Kz . Kx , Ky and Kz stand for hydraulic
conductivity in the X, Y and Z directions respectively in the local soil.
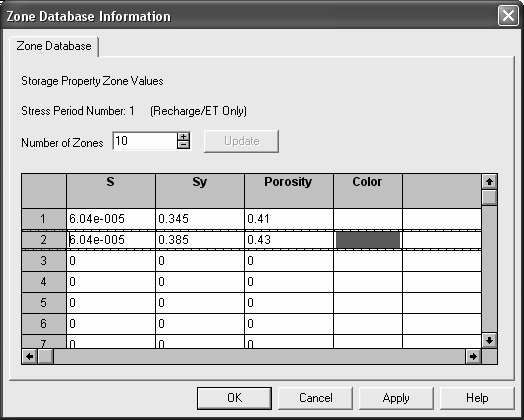
1) Enter a value of 6.04x10⁵ for the Storage Coefficient (S).
2) Enter a value of 0.345 for Specific Yield (Sy).
3) Enter a value of 0.41 for Porosity.
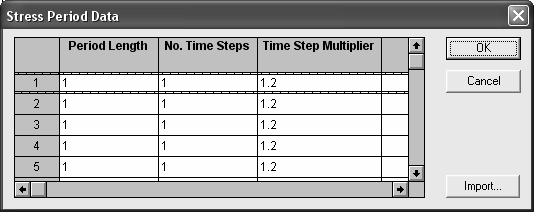
4) Enter a value of 30 for the “Maximum Number of Stress Periods.” 5) Accept all other default values as they are not required for a flow simulation.
6) Make sure that the “Initialize Model Grid” dialog looks similar to the one shown in Figure A.2.
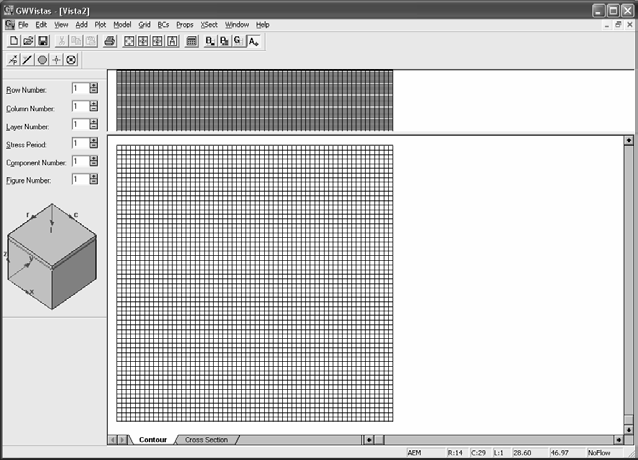
7) Now, click OK to close the dialog. A rectangular mesh as shown in Figure A.3 will appear in a few seconds
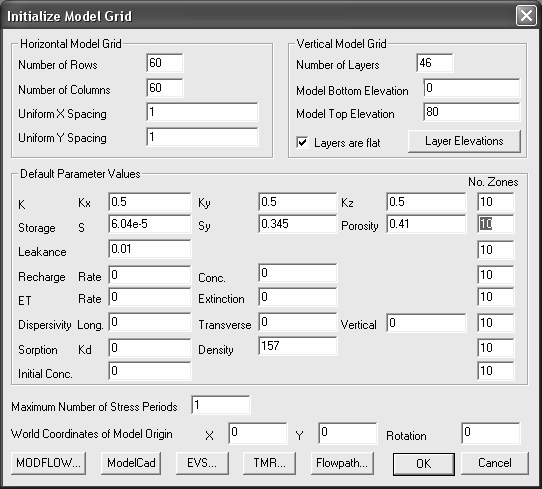
Figure A.2 GroundWater Vistas model grid initialization dialog.

A.4.1 Initial Heads Input
A.4.1.1 系列模拟中第一次模拟的初始水头设置
1) 单击菜单 “MODEL” → “MODFLOW” → “INITIAL HEADS.” 打开 “Initial Head Setup” 对话框。
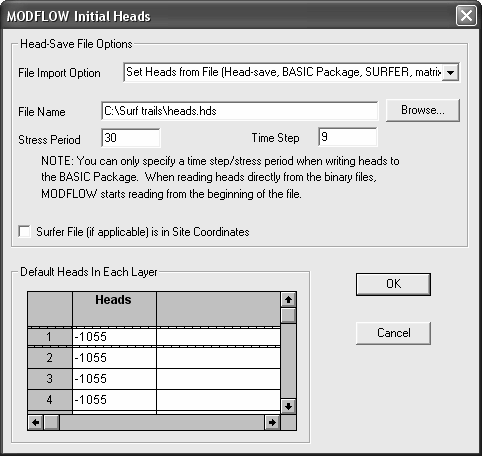
2) “Initial Head Setup” 对话框由两个部分组成,分别是(1)Head-Save 文件选项和(2)每个层的默认水头。为了设置系列中的第一次模拟,需要在 “每个层的默认水头” 选项中输入。
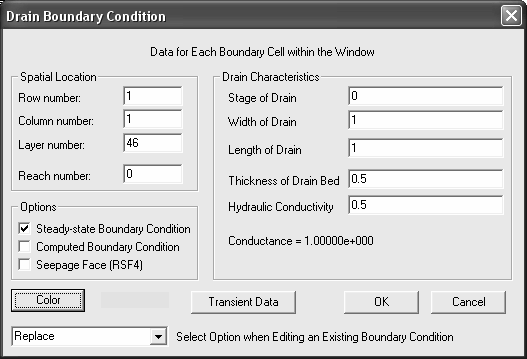
3) 在表示第一列各层的每一行中输入 -1055 英尺的数值。
选择 -1055 英尺的压力头值,因为在 -1055 英尺的压力头下的饱和含水量等于 Van Genutchen 方程中的 12% 重量含水量。
由于田间实验开始时观察到的重量含水量为 12%,我们尝试模拟相似的初始含水量用于模拟。
4) 接受对话框中的所有其他默认值,并确保对话框的外观与图 A.11 中显示的一样。

图 A.11 显示了第一次模拟的初始压力头输入的对话框。
5) 单击“OK”关闭对话框。
A.4.1.2 系列中第二次及后续模拟的初始水头设置
1) 单击菜单 “MODEL” → “MODFLOW” → “INITIAL HEADS.” 打开 “Initial Head Setup” 对话框。
2) “Initial Head Setup” 对话框由两个部分组成,分别是(1)Head-Save 文件选项和(2)每个层的默认水头。为了设置系列中第二次及后续的模拟,需要在 “Head-Save 文件” 选项中输入。
3) 将 “File Import Option” 从 “Do Not Import Starting Heads” 更改为 “Set Heads from File (Head-save, BASIC Package, SURFER, matrix).”
4) 浏览到第一次或前一次模拟中存储有模拟中最终水头值的头文件(.HDS 文件),然后选择 .HDS 文件。
5) 现在,在 “Time Step” 和 “Stress Period” 选项中输入前一次模拟的最后一个时步数和最后一个应力周期的编号。选择前一次模拟的最后一个时步数,以便第二次模拟使用第一次模拟的最终水头作为其初始条件,从而使模拟连续。
6) 接受对话框中的所有其他默认值,并确保对话框的外观与图 A.12 中显示的一样。
7) 单击 “OK” 关闭对话框。


 175
175

 被折叠的 条评论
为什么被折叠?
被折叠的 条评论
为什么被折叠?
 到【灌水乐园】发言


