


📢:如果你也对机器人、人工智能感兴趣,看来我们志同道合✨
📢:不妨浏览一下我的博客主页【https://blog.csdn.net/weixin_51244852】
📢:文章若有幸对你有帮助,可点赞 👍 收藏 ⭐不迷路🙉
📢:内容若有错误,敬请留言 📝指正!原创文,转载请注明出处
深度相机的测距原理
近几年来,主动式深度相机相比普通的单目相机和双目相机而言,能直接获取深度距离,在三维感知、智能驾驶等应用领域发展迅速。对比结构光类型的深度相机,ToF深度相机凭借其成像反应灵敏、消费级售价等优势更加备受青睐。所谓ToF深度相机,即以飞行时间(Time of flight, ToF)作为测距依据,并且根据激光发射器种类不同分为连续波型与脉冲型。其中,连续波型易受环境影响,因此不适合在室外进行高精度测量;与此同时,该类型的激光器功耗过大,不能长时间使用。与之相反,脉冲型ToF相机不仅功耗小,还能兼顾长时间的测量需求,由于使用过程中无需设置相位等参数,能有效避免累积误差,因此其具备高测量精度的优势。


该相机采用结构的测距方案
结构光3D成像技术主要由4大部分组成:
1)不可见光红外线(IR)发射模组:用于发射经过特殊调制的不可见红外光至拍摄物体。
2)不可见光红外线(IR)接收模组:接收由被拍摄物体反射回来的不可见红外光,通过计算获取被拍摄物体的空间信息。
3)镜头模组:采用普通镜头模组,用于2D彩色图片拍摄。
4)图像处理芯片:将普通镜头模组拍摄的2D彩色图片和IR接收模组获取的3D信息集合,经算法处理得当具备3D信息的彩色图片。
二次开发的环境配置
参考我的这篇文章,包括在Ubuntu系统的环境配置方法介绍
https://blog.csdn.net/weixin_51244852/article/details/117406060
SDK下载官网:
https://github.com/IntelRealSense/librealsense
二次开发案例:
https://blog.csdn.net/dieju8330/article/details/85272800
https://blog.csdn.net/dieju8330/article/details/85300976
实时测距
实现了在自己联想笔记本上连接深度相机成功编译代码并显示效果。其中最新的realsense sdk在测量物体时是可以直接显示距离值的,因此是比之前版本进行过修正。这一步后续可以结合之前旧版本详细注释的代码结合起来看。这个旧代码不需要修改了,对照着新版本,将实例分割模型和掩膜-实际面积换算代码全部嵌入进去。注意相机需要连接在USB3.0的接口上否则无法显示。
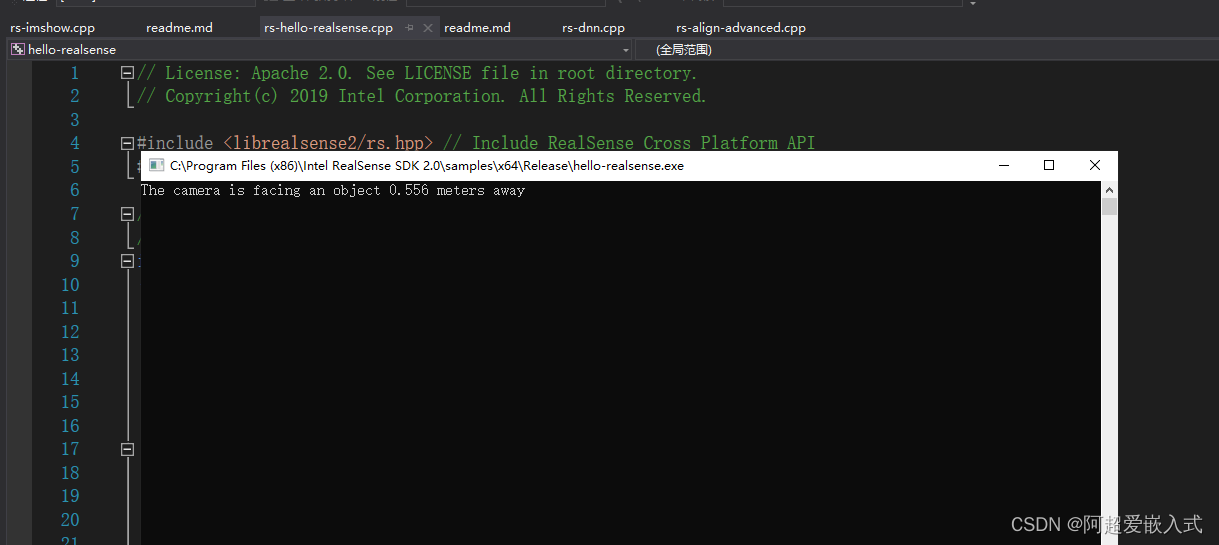
课程1:测量出图像中心点到相机的距离
rs-hello-realsense。代码实现:
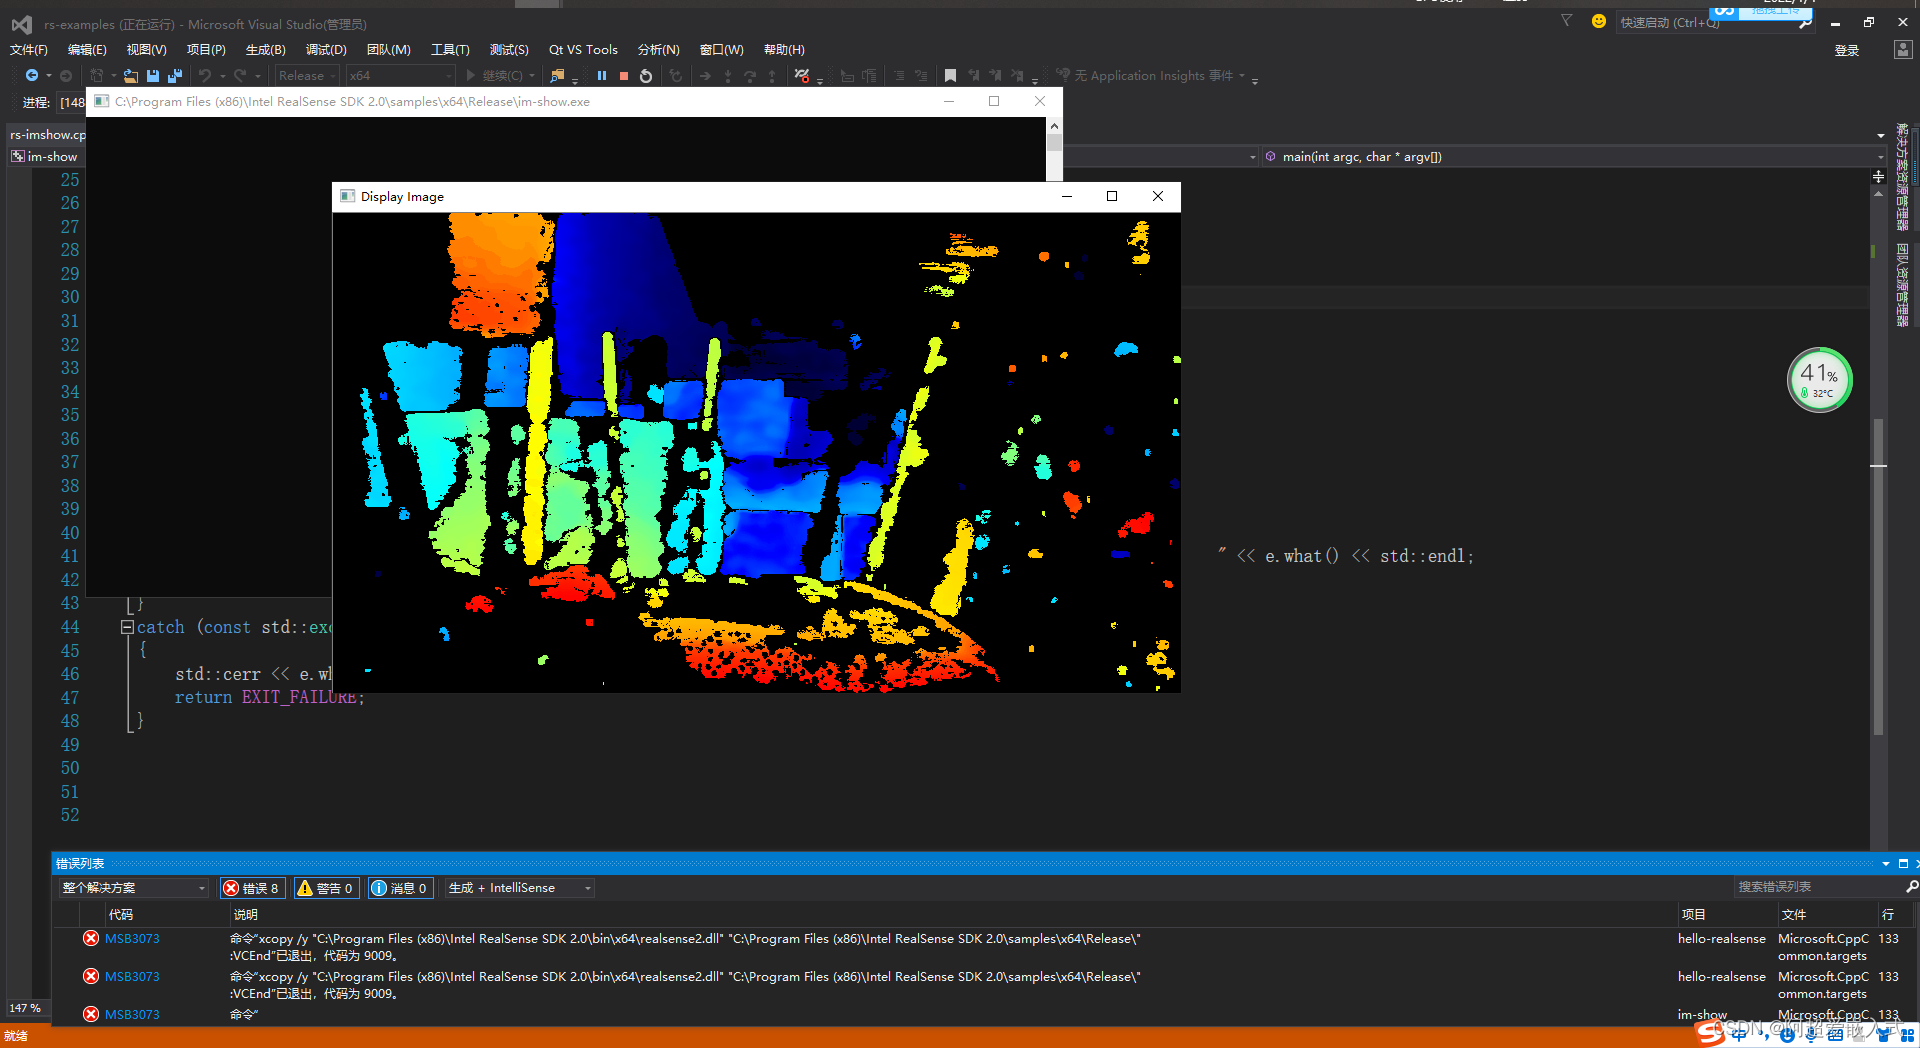
课程2:rs-imshow。改进:使用opencv的打开深度相机的深度图像。
但是遇到下面的报错:
一般都是将opencv的bin目录下的.dll文件都拷贝到下面目录下即可:C:\WINDOWS\system32
对这个system32文件的研究:https://zhidao.baidu.com/question/488179937.html
将所有bin目录下的dll全部复制到这个文件中就解决了
经过颜色渲染的和未经过颜色渲染的对比: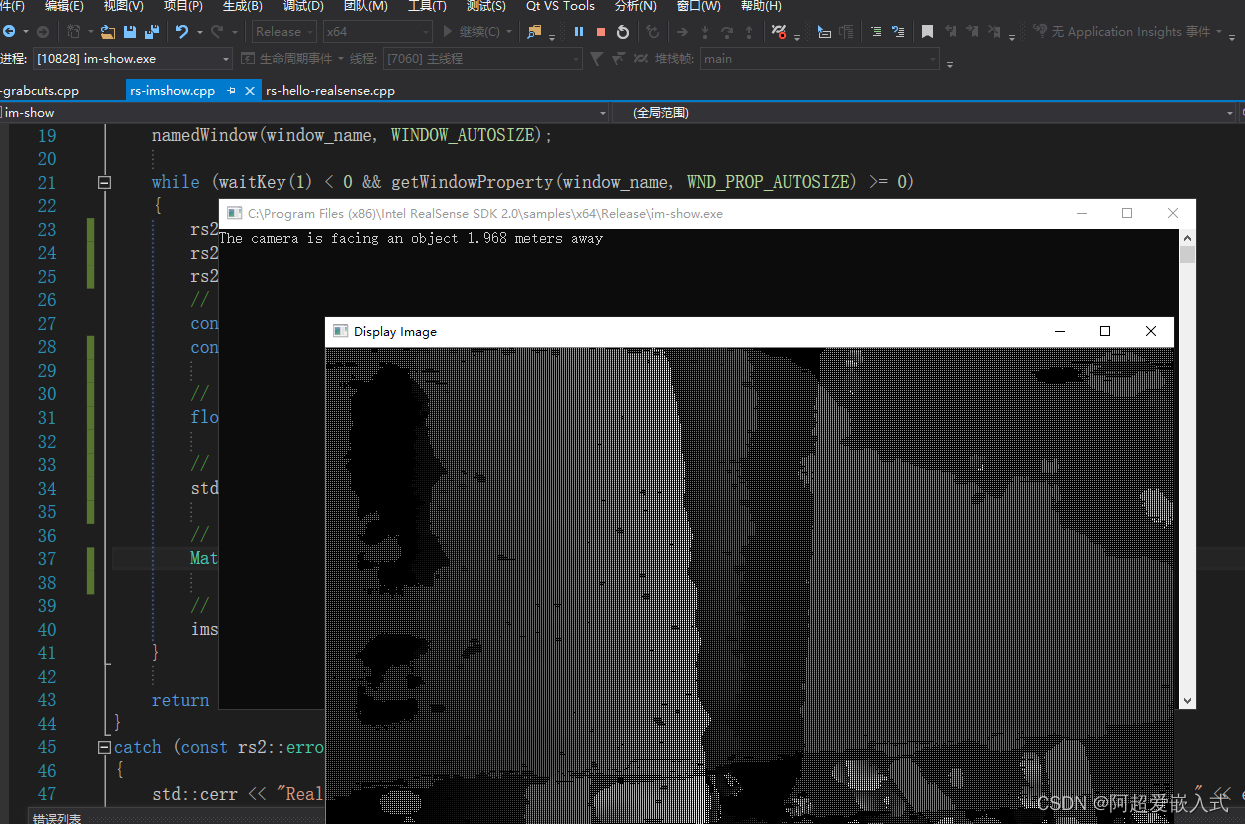
同时显示深度图和渲染过的深度图,以及图像中心距离: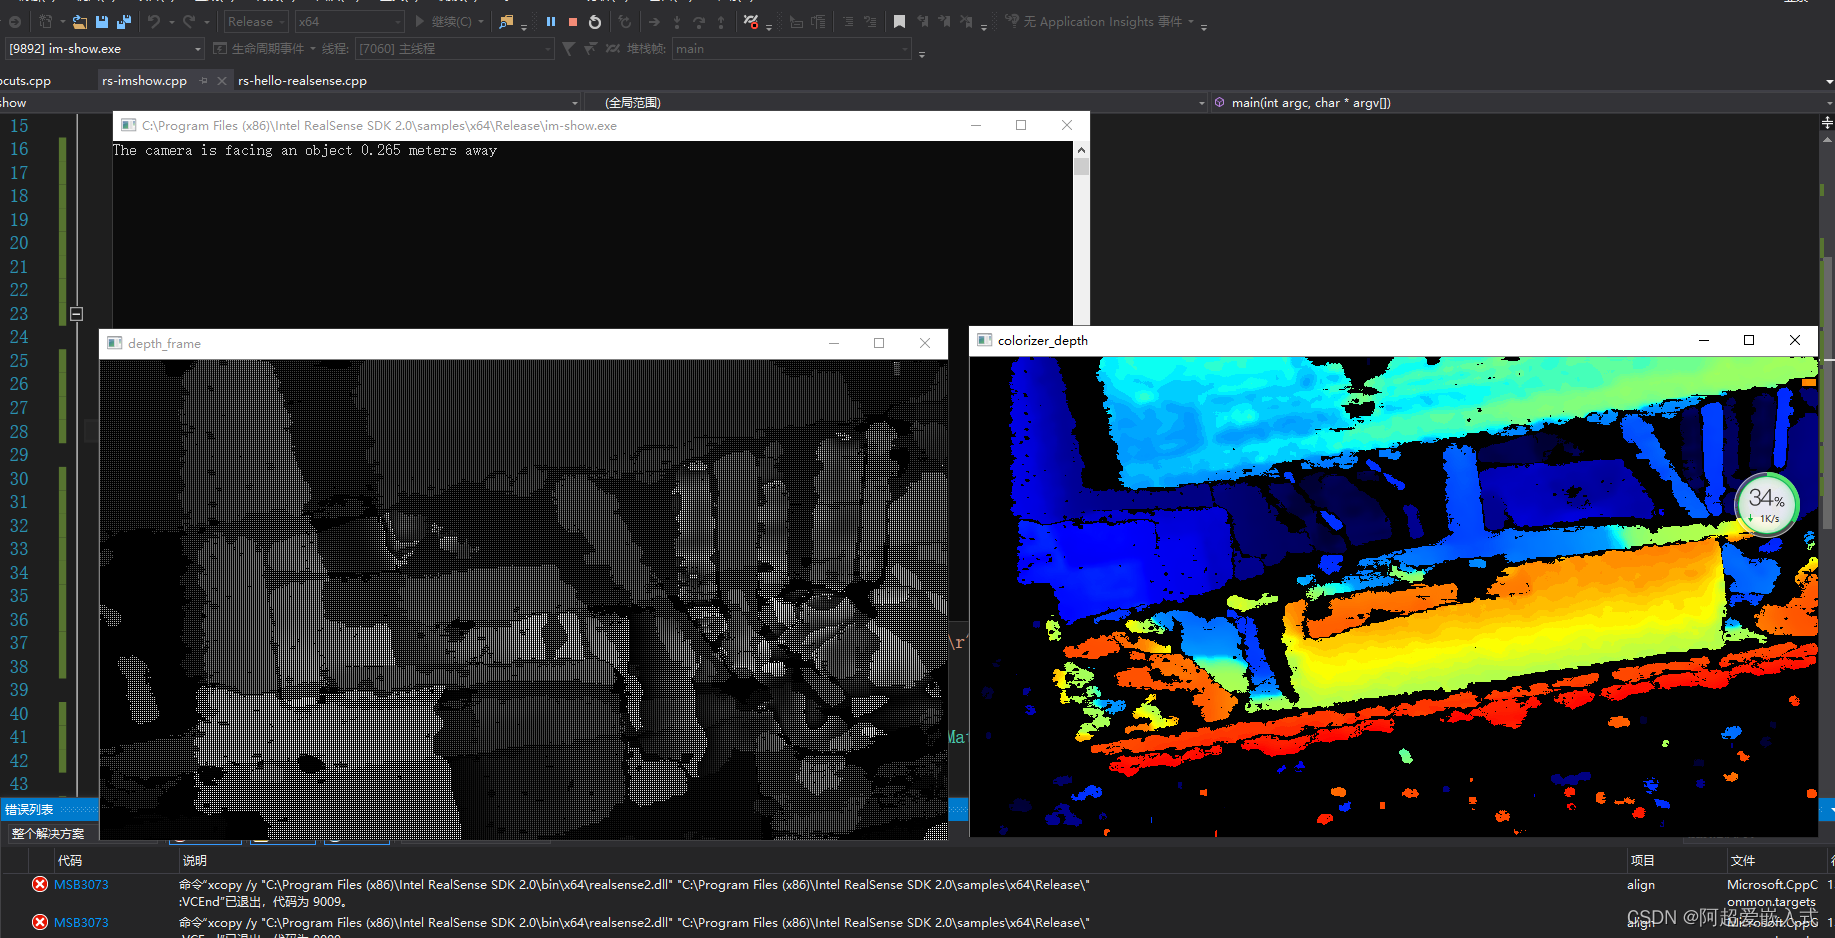
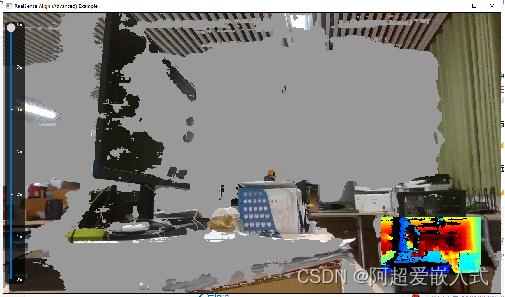
课程2:提取前景
由于需要根据深度剔除彩色图像的背景,因此将深度图数据和RGB图进行像素对齐。
做好了注释,并且从代码中实现了使用Mat格式显示rgb视频流,如下图: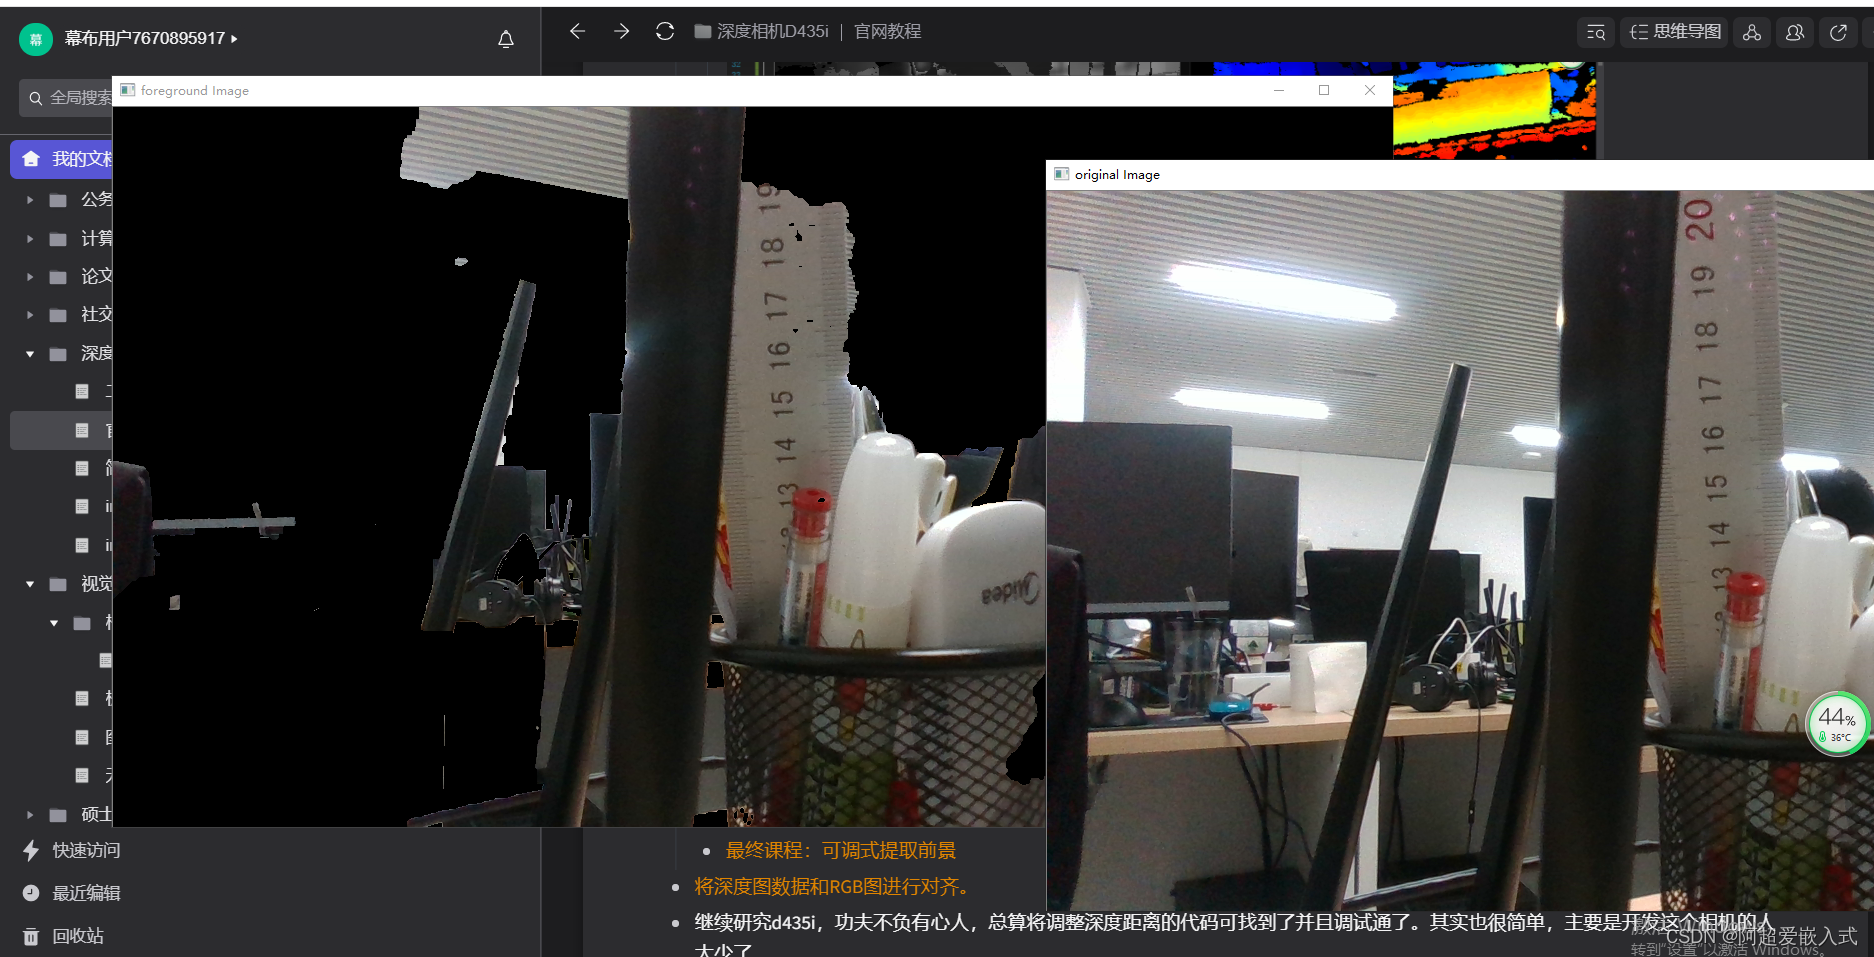
最终课程:可调式提取前景。学习深度相机的SDK最重要的一节,搞清楚。对齐原理:https://blog.csdn.net/dieju8330/article/details/85300976
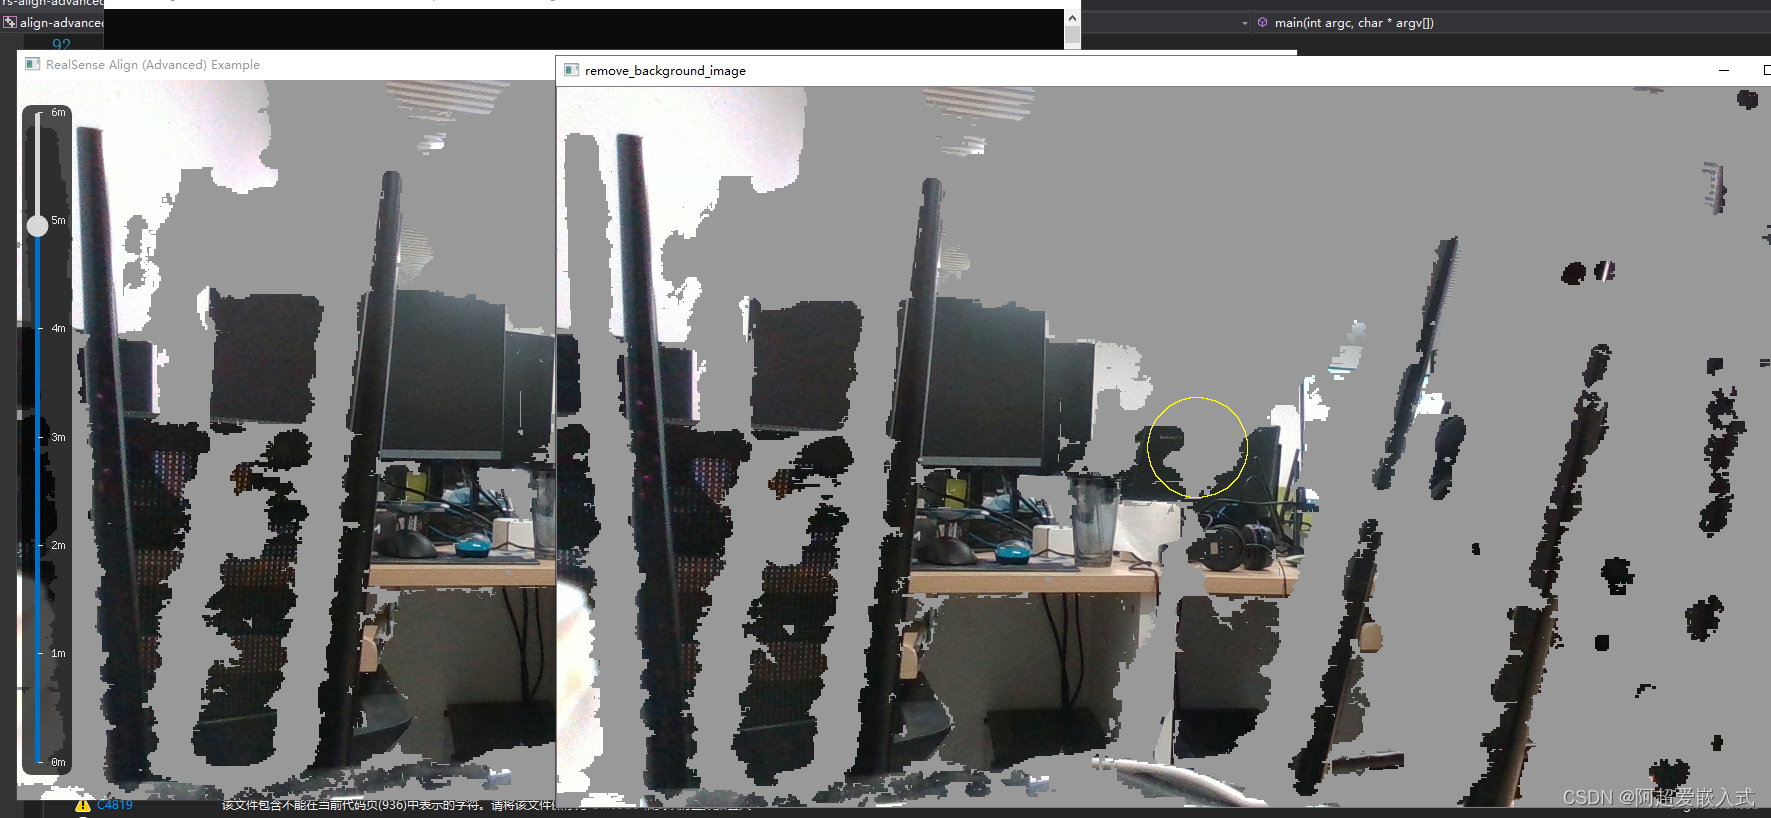
目前通过添加格式转换代码,实现使用mat格式显示彩色图像,那么下一步只需要在mat类型中检测分割目标即可。在mat类型的图像中进行简单的opencv图像处理操作,在图中绘制一个小圆圈,能显示,因此说明图像转换为mat类型后。能成功用被opencv api处理,那么后续只需要加入分割算法即可实现实例分割。
继续研究d435i,功夫不负有心人,总算将调整深度距离的代码可找到了并且调试通了。其实也很简单,主要是开发这个相机的人太少了。
Mask-RCNN嵌入到深度相机,并去除背景
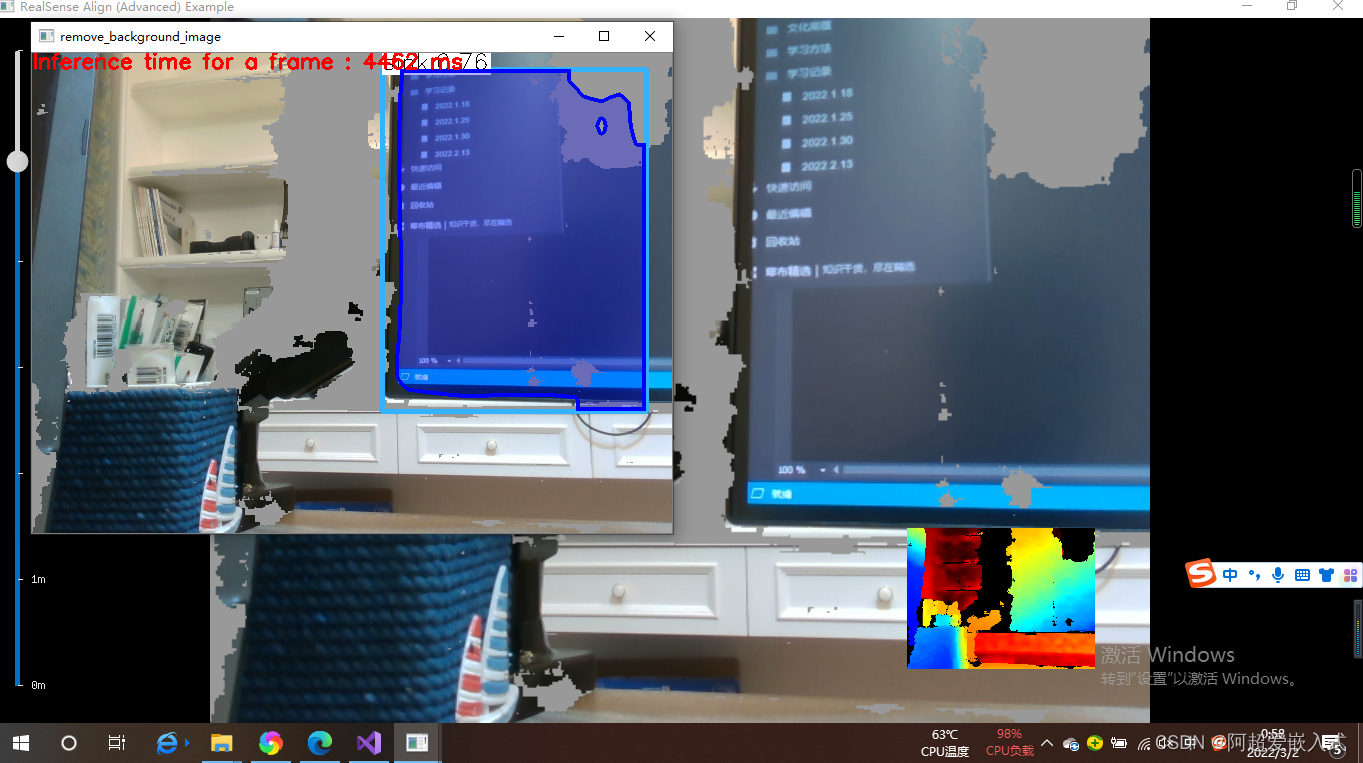
回答的问题:去除背景后的检测还是检测后去除背景?判断方法:
方法1.如果是前者的话,不会去识别覆盖掉的物体,后者是会识别被覆盖的物体,那么就会存在边界框
方法2:通过代码的含义去解释
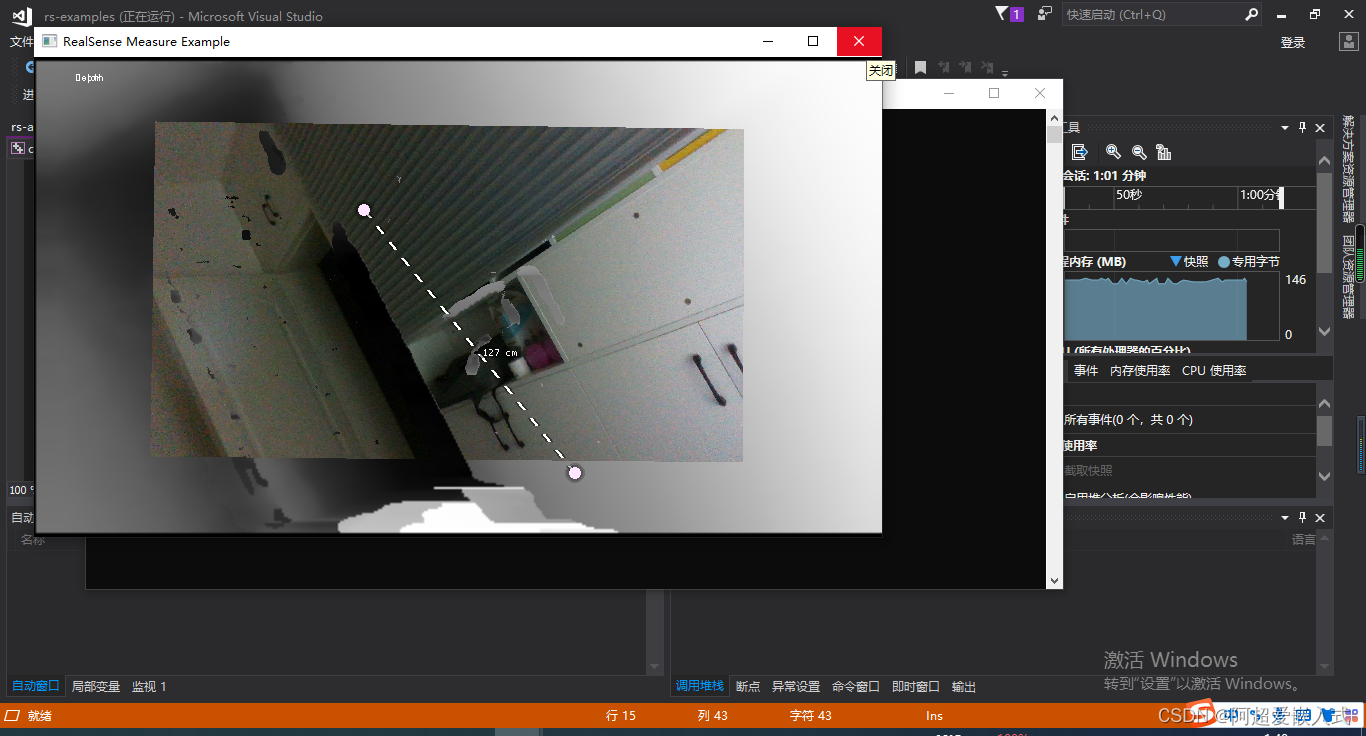
接下来,添加高度和宽度测量代码。研究meansure里面的代码
1.获取像素点三维坐标的函数是哪个?找到他。将像素装换为point
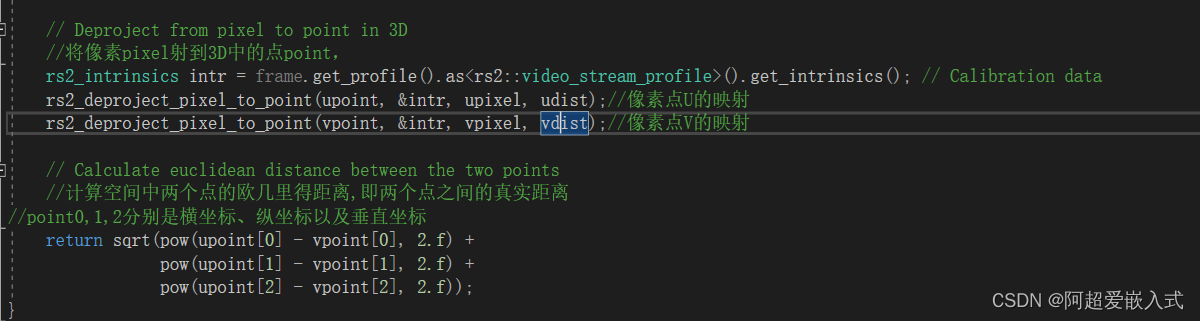
2.计算两点坐标空间距离的函数是哪个?找到他
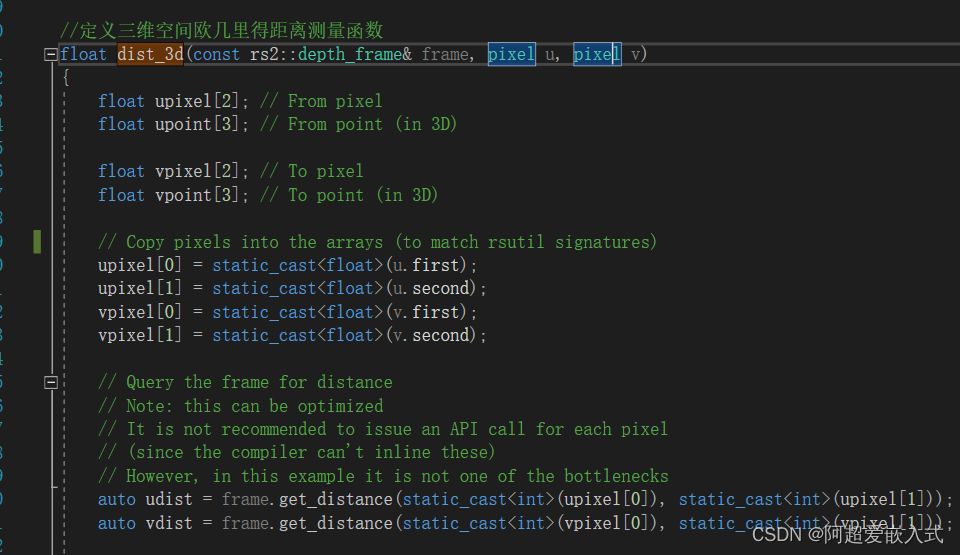
下一步:将函数dist_3d插入到rs-align-advanced
出处:https://blog.csdn.net/SFM2020/article/details/83542823
出处:https://blog.csdn.net/dieju8330/article/details/85272800
明确了深度相机在论文或是项目中的作用:
1.像素空间到实际空间的转换关系。这块还在探索阶段,需要多查阅资料尽快确定方案。
2.直接获取深度值。获取相机要果树之间的距离
3.剔除背景。剔除果园复杂的环境
Mask RCNN源代码(C++版本)
#include <fstream>
#include <sstream>
#include <iostream>
#include <string.h>
#include<opencv2/dnn.hpp>
#include <opencv2/imgproc.hpp>
#include <opencv2/highgui.hpp>

using namespace cv;
using namespace dnn;
using namespace std;

// Initialize the parameters
float confThreshold = 0.5; // Confidence threshold
float maskThreshold = 0.5; // Mask threshold

vector<string> classes;
vector<Scalar> colors;

// Draw the predicted bounding box
void drawBox(Mat& frame, int classId, float conf, Rect box, Mat& objectMask);

// Postprocess the neural network's output for each frame
void postprocess(Mat& frame, const vector<Mat>& outs);

int main()
{
	// Load names of classes
	string classesFile = "D:/opencv-4.4.0/models/mask_rcnn_inception_v2_coco_2018_01_28/mscoco_labels.names";
	ifstream ifs(classesFile.c_str());
	string line;
	while (getline(ifs, line)) classes.push_back(line);

	// Load the colors
	string colorsFile = "D:/opencv-4.4.0/models/mask_rcnn_inception_v2_coco_2018_01_28/colors.txt";
	ifstream colorFptr(colorsFile.c_str());
	while (getline(colorFptr, line))
	{
		char* pEnd;
		double r, g, b;
		r = strtod(line.c_str(), &pEnd);
		g = strtod(pEnd, NULL);
		b = strtod(pEnd, NULL);
		Scalar color = Scalar(r, g, b, 255.0);
		colors.push_back(Scalar(r, g, b, 255.0));
	}

	// Give the configuration and weight files for the model
	String textGraph = "D:/opencv-4.4.0/models/mask_rcnn_inception_v2_coco_2018_01_28/mask_rcnn_inception_v2_coco_2018_01_28.pbtxt";
	String modelWeights = "D:/opencv-4.4.0/models/mask_rcnn_inception_v2_coco_2018_01_28/frozen_inference_graph.pb";

	// Load the network
	Net net = readNetFromTensorflow(modelWeights, textGraph);
	/*net.setPreferableBackend(DNN_BACKEND_CUDA);
	net.setPreferableTarget(DNN_TARGET_CUDA);*/

	// Open a video file or an image file or a camera stream.
	string str, outputFile;
	VideoCapture cap(0);//根据摄像头端口id不同,修改下即可
	//VideoWriter video;
	Mat frame, blob;

	// Process frames.
	while (waitKey(1) < 0)
	{
		// get frame from the video
		cap >> frame;

		// Stop the program if reached end of video
		if (frame.empty())
		{
			cout << "Done processing !!!" << endl;
			cout << "Output file is stored as " << outputFile << endl;
			waitKey(3000);
			break;
		}
		// Create a 4D blob from a frame.
		blobFromImage(frame, blob, 1.0, Size(frame.cols, frame.rows), Scalar(), true, false);
		//blobFromImage(frame, blob);

		//Sets the input to the network
		net.setInput(blob);

		// Runs the forward pass to get output from the output layers
		std::vector<String> outNames(2);
		outNames[0] = "detection_out_final";
		outNames[1] = "detection_masks";
		vector<Mat> outs;
		net.forward(outs, outNames);

		// Extract the bounding box and mask for each of the detected objects
		postprocess(frame, outs);
		// Put efficiency information. The function getPerfProfile returns the overall time for inference(t) and the timings for each of the layers(in layersTimes)
		vector<double> layersTimes;
		double freq = getTickFrequency() / 1000;
		double t = net.getPerfProfile(layersTimes) / freq;
		string label = format("Inference time for a frame : %0.0f ms", t);
		putText(frame, label, Point(0, 15), FONT_HERSHEY_SIMPLEX, 0.6, Scalar(0, 0, 255));

		// Write the frame with the detection boxes
		Mat detectedFrame;
		frame.convertTo(detectedFrame, CV_8U);
		imshow("Mask R-cnn", detectedFrame);
	}
	cap.release();
	return 0;
}

// For each frame, extract the bounding box and mask for each detected object
void postprocess(Mat& frame, const vector<Mat>& outs)
{
	Mat outDetections = outs[0];
	Mat outMasks = outs[1];

	// Output size of masks is NxCxHxW where
	// N - number of detected boxes
	// C - number of classes (excluding background)
	// HxW - segmentation shape
	const int numDetections = outDetections.size[2];
	const int numClasses = outMasks.size[1];

	outDetections = outDetections.reshape(1, outDetections.total() / 7);
	for (int i = 0; i < numDetections; ++i)
	{
		float score = outDetections.at<float>(i, 2);
		if (score > confThreshold)
		{
			// Extract the bounding box
			int classId = static_cast<int>(outDetections.at<float>(i, 1));
			int left = static_cast<int>(frame.cols * outDetections.at<float>(i, 3));
			int top = static_cast<int>(frame.rows * outDetections.at<float>(i, 4));
			int right = static_cast<int>(frame.cols * outDetections.at<float>(i, 5));
			int bottom = static_cast<int>(frame.rows * outDetections.at<float>(i, 6));

			left = max(0, min(left, frame.cols - 1));
			top = max(0, min(top, frame.rows - 1));
			right = max(0, min(right, frame.cols - 1));
			bottom = max(0, min(bottom, frame.rows - 1));
			Rect box = Rect(left, top, right - left + 1, bottom - top + 1);

			// Extract the mask for the object
			Mat objectMask(outMasks.size[2], outMasks.size[3], CV_32F, outMasks.ptr<float>(i, classId));

			// Draw bounding box, colorize and show the mask on the image
			drawBox(frame, classId, score, box, objectMask);

		}
	}
}

// Draw the predicted bounding box, colorize and show the mask on the image
void drawBox(Mat& frame, int classId, float conf, Rect box, Mat& objectMask)
{
	//Draw a rectangle displaying the bounding box
	rectangle(frame, Point(box.x, box.y), Point(box.x + box.width, box.y + box.height), Scalar(255, 178, 50), 3);

	//Get the label for the class name and its confidence
	string label = format("%.2f", conf);
	if (!classes.empty())
	{
		CV_Assert(classId < (int)classes.size());
		label = classes[classId] + ":" + label;
	}

	//Display the label at the top of the bounding box
	int baseLine;
	Size labelSize = getTextSize(label, FONT_HERSHEY_SIMPLEX, 0.5, 1, &baseLine);
	box.y = max(box.y, labelSize.height);
	rectangle(frame, Point(box.x, box.y - round(1.5*labelSize.height)), Point(box.x + round(1.5*labelSize.width), box.y + baseLine), Scalar(255, 255, 255), FILLED);
	putText(frame, label, Point(box.x, box.y), FONT_HERSHEY_SIMPLEX, 0.75, Scalar(0, 0, 0), 1);

	Scalar color = colors[classId%colors.size()];

	// Resize the mask, threshold, color and apply it on the image
	resize(objectMask, objectMask, Size(box.width, box.height));
	Mat mask = (objectMask > maskThreshold);
	Mat coloredRoi = (0.3 * color + 0.7 * frame(box));
	coloredRoi.convertTo(coloredRoi, CV_8UC3);

	// Draw the contours on the image
	vector<Mat> contours;
	Mat hierarchy;
	mask.convertTo(mask, CV_8U);
	findContours(mask, contours, hierarchy, RETR_CCOMP, CHAIN_APPROX_SIMPLE);
	drawContours(coloredRoi, contours, -1, color, 5, LINE_8, hierarchy, 100);
	coloredRoi.copyTo(frame(box), mask);

}


 1万+
1万+


 被折叠的 条评论
为什么被折叠?
被折叠的 条评论
为什么被折叠?
 到【灌水乐园】发言


