


1.unity3d point light 个数限制更改
unity默认的pointlight个数为2个,多加的话先加的就没有效果,
值可以随意更改
2.多缓冲模式
包括双缓冲Double Buffer,三缓冲,四缓冲。。。。。。
好处有防画面撕裂、闪烁,防止在访问时被更改,瞬时全部更新而不是一点一点更新(比如说每帧的画面)
双缓冲常用来刷新显示屏,MSDN上有很详细的说明https://msdn.microsoft.com/en-us/library/b367a457(v=vs.110).aspx
Flicker is a common problem when programming graphics. Graphics operations that require multiple complex painting operations can cause the rendered images to appear to flicker or have an otherwise unacceptable appearance. To address these problems, the .NET Framework provides access to double buffering.
Double buffering uses a memory buffer to address the flicker problems associated with multiple paint operations. When double buffering is enabled, all paint operations are first rendered to a memory buffer instead of the drawing surface on the screen. After all paint operations are completed, the memory buffer is copied directly to the drawing surface associated with it. Because only one graphics operation is performed on the screen, the image flickering associated with complex painting operations is eliminated
一个wiki的例子博主感觉举得非常恰当
The easiest way to explain how multiple buffering works is to take a real world example. It is a nice sunny day and you have decided to get the paddling pool out, only you can not find your garden hose. You'll have to fill the pool with buckets. So you fill one bucket (or buffer) from the tap, turn the tap off, walk over to the pool, pour the water in, walk back to the tap to repeat the exercise. This is analogous to single buffering. The tap has to be turned off while you "process" the bucket of water.
Now consider how you would do it if you had two buckets. You would fill the first bucket and then swap the second in under the running tap. You then have the length of time it takes for the second bucket to fill in order to empty the first into the paddling pool. When you return you can simply swap the buckets so that the first is now filling again, during which time you can empty the second into the pool. This can be repeated until the pool is full. It is clear to see that this technique will fill the pool far faster as there is much less time spent waiting, doing nothing, while buckets fill. This is analogous to double buffering. The tap can be on all the time and does not have to wait while the processing is done.
If you employed another person to carry a bucket to the pool while one is being filled and another emptied, then this would be analogous to triple buffering. If this step took long enough you could employ even more buckets, so that the tap is continuously running filling buckets.
In computer science the situation of having a running tap that cannot be, or should not be, turned off is common (such as a stream of audio). Also, computers typically prefer to deal with chunks of data rather than streams. In such situations double buffering is often employed.
双缓冲模式的实现
实现需要两个buffer
实现方法需要几个函数:swap交换,reset重置用过的buffer,更新nextBuffer,显示currentBuffer。。。。
因为写的东西太少了,博主就不单发博客来说明了。。。by wolf96
三缓冲的介绍
Triple buffering[edit]
In computer graphics, triple buffering is similar to double buffering but provides a speed improvement. In double buffering the program must wait until the finished drawing is copied or swapped before starting the next drawing. This waiting period could be several milliseconds during which neither buffer can be touched.
In triple buffering the program has two back buffers and can immediately start drawing in the one that is not involved in such copying. The third buffer, the front buffer, is read by the graphics card to display the image on the monitor. Once the monitor has been drawn, the front buffer is flipped with (or copied from) the back buffer holding the last complete screen. Since one of the back buffers is always complete, the graphics card never has to wait for the software to complete. Consequently, the software and the graphics card are completely independent, and can run at their own pace. Finally, the displayed image was started without waiting for synchronization and thus with minimum lag.[1]
Due to the software algorithm not having to poll the graphics hardware for monitor refresh events, the algorithm is free to run as fast as possible. This can mean that several drawings that are never displayed are written to the back buffers. This is not the only method of triple buffering available, but is the most prevalent on the PC architecture where the speed of the target machine is highly variable.
四缓冲的介绍
Quad buffering[edit]
The term "Quad buffering" is used in stereoscopic implementations, and means the use of double buffering for each of the left and right eye images, thus four buffers total. The command to swap or copy the buffer typically applies to both pairs at once. If triple buffering was used then there would be six buffers.
Quad buffering is a technology for implementing stereoscopic frame rendering in computer graphics. For stereoscopic rendering, each eye must receive a separate image. Quad buffering uses double buffering with a front buffer and back buffer for each eye, totaling four buffers.
Similarly to the v-sync in 2D mode, quad buffering allows to swap the front and back buffers for both eyes in sync, allowing the display to seamlessly work with different rendering frame rates.
Quad buffering requires special support in the graphics card drivers which is disabled for most consumer cards. AMD's Radeon HD 6000 Series and newer support it[1].
3D standards like OpenGL[2] and Direct3D support quad buffering.
3.NVIDIA的G-SYNC原理
简而言之,G-SYNC模块的技术原理就是结合PC上安装的GeForce 显卡共同来调节显示器的可变刷新率。传统显示器的刷新率是固定的,60Hz就是60Hz,不能升高也无法降低。有了G-SYNC之后,显示器只有从显卡端获得了最新的完整画面帧后才会刷新,可实现30Hz~144Hz之间的自主调节。如果你想指望用这199美元的设备来提高游戏帧速,那结果可能会令你失望,因为G-SYNC既不能往上提高帧率,也不会往下压制帧率,它的本质是让显卡不再受显示器刷新率的制约,将游戏体验完全交给了显卡自身的性能表现。
当一款中端显卡在玩某游戏时不够60fps,此时开启垂直同步后游戏帧速可能会被直接锁定在30fps。使用G-SYNC技术之后,在玩同样的游戏时既可获得开启垂直同步后的画面效果,游戏依旧可以保持在原先的速度上!
可能有些玩家会有异议了,如果购买了一款120Hz甚至更高刷新率的显示器,G-SYNC还有什么意义?答案很简单,刷新率再高的显示器也不能根据显卡的实时帧率来实时调整刷新率,而G-SYNC的意义就是在每一秒都能做到刷新率跟显卡的实时帧数完美匹配,相当于是“无级变速”。对游戏开发人员而言,今后也不必再担心帧率会不足60fps,即便低帧率下也可以加入更多特效,而此时画面依然是流畅的!
正如NVIDIA所说,G-SYNC技术能够彻底解决垂直同步、刷新率限制带来的游戏画面撕裂、卡顿、延迟等问题,保证最好的流畅度。
4.SSSSS
http://www.iryoku.com/sssss/
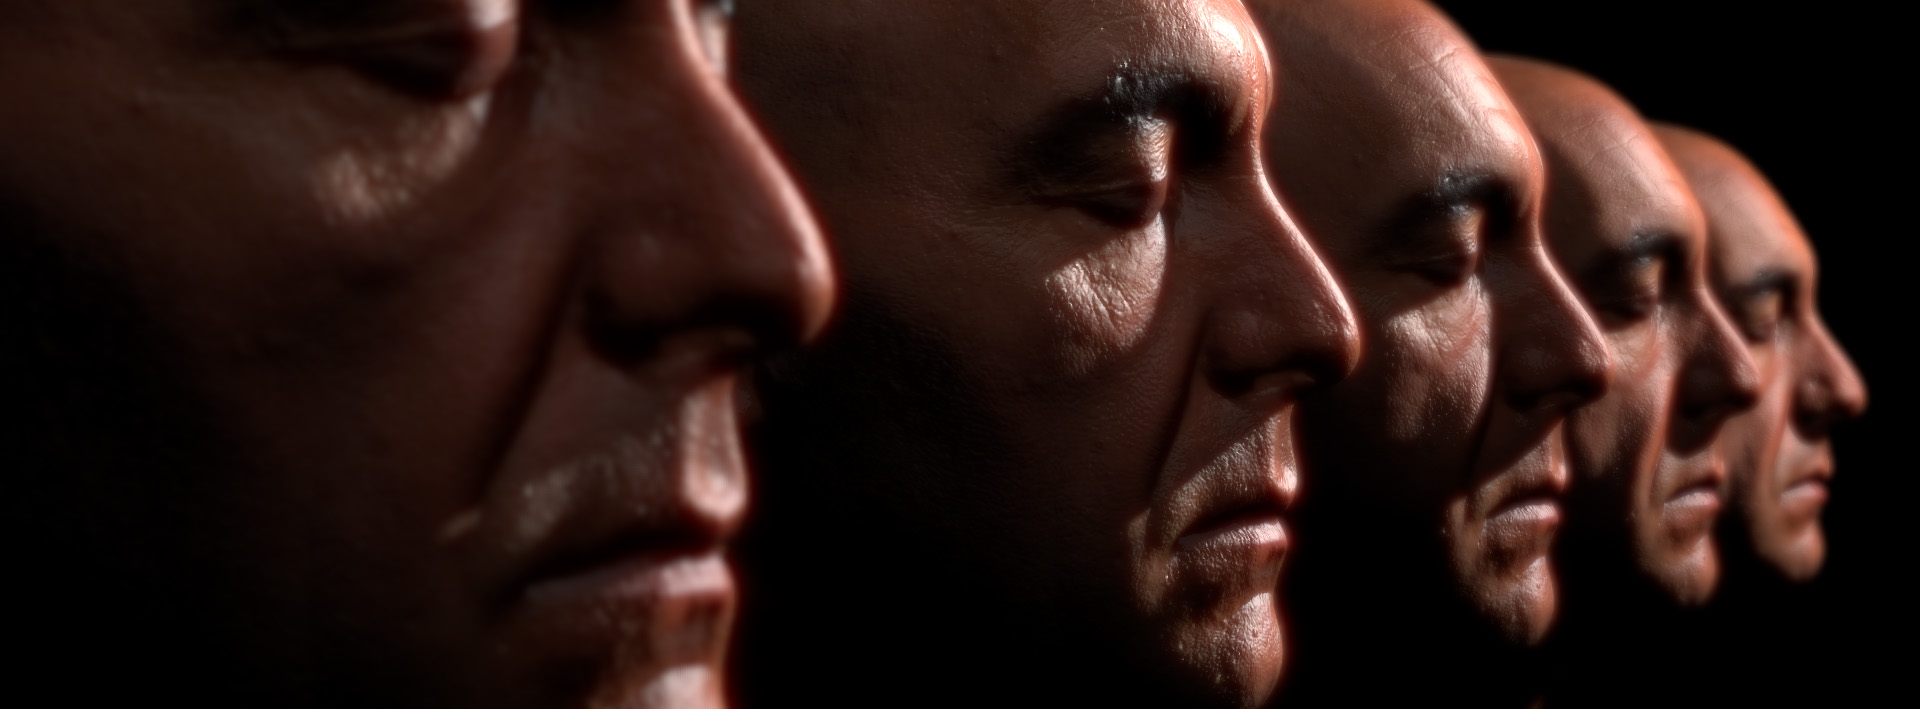
float4 BlurPS(PassV2P input, uniform float2 step) : SV_TARGET {
    // Gaussian weights for the six samples around the current pixel:
    //   -3 -2 -1 +1 +2 +3
    float w[6] = { 0.006,   0.061,   0.242,  0.242,  0.061, 0.006 };
    float o[6] = {  -1.0, -0.6667, -0.3333, 0.3333, 0.6667,   1.0 };

    // Fetch color and linear depth for current pixel:
    float4 colorM = colorTex.Sample(PointSampler, input.texcoord);
    float depthM = depthTex.Sample(PointSampler, input.texcoord);

    // Accumulate center sample, multiplying it with its gaussian weight:
    float4 colorBlurred = colorM;
    colorBlurred.rgb *= 0.382;

    // Calculate the step that we will use to fetch the surrounding pixels,
    // where "step" is:
    //     step = sssStrength * gaussianWidth * pixelSize * dir
    // The closer the pixel, the stronger the effect needs to be, hence
    // the factor 1.0 / depthM.
    float2 finalStep = colorM.a * step / depthM;

    // Accumulate the other samples:
    [unroll]
    for (int i = 0; i < 6; i++) {
        // Fetch color and depth for current sample:
        float2 offset = input.texcoord + o[i] * finalStep;
        float3 color = colorTex.SampleLevel(LinearSampler, offset, 0).rgb;
        float depth = depthTex.SampleLevel(PointSampler, offset, 0);

        // If the difference in depth is huge, we lerp color back to "colorM":
        float s = min(0.0125 * correction * abs(depthM - depth), 1.0);
        color = lerp(color, colorM.rgb, s);

        // Accumulate:
        colorBlurred.rgb += w[i] * color;
    }

    // The result will be alpha blended with current buffer by using specific
    // RGB weights. For more details, I refer you to the GPU Pro chapter :)
    return colorBlurred;
}
5.UnityStartCoroutine 是建一个纤程。。。
可以把yield理解成一种特殊形式的return,它和return一样,会立即把执行权返回父级函数。特别之处在于,yield后面跟的函数或对象会跟一个条件判断,当条件满足时,就会再次回调包含该yield的子函数,并且从yield语句之后继续执行。条件满足之前,执行父函数下面的语句,可以看作异步执行。
例如:
StartCoroutine(callYieldFunction());
-
 //在c#中必须显示的指明,启动一个纤程以调用含有yield的函数。
-
StartCoroutine
(callYieldFunction
(
)
)
;
-
Debug.Log
(
"print second"
)
;
-
-
//在c#中含有yield的函数,返回值必须为IEnumerator
-
IEnumerator callYieldFunction
(
)
-
 {
{
-
Debug.Log
(
"print first"
)
;
-
yield
return
new WaitForSeconds
(
2
)
;
-
Debug.Log
(
"print after 2 seconds"
)
;
-
}
-
Debug.Log
(
"print second"
)
;
-
-
//在c#中含有yield的函数,返回值必须为IEnumerator
-
IEnumerator callYieldFunction
(
)
-
{
-
Debug.Log
(
"print first"
)
;
-
yield
return
new WaitForSeconds
(
2
)
;
-
Debug.Log
(
"print after 2 seconds"
)
;
-
}
-
当没有父函数可以返回,本身已经是顶级函数的时候,yield的条件相当于同步执行,程序一直等到条件满足,才继续执行下面的语句。
-
IEnumerator Start
(
)
//注意c#中的返回值
-
{
-
Debug.Log
(
"print first"
)
;
-
yield
return
new WaitForSeconds
(
2
)
;
-
Debug.Log
(
"print after 2 seconds"
)
;
-
}
在理解了这个之后,就可以理解使用嵌套的yield,来实现同步的子纤程调用。
例如:因为start函数已经是顶级函数,所以外层的yield会”死在这里“,直到嵌套的纤程执行完毕,再继续执行。
-
IEnumerator Start
(
)
-
{
-
yield
return StartCoroutine
(
"callYieldFunction"
)
;
-
Debug.Log
(
"print latest"
)
;
-
}
-
-
IEnumerator callYieldFunction
(
)
-
{
-
Debug.Log
(
"print first"
)
;
-
yield
return
new WaitForSeconds
(
2
)
;
-
Debug.Log
(
"print after 2 seconds"
)
;
-
}
6.C#:运算符重载
运算符重载允许为运算指定用户定义的运算符实现,其中一个或两个操作数是用户定义的类或结构类型。用户定义的运算符实现的优先级总是高于预定义运算符实现:仅当没有适用的用户定义运算符实现时才会考虑预定义运算符实现。
| 运算符 | 可重载性 |
| +、-、!、~、++、--、true、false | 可以重载这些一元运算符。 |
| +、-、*、/、%、&、|、^、<<、>> | 可以重载这些二元运算符。 |
| ==、!=、<、>、<=、>= | 可以重载比较运算符。必须成对重载。 |
| &&、|| | 不能重载条件逻辑运算符。 |
| [] | 不能重载数组索引运算符,但可以定义索引器。 |
| () | 不能重载转换运算符,但可以定义新的转换运算符。 |
| +=、-=、*=、/=、%=、&=、|=、^=、<<=、>>= | 不能显式重载赋值运算符。 |
| =、.、?:、->、new、is、sizeof、typeof | 不能重载这些运算符。 |
public static result-type operator unary-operator ( op-typeoperand )
public static result-type operator binary-operator ( op-typeoperand, op-type2 operand2 )
public static implicit operator conv-type-out ( conv-type-inoperand )
public static explicit operator conv-type-out ( conv-type-inoperand )
参数:
result-type 运算符的结果类型。
unary-operator 下列运算符之一:+ - ! ~ ++ — true false
op-type 第一个(或唯一一个)参数的类型。
operand 第一个(或唯一一个)参数的名称。
binary-operator 其中一个:+ - * / % & | ^<< >>== != > < >=<=
op-type2 第二个参数的类型。
operand2 第二个参数的名称。
conv-type-out 类型转换运算符的目标类型。
conv-type-in 类型转换运算符的输入类型。
注意:
前两种形式声明了用户定义的重载内置运算符的运算符。并非所有内置运算符都可以被重载(请参见可重载的运算符)。op-type 和op-type2中至少有一个必须是封闭类型(即运算符所属的类型,或理解为自定义的类型)。例如,这将防止重定义整数加法运算符。
后两种形式声明了转换运算符。conv-type-in 和 conv-type-out中正好有一个必须是封闭类型(即,转换运算符只能从它的封闭类型转换为其他某个类型,或从其他某个类型转换为它的封闭类型)。
运算符只能采用值参数,不能采用 ref 或 out 参数。
C#要求成对重载比较运算符。如果重载了==,则也必须重载!=,否则产生编译错误。同时,比较运算符必须返回bool类型的值,这是与其他算术运算符的根本区别。
C# 不允许重载=运算符,但如果重载例如+运算符,编译器会自动使用+运算符的重载来执行+=运算符的操作。
运算符重载的其实就是函数重载。首先通过指定的运算表达式调用对应的运算符函数,然后再将运算对象转化为运算符函数的实参,接着根据实参的类型来确定需要调用的函数的重载,这个过程是由编译器完成。
任何运算符声明的前面都可以有一个可选的属性(C# 编程指南)列表。
<span style="font-size:14px;">using System;
using System.Collections.Generic;
using System.Text;

namespace OperatorOverLoading
{
    classProgram
    {
       static void Main(string[] args)
       {
           Student s1 = new Student(20, "Tom");
           Student s2 = new Student(18, "Jack");
           Student s3 = s1 + s2;

           s3.sayPlus();
           (s1 - s2).sayMinus();
           Console.ReadKey();
       }
    }
    public classStudent
    {
       public Student() { }
       public Student(int age, string name)
       {
           this.name = name;
           this.age = age;

       }
       private string name;
       private int age;

       public void sayPlus()
       {
           System.Console.WriteLine("{0} 年龄之和为:{1}", this.name, this.age);

       }
       public void sayMinus() {
           System.Console.WriteLine("{0} 年龄之差为:{1}", this.name,this.age);
       }
       //覆盖“+”操作符
       public static Student operator +(Student s1, Student s2)
       {
           return new Student(s1.age + s2.age, s1.name + " And " +s2.name);

       }
       //覆盖“-”操作符
       public static Student operator -(Student s1, Student s2) {
           return new Student(Math.Abs(s1.age - s2.age), s1.name + "And" +s2.name);
       }


   }
}</span>
7.c# implicit explicit关键字
implicit关键字用于声明隐式的用户定义类型转换运算符。(explicit反之)
static implicit operator target_type { source_type identifier }
隐式转换可以通过消除不必要的类型转换来提高源代码的可读性。但是,因为可以在未指定的情况下发生隐式转换,因此必须注意防止令人不愉快的后果。一般情况下,隐式转换运算符应当从不引发异常并且从不丢失信息,以便可以在不知晓的情况下安全使用它们。如果转换运算符不能满足那些条件,则应将其标记为 explicit。
下边是在网上找的几个简单例子
例1
class Digit
{
public Digit(double d) { val = d; }
public double val;
// User-defined conversion from Digit to double
public static implicit operator double(Digit d)
{
return d.val;
}
// User-defined conversion from double to Digit
public static implicit operator Digit(double d)
{
return new Digit(d);
}
}
class Program
{
static void Main(string[] args)
{
Digit dig = new Digit(7);
//This call invokes the implicit "double" operator
double num = dig;
//This call invokes the implicit "Digit" operator
Digit dig2 = 12;
Console.WriteLine("num = {0} dig2 = {1}", num, dig2.val);
Console.ReadLine();
}
}
例2
//基本数据类型到用户自定义类型
class Distance
{
private int feet;
private double inches;
//默认构造函数
public Distance()
{
feet = 0;
inches = 0.0;
}
//带有单参数的构造函数
public Distance(double metres)
{
double f;
f = 3.28 * metres;
this.feet = (int)f;
this.inches = 12 * (f - feet);
}
//由一个double隐式构造一个Distance
public static implicit operator Distance(double metres)
{
return new Distance(metres);
}
//由一个Distance显式返回一个double
public static explicit operator double(Distance d)
{
double metres;
metres = d.inches / 12 + (double)d.feet;
return (metres / 3.28);
}
public override string ToString()
{
return String.Format( "{0}英尺{1}英寸 ", this.feet, this.inches);
}
}
class DistanceDemo
{
public static void Main()
{
Distance d1 = 1.25;
Console.WriteLine(d1);
double d = (double)d1;
Console.WriteLine(d);
}
}
例3
using System;
namespace Hunts.Keywords
{
// 定义一个人民币结构。数据类型转换的语法对于结构和类是一样的
public struct RMB
{
// 注意:这些数的范围可能不能满足实际中的使用
public uint Yuan;
public uint Jiao;
public uint Fen;
public RMB(uint yuan, uint jiao, uint fen)
{
if (fen > 9)
{
jiao += fen / 10;
fen = fen % 10;
}
if (jiao > 9)
{
yuan += jiao / 10;
jiao = jiao % 10;
}
this.Yuan = yuan;
this.Jiao = jiao;
this.Fen = fen;
}
public override string ToString()
{
return string.Format("¥{0}元{1}角{2}分", Yuan, Jiao, Fen);
}
// 一些操作
public static RMB operator +(RMB rmb1, RMB rmb2)
{
return new RMB(rmb1.Yuan + rmb2.Yuan, rmb1.Jiao + rmb2.Jiao, rmb1.Fen + rmb2.Fen);
}
public static implicit operator float(RMB rmb)
{
return rmb.Yuan + (rmb.Jiao/10.0f) + (rmb.Fen/100.00f);
}
public static explicit operator RMB(float f)
{
uint yuan = (uint)f;
uint jiao = (uint)((f - yuan) * 10);
uint fen = (uint)(((f - yuan) * 100) % 10);
return new RMB(yuan, jiao, fen);
}
// more
}
class App
{
static void Main()
{
RMB r1, r2, r3, r4;
// 记得小学时的某次捐款,我把口袋里藏好的一块钱加6张一毛钱以及13个一分钱的硬币都贡献出去了:(
r1 = new RMB(1, 6, 13);
// 其实当时其他人都已经交过了,他们总共交了:
r2 = new RMB(46, 9, 3);
// 那么加上我的就是:
r3 = r1 + r2;
Console.WriteLine("r3 = {0}", r3.ToString());
// 隐式转换
float f = r3;
Console.WriteLine("float f= {0}", f);
// 显式转换
r4 = (RMB)f;
Console.WriteLine("r4 = {0}", r4.ToString());
//如果不进行显示转换,将出现错误 CS0266: 无法将类型“float”隐式转换为“Hunts.Keywords.RMB”。存在一个显式转换(是否缺少强制转换?)
Console.Read();
}
}
}
8.解释器模式
Interpreter模式也叫解释器模式,是由GoF提出的23种设计模式中的一种。Interpreter是行为模式之一,它是一种特殊的设计模式,它建立一个解释器,对于特定的计算机程序设计语言,用来解释预先定义的文法。
Interpreter是一种特殊的设计模式,它建立一个解释器,对于特定的计算机程序设计语言,用来解释预先定义的文法。简单地说,Interpreter模式是一种简单的语法解释器构架。
Interpreter模式有很多种实现方法,下面我们给出Interpreter模式的一种类图来说明Interpreter模式:

在上图中,我们假设需要在Client中解释某文法,Client调用Context来存储文法规则,并调用解释器AbstractionExpression类树来对该文法加以解释。注意,上图只是Interpreter模式的一种实现方式的类图。
Context
解释器上下文环境类。用来存储解释器的上下文环境,比如需要解释的文法等。
AbstractExpression
解释器抽象类。
ConcreteExpression
解释器具体实现类。
让一个表达式a经过PlusExpression解释器处理后使该表达式+1,经过MinusExpression解释器处理后使该表达式-1。
适用场景:
1.当有一个语言需要解释执行,并且你可将该语言中的句子表示为一个抽象语法树,可以使用解释器模式。而当存在以下情况时该模式效果最好
2.该文法的类层次结构变得庞大而无法管理。此时语法分析程序生成器这样的工具是最好的选择。他们无需构建抽象语法树即可解释表达式,这样可以节省空间而且还可能节省时间。
3.效率不是一个关键问题,最高效的解释器通常不是通过直接解释语法分析树实现的,而是首先将他们装换成另一种形式,例如,正则表达式通常被装换成状态机,即使在这种情况下,转换器仍可用解释器模式实现,该模式仍是有用的
代码:
import java.util.List;
public class Client {
public static void main(String []args) {
String inputExpr = " 10";
Context context = new Context(inputExpr);
List list = new ArrayList();
list.add( new PlusExpression());
list.add( new PlusExpression());
list.add( new MinusExpression());
list.add( new MinusExpression());
list.add( new MinusExpression());
for ( int i=0;i AbstractExpression expression = (AbstractExpression)list.get(i);
expression.interpret(context);
}
System.out.println(context.getOutput());
}
}
/**
* Context
*
*/
class Context {
private String input;
private int output;
public Context (String input) {
this. input = input;
}
public String getInput() {
return input;
}
public void setInput(String input) {
this.input = input;
}
public int getOutput() {
return output;
}
public void setOutput( int output) {
this.output = output;
}
}
/**
* Expression & subclass
*
*/
abstract class AbstractExpression {
public abstract void interpret(Context context);
}
class PlusExpression extends AbstractExpression {
public void interpret(Context context) {
System.out.println(" PlusExpression ++");
String input = context.getInput();
int parsedResult = Integer.parseInt(input);
parsedResult ++;
context.setInput(String.valueOf(parsedResult));
context.setOutput(parsedResult);
}
}
class MinusExpression extends AbstractExpression {
public void interpret(Context context) {
System.out.println(" PlusExpression --");
String input = context.getInput();
int parsedResult = Integer.parseInt(input);
parsedResult --;
context.setInput(String.valueOf(parsedResult));
context.setOutput(parsedResult);
}
}
运行并显示Client:
C:\Interpreter>java Client
PlusExpression ++
PlusExpression ++
PlusExpression --
PlusExpression --
PlusExpression --
9
C:\Interpreter>
9.c#获取本类的类名
string className = this.GetType().FullName;
10.子类沙盒模式Subclass Sandbox
要写的东西太少了,就不单发一篇博客了--by wolf96
使用基类提供的所有操作来定义子类,在子类中组合出几种方法实现
11.求向量的尖
设置y = 0,再单位化normalize
Vector3 crowd_zaxis = crowd_matrix . getForwardAxis ();
camera_zaxis . setY ( 0.0 f );
camera_zaxis = normalize ( camera_zaxis );

12.geometry shader in unity
Shader "Custom/GS Billboard"
{
	Properties
	{
		_SpriteTex ("Base (RGB)", 2D) = "white" {}
		_Size ("Size", Range(0, 3)) = 0.5
	}

	SubShader
	{
		Pass
		{
			Tags { "RenderType"="Opaque" }
			LOD 200

			CGPROGRAM
				#pragma target 5.0
				#pragma vertex VS_Main
				#pragma fragment FS_Main
				#pragma geometry GS_Main
				#include "UnityCG.cginc"

				// **************************************************************
				// Data structures												*
				// **************************************************************
				struct GS_INPUT
				{
					float4	pos		: POSITION;
					float3	normal	: NORMAL;
					float2  tex0	: TEXCOORD0;
				};

				struct FS_INPUT
				{
					float4	pos		: POSITION;
					float2  tex0	: TEXCOORD0;
				};


				// **************************************************************
				// Vars															*
				// **************************************************************

				float _Size;
				float4x4 _VP;
				Texture2D _SpriteTex;
				SamplerState sampler_SpriteTex;

				// **************************************************************
				// Shader Programs												*
				// **************************************************************

				// Vertex Shader ------------------------------------------------
				GS_INPUT VS_Main(appdata_base v)
				{
					GS_INPUT output = (GS_INPUT)0;

					output.pos =  mul(_Object2World, v.vertex);
					output.normal = v.normal;
					output.tex0 = float2(0, 0);

					return output;
				}


				// Geometry Shader -----------------------------------------------------
				[maxvertexcount(4)]
				void GS_Main(point GS_INPUT p[1], inout TriangleStream<FS_INPUT> triStream)
				{
					float3 up = float3(0, 1, 0);
					float3 look = _WorldSpaceCameraPos - p[0].pos;
					look.y = 0;
					look = normalize(look);
					float3 right = cross(up, look);

					float halfS = 0.5f * _Size;

					float4 v[4];
					v[0] = float4(p[0].pos + halfS * right - halfS * up, 1.0f);
					v[1] = float4(p[0].pos + halfS * right + halfS * up, 1.0f);
					v[2] = float4(p[0].pos - halfS * right - halfS * up, 1.0f);
					v[3] = float4(p[0].pos - halfS * right + halfS * up, 1.0f);

					float4x4 vp = mul(UNITY_MATRIX_MVP, _World2Object);
					FS_INPUT pIn;
					pIn.pos = mul(vp, v[0]);
					pIn.tex0 = float2(1.0f, 0.0f);
					triStream.Append(pIn);

					pIn.pos =  mul(vp, v[1]);
					pIn.tex0 = float2(1.0f, 1.0f);
					triStream.Append(pIn);

					pIn.pos =  mul(vp, v[2]);
					pIn.tex0 = float2(0.0f, 0.0f);
					triStream.Append(pIn);

					pIn.pos =  mul(vp, v[3]);
					pIn.tex0 = float2(0.0f, 1.0f);
					triStream.Append(pIn);
				}


				// Fragment Shader -----------------------------------------------
				float4 FS_Main(FS_INPUT input) : COLOR
				{
					return _SpriteTex.Sample(sampler_SpriteTex, input.tex0);
				}

			ENDCG
		}
	}
}
13.fragment shader 可以为null
可以为null,就是不写,也不声明
https://msdn.microsoft.com/zh-cn/library/windows/desktop/bb205146(v=vs.85).aspx
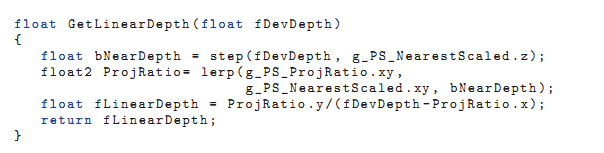
14.求线性深度linear depth
Device depth to linear depth
ProjRatio .xy= float2 ( zfar /( zfar - znear ), znear /( znear - zfar ));
float GetLinearDepth ( float fDevDepth )
{
return ProjRatio .y/( fDevDepth - ProjRatio .x);
}
Final linear depth reconstruction(for deferred lighting?)
float GetLinearDepth ( float fDevDepth )
{
float bNearDepth = step ( fDevDepth , g_PS_NearestScaled .z);
float2 ProjRatio = lerp ( g_PS_ProjRatio .xy ,
g_PS_NearestScaled .xy , bNearDepth );
float fLinearDepth = ProjRatio .y/( fDevDepth - ProjRatio .x);
return fLinearDepth ;
}
15.重建position
         var P : Matrix4x4 = camera.projectionMatrix;
         var invP = P.inverse;
         var projInfo : Vector4 = new Vector4
             ((-2.0f / (Screen.width * P[0])),
              (-2.0f / (Screen.height * P[5])),
              ((1.0f - P[2]) / P[0]),
              ((1.0f + P[6]) / P[5]));

         aoMaterial.SetVector ("_ProjInfo", projInfo); // used for unprojection
         aoMaterial.SetMatrix ("_ProjectionInv", invP); // only used for reference
		float3 ReconstructCSPosition(float2 S, float z)
		{
			float linEyeZ = LinearEyeDepth(z);
			return float3(((S.xy * _MainTex_TexelSize.zw) * _ProjInfo.xy + _ProjInfo.zw) * linEyeZ, linEyeZ);
		}
		float3 GetPosition(float2 ssC, float2 unitOffset)
		{
			float2 ssP = saturate(float2(unitOffset + ssC));

			float3 P;
			P.z = SAMPLE_DEPTH_TEXTURE(_CameraDepthTexture, ssP.xy);

			// Offset to pixel center
			P = ReconstructCSPosition(float2(ssP)/* + float2(0.5, 0.5)*/, P.z);

			return P;
		}
16.Unity的component模式
http://docs.unity3d.com/Manual/GameObjects.html
便于两组件相互通信相互关联的模式
GameObjects
GameObjects are the most important objects in Unity. It is very important to understand what a GameObject is, and how it can be used. This page will explain all that for you.
What are GameObjects?
Every object in your game is a GameObject. However, GameObjects don’t do anything on their own. They need special properties before they can become a character, an environment, or a special effect. But every one of these objects does so many different things. If every object is a GameObject, how do we differentiate an interactive power-up object from a static room? What makes these GameObjects different from each other?
The answer to this question is that GameObjects are containers. They are empty boxes which can hold the different pieces that make up a lightmapped island or a physics-driven car. So to really understand GameObjects, you have to understand these pieces; they are called Components. Depending on what kind of object you want to create, you will add different combinations of Components to the GameObject. Think of a GameObject as an empty cooking pot, and Components as different ingredients that make up your recipe of gameplay. You can also make your own Components using Scripts.
You can read more about GameObjects, Components, and Scripts on the other pages in this section.
17.mono&unity
商业转载请联系作者获得授权,非商业转载请注明出处。
作者:周华
链接:http://www.zhihu.com/question/24676340/answer/28598000
来源:知乎
.net是微软出的标准。如果站在Mono的角度来说,这套标准能规定编译器产生一些符合一定条件的文件出来,这些中间文件最后在目标平台上被解析成跟机器相关的东西。问题是,开始只有Windows上才能运行.net标准的代码。因为其他如Linux之类的机器上没有相应的基础库和相关的执行文件来解析这种标准下的东西。所以,就产生了Mono。Mono的目标是在尽可能多的平台上使.net标准的东西能正常运行的一套工具,叫framework也好,叫库也好,核心在于“跨平台的让.net代码能运行起来“。
目前来说,Mono支持这么多的平台:
Operating Systems
- Linux
- Mac OS X,iPhone OS
- Sun Solaris
- BSD - OpenBSD, FreeBSD, NetBSD
- Microsoft Windows
- Nintendo Wii
- Sony PlayStation 3
- 1.1 C#
- 1.2 F#
- 1.3 Java
- 1.4 Scala
- 1.5 Boo
- 1.6 Nemerle
- 1.7 Visual Basic.NET
- 1.8 Python
- 1.9 JavaScript
- 1.10 Oberon
- 1.11 PHP
- 1.12 Object Pascal
- 1.13 LUA
- 1.14 Cobra
- 1.15 Other languages
看到上面的Boo和C#和JavaScript了,就是Unity目前选用的三种语言。
其他参考:
Mono Project (由Novell公司主持)_中文C#技术站
2、Unity:
这是一个3D引擎,用来给行业(游戏、教育、仿真等需要大量使用三维数字表现的地方)快速的制作互动式的3D数字产品(主要是3d游戏)的工具。在用到编程的地方,Unity采用C#、JavaScript(官方可能叫UnityScript)、Boo,这些语言的编译支持需要上面的Mono的支持。Unity默认的开发IDE,也是Mono提供的MonoDevelop。Unity的跨平台能力,主要是架构在Mono这个基础上。
18.提高播放器音质方法(题外。。)
首先设置软件:
WMP因为没找到 ASIO输出方法,就使用了WDM输出,只把输出位数改为24bit输出
设置方法:
按Alt调出菜单,选择 工具-》选项..., 然后 《设备》选项卡里选择 扬声器 ,点 高级。
然后音频设备选择: MUSILAND Monitor 02 US,同时把下面的勾选上(对音频CD使用24位音频),这个设置可以提高播放HDCD的音质。
千千静听:
右键主界面点属性,选择 音频设备 ,然后在输出设备里选择 MUSILAND Monitor ASIO Driver,
输出格式选择 原始比特,取消 高频抖动,取消采样率转换。
foobar2000设置:
文件:-》参数选项: 播放-》输出,然后在设备列表里面选择 《ASIO:MUSILAND Monitor Series》
2,在 ASIO虚拟设备选项卡里面,点添加,然后把设备添加进来。
3,在选项卡 高级 里面,把 解码-》基调、曲线波采样率 修改为 192000
以上设置完成。
亲测效果巨大
FOOBAR2000怎样正确安装音频驱动ASIO提升音质
本人以前用惯了千千静听,也曾经发帖如何加载音频驱动软件ASIO4ALL V2,听音效果已经相当不错,唯一的缺憾是在电脑上无法调整音频输出音量,经实际安装使用FOOBAR2000加ASIO能够实现调节音量。
很多音乐发烧友喜欢用FOOBAR2000来播放音乐,目前FOOBAR2000最新版本是V1.2.9。这款软件有非常多的插件可以应用,其中对音质提升最为明显是ASIO。但是很多人都不知道有ASIO这款音频驱动插件,更不知道如何正确安装使用,下面作些安装方面的共享:
1,到哪里下载汉化版FOOBAR2000V1.2.9:
百度网盘:
链接:http://pan.baidu.com/share/link? ... 1&uk=3355546973 密码:vs8w
软件包里选择安装B版的FOOBAR2000V1.2.9。
2,音频驱动插件foo_out_asio.fb2k-component (182.14K)可以直接到FOOBAR2000官网下载: http://www.foobar2000.org/components/view/foo_out_asio,点击Links下面的Download,并记住下载保存该安装文件的位置。
3,安装FOOBAR2000,界面如下:

4,安装foo_out_asio.fb2k-component ,依次点“文件”--“参数选项”--“组件””:

继续点“安装”-找到foo_out_asio.fb2k-component 安装文件存放地址,点击foo_out_asio.fb2k-component 为蓝色,再点“打开”后可以见到以下对话框:

上图中右侧对话框内最上方第一栏“组件”下方是foo_out_asio,说明安装ASIO成功。
5,进行播放输出的设置:依次点“文件”--“参数设置”-- “播放”前面的“+”--“输出”前面的“+”--点蓝“输出”,在右侧“设备”下面下拉菜单点选“ASIO:ASIO4ALL V2”,点击下方的“确定”,如下图:

6,在左侧对话框中“输出”下方子菜单“ASIO”点蓝,在右侧对话框中间“run with high...”前面的小方框点钩,最后点击下方的“确定”。

到此一切OK了,只要添加音频文件进行播放时,在屏幕右下角会出现ASIO4ALL V2的对话框,音质能有非常明显的提升。
WMP,是Windows 操作系统自带的 Windows Media Player播放器,不同版本的WINDOWS操作系统均自带此款播放器,由于不同版本WINDOWS操作系统的底层架构不同,系统自带的WMP播放器功能也不尽相同,特别是WINDOWS XP 与WINDOWS 7 或WINDOWS8、WINDOWS 8.1差别更大!


19.c#精确计算函数运行多长时间
#有个Stopwatch用来计时的,按你的需求,代码可能是
Stopwatch sw1 = new Stopwatch();
Stopwatch sw2 = new Stopwatch();
sw1.Start();//主程序开始计时
//其它代码
sw2.Start();//f方法开始计时
f();
sw2.Stop();
//其它代码
sw1.Stop();
//sw1.ElapsedMilliseconds即为总耗时(毫秒),sw2.ElapsedMilliseconds为f运行耗时
//当然Stopwatch还有其它一些用法,比如分段记时等等,可以自己研究一下。20.c#获取当前执行行数,当前执行的函数,当前执行的文件
http://blog.csdn.net/weizhiai12/article/details/7062854
当前执行行数
    public static int GetLineNum()
    {
        System.Diagnostics.StackTrace st = new System.Diagnostics.StackTrace(1, true);
        return st.GetFrame(0).GetFileLineNumber();
    }
当前执行函数
http://bbs.csdn.net/topics/100112348
System.Reflection.MethodInfo.GetCurrentMethod().Name 当前执行文件
    public static string GetCurSourceFileName()
    {
        System.Diagnostics.StackTrace st = new System.Diagnostics.StackTrace(1, true);

        return st.GetFrame(0).GetFileName();

}21.基数排序
http://www.cnblogs.com/jingmoxukong/p/4311237.html
基数排序又称桶排序。
基数排序与本系列前面讲解的七种排序方法都不同,它不需要比较关键字的大小。
它是根据关键字中各位的值,通过对排序的N个元素进行若干趟“分配”与“收集”来实现排序的。
不妨通过一个具体的实例来展示一下,基数排序是如何进行的。
我们知道,任何一个阿拉伯数,它的各个位数上的基数都是以0~9来表示的。
所以我们不妨把0~9视为10个桶。
我们先根据序列的个位数的数字来进行分类,将其分到指定的桶中。例如:R[0] = 50,个位数上是0,将这个数存入编号为0的桶中。
分类后,我们在从各个桶中,将这些数按照从编号0到编号9的顺序依次将所有数取出来。
这时,得到的序列就是个位数上呈递增趋势的序列。
接下来,可以对十位数、百位数也按照这种方法进行排序,最后就能得到排序完成的序列。
22.c#多维数组与锯齿数组
多维数组:a[ , ]锯齿数组:a[ ][ ]
23.凸包

常见求法
Graham's Scan法

Jarvis步进法。
中心法
水平法
快包法
选择最左、最右、最上、最下的点,它们必组成一个凸 四边形(或三角形)。这个四边形内的点必定不在凸包上。然后将其余的点按最接近的边分成四部分,再进行快包法(QuickHull)Graham扫描法
基本思想:通过设置一个关于候选点的堆栈s来解决凸包问题。
操作:输入集合Q中的每一个点都被压入栈一次,非CH(Q)(表示Q的凸包)中的顶点的点最终将被弹出堆栈,当算法终止时,堆栈S中仅包含CH(Q)中的顶点,其顺序为个各顶点在边界上出现的逆时针方向排列的顺序。
注:下列过程要求|Q|>=3,它调用函数TOP(S)返回处于堆栈S 顶部的点,并调用函数NEXT-TO –TOP(S)返回处于堆栈顶部下面的那个点。但不改变堆栈的结构。
GRAHAM-SCAN(Q)
1 设P0 是Q 中Y 坐标最小的点,如果有多个这样的点则取最左边的点作为P0;
2 设<P1,P2,……,Pm>是Q 中剩余的点,对其按逆时针方向相对P0 的极角进行排序,如果有数个点有相同的极角,则去掉其余的点,只留下一个与P0 距离最远的那个点;
3 PUSH(p0 , S)
4 PUSH(p1 , S)
5 PUSH(p3 , S)
6 for i←3 to m
7 do while 由点NEXT-TOP-TOP(S),TOP(S)和Pi 所形成的角形成一次非左转
8 do POP(S)
9 PUSH(pi , S)
10 return S
首先,找一个凸包上的点,把这个点放到第一个点的位置P0。然后把P1~Pm 按照P0Pi的方向排序,可以用矢量积(叉积)判定。
做好了预处理后开始对堆栈中的点<p3,p4,...,pm>中的每一个点进行迭代,在第7到8行的while循环把发现不是凸包中的顶点的点从堆栈中移去。(原理:沿逆时针方向通过凸包时,在每个顶点处应该向左转。因此,while循环每次发现在一个顶点处没有向左转时,就把该顶点从堆栈中弹出。)当算法向点pi推进、在已经弹出所有非左转的顶点后,就把pi压入堆栈中。
举例如下:


http://www.cnblogs.com/jbelial/archive/2011/08/05/2128625.html
24.等价关系
25.矩阵乘法


26.矩阵转置
把矩阵A的行换成相应的列,得到的新矩阵称为A的转置矩阵,记作AT或A。通常矩阵的第一列作为转置矩阵的第一行,第一行作为转置矩阵的第一列
27.带状矩阵
设一个n×n方阵里,i表示行,j表示列则带状矩阵要满足的条件是:当:
1. i=1,j=1,2
2. 1<i<n,j=i-1,i,i+1
3. i=n,j=n-1,n
时,aij≠0.否则aij=0
所以,比如一个10×10带状矩阵可以是:
1100000000
1110000000
0111000000
0011100000
0001110000
0000111000
0000011100
0000001110
0000000111
0000000011
28.unity中的自阴影
Shader "Custom/shadow" {
	SubShader{
	Pass{

		// 1.) This will be the base forward rendering pass in which ambient, vertex, and
		// main directional light will be applied. Additional lights will need additional passes
		// using the "ForwardAdd" lightmode.
		// see: http://docs.unity3d.com/Manual/SL-PassTags.html
		Tags{ "LightMode" = "ForwardBase" }

		CGPROGRAM

#pragma vertex vert
#pragma fragment frag
#include "UnityCG.cginc"

			// 2.) This matches the "forward base" of the LightMode tag to ensure the shader compiles
			// properly for the forward bass pass. As with the LightMode tag, for any additional lights
			// this would be changed from _fwdbase to _fwdadd.
#pragma multi_compile_fwdbase

			// 3.) Reference the Unity library that includes all the lighting shadow macros
#include "AutoLight.cginc"


		struct v2f
		{
			float4 pos : SV_POSITION;

			// 4.) The LIGHTING_COORDS macro (defined in AutoLight.cginc) defines the parameters needed to sample
			// the shadow map. The (0,1) specifies which unused TEXCOORD semantics to hold the sampled values -
			// As I'm not using any texcoords in this shader, I can use TEXCOORD0 and TEXCOORD1 for the shadow
			// sampling. If I was already using TEXCOORD for UV coordinates, say, I could specify
			// LIGHTING_COORDS(1,2) instead to use TEXCOORD1 and TEXCOORD2.
			LIGHTING_COORDS(0, 1)
		};


		v2f vert(appdata_base v) {
			v2f o;
			o.pos = mul(UNITY_MATRIX_MVP, v.vertex);

			// 5.) The TRANSFER_VERTEX_TO_FRAGMENT macro populates the chosen LIGHTING_COORDS in the v2f structure
			// with appropriate values to sample from the shadow/lighting map
			TRANSFER_VERTEX_TO_FRAGMENT(o);

			return o;
		}

		fixed4 frag(v2f i) : COLOR{

			// 6.) The LIGHT_ATTENUATION samples the shadowmap (using the coordinates calculated by TRANSFER_VERTEX_TO_FRAGMENT
			// and stored in the structure defined by LIGHTING_COORDS), and returns the value as a float.
			float attenuation = LIGHT_ATTENUATION(i);
			return fixed4(1.0, 0.0, 0.0, 1.0) * attenuation;
		}

		ENDCG
	}
}

	// 7.) To receive or cast a shadow, shaders must implement the appropriate "Shadow Collector" or "Shadow Caster" pass.
	// Although we haven't explicitly done so in this shader, if these passes are missing they will be read from a fallback
	// shader instead, so specify one here to import the collector/caster passes used in that fallback.
	Fallback "VertexLit"
}29.unity mutipass shader with light map
You should use the Blend-tag to blend the result of two passes.BlendDstColorZero ,etc.
https://gist.github.com/jimfleming/5937437
Shader "Diffuse Lightmap" {

  Properties {
    _MainTex ("Texture 1", 2D) = "white" {}
  }

  SubShader {
    Tags { "RenderType" = "Opaque" }

    Pass {
      // Disable lighting, we're only using the lightmap
      Lighting Off

      CGPROGRAM
      // Must be a vert/frag shader, not a surface shader: the necessary variables
      // won't be defined yet for surface shaders.
      #pragma vertex vert
      #pragma fragment frag

      #include "UnityCG.cginc"

      struct v2f {
        float4 pos : SV_POSITION;
        float2 uv0 : TEXCOORD0;
        float2 uv1 : TEXCOORD1;
      };

      struct appdata_lightmap {
        float4 vertex : POSITION;
        float2 texcoord : TEXCOORD0;
        float2 texcoord1 : TEXCOORD1;
      };

      // These are prepopulated by Unity
      sampler2D unity_Lightmap;
      float4 unity_LightmapST;

      sampler2D _MainTex;
      float4 _MainTex_ST; // Define this since its expected by TRANSFORM_TEX; it is also pre-populated by Unity.

      v2f vert(appdata_lightmap i) {
        v2f o;
        o.pos = mul(UNITY_MATRIX_MVP, i.vertex);

        // UnityCG.cginc - Transforms 2D UV by scale/bias property
        // #define TRANSFORM_TEX(tex,name) (tex.xy * name##_ST.xy + name##_ST.zw)
        o.uv0 = TRANSFORM_TEX(i.texcoord, _MainTex);

        // Use `unity_LightmapST` NOT `unity_Lightmap_ST`
        o.uv1 = i.texcoord1.xy * unity_LightmapST.xy + unity_LightmapST.zw;
        return o;
      }

      half4 frag(v2f i) : COLOR {
        half4 main_color = tex2D(_MainTex, i.uv0);

        // Decodes lightmaps:
        // - doubleLDR encoded on GLES
        // - RGBM encoded with range [0;8] on other platforms using surface shaders
        // inline fixed3 DecodeLightmap(fixed4 color) {
        // #if defined(SHADER_API_GLES) && defined(SHADER_API_MOBILE)
          // return 2.0 * color.rgb;
        // #else
          // return (8.0 * color.a) * color.rgb;
        // #endif
        // }

        main_color.rgb *= DecodeLightmap(tex2D(unity_Lightmap, i.uv1));
        return main_color;
      }
      ENDCG
    }
  }
}
// Upgrade NOTE: commented out 'float4 unity_LightmapST', a built-in variable
// Upgrade NOTE: commented out 'sampler2D unity_Lightmap', a built-in variable
// Upgrade NOTE: replaced tex2D unity_Lightmap with UNITY_SAMPLE_TEX2D
Shader "Custom/lightMapTest" {
Properties{
_NormalTex("normal texture", 2D) = "white" {}
_MainTex("Base (RGB)", 2D) = "white" {}
_Color("Color", Color) = (1, 1, 1, 1)
// _CoolC("Cool Color", Color) = (1, 1, 1, 1)
// _WarmC("Warm Color", Color) = (1, 1, 1, 1)
}
SubShader{
pass{//平行光的的pass渲染
Tags{ "LightMode" = "ForwardBase" }
Cull Back
CGPROGRAM
#pragma vertex vert
#pragma fragment frag
//#pragma multi_compile_fwdbase
#include "UnityCG.cginc"
#include "Lighting.cginc"
#include "AutoLight.cginc"
#pragma target 5.0
float4 _Color;
/// sampler2D unity_lightmap;
// float4 unity_lightmapST;
uniform sampler2D _NormalTex;
uniform sampler2D _MainTex;
float4 _MainTex_ST;
struct v2f {
float4 pos : SV_POSITION;
float2 uv_MainTex : TEXCOORD0;
float3 lightDir : TEXCOORD1;
float3 viewDir : TEXCOORD2;
float3 normal : TEXCOORD3;
// float2 uv_lightmap : TEXCOORD4;
LIGHTING_COORDS(4, 1)
};
v2f vert(appdata_full v) {
v2f o;
o.pos = mul(UNITY_MATRIX_MVP, v.vertex);
o.normal = v.normal;
o.lightDir = ObjSpaceLightDir(v.vertex);
o.viewDir = ObjSpaceViewDir(v.vertex);
o.uv_MainTex = TRANSFORM_TEX(v.texcoord, _MainTex);
// o.uv_lightmap = v.texcoord1.xy * unity_lightmapST.xy + unity_lightmapST.zw;
TRANSFER_VERTEX_TO_FRAGMENT(o);
return o;
}
float4 frag(v2f i) :COLOR
{
float3 lightDir = normalize(i.lightDir);
float3 viewDir = normalize(i.viewDir);
float3 N = normalize(i.normal);
float3 H = normalize(lightDir + viewDir);
float4 c = tex2D(_MainTex, i.uv_MainTex);
float3 lightColor = _LightColor0.rgb;
float diff = max(0.1, dot(lightDir, N));
// float4 lightMap = tex2D(unity_lightmap, i.uv_lightmap);
return c*_Color;
return float4(diff*lightColor/*DecodeLightmap(lightMap)*/, 1)*c*_Color;
}
ENDCG
}
Pass{
Blend DstColor Zero
// Disable lighting, we're only using the lightmap
Lighting Off
CGPROGRAM
// Must be a vert/frag shader, not a surface shader: the necessary variables
// won't be defined yet for surface shaders.
#pragma vertex vert
#pragma fragment frag
#include "UnityCG.cginc"
struct v2f {
float4 pos : SV_POSITION;
float2 uv0 : TEXCOORD0;
float2 uv1 : TEXCOORD1;
};
struct appdata_lightmap {
float4 vertex : POSITION;
float2 texcoord : TEXCOORD0;
float2 texcoord1 : TEXCOORD1;
};
// These are prepopulated by Unity
// sampler2D unity_Lightmap;
// float4 unity_LightmapST;
sampler2D _MainTex;
float4 _MainTex_ST; // Define this since its expected by TRANSFORM_TEX; it is also pre-populated by Unity.
v2f vert(appdata_lightmap i) {
v2f o;
o.pos = mul(UNITY_MATRIX_MVP, i.vertex);
// UnityCG.cginc - Transforms 2D UV by scale/bias property
// #define TRANSFORM_TEX(tex,name) (tex.xy * name##_ST.xy + name##_ST.zw)
o.uv0 = TRANSFORM_TEX(i.texcoord, _MainTex);
// Use `unity_LightmapST` NOT `unity_Lightmap_ST`
o.uv1 = i.texcoord1.xy * unity_LightmapST.xy + unity_LightmapST.zw;
return o;
}
half4 frag(v2f i) : COLOR{
half4 main_color = tex2D(_MainTex, i.uv0);
// Decodes lightmaps:
// - doubleLDR encoded on GLES
// - RGBM encoded with range [0;8] on other platforms using surface shaders
// inline fixed3 DecodeLightmap(fixed4 color) {
// #if defined(SHADER_API_GLES) && defined(SHADER_API_MOBILE)
// return 2.0 * color.rgb;
// #else
// return (8.0 * color.a) * color.rgb;
// #endif
// }
main_color.rgb *= DecodeLightmap(UNITY_SAMPLE_TEX2D(unity_Lightmap, i.uv1));
return main_color;
}
ENDCG
}
}
FallBack "Diffuse"
}
30.环境光
UNITY_LIGHTMODEL_AMBIENT
31.在物体shader中获取其像素的z值和屏幕空间uv值
			float4 scr=ComputeScreenPos(i.scr);
			scr.xyz/=scr.w;
			float hd=scr.z;
			hd=Linear01Depth(hd);

			float d=tex2D(_CameraDepthTexture,scr.xy).r;// 取得屏幕上的像素点的Z深度,scr.xy就是屏幕空间uv
d=Linear01Depth(d);32.shader中点光源光照处理
https://en.wikibooks.org/wiki/Cg_Programming/Unity/Multiple_Lights主要部分:
 // Diffuse reflection by four "vertex lights"
            float3 vertexLighting = float3(0.0, 0.0, 0.0);
            #ifdef VERTEXLIGHT_ON
            for (int index = 0; index < 4; index++)
            {
               float4 lightPosition = float4(unity_4LightPosX0[index],
                  unity_4LightPosY0[index],
                  unity_4LightPosZ0[index], 1.0);

               float3 vertexToLightSource =
                  lightPosition.xyz - output.posWorld.xyz;
               float3 lightDirection = normalize(vertexToLightSource);
               float squaredDistance =
                  dot(vertexToLightSource, vertexToLightSource);
               float attenuation = 1.0 / (1.0 +
                  unity_4LightAtten0[index] * squaredDistance);
               float3 diffuseReflection = attenuation
                  * unity_LightColor[index].rgb * _Color.rgb
                  * max(0.0, dot(output.normalDir, lightDirection));

               vertexLighting = vertexLighting + diffuseReflection;
            }
            #endif
全部shader:
Shader "Cg per-pixel lighting with vertex lights" {
   Properties {
      _Color ("Diffuse Material Color", Color) = (1,1,1,1)
      _SpecColor ("Specular Material Color", Color) = (1,1,1,1)
      _Shininess ("Shininess", Float) = 10
   }
   SubShader {
      Pass {
         Tags { "LightMode" = "ForwardBase" } // pass for
            // 4 vertex lights, ambient light & first pixel light

         CGPROGRAM
         #pragma multi_compile_fwdbase
         #pragma vertex vert
         #pragma fragment frag

         #include "UnityCG.cginc"
         uniform float4 _LightColor0;
            // color of light source (from "Lighting.cginc")

         // User-specified properties
         uniform float4 _Color;
         uniform float4 _SpecColor;
         uniform float _Shininess;

         struct vertexInput {
            float4 vertex : POSITION;
            float3 normal : NORMAL;
         };
         struct vertexOutput {
            float4 pos : SV_POSITION;
            float4 posWorld : TEXCOORD0;
            float3 normalDir : TEXCOORD1;
            float3 vertexLighting : TEXCOORD2;
         };

         vertexOutput vert(vertexInput input)
         {
            vertexOutput output;

            float4x4 modelMatrix = _Object2World;
            float4x4 modelMatrixInverse = _World2Object;

            output.posWorld = mul(modelMatrix, input.vertex);
            output.normalDir = normalize(
               mul(float4(input.normal, 0.0), modelMatrixInverse).xyz);
            output.pos = mul(UNITY_MATRIX_MVP, input.vertex);

            // Diffuse reflection by four "vertex lights"
            output.vertexLighting = float3(0.0, 0.0, 0.0);
            #ifdef VERTEXLIGHT_ON
            for (int index = 0; index < 4; index++)
            {
               float4 lightPosition = float4(unity_4LightPosX0[index],
                  unity_4LightPosY0[index],
                  unity_4LightPosZ0[index], 1.0);

               float3 vertexToLightSource =
                  lightPosition.xyz - output.posWorld.xyz;
               float3 lightDirection = normalize(vertexToLightSource);
               float squaredDistance =
                  dot(vertexToLightSource, vertexToLightSource);
               float attenuation = 1.0 / (1.0 +
                  unity_4LightAtten0[index] * squaredDistance);
               float3 diffuseReflection = attenuation
                  * unity_LightColor[index].rgb * _Color.rgb
                  * max(0.0, dot(output.normalDir, lightDirection));

               output.vertexLighting =
                  output.vertexLighting + diffuseReflection;
            }
            #endif
            return output;
         }

         float4 frag(vertexOutput input) : COLOR
         {
            float3 normalDirection = normalize(input.normalDir);
            float3 viewDirection = normalize(
               _WorldSpaceCameraPos - input.posWorld.xyz);
            float3 lightDirection;
            float attenuation;

            if (0.0 == _WorldSpaceLightPos0.w) // directional light?
            {
               attenuation = 1.0; // no attenuation
               lightDirection =
                  normalize(_WorldSpaceLightPos0.xyz);
            }
            else // point or spot light
            {
               float3 vertexToLightSource =
                  _WorldSpaceLightPos0.xyz - input.posWorld.xyz;
               float distance = length(vertexToLightSource);
               attenuation = 1.0 / distance; // linear attenuation
               lightDirection = normalize(vertexToLightSource);
            }

            float3 ambientLighting =
                UNITY_LIGHTMODEL_AMBIENT.rgb * _Color.rgb;

            float3 diffuseReflection =
               attenuation * _LightColor0.rgb * _Color.rgb
               * max(0.0, dot(normalDirection, lightDirection));

            float3 specularReflection;
            if (dot(normalDirection, lightDirection) < 0.0)
               // light source on the wrong side?
            {
               specularReflection = float3(0.0, 0.0, 0.0);
                  // no specular reflection
            }
            else // light source on the right side
            {
               specularReflection = attenuation * _LightColor0.rgb
                  * _SpecColor.rgb * pow(max(0.0, dot(
                  reflect(-lightDirection, normalDirection),
                  viewDirection)), _Shininess);
            }

            return float4(input.vertexLighting + ambientLighting
               + diffuseReflection + specularReflection, 1.0);
         }
         ENDCG
      }

      Pass {
         Tags { "LightMode" = "ForwardAdd" }
            // pass for additional light sources
         Blend One One // additive blending

          CGPROGRAM

         #pragma vertex vert
         #pragma fragment frag

         #include "UnityCG.cginc"
         uniform float4 _LightColor0;
            // color of light source (from "Lighting.cginc")

         // User-specified properties
         uniform float4 _Color;
         uniform float4 _SpecColor;
         uniform float _Shininess;

         struct vertexInput {
            float4 vertex : POSITION;
            float3 normal : NORMAL;
         };
         struct vertexOutput {
            float4 pos : SV_POSITION;
            float4 posWorld : TEXCOORD0;
            float3 normalDir : TEXCOORD1;
         };

         vertexOutput vert(vertexInput input)
         {
            vertexOutput output;

            float4x4 modelMatrix = _Object2World;
            float4x4 modelMatrixInverse = _World2Object;

            output.posWorld = mul(modelMatrix, input.vertex);
            output.normalDir = normalize(
               mul(float4(input.normal, 0.0), modelMatrixInverse).xyz);
            output.pos = mul(UNITY_MATRIX_MVP, input.vertex);
            return output;
         }

         float4 frag(vertexOutput input) : COLOR
         {
            float3 normalDirection = normalize(input.normalDir);

            float3 viewDirection = normalize(
               _WorldSpaceCameraPos.xyz - input.posWorld.xyz);
            float3 lightDirection;
            float attenuation;

            if (0.0 == _WorldSpaceLightPos0.w) // directional light?
            {
               attenuation = 1.0; // no attenuation
               lightDirection =
                  normalize(_WorldSpaceLightPos0.xyz);
            }
            else // point or spot light
            {
               float3 vertexToLightSource =
                  _WorldSpaceLightPos0.xyz - input.posWorld.xyz;
               float distance = length(vertexToLightSource);
               attenuation = 1.0 / distance; // linear attenuation
               lightDirection = normalize(vertexToLightSource);
            }

            float3 diffuseReflection =
               attenuation * _LightColor0.rgb * _Color.rgb
               * max(0.0, dot(normalDirection, lightDirection));

            float3 specularReflection;
            if (dot(normalDirection, lightDirection) < 0.0)
               // light source on the wrong side?
            {
               specularReflection = float3(0.0, 0.0, 0.0);
                  // no specular reflection
            }
            else // light source on the right side
            {
               specularReflection = attenuation * _LightColor0.rgb
                  * _SpecColor.rgb * pow(max(0.0, dot(
                  reflect(-lightDirection, normalDirection),
                  viewDirection)), _Shininess);
            }

            return float4(diffuseReflection
               + specularReflection, 1.0);
               // no ambient lighting in this pass
         }

         ENDCG
      }

   }
   Fallback "Specular"
}33.物体空间转为世界空间的正确转换方式
i have this very problem but when i look in the UnityCG.cginc they comput the worldspace pos several time using code like float3 worldPos = mul(_Object2World, v).xyz; which is exacly what you do
这个是对的:
mul(_Object2World, v.vertex).xyz;;这个是错的:
mul(_Object2World, v.vertex.xyz);34.只可见阴影而不见物体
http://answers.unity3d.com/questions/269292/having-an-invisible-object-that-casts-shadows.html
EDIT for Unity 5:
Now, you just have to change the Cast Shadows Mode to "Shadows Only" in the Mesh Renderer property of your gameobject.
Legacy solution for Unity 4:
I've seen this question asked many times, but no one gave any easy answer, although it exists..! I have been able to find it after reading a lot of forum posts and some experimentations, and here it goes :
1- add this shader in your project : (ie: copy/paste in a file named "InvisibleShadowCaster.shader" )
Shader "Transparent/InvisibleShadowCaster"{Subshader{UsePass "VertexLit/SHADOWCOLLECTOR"UsePass "VertexLit/SHADOWCASTER"}Fallback off}
2- create a new material, and set its shader to "Transparent/InvisibleShadowCaster"
3- assign that new material to your Invisible shadow caster object
4- Done
As there's only the shadow casting pass supported (1 for forward rendering & 1 for deferred rendering), you can be sure it doesn't take any extra resource, and it's easy to set it all up.
Here the result :
You can notice the shadow on the box under the plan, and on the bottom part of the sphere.


 765
765

 被折叠的 条评论
为什么被折叠?
被折叠的 条评论
为什么被折叠?
 到【灌水乐园】发言


