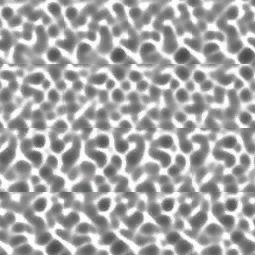
大家好,我是Zander. 今天我们来实现一下水波纹的效果。效果如下:
具体实现如下:
Shader "Custom/AnimTextureShader" {
	Properties {
		_MainTex("Base (RGB)",2D) = "white"{}        // 资源图
		_NumTexTiles("Num tex tiles",Vector) = (4,4,0,0)  //图片瓦块的数量 4*4
		_ReplaySpeed("Replay speed",float)  = 4       //纹理移动速度
		_Color("Color",Color) = (1,1,1,1)             //背景色
	}
	SubShader {
		Tags { "Queue"="Transparent"  "IgnoreProjector" = "True"  "RenderType"="Transparent" }

		Blend One One      // 贴图和背景叠加   无Alpha透明通道处理   Blend zero one:仅显示背景的RGB部分 Blend one  zero:  仅显示贴图的RGB部分,无Alpha透明通道处理。
		Cull Off           //  cull off  双面都渲染  cull back 单面渲染  Cull Front 剔除正面
		Lighting Off       //关闭灯光
		ZWrite Off Fog{ Color(0,0,0,0) }

		CGINCLUDE
		#include"UnityCG.cginc"
		sampler2D _MainTex;

		float4    _Color;
		float4    _NumTexTiles;
		float     _ReplaySpeed;
		float     _Randomize;

		struct v2f
		{
		   float4 pos : SV_POSITION;  //裁剪空间中的顶点坐标
		   float4 uv  : TEXCOORD0;    //顶点的纹理坐标
		   fixed4 col : COLOR;        //顶点颜色
		};

		float2 Rand(float2 ij)    //得到x方向 和y 方向上的随机数
		{
		   const float4 a = float4(97.409091034f,54.598150033f,56.205410758f,44.687805943f);
		   float4 result = float4(ij ,ij);

		   for( int i = 0; i < 2 ; i++)
		   {
		       result.x = frac(dot(result,a));
			   result.y = frac(dot(result,a));
			   result.z = frac(dot(result,a));
			   result.w = frac(dot(result,a));
		   }

		   return result.xy;
		}

		v2f vert(appdata_full v)    //顶点计算  appdata_full  可用于顶点着色器的输入
		{
		    v2f o;

			float     time  = (v.color.a*60 + _Time.y) * _ReplaySpeed;
			float     itime = floor(time);
			float     ntime = itime +1;
			float     ftime = time - itime;

			float2    texTileSize  = 1.0f / _NumTexTiles.xy;
			float4    tile;

#if 0
		if (_Randomize > 0)
		{
			itime = floor(Rand(itime) * 1000);
			ntime= floor(Rand(ntime) * 1000);
		}
#endif

		#if 1
		tile.xy = float2(itime,floor(itime /_NumTexTiles.x));
		tile.zw= float2(ntime,floor(ntime /_NumTexTiles.x));
		#endif


		tile = fmod(tile,_NumTexTiles.xyxy);

		o.pos= mul(UNITY_MATRIX_MVP, v.vertex);      // UNITY_MATRIX_MVP 用于将顶点/方向矢量从模型空间转换到剪裁空间   mul()  矩阵转换函数
		o.uv	= (v.texcoord.xyxy + tile) * texTileSize.xyxy;   //得到UV值
		o.col	= float4(_Color.xyz * v.color.xyz,ftime);        //得到颜色值


		return o;
		}
		ENDCG

		Pass {
		CGPROGRAM
		#pragma vertex vert
		#pragma fragment frag
		#pragma fragmentoption ARB_precision_hint_fastest		 // fragmentoption 用于限制编译出的frag函数
		fixed4 frag (v2f i) : COLOR    //片元计算
		{
			return lerp(tex2D (_MainTex, i.uv.xy),tex2D (_MainTex, i.uv.zw),i.col.a) * i.col;
		}
		ENDCG
	}
		}
}
返回到Unity中,在场景中新建Plane物体,然后在Project下创建一个Material,把新写的shader赋给Material上,如图
好了,这一章就写到这,欢迎大家加入QQ群:280993838 。或者关注我的公众号:


 1489
1489

 被折叠的 条评论
为什么被折叠?


