


The PC's software environment is mainly consisted of Win Pro. SP1, VS2010 (CHN langue pack) and a PCL-1.6.0.
1. cmake-3.6.2-win64-x64: It is available athttps://cmake.org/download/.
2. opencv-2.4.10 for Windows.
3. PCL-1.6.0-AllInOne-msvc2010-win32 at
4. qt-opensource-windows-x86-msvc2010_opengl-5.4.1: It isavailable athttps://download.qt.io/archive/qt/5.4/5.4.1/.
5. libQGLViewer-2.6.3: This one is available athttp://libqglviewer.com/src/.
6. suitesparse-metis-for-windows-1.3.0 athttps://github.com/jlblancoc/suitesparse-metis-for-windows/tree/v1.3.0
7. g2o: Use the one given in RGB-D SLAM package (GAO Xiang).
Before going any further, make sure every binary package you downloaded is consistent with you compiler, e.g. the compiler in my work is MSVC10.0 (VS2010) and the binary installation of Qt5 (item 4 given above) is also compiled by MSVC 10.0.
1. Install cmake at first. The version used in my work is given above.
Decompress the installation package in advance, e.g. extract files to D:\cmake362\bin.
Open bin\cmake-gui which then looks like

 (Zoom it to have a goodlook.)
2. Install OpenCV to D:\opencv2410.
3. Install SuiteSparse in terms of two blogs,
http://blog.csdn.net/ye_shen_wei_mian/article/details/51864239
and
http://m.blog.csdn.net/article/details?id=50100549
, where the details originates from the 2nd blog.
In the 2nd blog, we were told that the Sparse suite contains many OpenSource libraries, such as Blas, Lapack, Cholmod et al. where Cholmod is our need but later we also use BLAS and LAPACK libraries.
è Extract files from the SuiteSparse package. Files of each package were depressed to “D:” unless other cases mentioned. Remember the director where the SuiteSparse had just been exported, which we denote it as SP_ROOT. SuiteSparse root is d:\suitesparse130.
è In the 3rd step of blog 2, we were told that don't replace the existing METIS with an extra download (if you have, of course). Yes, we step this operation.
è Edit SP_ROOT\metis\CMakeLists.txt by appending a newline,
cmake_policy(SET CMP0022NEW)
, at the end of the file. Note that you can have this file a backup before modification.

It should look like this snapshot.
The 2nd blog at this step also told something (version info) about using CUDA which we don't use in this moment.
è Configure CMAKE as the description given in blog 2. We were told here that do not choose HAVE_COMPLEX option to prevent ERRORs. This is my path.
Then, press “Configure” button and choose your compiler as
 .
.
Note that you need to rollback a file namely cvtres.exe under C:\Program Files (x86)\Microsoft Visual Studio 10.0\VC\bin if you get an error as
LINK : fatal error LNK1123:转换到COFF期间失败:文件无效或损坏[D:\suitesparse130\build_vs2010\CMakeFiles\CMakeTmp\cmTC_1efa4.vcxproj]已完成生成项目“D:\suitesparse130\build_vs2010\CMakeFiles\CMakeTmp\cmTC_1efa4.vcxproj”(默认目标)的操作-失败.
I got this error because of the version of my compiler. Hence, a rollback is done by replace a newer version of that .exe file by a relatively older version found in C:\Windows\Microsoft.NET\Framework\v2.0.50727. The problem then solved.
Press the “Configure” button again which gives the result as

There might be an error about BLAS or LAPACK_LIB path. I got these problems during compilation and then I dropped these options, where “SUITESPARSE_DL_LAST” seems to be the flag forgetting the newest version and I choose to drop it at last.

The final configuration looks like
 .
.
è Actually, in my work I did not choose anything after pressing “Configure” button, and then press “Generate” which would give you the result like
 .
.
The folder, build_vs2010, then looks like the right part of the figure below.

è Open the Project file
 , and then build DEBUG version and RELEASE version of the INSTALL project, relatively.
If you want to build the release version, for example, of the INSTALL project, choose “Release” in solution configuration bar
 .
.
In my work, the release version for Win32 arch was built.
The folder of build then gets some new items like

Similarly, we can get the Debug version for Win32 arch and so is X64 arch. In my work, the compiler option for X64 is shown as
 .
.
è Now, we need to test if the compiled SuiteSparse works well or not.
Suppose that we use Win32 arch and we firstly create an empty Win32 C++ project via VS2010, named as SSparseTest.
Second, we create a new environment variable at user's variable. For example, the variable's name is set as SSPARSE and its value is set by D:\suitesparse130\build_vs2010 where the compiled project had just been obtained.
è Qt5 Installation.
My Qt5 version is qt-windows-opensource-5.4.1-msvc2010_opengl-x86-offline gathered fromhttp://download.qt.io/archive/qt/5.4/5.4.1/.We need a version that combines with OpenGL for generating libQGLViewer.
Double click its icon to install it.
Next, we need to download a Qt addin. We got a qt-vs-addin-1.2.4-opensource.exe in this case. We then can find a Qt5 in the menu bar of VS 2010.

Open this menu and set Qt Options, for which we firstly choose “Qt Version” option and add the path of Qt that had just been installed. It gives a version name automatically once we chose the path of Qt, see snapshot below.

è We go to the first try of compiling libQGLViewer-2.6.3 instead of using the one given by GAO's blog.
In my work, this package removed and libQGLViewer-2.6.3 is used instead. It's been exported to D:\libQGLViewer263.
Beforeopen libQGLViewer….pro, remember that we need to make sure the environment variable of Qt5 already exists, which is QTDIR (or QT_DIR, this is better I guess) would be used for generating the project.
Choose “Open Qt Project File (.pro) ...” of the ‘Qt5’ menu to open libQGLViewer project.

è We now get to compile g2o given in GAO's package.
The g2o has been decompressed into d:\g2o_Win32 because I didn't have x64 project of libQGLViewer before this step.
Another blog is the reference guide for compiling g2o, which can be found athttp://blog.csdn.net/aptx704610875/article/details/51245143.
Open cmake and set two paths for generating g2o project of the Win32 arch.

Next we choose the compiler as well as what we did for SuiteSparse.
An error occurred while configuring g2o project with cmake (add the policy in CMakeLists.txt).
The error may depends on your compiler and Qt.
CMake finds out several packages are missing, CHOLMOD, BLAS, CSPARSE, Qt, QGLVIEWER and EIGEN3.
è CHOLMOD_INCLUDE_DIR=D:\suitesparse130\build_vs2010\install\include\suitesparse
CHOLMOD_LIBRARY=D:/suitesparse130/build_vs2010/install/lib/libcholmod.lib
CSPARSE_INCLUDE_DIR=D:\suitesparse130\build_vs2010\install\include\suitesparse
CSPARSE_LIBRARY=D:\suitesparse130\build_vs2010\install\lib
EIGEN3_INCLUDE_DIR=C:\Program Files (x86)\PCL1.6.0\3rdParty\Eigen\include\
QGLVIEWER_INCLUDE_DIR=D:\libQGLViewer263\QGLViewer
QGLVIEWER_LIBRARY_DEBUG=D:/libQGLViewer263/QGLViewer/QGLViewer2d.lib
QGLVIEWER_LIBRARY_RELEASE=D:/libQGLViewer263/QGLViewer/QGLViewer2.lib
Qt5_DIR=D:\Qt\Qt5.4.1\5.4\msvc2010_opengl\lib\cmake\Qt5
BLAS_LIBRARIES=D:/suitesparse130/build_vs2010/install/lib/lapack_blas_windows/libblas.lib
BLAS_LIBRARIES_DIR=D:/suitesparse130/build_vs2010/install/lib/lapack_blas_windows
LAPACK_LIBRARIES=D:/suitesparse130/build_vs2010/install/lib/lapack_blas_windows/liblapack.lib
LAPACK_LIBRARIES_DIR=D:/suitesparse130/build_vs2010/install/lib/lapack_blas_windows
CHOLMOD_LIBRARIES=D:/suitesparse130/build_vs2010/install/lib/libcholmod.lib (The itemwe added in terms of CMAKE result).
The next task is compiling g2o project viaVS2010.
è Finally, g2o is successfully compiled after 55 items had been generated.

è In the following, we can try to test the g2o via running a program.
http://blog.csdn.net/aptx704610875/article/details/51245143
We have already obtained .lib, .dll and .exe files of g2o. Open g2o\bin to see these files.
è At last, we are going to do the RGB-D SLAM given in GAO's blog,
http://www.cnblogs.com/gaoxiang12/p/4754948.html.
This test is based on all of tasks we finished previously in terms of GAO's blog, i.e. those CPP projects.
Once you successfully run the program given in the 7th blog, the result can be seen via PCD-viewer and g2o-viewer, respectively.
Both viewers had already been generated after you installed PCL and compiled g2o.
We first launch a command line and get into the directory of PCD-viewer, which looks like

The result of point-cloud can be visualized via a DOS command,
.

Type “Enter” and wait until a new window popping up, and then we will get a view of the point-cloud which looks like
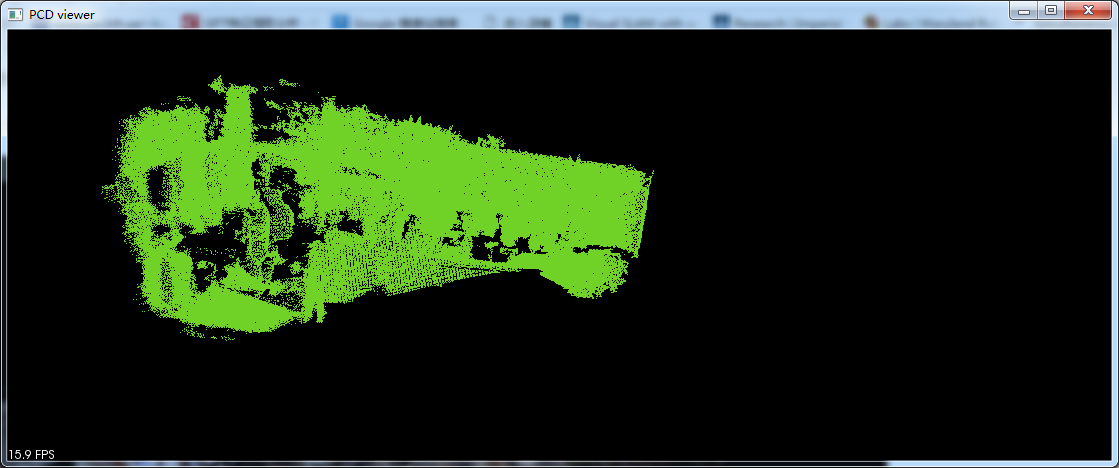
This pic looks bizarre in comparison with the one given in GAO's blog but I don't know what the reason is then. Maybe later I can obtain an answer from them (I posted a question there in the blog).
We can have a look at .g2o file in a similar way.
Turn to the directory of g2o at first.

Launch g2o-viewer via DOS command,
 .
.
Open “File” menu and load your .g2o file, i.e. the pose graph after optimization and before optimizing.
 (g2o viewer)
 (pose graph before optimization)


 1479
1479

 被折叠的 条评论
为什么被折叠?
被折叠的 条评论
为什么被折叠?
 到【灌水乐园】发言


