


下面以 LLaVA-v1.5-13B 为例介绍 LLaVA 模型的训练。
01

特征对齐阶段
准备数据
下载 LLaVA-Pretrain[2] 数据集
# 将数据下载到 ./playground/data/LLaVA-Pretrain,否则需要修改启动脚本的 data\_path 参数
huggingface-cli download --repo-type dataset liuhaotian/LLaVA-Pretrain --local-dir ./playground/data/LLaVA-Pretrain
LLaVA-Pretrain 包含 3 个文件:
- blip_laion_cc_sbu_558k.json:此数据的构造过程是将 image-caption 数据添加随机选择的指令(例如:“Describe this image”)转换成多模态对话,下面是数据示例:
{
    'id': '004539375',
    'image': '00453/004539375.jpg',
    'conversations': \[
      {
        'from': 'human',
        'value': 'Render a clear and concise summary of the photo.\\n<image>'
      },
      {
        'from': 'gpt',
        'value': 'select luxury furniture 3 - inch gel memory foam mattress topper'
      }
    \]  },
- blip_laion_cc_sbu_558k_meta.json:包含 3 种元数据,分别是图像路径、图像 URL 和 blip_caption
{
    'id': '004539375',
    'image': '00453/004539375.jpg',
    'blip\_caption': 'select luxury furniture 3 - inch gel memory foam mattress topper',
    'url': 'http://ec1.ostkcdn.com/images/products/8111140/P15459545.jpg'  }
- images.zip:LAION/CC/SBU 筛选后的子集
解压images.zip
# 解压到 ./playground/data/LLaVA-Pretrain/images,否则需要修改启动脚本的 image\_folder 参数
unzip ./playground/data/LLaVA-Pretrain/images.zip -d ./playground/data/LLaVA-Pretrain/images
启动训练
在这个阶段,使用 8 个 A100(80G)训练 LLaVA-v1.5-13B 大约需要 5.5 小时。
启动的脚本是scripts/v1_5/pretrain.sh,它的内容如下:
#!/bin/bash
deepspeed llava/train/train\_mem.py \\
    --deepspeed ./scripts/zero2.json \\  # 使用 DeepSpeed ZeRO-2
    --model\_name\_or\_path lmsys/vicuna-13b-v1.5 \\  # 语言模型是 lmsys/vicuna-13b-v1.5
    --version plain \\
    --data\_path ./playground/data/LLaVA-Pretrain/blip\_laion\_cc\_sbu\_558k.json \\  # 训练样本文件
    --image\_folder ./playground/data/LLaVA-Pretrain/images \\  # 存放图像的目录
    --vision\_tower openai/clip-vit-large-patch14-336 \\  # 视觉编码器
    --mm\_projector\_type mlp2x\_gelu \\  # projector 的类型
    --tune\_mm\_mlp\_adapter True \\  # 是否训练 projector
    --mm\_vision\_select\_layer -2 \\
    --mm\_use\_im\_start\_end False \\
    --mm\_use\_im\_patch\_token False \\
    --bf16 True \\
    --output\_dir ./checkpoints/llava-v1.5-13b-pretrain \\  # 保存的路径
    --num\_train\_epochs 1 \\
    --per\_device\_train\_batch\_size 32 \\
    --per\_device\_eval\_batch\_size 4 \\
    --gradient\_accumulation\_steps 1 \\
    --evaluation\_strategy 'no' \\
    --save\_strategy 'steps' \\
    --save\_steps 24000 \\
    --save\_total\_limit 1 \\
    --learning\_rate 1e-3 \\
    --weight\_decay 0. \\
    --warmup\_ratio 0.03 \\
    --lr\_scheduler\_type 'cosine' \\
    --logging\_steps 1 \\
    --tf32 True \\
    --model\_max\_length 2048 \\
    --gradient\_checkpointing True \\
    --dataloader\_num\_workers 4 \\
    --lazy\_preprocess True \\
    --report\_to wandb
启动脚本:
sh ./scripts/v1\_5/pretrain.sh
启动训练后,会自动下载语言模型视觉编码器的权重,完成权重的下载后会提示是否需要使用 wandb 可视化结果,这里按需选择即可。

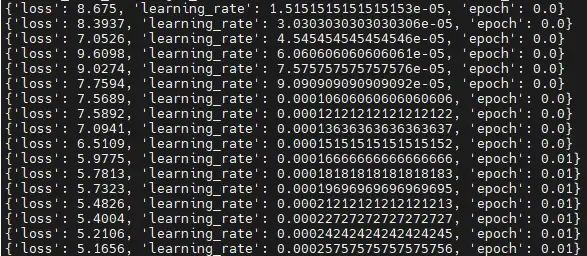
接下来就开始了训练,下面是 loss 的部分日志:
训练完成后,权重会保存在./checkpoints/llava-v1.5-13b-pretrain目录。
===
02

视觉指令微调阶段
完成特征对齐阶段的训练后,我们进入视觉指令微调阶段。注意:如果我们跳过特征对齐阶段的训练,则需要将对应的 projector 下载到./checkpoints目录,下载的命令如下:
huggingface-cli download liuhaotian/llava-v1.5-mlp2x-336px-pretrain-vicuna-13b-v1.5 --local-dir ./checkpoints/llava-v1.5-13b-pretrain
准备数据
下载数据集
- 下载 llava_v1_5_mix665k.json[3]
# 将数据下载到 ./playground/data/LLaVA-Instruct-150K
huggingface-cli download --repo-type dataset liuhaotian/LLaVA-Instruct-150K --local-dir ./playground/data/LLaVA-Instruct-150K
cp ./playground/data/LLaVA-Instruct-150K/llava\_v1\_5\_mix665k.json ./playground/data/llava\_v1\_5\_mix665k.json
下面是 llava_v1_5_mix665k.json 的示例:
{
    'id': '000000033471',  // 样本的唯一 id
    'image': 'coco/train2017/000000033471.jpg',  // 可以是绝对路径,也可以是相对于 image\_folder 的路径
    'conversations': \[
      {
        'from': 'human',
        'value': '<image>\\nWhat are the colors of the bus in the image?'
      },
      {
        'from': 'gpt',
        'value': 'The bus in the image is white and red.'
      },
      {
        'from': 'human',
        'value': 'What feature can be seen on the back of the bus?'
      },
      {
        'from': 'gpt',
        'value': 'The back of the bus features an advertisement.'
      },
      {
        'from': 'human',
        'value': 'Is the bus driving down the street or pulled off to the side?'
      },
      {
        'from': 'gpt',
        'value': 'The bus is driving down the street, which is crowded with people and other vehicles.'
      }
    \]  },
- 下载 COCO train2017[4]
wget http://images.cocodataset.org/zips/train2017.zip -P ./playground/data/cocounzip ./playground/data/coco/train2017.zip -d ./playground/data/coco
- 下载 GQA images[5]
wget https://downloads.cs.stanford.edu/nlp/data/gqa/images.zip -P ./playground/data/gqaunzip ./playground/data/gqa/images.zip -d ./playground/data/gqa
- 下载 OCR-VQA[6] 将 OCR-VQA 中的 dataset.json 和 loadDataset.py 文件下载到 ./playground/data/ocr_vqa 目录。注释 loadDataset.py 中的 pdb.set_trace()后执行下面的命令:
cd ./playground/data/ocr\_vqa
python loadDataset.py
# 回到 LLaVA 目录cd ../../../
使用下面的代码处理 OCR-VQA 图像的后缀问题[7]:
import json
import os

with open('./playground/data/llava\_v1\_5\_mix665k.json') as f:
    samples = json.load(f)

for sample in samples:
    if 'image' not in sample:
        continue

    img\_path = os.path.join('./playground/data', sample\['image'\])
    if not os.path.exists(img\_path):
        # 处理 OCR-VQA 图像后缀和 llava\_v1\_5\_mix665k.json 中的后缀不一致问题
        img\_path\_wo\_ext = os.path.splitext(img\_path)\[0\]
        for ext in \['.png', '.gif'\]:
            real\_path = img\_path\_wo\_ext + ext
            if os.path.exists(real\_path):
                # 重命名
                os.replace(real\_path, img\_path)
                break
也可以参考 https://github.com/haotian-liu/LLaVA/pull/1458 给出的路径下载 ORC-VQA 数据。
- 下载 TextVQA[8]
wget https://dl.fbaipublicfiles.com/textvqa/images/train\_val\_images.zip -P ./playground/data/textvqaunzip ./playground/data/textvqa/train\_val\_images.zip -d ./playground/data/textvqa
- 下载 VisualGenome part1[9] 和 part2[10]
wget https://cs.stanford.edu/people/rak248/VG\_100K\_2/images.zip -P ./playground/data/vg
wget https://cs.stanford.edu/people/rak248/VG\_100K\_2/images2.zip -P ./playground/data/vg
unzip ./playground/data/vg/images.zip -d ./playground/data/vg
unzip ./playground/data/vg/images2.zip -d ./playground/data/vg
数据集结构
完成数据集的下载后,检查数据集的目录结构是否和下面的一致:
├── coco
│   ├── train2017
│   │   ├── xxx.jpg
├── gqa
│   ├── images
│   │   ├── xxx.jpg
├── llava\_v1\_5\_mix665k.json
├── ocr\_vqa
│   ├── dataset.json
│   ├── images
│   │   ├── xxx.jpg
│   └── loadDataset.py
├── textvqa
│   ├── train\_images
│   │   ├── xxx.jpg
│── vg
├── └── VG\_100K
│   │   ├── xxx.jpg
├── │── VG\_100K\_2
│   │   ├── xxx.jpg
使用下面的代码检查数据目录结构:
import json
import os

with open('./playground/data/llava\_v1\_5\_mix665k.json') as f:
    samples = json.load(f)

missing\_cnt = 0  # 记录图像路径不存在的个数
for sample in samples:
    if 'image' not in sample:
        continue

    img\_path = os.path.join('./playground/data', sample\['image'\])
    if not os.path.exists(img\_path):
        missing\_cnt += 1

print(missing\_cnt)
如果 missing_cnt 为 0,则说明数据的目录结构是正确的。
03

启动训练
在启动训练前,请查看 https://github.com/haotian-liu/LLaVA/issues/1144 以避免训练结束后权重保存出错。
在这个阶段,使用 8 个 A100(80G)训练 LLaVA-v1.5-13B 大约需要 20 小时。启动的脚本是scripts/v1_5/finetune.sh,它的内容如下:
#!/bin/bash

deepspeed llava/train/train\_mem.py \\
    --deepspeed ./scripts/zero3.json \\  # 使用 DeepSpeed ZeRO-3
    --model\_name\_or\_path lmsys/vicuna-13b-v1.5 \\
    --version v1 \\
    --data\_path ./playground/data/llava\_v1\_5\_mix665k.json \\  # 训练样本
    --image\_folder ./playground/data \\  # 存放图像的目录
    --vision\_tower openai/clip-vit-large-patch14-336 \\
    --pretrain\_mm\_mlp\_adapter ./checkpoints/llava-v1.5-13b-pretrain/mm\_projector.bin \\
    --mm\_projector\_type mlp2x\_gelu \\  # projector 的类型
    --mm\_vision\_select\_layer -2 \\
    --mm\_use\_im\_start\_end False \\
    --mm\_use\_im\_patch\_token False \\
    --image\_aspect\_ratio pad \\
    --group\_by\_modality\_length True \\
    --bf16 True \\
    --output\_dir ./checkpoints/llava-v1.5-13b \\
    --num\_train\_epochs 1 \\
    --per\_device\_train\_batch\_size 16 \\
    --per\_device\_eval\_batch\_size 4 \\
    --gradient\_accumulation\_steps 1 \\
    --evaluation\_strategy 'no' \\
    --save\_strategy 'steps' \\
    --save\_steps 50000 \\
    --save\_total\_limit 1 \\
    --learning\_rate 2e-5 \\
    --weight\_decay 0. \\
    --warmup\_ratio 0.03 \\
    --lr\_scheduler\_type 'cosine' \\
    --logging\_steps 1 \\
    --tf32 True \\
    --model\_max\_length 2048 \\
    --gradient\_checkpointing True \\
    --dataloader\_num\_workers 4 \\
    --lazy\_preprocess True \\
    --report\_to wandb
启动脚本:
sh ./scripts/v1\_5/finetune.sh
启动训练后,会询问是否需要使用 wandb 可视化结果,这里按需选择即可。
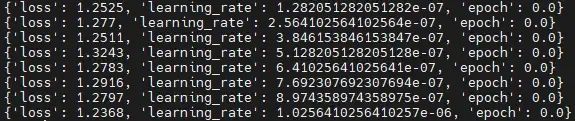
接下来就开始了训练,下面是 loss 的部分日志:
训练完成后,权重会保存在./checkpoints/llava-v1.5-13b目录。注意:如果单卡显存不足 80G,可以使用 LoRA 微调脚本 finetune_lora.sh[11]。完成训练后,可以参考 LLaVA 评测[12]对模型的性能进行评测。
04
微调自定义数据集
参考 Finetune LLaVA on Custom Datasets[13]
将训练样本以列表的形式保存到 json 文件,其中每一个样本是一个字典,它至少包含三个字段:
-
id:全局唯一的字符串
-
image:图片的路径,可以是绝对路径,也可以是相对于image_folder的相对路径
-
conversations:人类和语言模型的对话
下面是一个示例:
\[
  {
    'id': '997bb945-628d-4724-b370-b84de974a19f',
    'image': 'part-000001/997bb945-628d-4724-b370-b84de974a19f.jpg',
    'conversations': \[
      {
        'from': 'human',
        'value': '<image>\\nWrite a prompt for Stable Diffusion to generate this image.'
      },
      {
        'from': 'gpt',
        'value': 'a beautiful painting of chernobyl by nekro, pascal blanche, john harris, greg rutkowski, sin jong hun, moebius, simon stalenhag. in style of cg art. ray tracing. cel shading. hyper detailed. realistic. ue 5. maya. octane render. '
      },
    \]
  },
  ...
\]
完成数据的处理后,修改 finetune.sh[14] 中的 data_path 参数(必须)以及其他想要调整的参数(可选,例如学习率)。
修改完成后,即可启动训练:
sh ./scripts/v1\_5/finetune.sh
以上就是 LLaVA 的训练流程。
AI大模型学习路线
如果你对AI大模型入门感兴趣,那么你需要的话可以点击这里大模型重磅福利:入门进阶全套104G学习资源包免费分享!
扫描下方csdn官方合作二维码获取哦!

这是一份大模型从零基础到进阶的学习路线大纲全览,小伙伴们记得点个收藏!

第一阶段: 从大模型系统设计入手,讲解大模型的主要方法;
第二阶段: 在通过大模型提示词工程从Prompts角度入手更好发挥模型的作用;
第三阶段: 大模型平台应用开发借助阿里云PAI平台构建电商领域虚拟试衣系统;
第四阶段: 大模型知识库应用开发以LangChain框架为例,构建物流行业咨询智能问答系统;
第五阶段: 大模型微调开发借助以大健康、新零售、新媒体领域构建适合当前领域大模型;
第六阶段: 以SD多模态大模型为主,搭建了文生图小程序案例;
第七阶段: 以大模型平台应用与开发为主,通过星火大模型,文心大模型等成熟大模型构建大模型行业应用。
100套AI大模型商业化落地方案

大模型全套视频教程

200本大模型PDF书籍

👉学会后的收获:👈
• 基于大模型全栈工程实现(前端、后端、产品经理、设计、数据分析等),通过这门课可获得不同能力;
• 能够利用大模型解决相关实际项目需求: 大数据时代,越来越多的企业和机构需要处理海量数据,利用大模型技术可以更好地处理这些数据,提高数据分析和决策的准确性。因此,掌握大模型应用开发技能,可以让程序员更好地应对实际项目需求;
• 基于大模型和企业数据AI应用开发,实现大模型理论、掌握GPU算力、硬件、LangChain开发框架和项目实战技能, 学会Fine-tuning垂直训练大模型(数据准备、数据蒸馏、大模型部署)一站式掌握;
• 能够完成时下热门大模型垂直领域模型训练能力,提高程序员的编码能力: 大模型应用开发需要掌握机器学习算法、深度学习框架等技术,这些技术的掌握可以提高程序员的编码能力和分析能力,让程序员更加熟练地编写高质量的代码。
LLM面试题合集

大模型产品经理资源合集

大模型项目实战合集

👉获取方式:
😝有需要的小伙伴,可以保存图片到wx扫描二v码免费领取【保证100%免费】🆓


 2988
2988

 被折叠的 条评论
为什么被折叠?
被折叠的 条评论
为什么被折叠?
 到【灌水乐园】发言


